


1 建议 消息的Token存放在一个公共区,这样send和register不要为取名字发愁,还是强类型的
    public class MessageTokens
    {
        public static readonly string ReturnTeacher = Guid.NewGuid().ToString();

        public static readonly string ReturnTeacher2 = Guid.NewGuid().ToString();
    }
关于PropertyChangedMessage<T>的使用
新增一个
public partial class LoginUserModel : ObservableRecipient
{
[ObservableProperty]
[AlsoBroadcastChange]
private string username;
[ObservableProperty]
[AlsoBroadcastChange]
private string password;
public LoginUserModel()
{
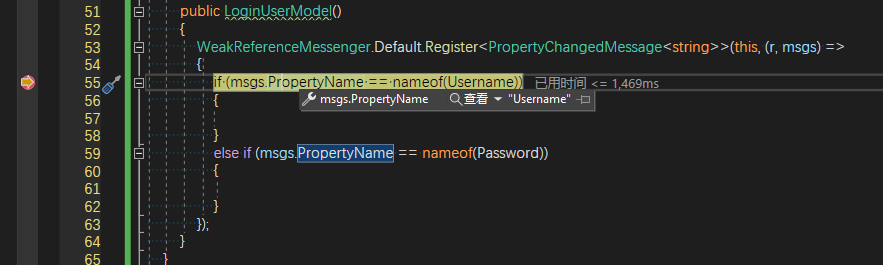
WeakReferenceMessenger.Default.Register<PropertyChangedMessage<string>>(this, (r, msgs) =>
{
if (msgs.PropertyName == nameof(Username))
{
}
else if (msgs.PropertyName == nameof(Password))
{
}
});
}
}
使用 [AlsoBroadcastChange]特性时候,当前类必须继承ObservableRecipient
然后注册一个PropertyChangedMessage的消息,当某个属性调用了 属性通知方法,就会自动到PropertyChangedMessage这个消息中处理,你可以获得新值,旧值,属性名。
那么我们在TwoWindow上新增两个文本框,绑定这个model
    public partial class TwoWindowViewModel : ObservableValidator
    {
        [ObservableProperty]
        private LoginUserModel loginuser=new LoginUserModel();
然后xaml
<Window x:Class="AyWpfNet6.TwoWindow"
        xmlns="http://schemas.microsoft.com/winfx/2006/xaml/presentation"
        xmlns:x="http://schemas.microsoft.com/winfx/2006/xaml"
        xmlns:d="http://schemas.microsoft.com/expression/blend/2008"
        xmlns:mc="http://schemas.openxmlformats.org/markup-compatibility/2006"
        xmlns:local="clr-namespace:AyWpfNet6"
        mc:Ignorable="d"      DataContext="{Binding Source={StaticResource Locator},Path=TwoWindowViewModel}"
        Title="TwoWindow" Height="450" Width="800">
    <Grid>
        <StackPanel>
            <TextBox HorizontalAlignment="Left" Margin="275,155,0,0" TextWrapping="Wrap" Text="{Binding InputCode,Mode=TwoWay,UpdateSourceTrigger=PropertyChanged}" VerticalAlignment="Top" Width="200"/>
            <TextBox HorizontalAlignment="Left" Margin="275,10,0,0" TextWrapping="Wrap" Text="{Binding Loginuser.Username,Mode=TwoWay,UpdateSourceTrigger=PropertyChanged}" VerticalAlignment="Top" Width="200"/>
            <TextBox HorizontalAlignment="Left" Margin="275,10,0,0" TextWrapping="Wrap" Text="{Binding Loginuser.Password,Mode=TwoWay,UpdateSourceTrigger=PropertyChanged}" VerticalAlignment="Top" Width="200"/>
            <Button Content="调用MainWindow的显示Code" Command="{Binding ShowCodeCommand}"/>
        </StackPanel>
    </Grid>
</Window>
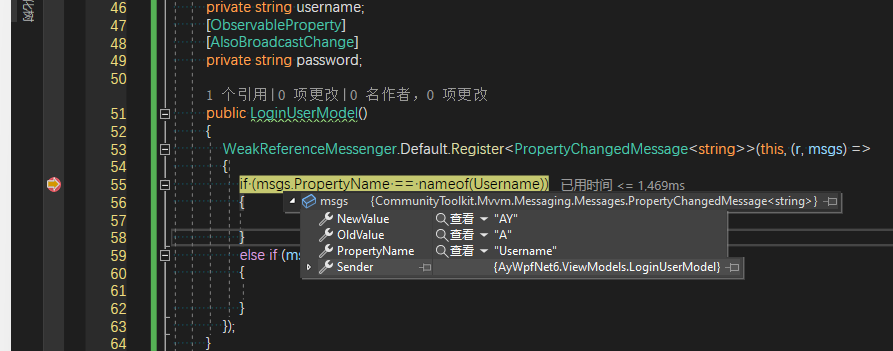
运行项目,打开TwoWindow,打上断电,输入内容时候,进入了断点如下
这是我第二次进入断点,第一次输入了A,然后第二次输入Y
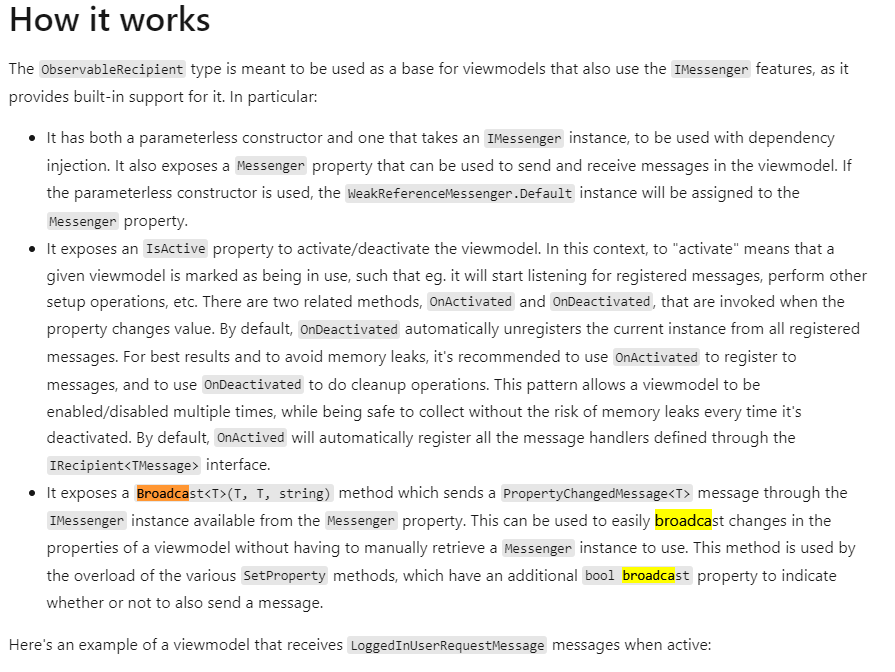
它公开了一个 Broadcast<T>(T, T, string) 方法,该方法通过 Messenger 属性中可用的 IMessenger 实例发送 PropertyChangedMessage<T> 消息。 这可用于轻松广播视图模型属性的更改,而无需手动检索要使用的 Messenger 实例。 此方法由各种 SetProperty 方法的重载使用,这些方法具有额外的 bool 广播属性来指示是否也发送消息。
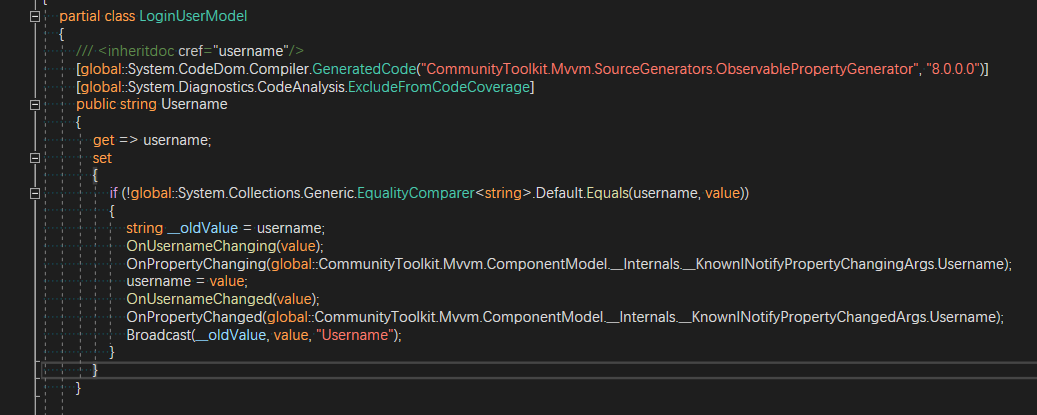
Broadcast的老式用法,下面是源码生成器生成的
Ioc知识
我直接拷贝官方文档的东西了,可以对照着我这个系列第一天博客思想参考
public sealed partial class App : Application
{
    public App()
    {
        Services = ConfigureServices();

        this.InitializeComponent();
    }

    /// <summary>
    /// Gets the current <see cref="App"/> instance in use
    /// </summary>
    public new static App Current => (App)Application.Current;

    /// <summary>
    /// Gets the <see cref="IServiceProvider"/> instance to resolve application services.
    /// </summary>
    public IServiceProvider Services { get; }

    /// <summary>
    /// Configures the services for the application.
    /// </summary>
    private static IServiceProvider ConfigureServices()
    {
        var services = new ServiceCollection();

        services.AddSingleton<IFilesService, FilesService>();
        services.AddSingleton<ISettingsService, SettingsService>();
        services.AddSingleton<IClipboardService, ClipboardService>();
        services.AddSingleton<IShareService, ShareService>();
        services.AddSingleton<IEmailService, EmailService>();

        return services.BuildServiceProvider();
    }
}
其他地方使用
IFilesService filesService = App.Current.Services.GetService<IFilesService>();
构造函数注入
public class FileLogger : IFileLogger
{
    private readonly IFilesService FileService;
    private readonly IConsoleService ConsoleService;

    public FileLogger(
        IFilesService fileService,
        IConsoleService consoleService)
    {
        FileService = fileService;
        ConsoleService = consoleService;
    }

    // Methods for the IFileLogger interface here...
}
增加一个新的接口和实现,需要在统一的地方注册
/// <summary>
/// Configures the services for the application.
/// </summary>
private static IServiceProvider ConfigureServices()
{
    var services = new ServiceCollection();

    services.AddSingleton<IFilesService, FilesService>();
    services.AddSingleton<IConsoleService, ConsoleService>();
    services.AddSingleton<IFileLogger, FileLogger>();

    return services.BuildServiceProvider();
}

// Retrieve a logger service with constructor injection
IFileLogger fileLogger = App.Current.Services.GetService<IFileLogger>();
关于viewmodel的实例管理
/// <summary>
/// Configures the services for the application.
/// </summary>
private static IServiceProvider ConfigureServices()
{
    var services = new ServiceCollection();

    // Services
    services.AddSingleton<IContactsService, ContactsService>();
    services.AddSingleton<IPhoneService, PhoneService>();

    // Viewmodels
    services.AddTransient<ContactsViewModel>();

    return services.BuildServiceProvider();
}
vm都是瞬时的,用完就销毁,服务是单例
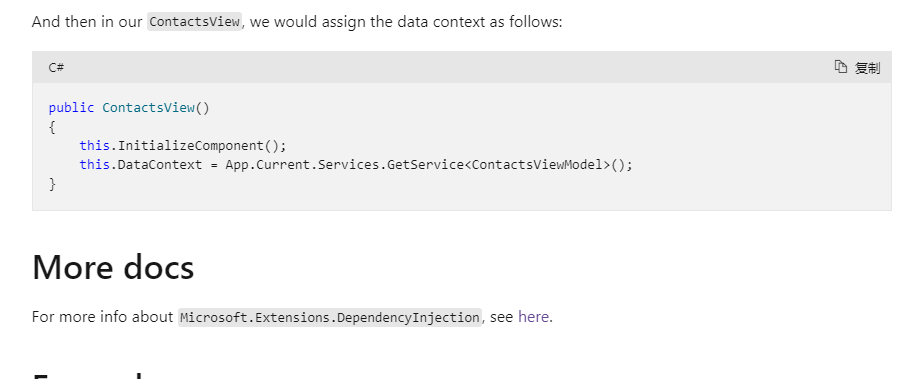
页面的话,在xaml.cs下指定vm
public ContactsView()
{
    this.InitializeComponent();
    this.DataContext = App.Current.Services.GetService<ContactsViewModel>();
}
我们那个直接xaml上指定。
官方文档下方也加了 推荐使用 我第一天使用的那个DI
Dependency injection in ASP.NET Core | Microsoft Docs
services.AddTransient<IServiceA, ServiceAImpl>();//瞬时模式(每次获取对象的时候,容器都会重新给我们new一个新的对象返回)
services.AddSingleton<IServiceB, ServiceBImpl>();//单例模式(第一次请求的时候,创建对象,以后再次请求都是同一个对象)
services.AddScoped<IServiceC, ServiceCImpl>(); //作用域模式(在一个请求中,多次使用,这时候提供的是同一个对象)


 3477
3477


 被折叠的 条评论
为什么被折叠?
被折叠的 条评论
为什么被折叠?
 到【灌水乐园】发言


