


文章目录
数据分析第二讲 matplotlib折线图

1、matplotlib介绍
- Matplotlib 是一个 Python 的 2D绘图库,最流行的Python底层绘图库,主要做数据可视
化图标
1.能将数据进行可视化,更直观的
2.使数据更加直观,更具说服力
2、matplotlib简单使用
2.1 matplotlib安装:pip3 install matplotlib
2.2 写代码
# 创建数字1到5的列表:
# 使用list(range(1,6)
print(list(range(1, 6)))  # [1, 2, 3, 4, 5]
print([i for i in range(1, 6)])  # [1, 2, 3, 4, 5]  # 列表推导式

# 假设一天中每隔两个小时的气温分别是   24 [2, 4, 6, 8,..., 24]
# [15,13,14.5,17,20,25,26,26,27,22,18,15]
# pip3 install matplotlib   安装matplotlib库
# as 别名
from matplotlib import pyplot as plt


x = range(2, 26, 2)
y = [15, 13, 14.5, 17, 20, 25, 26, 26, 27, 22, 18, 15]
# x轴 y轴  plot x and y using default line style and color
plt.plot(x, y)  # 折线图
plt.plot(x, y, 'bo')  # 散点图
plt.show()
2.3 运行代码,得到折线图

3、完善图形
3.1完善图形
- 1.设置图片大小
宽 高 dpi图片清晰度
fig = plt.figure(figsize=(20,8),dpi=80) - 2.保存到本地
plt.savefig(’./matp.png’) - 3.描述信息,x和y轴表示什么
plt.xlabel(‘time’)
plt.ylabel(‘temp’) - 4.调整x或者y的刻度的间距
plt.xticks(x)
设置中文调整x轴的刻度
import matplotlib
font = {
‘family’:‘SimHei’,
‘weight’:‘bold’,
‘size’:12
}
matplotlib.rc(“font”, **font)
_x = [i/2 for i in range(4, 49)] # 可以得到半个小时的刻度
plt.xticks(_x)
- 5.线条的样式(颜色,透明度)
plt.plot(x, y_1, label=“yangyu大帝”, color=‘red’, marker=‘o’)
plt.plot(x, y_2, label=‘电击小子’, linestyle=‘dashed’) - 6.标记处特殊的点(最高点,最低点)
import numpy as np
x = range(2, 26, 2)
y = [15, 13, 14.5, 17, 20, 25, 26, 26, 27, 22, 18, 15]
y = np.array(y)
print(y) # [15. 13. 14.5 17. 20. 25. 26. 26. 27. 22. 18. 15. ]
max_index = np.argmax(y) # max value index
print(max_index) # 8
min_index = np.argmin(y) # min value index
print(min_index) # 1
plt.plot(x[max_index], y[max_index], ‘ks’)
show_max = ‘[’ + str(x[max_index]) + ‘,’ + str(y[max_index]) + ‘]’
plt.annotate(show_max, xy=(x[max_index], y[max_index]))
plt.plot(x[min_index], y[min_index], ‘gs’)
show_min = ‘[’ + str(x[min_index]) + ‘,’ + str(y[min_index]) + ‘]’
plt.annotate(show_min, xy=(x[min_index], y[min_index])) - 7.给图片一个水印(防伪,防止盗用)
import matplotlib.image as image
datafile = ‘yangyu.jpg’
im = image.imread(datafile)
fig.figimage(im)
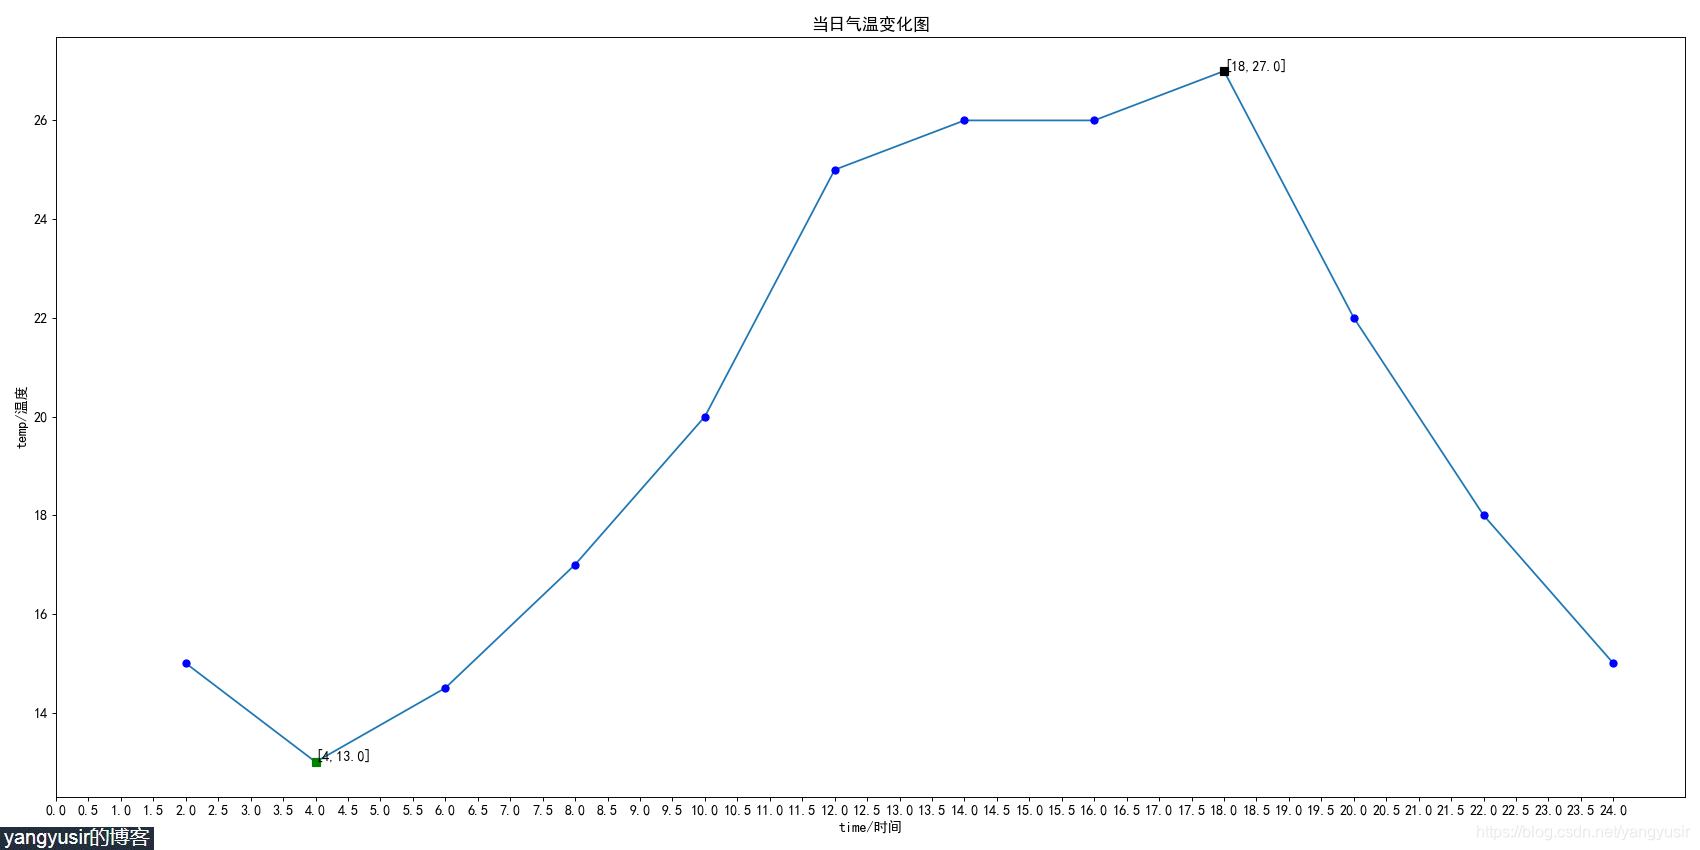
# 假设一天中每隔两个小时的气温分别是   24 [2, 4, 6, 8,..., 24]
# [15,13,14.5,17,20,25,26,26,27,22,18,15]
from matplotlib import pyplot as plt
import numpy as np
import matplotlib
import matplotlib.image as image

font = {
    'family': 'SimHei',
    'weight': 'bold',
    'size': 12
}
matplotlib.rc("font", **font)
x = range(2, 26, 2)
y = [15, 13, 14.5, 17, 20, 25, 26, 26, 27, 22, 18, 15]
y = np.array(y)
# print(y)  # [15.  13.  14.5 17.  20.  25.  26.  26.  27.  22.  18.  15. ]
max_index = np.argmax(y)  # max value index
# print(max_index)  # 8
min_index = np.argmin(y)  # min value index
# print(min_index)  # 1
# 设置图片大小figsize  宽 高  dpi 图片的清晰度 max 100
fig = plt.figure(figsize=(20, 10), dpi=85)
# 设置x轴和y轴描述信息
plt.xlabel('time/时间')
plt.ylabel('temp/温度')

# x轴 y轴  plot x and y using default line style and color
plt.plot(x, y)  # 折线图
plt.plot(x, y, 'bo')  # 散点图
plt.plot(x[max_index], y[max_index], 'ks')
show_max = '[' + str(x[max_index]) + ',' + str(y[max_index]) + ']'
plt.annotate(show_max,  xy=(x[max_index], y[max_index]))
plt.plot(x[min_index], y[min_index], 'gs')
show_min = '[' + str(x[min_index]) + ',' + str(y[min_index]) + ']'
plt.annotate(show_min, xy=(x[min_index], y[min_index]))

# _x = range(2, 25)   # range函数的步进必须是int类型,得不到半个小时的刻度,用列表推导式
_x = [i / 2 for i in range(0, 49)]  # 可以得到半个小时的刻度
plt.xticks(_x)
# 设置title
plt.title("当日气温变化图")
# 加水印
datafile = 'yangyu.jpg'
im = image.imread(datafile)
fig.figimage(im)
# 保存图片
plt.savefig('./matp.png')

plt.show()
4、设置中文调整x轴的刻度
_x = list(x)[::10]
_xtick_labels = [“hello,{}”.format(i) for i in _x]
plt.xticks(_x,_xtick_labels)
5、练习
练习1
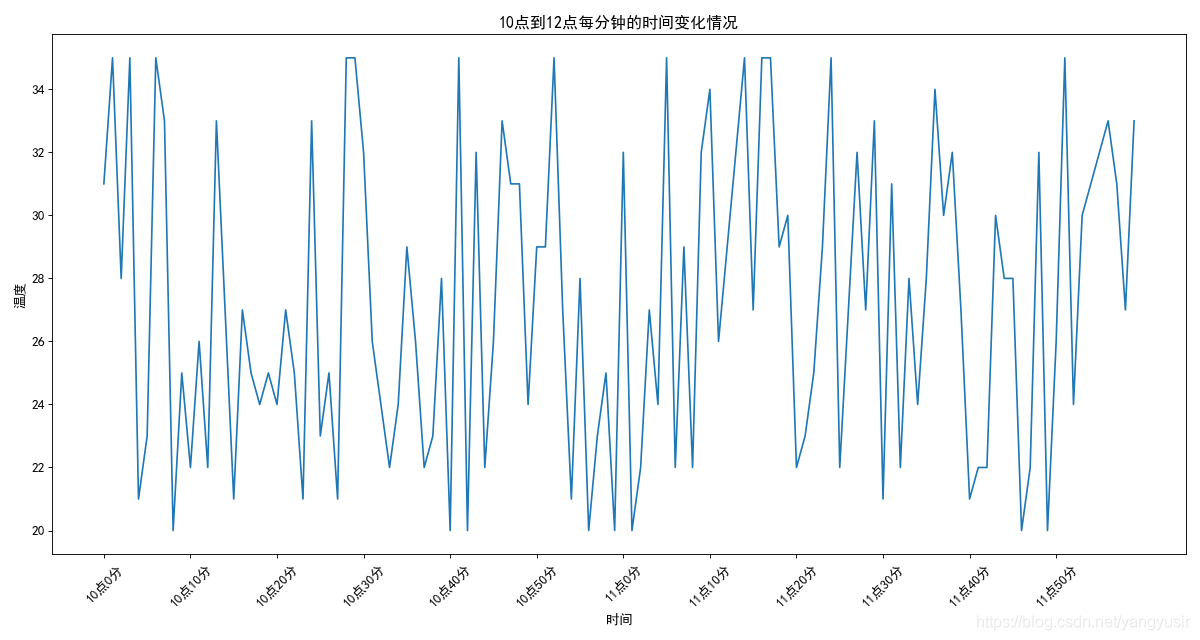
如果列表a表示10点到12点的每一分钟的气温,如何绘制折线图观察每分钟气温的变化情况
a = [random.randint(20,35) for i in range(120)]
# 如果列表a表示10点到12点的每一分钟的气温,如何绘制折线图观察每分钟气温的变化情况
# a = [random.randint(20, 35) for i in range(120)]
import random
from matplotlib import pyplot as plt
import matplotlib

# ttc 不支持  ttf的字体才可以
font = {
'family':'SimHei',
'weight':'bold',
'size':12
}
matplotlib.rc("font", **font)
x = range(0, 120)
y = [random.randint(20, 35) for i in range(120)]

# 设置图形大小
plt.figure(figsize=(15, 8), dpi=80)

# 图像title
plt.title("10点到12点每分钟的时间变化情况")  # 设置title

# 描述信息
plt.xlabel("时间")  # 设置x轴的lable
plt.ylabel("温度")  # 设置y轴的lable

_x = range(0, 120, 10)
_xtick_lable = ["10点{}分".format(i) for i in range(60)]
_xtick_lable += ["11点{}分".format(i) for i in range(60)]

# 设置x轴刻度
print(_xtick_lable)
plt.xticks(_x, _xtick_lable[::10], rotation=45)  # 旋转45度

plt.plot(x, y)

plt.show()

# 另一种修改字体的方法
'''
from matplotlib.font_manager import FontProperties
# 把字体注册到matplotlib字体库
font = FontProperties(fname=r"c:\windows\fonts\simsun.ttc", size=14)
plt.xticks(list(x)[::3],_xtick_labels[::3],rotation=90, fontproperties=font)
plt.xticks(_x, _xtick_lable[::10], fontproperties=font, rotation=45)  # 旋转45度
'''
练习2
假设大家在30岁的时候,根据自己的实际情况,统计出来了从11岁到30岁每年交的男女朋友
的数量如列表a,请绘制出该数据的折线图,以便分析自己每年交男女朋友的数量走势
a = [1,0,1,1,2,4,3,2,3,4,4,5,6,5,4,3,3,1,1,1]
要求: y轴表示个数 x轴表示岁数,比如11岁,12岁
'''
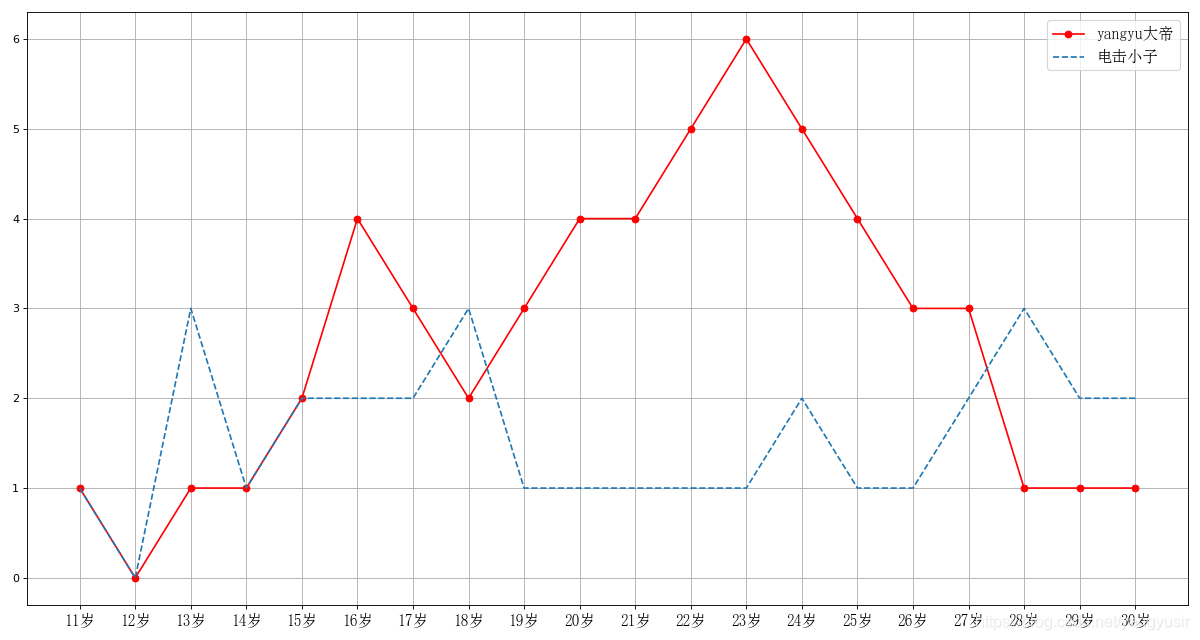
假设大家在30岁的时候,根据自己的实际情况,统计出来了你和同学从11岁到30岁每年交的
男女朋友的数量如列表a和b,请绘制出该数据的折线图,以便分析自己和同学每年交男女朋友
的数量走势
a = [1,0,1,1,2,4,3,2,3,4,4,5,6,5,4,3,3,1,1,1]
b = [1,0,3,1,2,2,2,3,1,1,1,1,1,2,1,1,2,3,2,2]
要求:
y轴表示个数
x轴表示岁数,比如11岁,12岁
'''
from matplotlib import pyplot as plt
from matplotlib.font_manager import FontProperties
font = FontProperties(fname=r"c:\windows\fonts\simsun.ttc", size=14)
x = range(11, 31)
y_1 = [1, 0, 1, 1, 2, 4, 3, 2, 3, 4, 4, 5, 6, 5, 4, 3, 3, 1, 1, 1]
y_2 = [1, 0, 3, 1, 2, 2, 2, 3, 1, 1, 1, 1, 1, 2, 1, 1, 2, 3, 2, 2]
# print(len(x)) # 20
# print(len(y)) # 20
# 设置图片大小
plt.figure(figsize=(15, 8), dpi=80)
# 设置x轴的刻度
_xticks = ["{}岁".format(i) for i in range(11, 31)]
plt.xticks(x, _xticks, fontproperties=font)
# 根据x,y来绘制图形
# plot(x, y, color='green', marker='o', linestyle='dashed',
# ... linewidth=2, markersize=12) #
# color # 线条颜色
# linestyle 线条样式
plt.plot(x, y_1, label="yangyu大帝", color='red', marker='o')
plt.plot(x, y_2, label='电击小子', linestyle='dashed')
plt.grid() # 添加网格
plt.legend(prop=font) # 图例
plt.show()
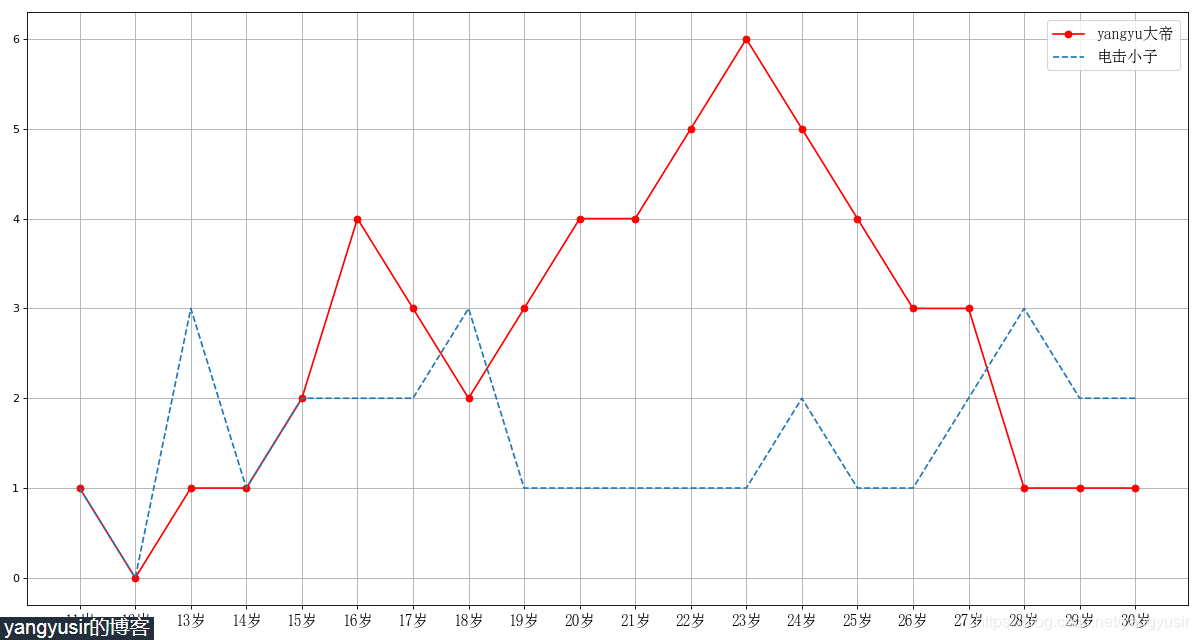
6、图片加水印
'''
假设大家在30岁的时候,根据自己的实际情况,统计出来了你和同学从11岁到30岁每年交的
男女朋友的数量如列表a和b,请绘制出该数据的折线图,以便分析自己和同学每年交男女朋友
的数量走势
a = [1,0,1,1,2,4,3,2,3,4,4,5,6,5,4,3,3,1,1,1]
b = [1,0,3,1,2,2,2,3,1,1,1,1,1,2,1,1,2,3,2,2]
要求:
y轴表示个数
x轴表示岁数,比如11岁,12岁
'''

from matplotlib import pyplot as plt
from matplotlib.font_manager import FontProperties
import matplotlib.image as image
font = FontProperties(fname=r"c:\windows\fonts\simsun.ttc", size=14)

x = range(11, 31)
y_1 = [1, 0, 1, 1, 2, 4, 3, 2, 3, 4, 4, 5, 6, 5, 4, 3, 3, 1, 1, 1]
y_2 = [1, 0, 3, 1, 2, 2, 2, 3, 1, 1, 1, 1, 1, 2, 1, 1, 2, 3, 2, 2]
# print(len(x))  # 20
# print(len(y))  # 20

# 设置图片大小
fig = plt.figure(figsize=(15, 8), dpi=80)

# 设置x轴的刻度
_xticks = ["{}岁".format(i) for i in range(11, 31)]
plt.xticks(x, _xticks, fontproperties=font)

# 根据x,y来绘制图形
# plot(x, y, color='green', marker='o', linestyle='dashed',
#         ...      linewidth=2, markersize=12)  #
# color  # 线条颜色
# linestyle 线条样式
plt.plot(x, y_1, label="yangyu大帝", color='red', marker='o')
plt.plot(x, y_2, label='电击小子', linestyle='dashed')
plt.grid()  # 添加网格
plt.legend(prop=font)  # 图例

# 设置图片水印
datafile = 'yangyu.jpg'
im = image.imread(datafile)
fig.figimage(im)

plt.show()
7、matplotlib绘制图形
- matplotlib官网:https://matplotlib.org/gallery/index.html
- matplotlib能够绘制折线图,散点图,柱状图,直方图等
- 我们需要知道不同的统计图到底能够表示什么,以此来决定选择哪种统计图来更直
观的呈现我们的数据
7.1 折线图:以折线的上升或下降来表示统计数量的增减变化的统计图
特点:能够显示数据的变化趋势,反映事物的变化情况(变化)

7.2 直方图:由一系列高度不等的纵向条纹或线段表示数据分布的情况,一般用横轴表示数据范围,纵轴表示分布情况
特点:绘制连续性的数据,展示一组或者多组数据的分布情况(统计)
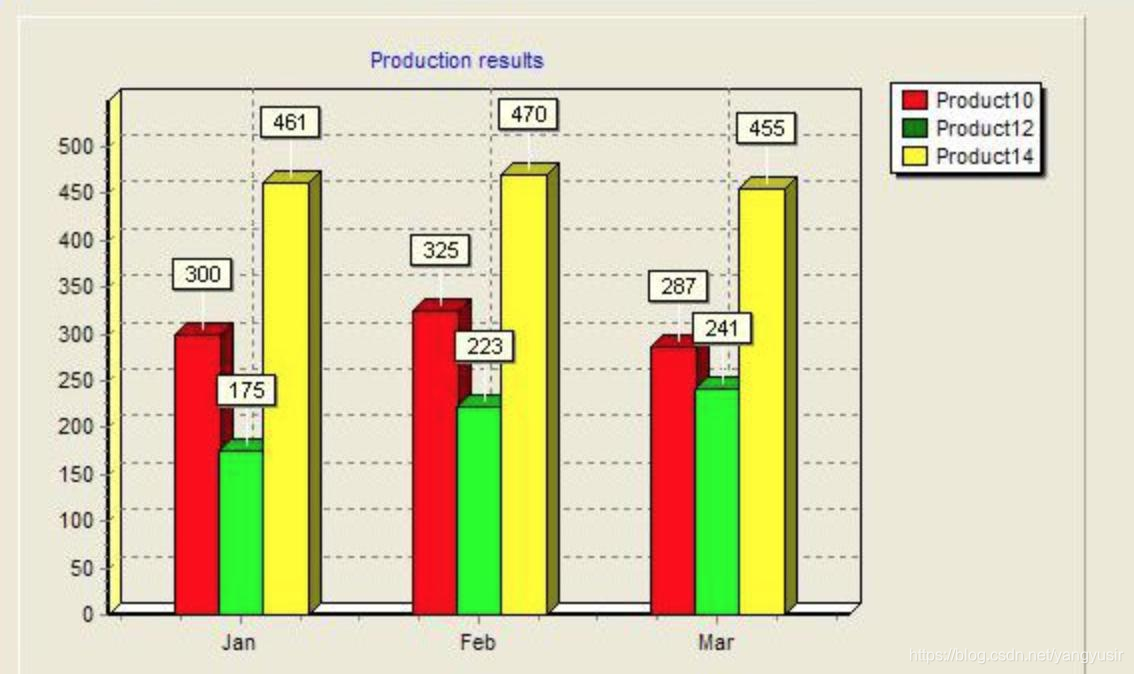
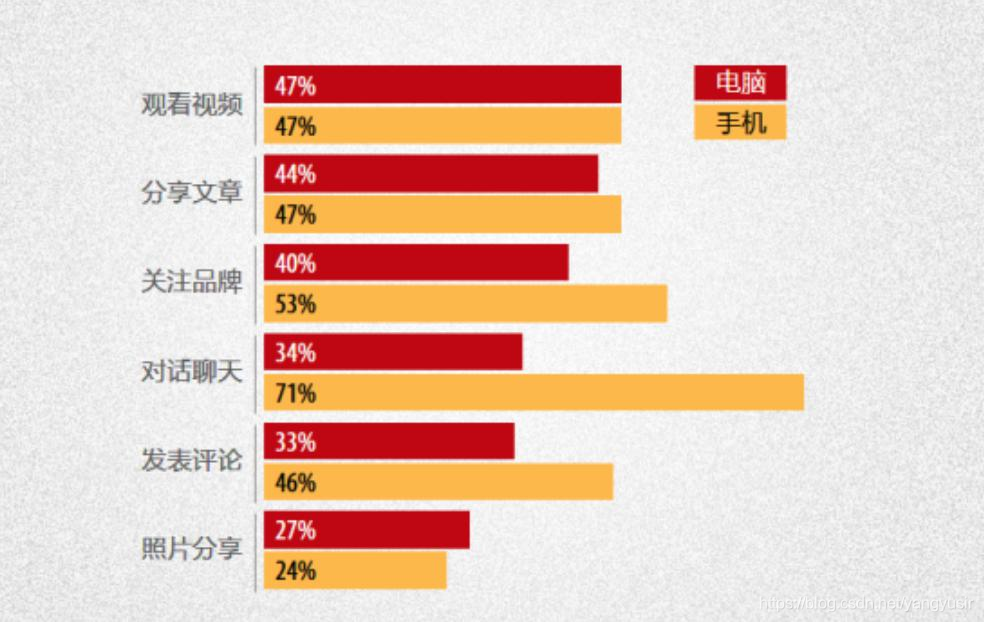
7.3 :排列在工作表的列或行中的数据可以绘制到条形图中
特点:绘制连离散的数据,能够一眼看出各个数据的大小,比较数据之间的差别(统计)
7.4 散点图:用两组数据构成多个坐标点,考察坐标点的分布,判断两变量之间是否存在某种关联,或总结坐标点的分布模式
特点:判断变量之间是否存在数量关联趋势,表示离群点(分布规律)
8、总结
1.绘制了折线图(plt.plot)
2.设置了图片的大小和分辨率(plt.figure)
3.实现了图片的保存(plt.savefig)
4.设置了xy轴上的刻度和字符串(xticks)
5.解决了刻度稀疏和密集的问题(xticks)
6.设置了标题,xy轴的lable(title,xlable,ylable)
7.设置了字体(font,manager,fontproperties,matplotlib.rc)
8.在一个图上绘制多个图形(plt多次plot即可)
9.为不同的图形添加图例(legend(prop=font))


 被折叠的 条评论
为什么被折叠?
被折叠的 条评论
为什么被折叠?
 到【灌水乐园】发言


