


一、缓存
缓存的工作机制是:先从缓存中读取数据,如果没有再从数据库读取实际数据,并把读取的数据存入缓存,下次再访问相同资源的时候,直接从缓存中获取,这样就可以缓解一些数据库的压力。
缓存有两个比较常用的概念:
TTL(Time To Live )
存活期,即从缓存中创建时间点开始直到它到期的一个时间段(不管在这个时间段内有没有访问都将过期)
TTI(Time To Idle)
空闲期,即一个数据多久没被访问将从缓存中移除的时间。
在并发环境下,一般使用ConcurrentHashMap键值对来做缓存对象。
二、Ehcache缓存
Shiro默认支持的缓存是ehcache缓存。
下面介绍在Shiro中集成Ehcache的步骤。
(1)首先要指明Ehcache的配置文件ehcache.xml。
<ehcache name="shiroCache">
    <!-- 磁盘上缓存的位置 -->
    <diskStore path="java.io.tmpdir"/>

    <!--
    更多详细配置可参考:https://www.cnblogs.com/huangzijian/p/6723630.html
    name:缓存名称
    maxElementsInMemory 缓存最大数
    eternal 缓存中对象是否为永久
    overflowToDisk 内存不足时,是否启用磁盘缓存
    timeToLiveSeconds 缓存数据的生存时间(单位秒)
    timeToIdleSeconds 缓存对象空闲多久后删除(单位秒)
    diskPersistent 是否在VM重启时存储硬盘的缓存数据
    diskExpiryThreadIntervalSeconds 磁盘失效线程运行时间间隔
    -->
    <defaultCache
            maxElementsInMemory="10000"
            eternal="false"
            overflowToDisk="false"
            timeToIdleSeconds="300"
            timeToLiveSeconds="300"
            diskPersistent="false"
            diskExpiryThreadIntervalSeconds="120"
    />

    <!-- 认证缓存 -->
    <cache name="authenticationCache"
           maxElementsInMemory="10000"
           eternal="false"
           overflowToDisk="false"
           timeToIdleSeconds="300"
           timeToLiveSeconds="300"
           diskPersistent="false"
           diskExpiryThreadIntervalSeconds="120"
    />
</ehcache>
(2)在shiro.xml中配置此缓存,并指明其配置文件
   <!-- shiro的自带 EhCache缓存管理器 -->
    <bean id="cacheManager" class="org.apache.shiro.cache.ehcache.EhCacheManager">
        <property name="cacheManagerConfigFile" value="classpath:ehcache.xml"/>
    </bean>
(3)在自定义Realm中开启缓存,表明Realm的认证或者授权 有可能希望得到缓存。
例如本例中开启了认证缓存。
认证缓存的名字authenticationCache就是ehcache.xml中的认证缓存Cache的name属性。
如果想开启授权缓存,那么只需要把authorizationCachingEnabled属性的值设置为true,并在ehcache.xml中配置相对应的缓存配置即可。
<property name="authorizationCachingEnabled" value="true"/>
    <!-- 自定义Realm -->
    <bean id="userRealm" class="com.jay.shiro.UserRealm">
        <property name="cachingEnabled" value="true"/>
        <!-- 是否启用认证缓存 -->
        <property name="authenticationCachingEnabled" value="true"/>
        <!-- 开启后使用ehcache.xml中名为authenticationCache的缓存-->
        <property name="authenticationCacheName" value="authenticationCache"/>
        <!-- 是否启用授权缓存 -->
        <property name="authorizationCachingEnabled" value="false"/>
        <property name="authorizationCacheName" value="authorizationCache"/>
    </bean>
(4)在SecurityManager中引入缓存配置
 <!-- securityManager 对象-->
    <bean id="securityManager" class="org.apache.shiro.web.mgt.DefaultWebSecurityManager">
        ...
        <!-- 引入UserRealm -->
        <property name="realm" ref="userRealm"/>
        <!-- 引入ehcache缓存 -->
        <property name="cacheManager" ref="cacheManager"/>
    </bean>
经过上述4步配置,我们的shiro环境就能够使用ehcache缓存了。
三、测试
上述配置完毕,下面我们就来测试一下缓存是否有效。
启动项目后,来到项目的根目录。
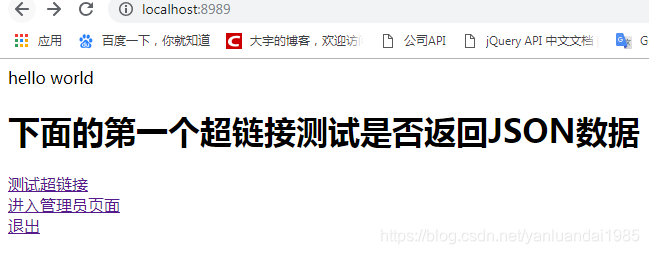
点击第一个测试超链接,发送向后台请求全部用户JSON数据的请求。因为没有登录,所以被强制重定向到登录页面。
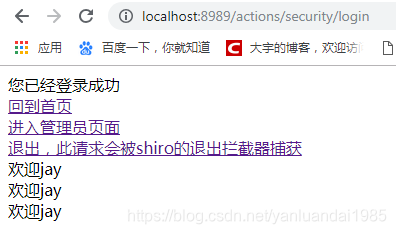
在登录页面上输入"jay / 123456",登录成功后,页面被转到home.jsp页面。效果如图所示。
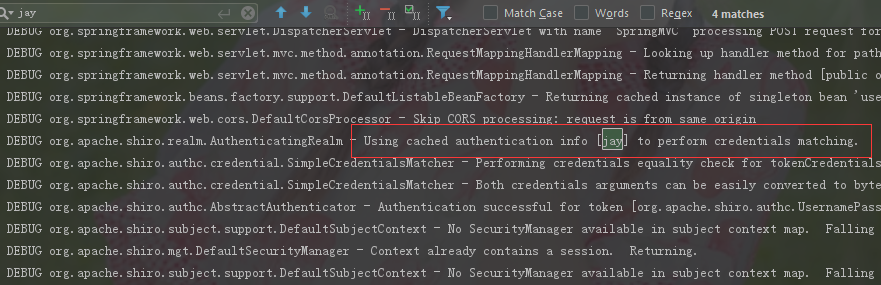
刷新此页面,在后台的控制台上,发现如下语句。
DEBUG org.apache.shiro.realm.AuthenticatingRealm - Using cached authentication info [jay] to perform credentials matching.
说明我们在刷新此页面的时候,系统需要判断当前用户是否登录。如果再去查询一次数据库,显然对系统性能有所影响。我们配置了缓存,所以直接从缓存中获取之前的认证信息,从而缓解了数据库的压力。
四、源码下载
本章节项目源码:点击我下载源码
参考文章:从零到实现Shiro中Authorization和Authentication的缓存 作者:小小Prince
----------------------------------------------------分割线-------------------------------------------------------
下一篇:第十五节 Shiro集成Redis实现分布式集群Cache共享
阅读更多:跟着大宇学Shiro目录贴


 1536
1536

 被折叠的 条评论
为什么被折叠?
被折叠的 条评论
为什么被折叠?
 到【灌水乐园】发言


