Vue上传图片(只能上传一个)及可替换

手摸手教你实现vue上传图片-头像,只能上传一张且可重复替换!

vue结合element-ui实现上传头像图片

话不多说直接上图

初始页面
. 初始化页面样式可更改哈

代码如下

<div style="position: relative;">
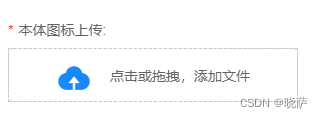
            <div style="height:36px;line-height:36px"><span style="color:red;margin-right:5px;">*</span>本体图标上传:</div>
            <div class="img-upload">
              <div v-if="isView" class="el-upload__text">
                <i class="el-icon-upload" />
                点击或拖拽,添加文件
              </div>
            </div>
            <div style="position: absolute;top:36px">
              <el-upload
                ref="upload"
                action="#"
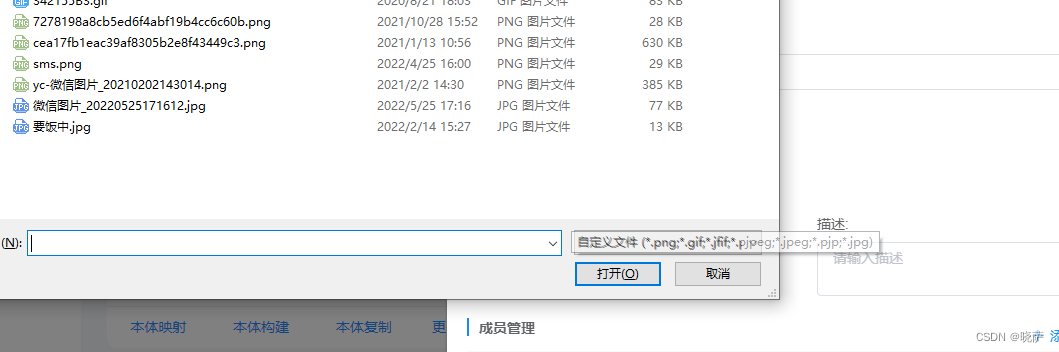
                accept="image/png,image/gif,image/jpg,image/jpeg"
                list-type="picture-card"
                :before-upload="beforeAvatarUpload"
                :file-list="fileList"
                :limit="1"
                :on-change="imgChange"
                :class="{hide:hideUpload}"
                :auto-upload="false"
              >
                <div slot="file" slot-scope="{file}">
                  <img
                    class="el-upload-list__item-thumbnail"
                    :src="file.url"
                    alt=""
                  >
                  <i class="el-icon-success" />
                  <span class="imgsp1">上传成功!</span>
                  <span class="imgsp2" @click="handleRemove(file,fileList)">重新上传</span>
                </div>
              </el-upload>
            </div>
          </div>

> `fileList: [], // 上传的文件列表
      hideUpload: false,`


beforeAvatarUpload(file) { // 头像限制
      const isJPG = file.type === 'image/jpeg' || file.type === 'image/png' || file.type === 'image/gif'
      const isLt2M = file.size / 1024 / 1024 < 2
      if (!isJPG) {
        this.$message.error('上传头像图片只能是 JPG/PNG/GIF 格式!')
      }
      if (!isLt2M) {
        this.$message.error('上传头像图片大小不能超过 2MB!')
      }
      return (isJPG) && isLt2M
    },
    imgChange (files, fileList) { // 上传改变
      const formDataFile = new FormData()// 通过form数据格式来传
      formDataFile.append('file', files.raw) // 传文件
      uploadFile(formDataFile).then(res => {
        if (res.resp_code === 0) {
          this.isView = false
          this.formData.iconUrl = res.datas.url
          if (fileList.length > 0) {
            this.hideUpload = true
          } else {
            this.hideUpload = false
          }
        }
      })
    },
    ## css代码
::v-deep .el-upload-dragger{
    width: 290px;
    height: 54px;
  }
  ::v-deep .el-upload-dragger .el-icon-upload{
    font-size: 36px;
    margin: 0;
    margin-right: 14px;
    line-height: 0;
    vertical-align: middle;
  }
  .el-upload__text{
    line-height: 54px;
    text-align: center;
  }
  .el-upload__isView{
    line-height: 40px;
    padding: 8px;
    box-sizing: border-box;
    color: #999999;
    span{
      display: inline-block;
    }
    .sp1{
      width: 40px;
      height: 40px;
      margin-right: 34px;
      background: skyblue;
      border-radius: 6px 6px 6px 6px;
      img{
        width: 100%;
      }
    }
    .sp2{
      color: #1989FA;
    }
  }
  .hide ::v-deep .el-upload--picture-card{
      display: none;
  }
  .imgBig ::v-deep .el-dialog__headerbtn{
    top: 0;
  }
  .img-upload{
    width: 290px;
    height: 54px;
    border: 1px dashed #ccc;
    cursor: pointer;
    .el-icon-upload{
      font-size: 36px;
      vertical-align: middle;
      margin-right: 14px;
      color: #1989FA;
    }
  }
  ::v-deep .el-upload-list--picture-card .el-upload-list__item{
    width: 290px;
    height: 54px;
    padding: 6px 8px;
  }
  ::v-deep .el-upload--picture-card{
    width: 290px;
    height: 54px;
    padding: 8px;
    background-color: transparent;
  }
  ::v-deep .el-upload-list--picture-card .el-upload-list__item-thumbnail{
    width: 40px;
    height: 40px;
  }
  .el-icon-success{
    color: #15BE50;
    font-size: 20px;
    vertical-align: middle;
    margin-left: 34px;
  }
  .imgsp1{
    margin-left: 10px;
    color:#999;
  }
  .imgsp2{
    color: #1989FA;
    cursor: pointer;
  }
## 到此就全部完成了,看效果
![第一步](https://img-blog.csdnimg.cn/02b36eefe653481dac65435241f53c34.png#pic_center)

![第二步](https://img-blog.csdnimg.cn/be9e1fe9c62f44e780fb6df53bf2b791.png#pic_center)
![第三步](https://img-blog.csdnimg.cn/5e3181a37c36400595e6ad0c9d805106.png#pic_center)
## 完整效果在这里:

[video(video-2emHLzJy-1655187375197)(type-csdn)(url-https://live.csdn.net/v/embed/216261)(image-https://video-community.csdnimg.cn/vod-84deb4/b98c43062fd8440aa414e41e8ebcf594/snapshots/e98b525e8124449a87800ddd22f334f4-00002.jpg?auth_key=4808786210-0-0-a20953a6750fcc8ff5cc7294b6b83871)(title-上传头像)]

  • 0
    点赞
  • 2
    收藏
    觉得还不错? 一键收藏
  • 1
    评论
### 回答1: 好的,我可以回答这个问题。使用Vue3和TypeScript来仿造京东首页是可行的,需要使用Vue CLI来创建项目,然后使用Vue Router来管理路由,使用Vuex来管理状态,使用axios来进行数据请求,使用Element UI来构建页面组件。同时,需要熟悉Vue3和TypeScript的语法和特性,以及京东首页的设计和布局。 ### 回答2: 使用Vue 3和TypeScript可以轻松地仿造京东首页并编写一个类似的页面。首先,我们需要建立一个Vue项目,并确保项目中安装了Vue 3和TypeScript依赖。 接下来,我们可以根据京东首页的布局和组件结构来重建页面。可以使用Vue的组件化开发方式,将页面拆分为多个组件,从而增加代码的可维护性和复用性。 在编写组件时,使用Vue 3的Composition API可以更好地管理组件的生命周期和状态。在组件中,可以使用`<template>`标签来定义组件的HTML布局,使用`<script>`标签来编写组件的逻辑和处理函数,使用`<style>`标签来定义组件的样式。 在编写逻辑部分时,可以使用TypeScript的类型系统来提供更好的代码提示和类型检查。可以定义接口或类型来描述组件所接收的props和数据结构,并使用泛型来约束函数的输入和输出。 在仿造京东首页时,可以使用Vue Router来实现不同页面之间的导航和路由跳转。可以使用axios或其他HTTP库来进行异步数据请求,并使用Vuex来进行全局状态管理。 最后,可以使用Vue的指令、过滤器和动画等特性来增加页面的交互效果和动画效果。可以使用京东的样式和图片资源来使页面更加逼真地仿造京东首页。 综上所述,使用Vue 3和TypeScript可以轻松地编写一个仿京东首页的页面。通过组件化开发、Composition API、TypeScript的类型系统以及Vue的特性和库的支持,我们可以快速构建出一个功能完备、交互流畅的仿京东首页页面。 ### 回答3: Vue3是一款流行的JavaScript框架,而TypeScript是一种类型安全的编程语言。结合这两者,我们可以使用Vue3和TypeScript来仿造京东首页写一个页面。 首先,我们需要创建一个Vue3项目并安装所需的依赖。在终端中运行以下命令: ``` vue create jingdong-page cd jingdong-page ``` 然后,我们可以使用Vue组件的方式来构建页面。在src目录下创建一个components文件夹,并创建一个名为Home.vue的文件。 在Home.vue中,我们可以使用Vue的模板语法和组件的概念来构建页面的结构和样式。例如,我们可以创建一个顶部导航条组件和一个商品列表组件。 ```html <template> <div> <my-header></my-header> <my-goods-list></my-goods-list> </div> </template> <script lang="ts"> import { defineComponent } from 'vue' import MyHeader from './MyHeader.vue' import MyGoodsList from './MyGoodsList.vue' export default defineComponent({ components: { MyHeader, MyGoodsList, }, }) </script> <style scoped> /* 样式 */ </style> ``` 接下来,我们可以创建MyHeader.vue和MyGoodsList.vue两个组件来实现顶部导航条和商品列表的样式和逻辑。在这些组件中,我们可以使用TypeScript的类型注解来增加代码的可靠性。 ```html <!-- MyHeader.vue --> <template> <header> <!-- 导航条内容 --> </header> </template> <script lang="ts"> import { defineComponent } from 'vue' export default defineComponent({ name: 'MyHeader', // 类型注解 props: { // 属性 }, // 方法 methods: { // 方法 }, }) </script> <style scoped> /* 样式 */ </style> ``` ```html <!-- MyGoodsList.vue --> <template> <ul> <!-- 商品列表内容 --> </ul> </template> <script lang="ts"> import { defineComponent } from 'vue' export default defineComponent({ name: 'MyGoodsList', // 类型注解 props: { // 属性 }, // 方法 methods: { // 方法 }, }) </script> <style scoped> /* 样式 */ </style> ``` 最后,在src目录下的main.ts中,我们可以导入并使用Home.vue组件来渲染页面。 ```typescript import { createApp } from 'vue' import Home from './components/Home.vue' createApp(Home).mount('#app') ``` 这样,我们就使用Vue3和TypeScript仿造了一个简单的京东首页页面。通过组件化和类型注解,我们可以更好地组织代码和管理状态,提高代码的可维护性和可读性。

“相关推荐”对你有帮助么?

  • 非常没帮助
  • 没帮助
  • 一般
  • 有帮助
  • 非常有帮助
提交
评论 1
添加红包

请填写红包祝福语或标题

红包个数最小为10个

红包金额最低5元

当前余额3.43前往充值 >
需支付:10.00
成就一亿技术人!
领取后你会自动成为博主和红包主的粉丝 规则
hope_wisdom
发出的红包
实付
使用余额支付
点击重新获取
扫码支付
钱包余额 0

抵扣说明:

1.余额是钱包充值的虚拟货币,按照1:1的比例进行支付金额的抵扣。
2.余额无法直接购买下载,可以购买VIP、付费专栏及课程。

余额充值