


文章目录
一.日志监控
1.下载监控日志的程序包
[root@yei ~]# ls
anaconda-ks.cfg       zabbix-5.0.2
pyscripts-master.zip  zabbix-5.0.2.tar.gz
[root@yei ~]# yum -y install unzip
[root@yei ~]#  unzip pyscripts-master.zip
Archive:  pyscripts-master.zip
67a2f27e90f1cb27d46bbe855d255b3e0d302cd7
   creating: pyscripts-master/
  inflating: pyscripts-master/README.md
  inflating: pyscripts-master/dmp4.py
  inflating: pyscripts-master/log.py
  inflating: pyscripts-master/mail_send.py
  inflating: pyscripts-master/定时发微信群消息.zip
[root@yei ~]# cd pyscripts-master
[root@yei pyscripts-master]# ls
dmp4.py  mail_send.py  定时发微信群消息.zip
log.py   README.md
log.py
作用:检查日志文件中是否有指定的关键字
第一个参数为日志文件名(必须有,相对路径、绝对路径均可)
第二个参数为seek position文件的路径(可选项,若不设置则默认为/tmp/logseek文件。相对路径、绝对路径均可)
第三个参数为搜索关键字,默认为 Error(如果不为Error,则必须加第二和第三两个参数)
[root@yei pyscripts-master]# rm -rf dmp4.py mail_send.py README.md 定时发微信群消息.zip
[root@yei pyscripts-master]# ls
log.py
[root@yei pyscripts-master]# ls /scripts/
check_process.sh
[root@yei pyscripts-master]# mv log.py  /scripts/
[root@yei pyscripts-master]# ls
[root@yei pyscripts-master]# cd
[root@yei ~]# ls
anaconda-ks.cfg       zabbix-5.0.2
pyscripts-master      zabbix-5.0.2.tar.gz
pyscripts-master.zip
[root@yei ~]# rm -rf pyscripts-master*
[root@yei ~]# ls
anaconda-ks.cfg  zabbix-5.0.2  zabbix-5.0.2.tar.gz
[root@yei ~]# cd /scripts/
[root@yei scripts]# ls
check_process.sh  log.py
[root@yei scripts]# chmod +x log.py
[root@yei scripts]# ll
total 8
-rwxr-xr-x 1 root root  140 Jul 21 19:32 check_process.sh
-rwxr-xr-x 1 root root 1854 Mar 22 16:09 log.py

[root@yei scripts]# echo 'Failed' > key

[root@yei ~]# cd /usr/local/etc/
2.启动自定义监控功能
[root@yei ~]# cd /usr/local/etc/
[root@yei etc]# vim zabbix_agentd.conf
\# Format: UserParameter=<key>,<shell command>
UserParameter=check_process[*],/bin/bash /scripts/check_process.sh $1
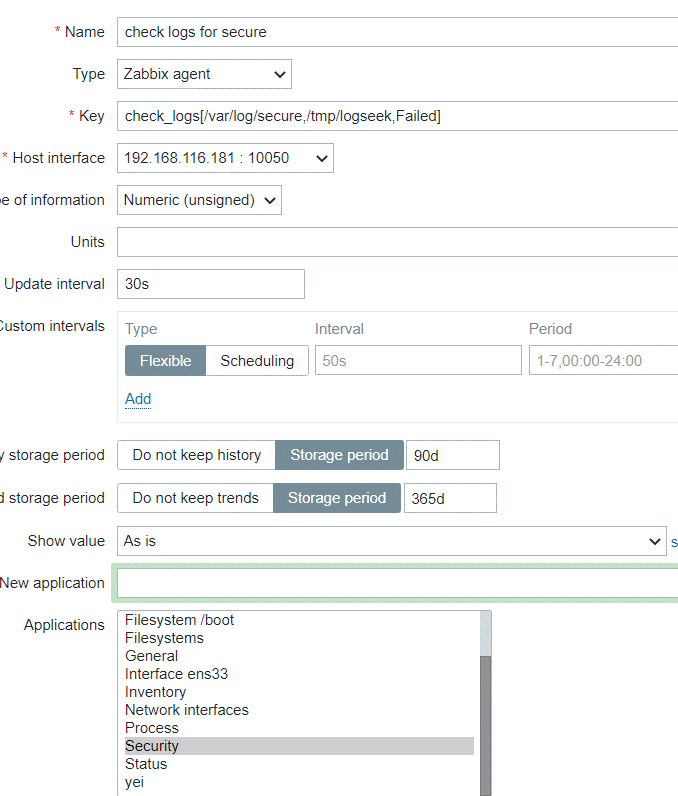
UserParameter=check_logs[*],/usr/bin/python /scripts/log.py $1 $2 $3
[root@yei etc]# cd
[root@yei ~]# python /scripts/log.py /var/lo
local/ lock/ log/
[root@yei ~]# python /scripts/log.py /var/log/secure /tmp/myseek failed
0
[root@yei scripts]# echo 'Failed' >> /var/log/secure
[root@yei ~]# python /scripts/log.py /var/log/secure /tmp/myseek Failed
1
[root@yei ~]# python /scripts/log.py /var/log/secure /tmp/myseek Failed
0
[root@yei ~]# pkill zabbix
[root@yei ~]# zabbix_agentd
[root@yeqixian ~]# zabbix_get -s 192.168.116.181 -k check-logs[/var/log/secure,/tmp/logseek,Failed]
ZBX_NOTSUPPORTED: Unsupported item key.
[root@yei log]# setfacl -m u:zabbix:r secure
[root@yei log]# getfacl secure
# file: secure
# owner: root
# group: root
user::rw-
user:zabbix:r--
group::---
mask::r--
other::---
[root@yeqixian ~]# cd /usr/local/etc/
[root@yeqixian etc]# ls
zabbix zabbix_agentd.conf.d zabbix_server.conf.d
zabbix_agentd.conf zabbix_server.conf
[root@yeqixian etc]# vim zabbix_agentd.conf
# UnsafeUserParameters=0
UnsafeUserParameters=1
[root@yeqixian etc]# pkill zabbix
[root@yeqixian etc]# zabbix_agentd
[root@yeqixian etc]# zabbix_server
[root@yei etc]# pkill zabbix
[root@yei etc]# zabbix_agentd
[root@yeqixian etc]# zabbix_get -s 192.168.116.181 -k check_logs[/var/log/secure,/tmp/logseek,Failed]
[root@yei ~]# cd /tmp/
[root@yei tmp]# ls
abc
logseek
systemd-private-1908c538f5b344838ec08a25c6e96e91-mariadb.service-N126du
vmware-root
yum_save_tx.2020-07-22.17-52.sI1DkG.yumtx
zabbix_agentd.log
zabbix_agentd.pid
[root@yei tmp]# cd /usr/local/etc/zabbix_agentd.conf
-bash: cd: /usr/local/etc/zabbix_agentd.conf: Not a directory
[root@yei tmp]# rm -rf /tmp/logseek /tmp/myseek
[root@yei tmp]# ls
abc
systemd-private-1908c538f5b344838ec08a25c6e96e91-mariadb.service-N126du
vmware-root
yum_save_tx.2020-07-22.17-52.sI1DkG.yumtx
zabbix_agentd.log
zabbix_agentd.pid
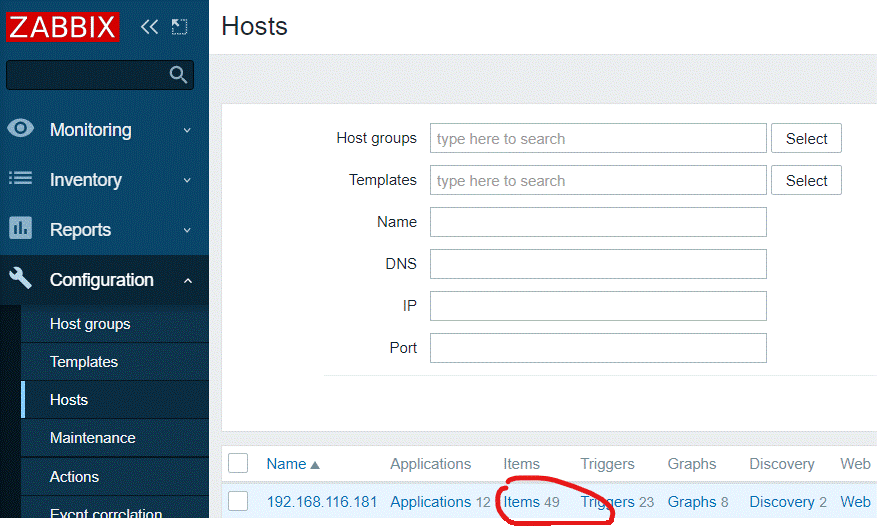
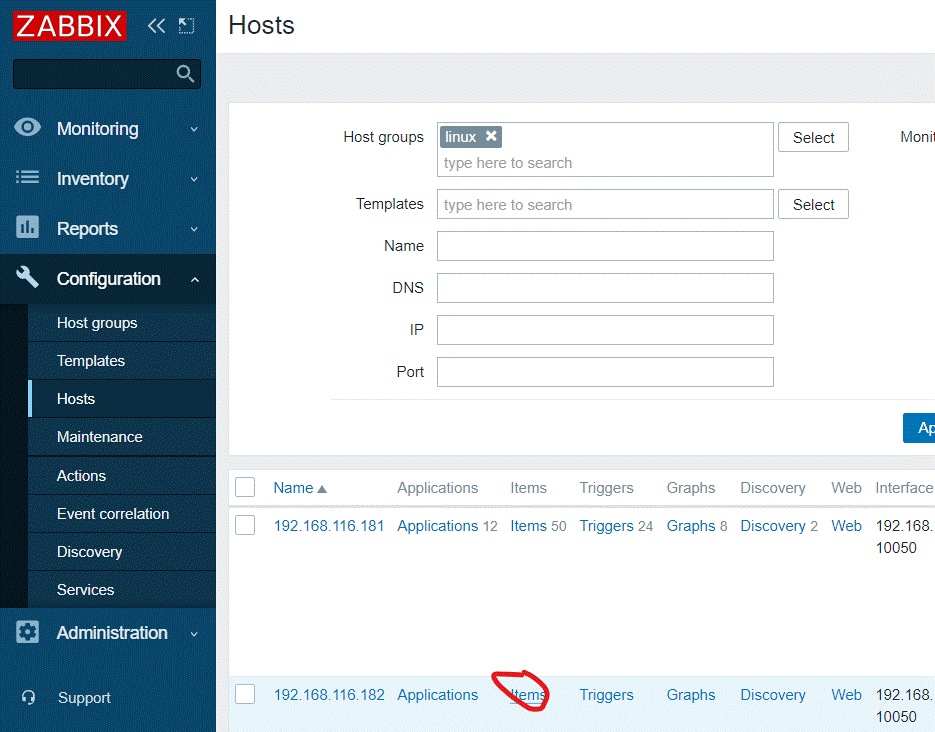
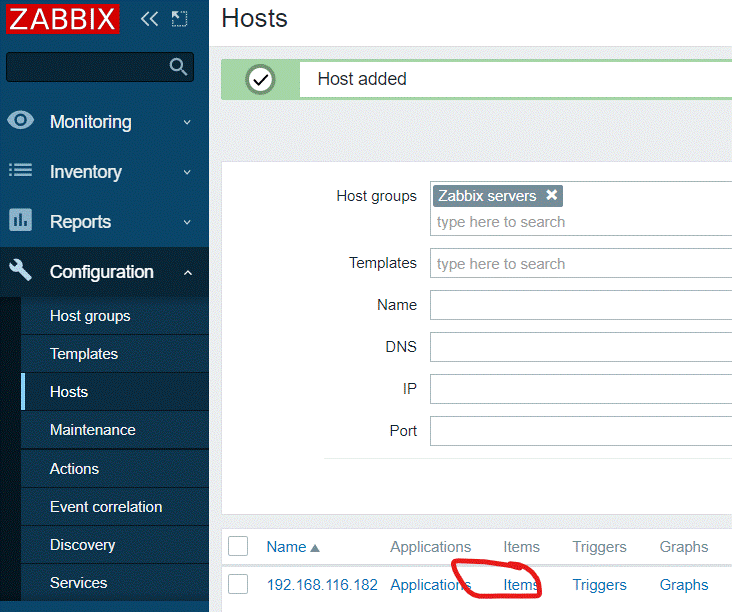
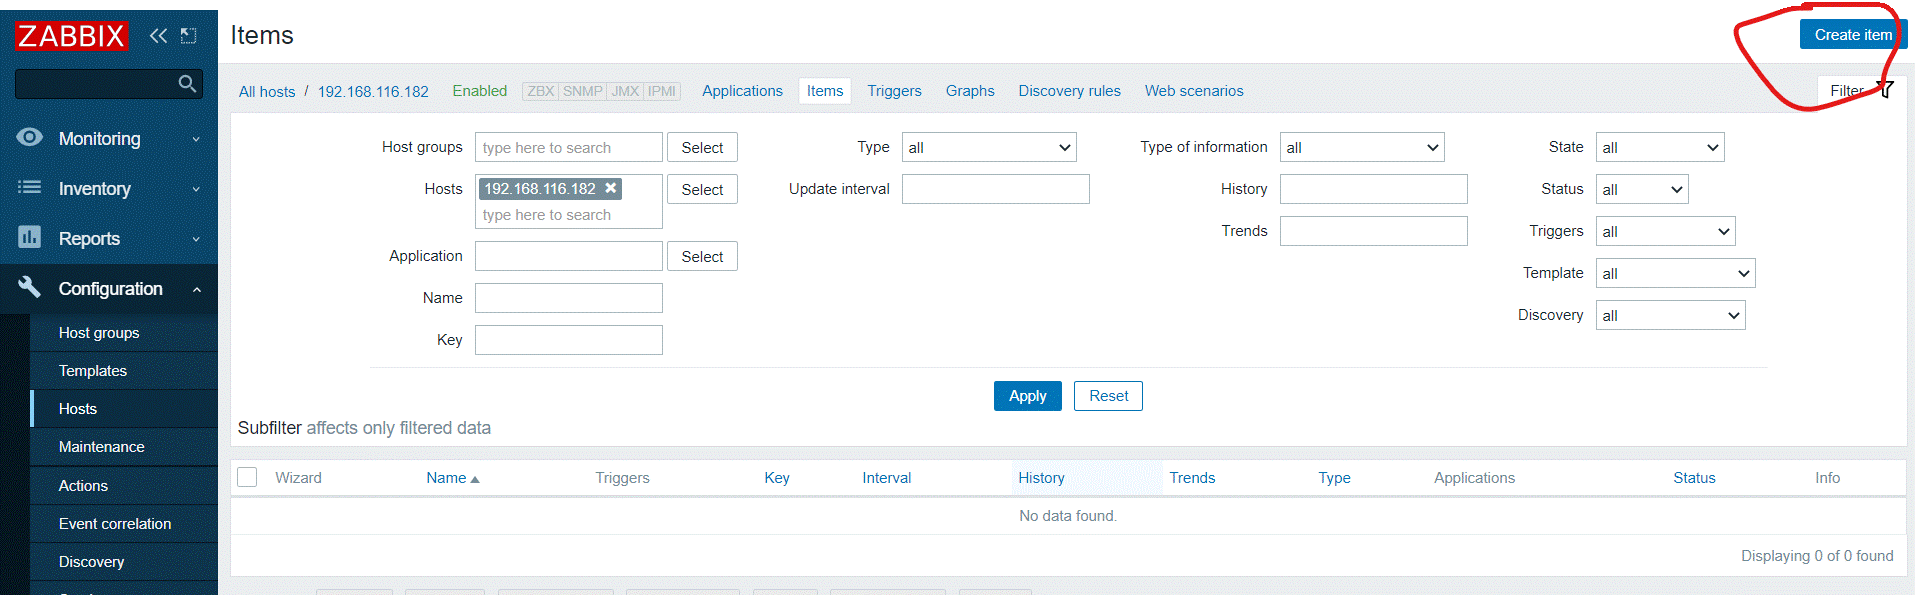
3.添加项目

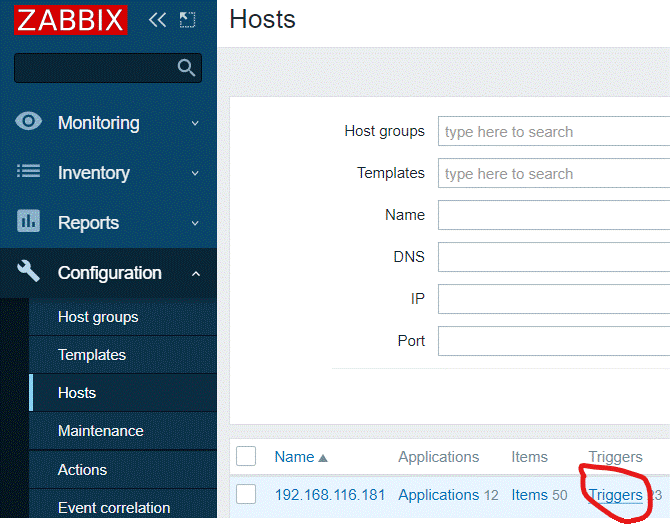
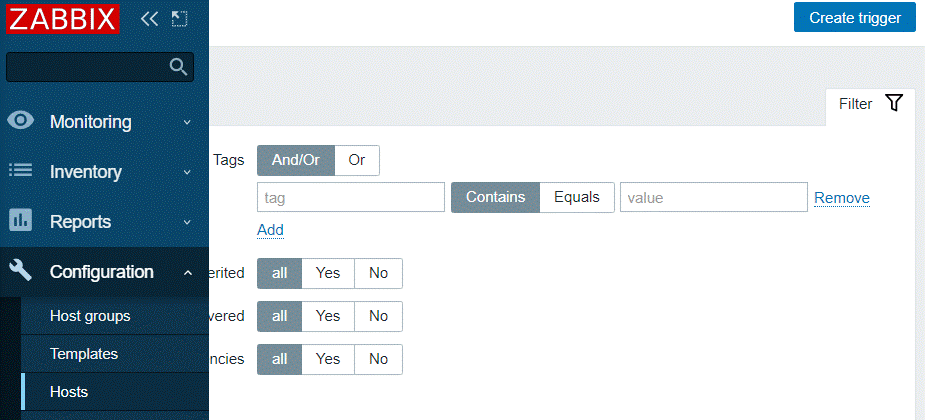
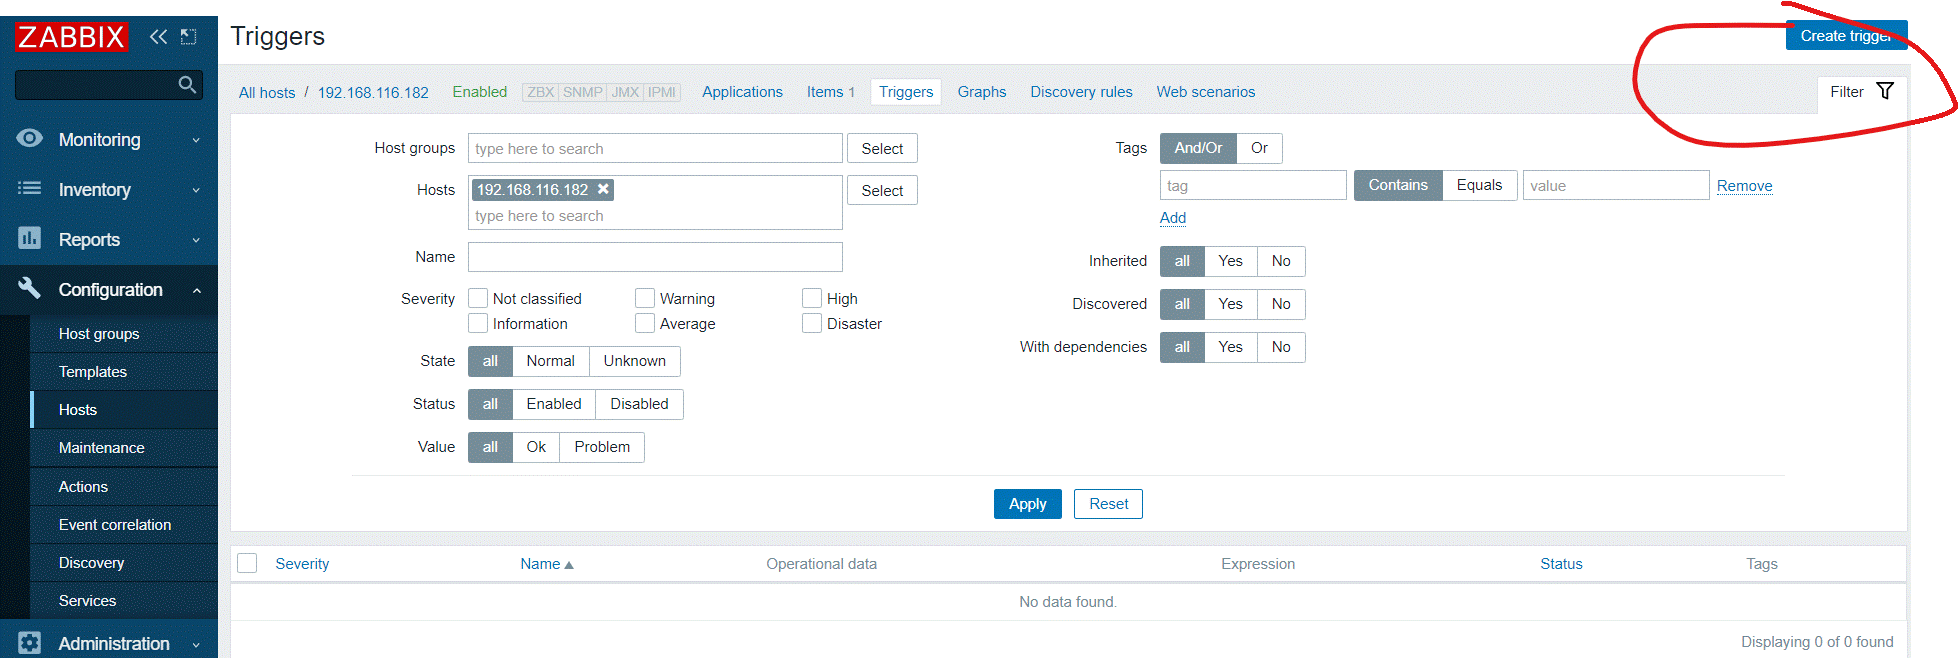
4.添加触发器
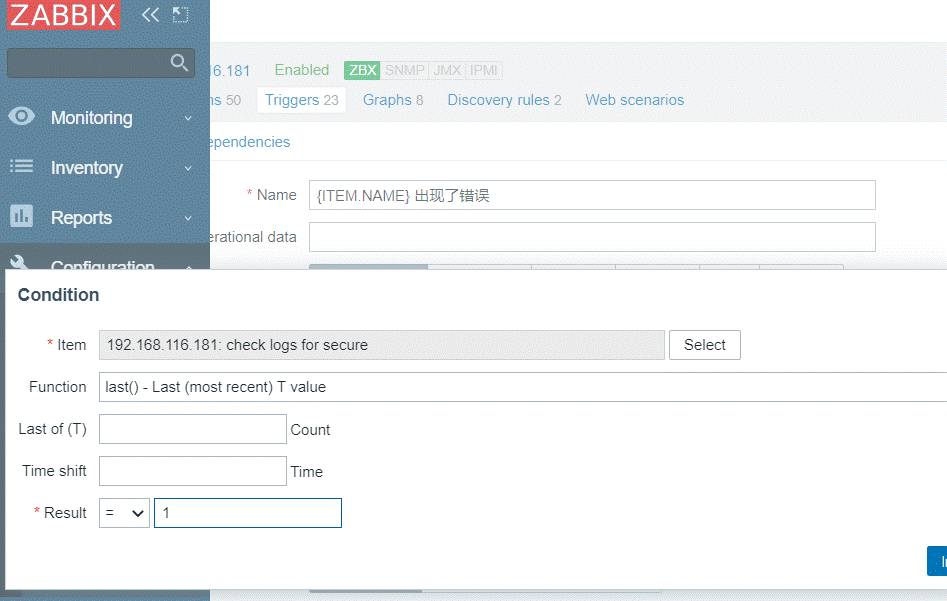
5.查看

二.mysql监控
1.监控mysql主从
1.环境:
| IP | 主从 |
|---|---|
| 192.168.116.181 | 主 |
| 192.168.116.182 | 从 |
2.主从配置
主:
[root@yei tmp]# yum -y install gcc gcc-c++ vim wget pcre-devel openssl-devel
[root@yei tmp]# scp zabbix-5.0.2.tar.gz 192.168.116.182:/root/
[root@yei tmp]# systemctl enable --now
[root@yei tmp]# yum -y install mariadb-libs.x86_64 1:5.5.65-1.el7   freetype.x86_64 0:2.8-14.el7
[root@yei tmp]# systemctl enable --now  mariadb
[root@yei tmp]# ss -antl
[root@yei tmp]# mysql
MariaDB [(none)]> CREATE USER 'repl'@'192.168.116.182' IDENTIFIED BY 'repl123';
Query OK, 0 rows affected (0.00 sec)

MariaDB [(none)]> GRANT REPLICATION SLAVE ON *.* TO 'repl'@'192.168.116.182';
Query OK, 0 rows affected (0.00 sec)
MariaDB [(none)]> flush privileges;
Query OK, 0 rows affected (0.00 sec)
[root@yei tmp]# vim /etc/my.cnf
# instructions in http://fedoraproject.org/wiki/Systemd
server-id = 10
log-bin = mysql_bin
[root@yei tmp]# systemctl restart mariadb
MariaDB [(none)]> show master status;
+------------------+----------+--------------+------------------+
| File             | Position | Binlog_Do_DB | Binlog_Ignore_DB |
+------------------+----------+--------------+------------------+
| mysql_bin.000001 |      245 |              |                  |
+------------------+----------+--------------+------------------+
1 row in set (0.00 sec)
从:
[root@qixian ~]# yum -y install vim wget
[root@qixian ~]# tar xf zabbix-5.0.2.tar.gz
[root@qixian ~]# cd zabbix-5.0.2
[root@qixian zabbix-5.0.2]# yum clean all
[root@qixian zabbix-5.0.2]#  yum makecache fast
[root@qixian zabbix-5.0.2]# yum -y install gcc gcc-c++ vim wget pcre-devel openssl-devel
[root@qixian zabbix-5.0.2]# yum -y install mariadb*


[root@qixian ~]# vim /etc/my.cnf
# instructions in http://fedoraproject.org/wiki/Systemd
server-id = 20
relay-log = myrelay
[root@qixian ~]# systemctl enable --now mariadb
Created symlink from /etc/systemd/system/multi-user.target.wants/mariadb.service to /usr/lib/systemd/system/mariadb.service.

[root@qixian ~]# mysql
Welcome to the MariaDB monitor.  Commands end with ; or \g.
Your MariaDB connection id is 2
Server version: 5.5.65-MariaDB MariaDB Server

Copyright (c) 2000, 2018, Oracle, MariaDB Corporation Ab and others.

Type 'help;' or '\h' for help. Type '\c' to clear the current input statement.

MariaDB [(none)]> show databases;
+--------------------+
| Database           |
+--------------------+
| information_schema |
| mysql              |
| performance_schema |
| test               |
+--------------------+
4 rows in set (0.00 sec)

MariaDB [(none)]> CHANGE MASTER TO
    -> MASTER_HOST='192.168.116.181',
    -> MASTER_USER='repl',
    -> MASTER_PASSWORD='repl123',
    -> MASTER_LOG_FILE='mysql_bin.000001',
    -> master_log_pos=245;
Query OK, 0 rows affected (0.01 sec)
MariaDB [(none)]> start slave;
Query OK, 0 rows affected (0.01 sec)
MariaDB [(none)]> show slave status\G
*************************** 1. row ***************************
               Slave_IO_State: Waiting for master to send event
                  Master_Host: 192.168.116.181
                  Master_User: repl
                  Master_Port: 3306
                Connect_Retry: 60
              Master_Log_File: mysql_bin.000001
          Read_Master_Log_Pos: 245
               Relay_Log_File: myrelay.000002
                Relay_Log_Pos: 529
        Relay_Master_Log_File: mysql_bin.000001
             Slave_IO_Running: Yes
            Slave_SQL_Running: Yes
[root@qixian zabbix-5.0.2]# ./configure --enable-agent
[root@qixian zabbix-5.0.2]# make install
[root@qixian etc]# vim zabbix_agentd.conf
# Server=

Server=192.168.116.145
# ServerActive=

ServerActive=192.168.116.145
# Hostname=

Hostname=MySQL_Slave1
[root@qixian etc]# useradd -r -M -s /sbin/nologin zabbix[root@qixian etc]# zabbix_agentd
[root@qixian etc]# ss -antl
State      Recv-Q Send-Q Local Address:Port               Peer Address:Port
LISTEN     0      128     *:10050               *:*
LISTEN     0      50      *:3306                *:*
LISTEN     0      128     *:22                  *:*
LISTEN     0      100    127.0.0.1:25                  *:*
LISTEN     0      128    :::22                 :::*
LISTEN     0      100       ::1:25                 :::*

[root@qixian scripts]# vim check_replication
#!/bin/bash


mysql_status=$(mysql -uroot  -e 'show slave status\G' 2>/dev/null|grep 'Slave.*Running'|grep -c 'Yes')

if [ $mysql_status -ne 2 ];then
    echo '1'
else
    echo '0'
fi
[root@qixian scripts]# systemctl stop mariadb
[root@qixian scripts]# bash check_replication
1
[root@qixian scripts]# systemctl start mariadb
[root@qixian scripts]# bash check_replication
0
[root@qixian scripts]# cd
[root@qixian ~]# ls /scripts/
check_replication
[root@qixian ~]# vim /usr/local/etc/zabbix_agentd.conf

# Default:
UnsafeUserParameters=1
UserParameter=check_replication,/bin/bash /scripts/check_replication
[root@qixian ~]# pkill zabbix
[root@qixian ~]# zabbix_agentd


[root@yeqixian ~]# zabbix_get -s 192.168.116.182 -k check_replication
0
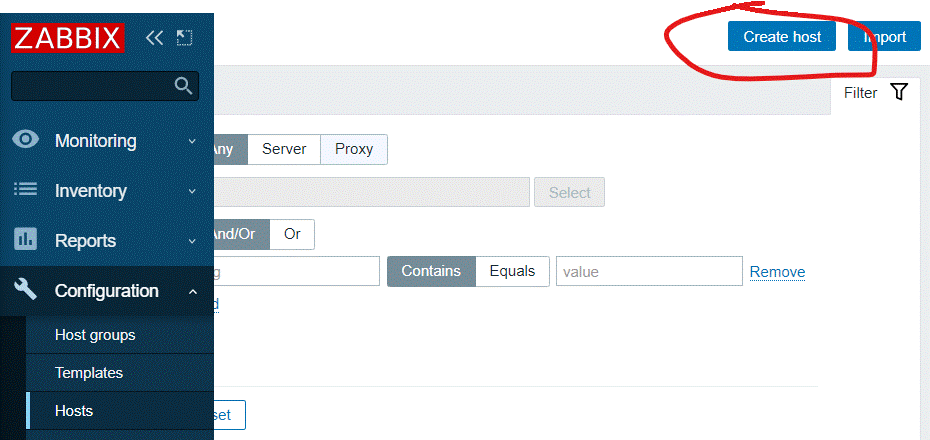
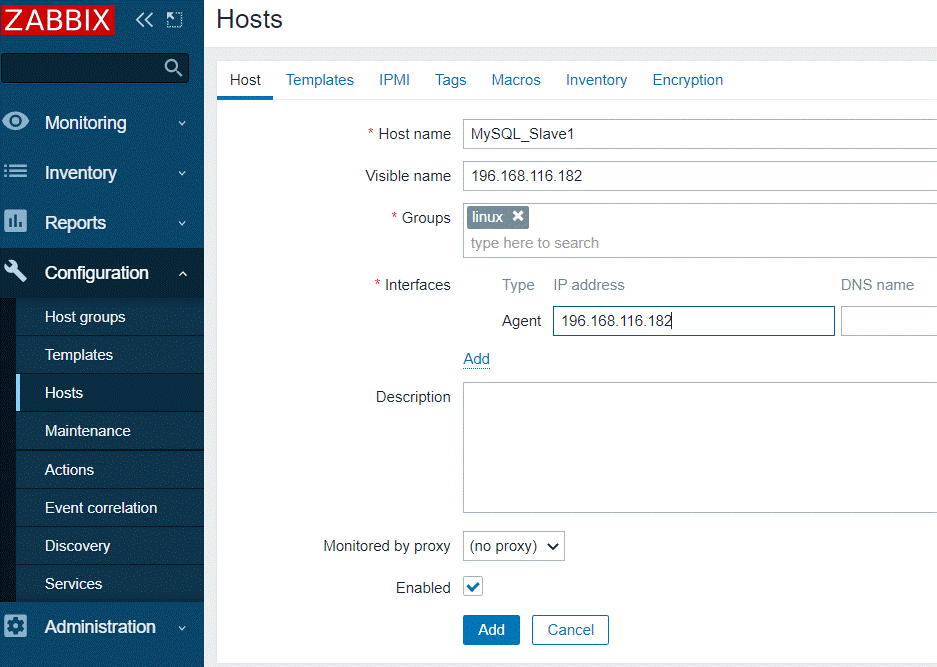
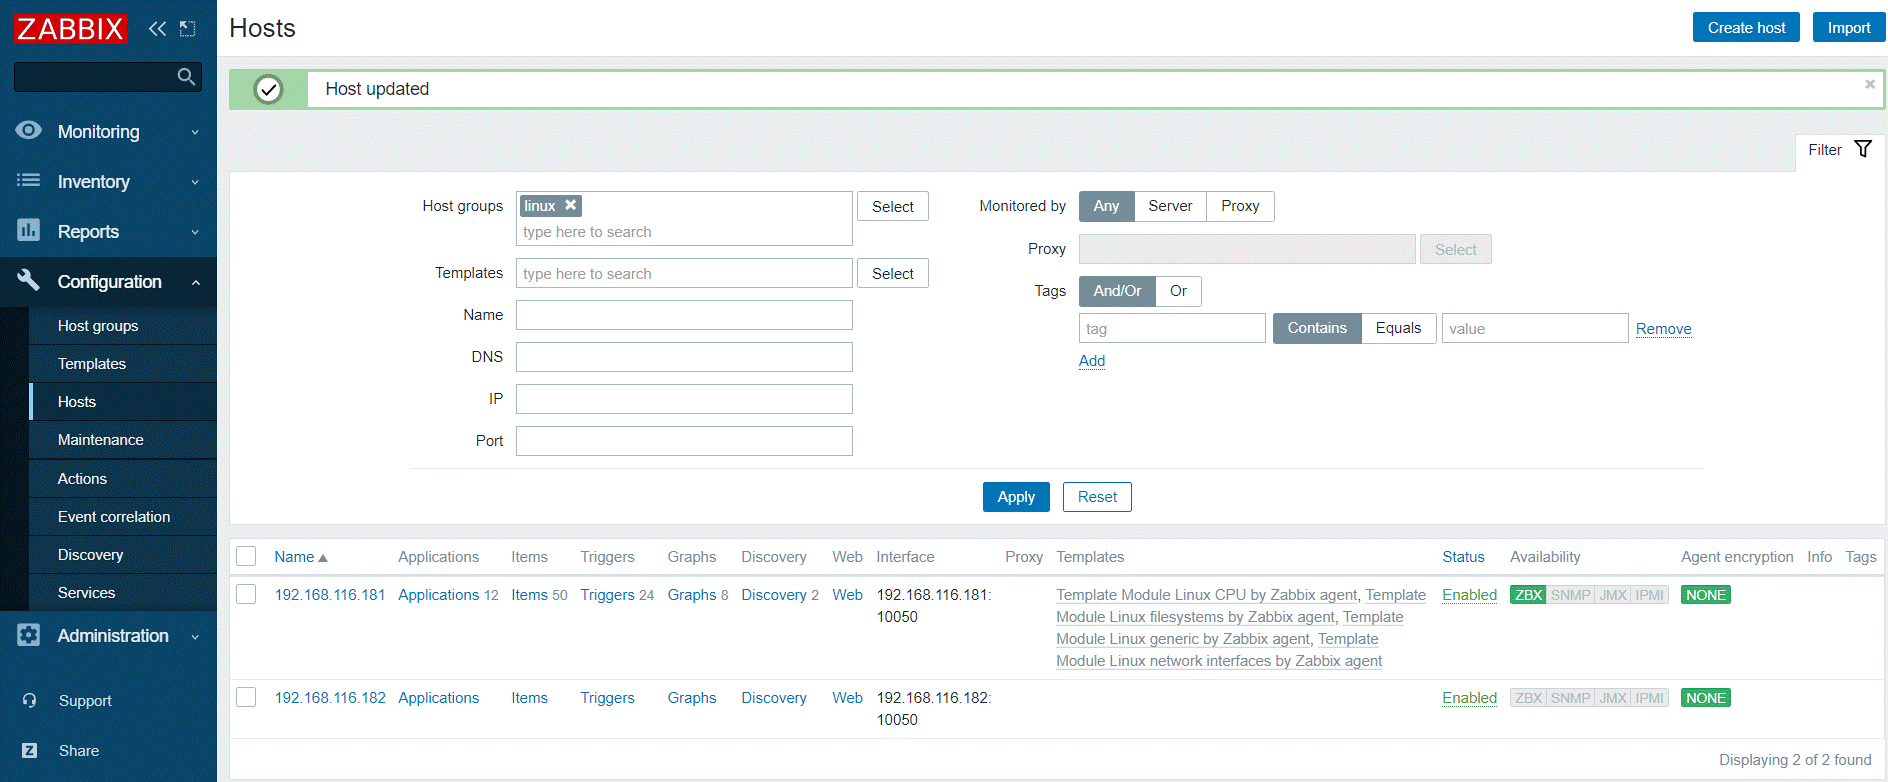
3.添加主机
4.添加项目

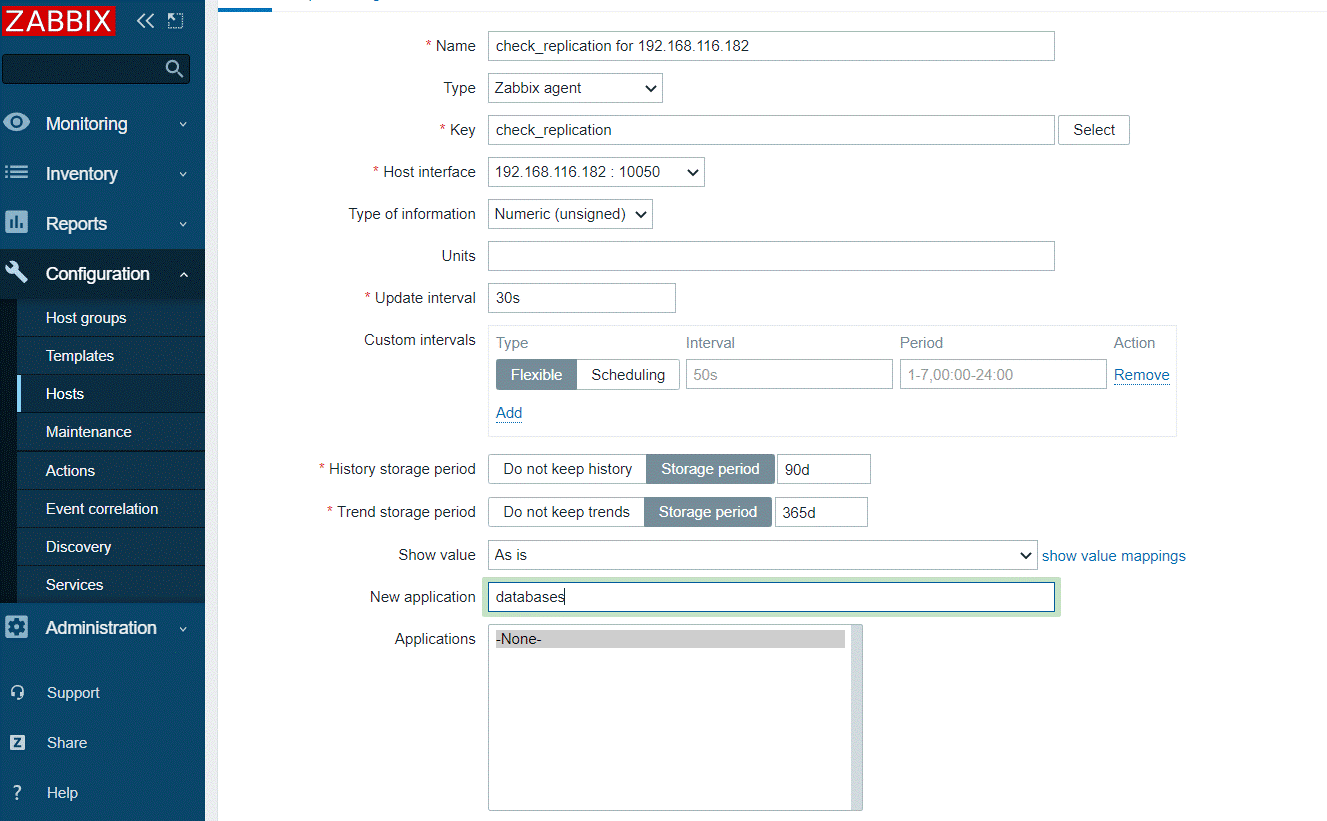
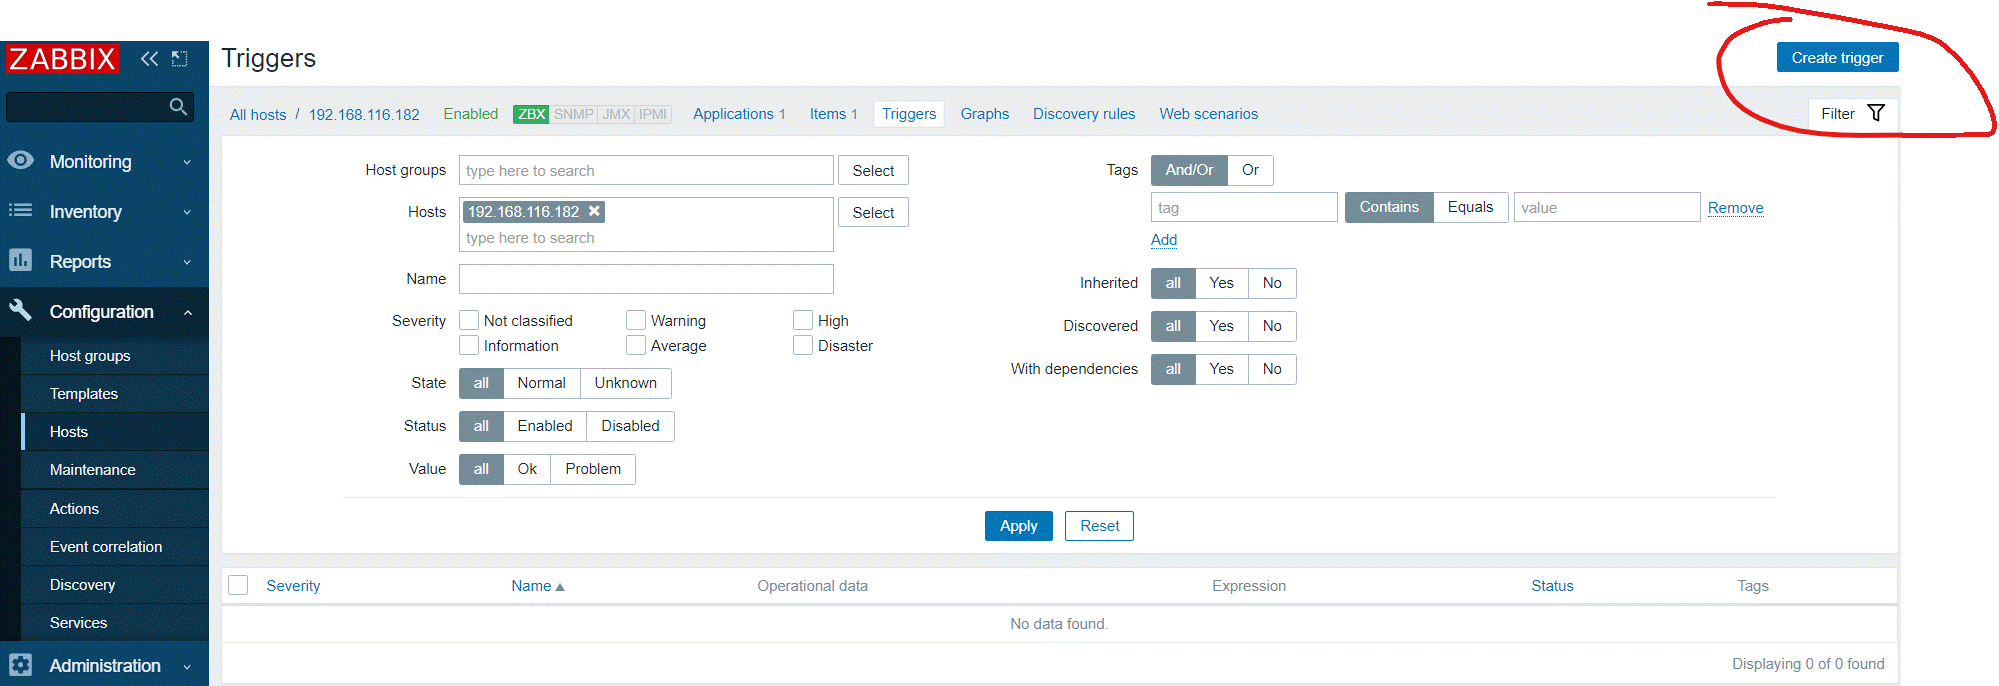
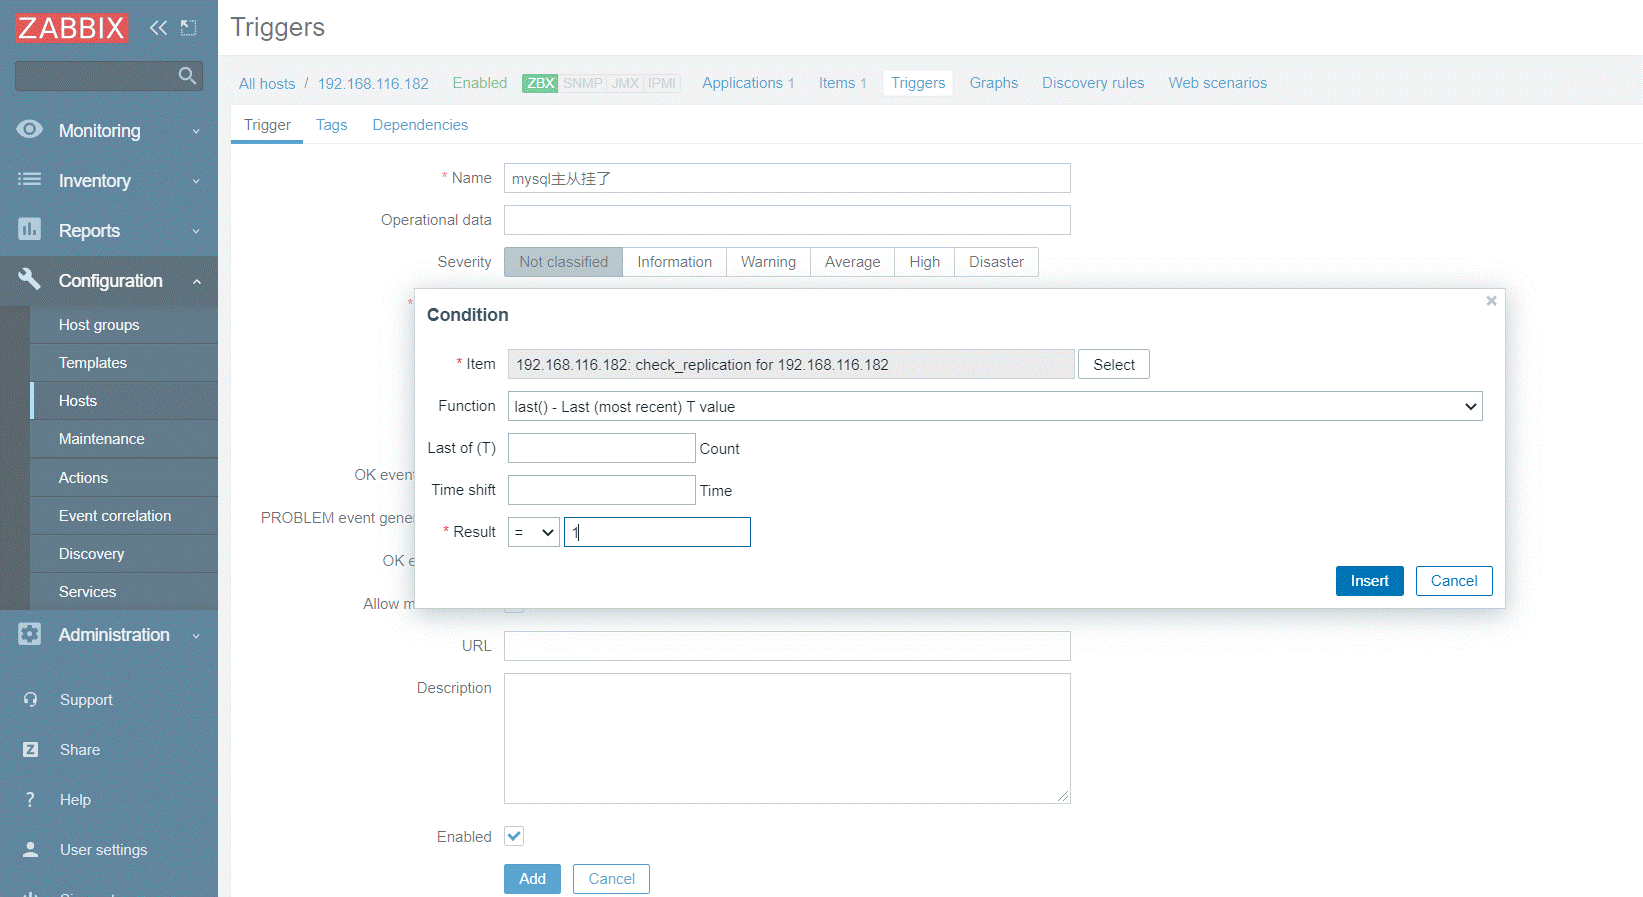
5.添加触发器

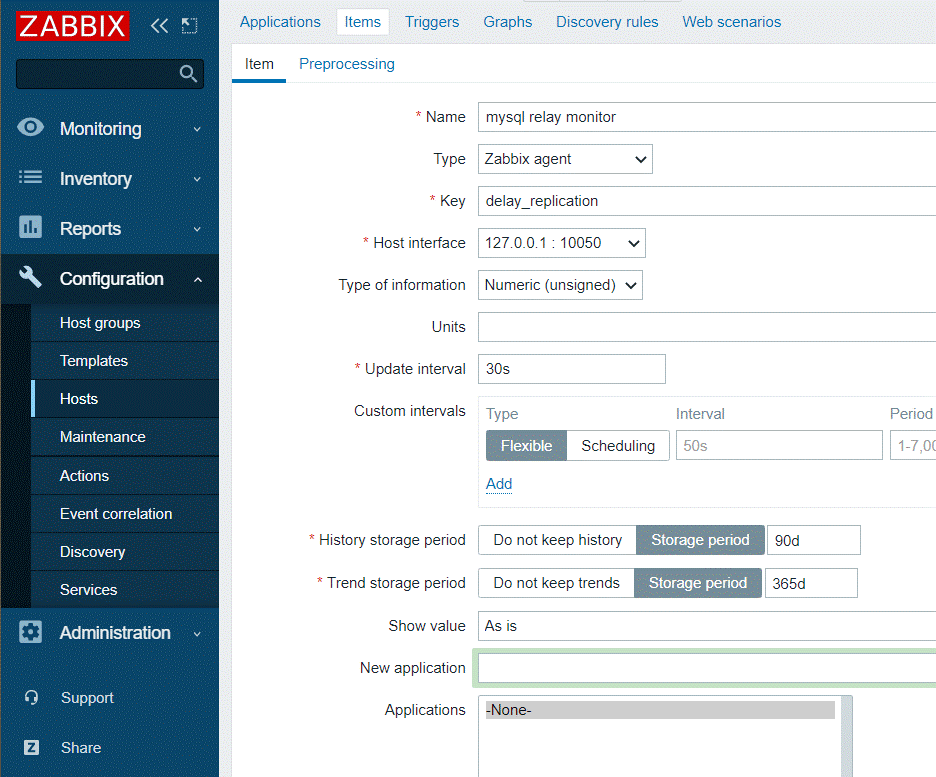
2.监控mysql主从延迟
1.写脚本把想监控的资源状态取出来
[root@qixian ~]# mysql -uroot -e 'show slave status\G' 2>/dev/null|grep 'Seconds_Behind_Master'|awk -F'[: ]+' '{print $3}'
0
[root@qixian ~]# cd /scripts/
[root@qixian scripts]# vim delay_replication.sh
#!/bin/bash

dalay_value=$(mysql -uroot -e 'show slave status\G' 2>/dev/null|grep 'Seconds_Behind_Master'|awk -F'[: ]+' '{print $3}')
echo $dalay_value
[root@qixian scripts]# bash delay_replication.sh
0
2.启动自定义监控功能
[root@qixian scripts]# vim /usr/local/etc/zabbix_agentd.conf
UserParameter=check_replication,/bin/bash /scripts/check_replication.sh
UserParameter=delay_replication,/bin/bash /scripts/delay_replication.sh
3.添加项目
4.添加触发器
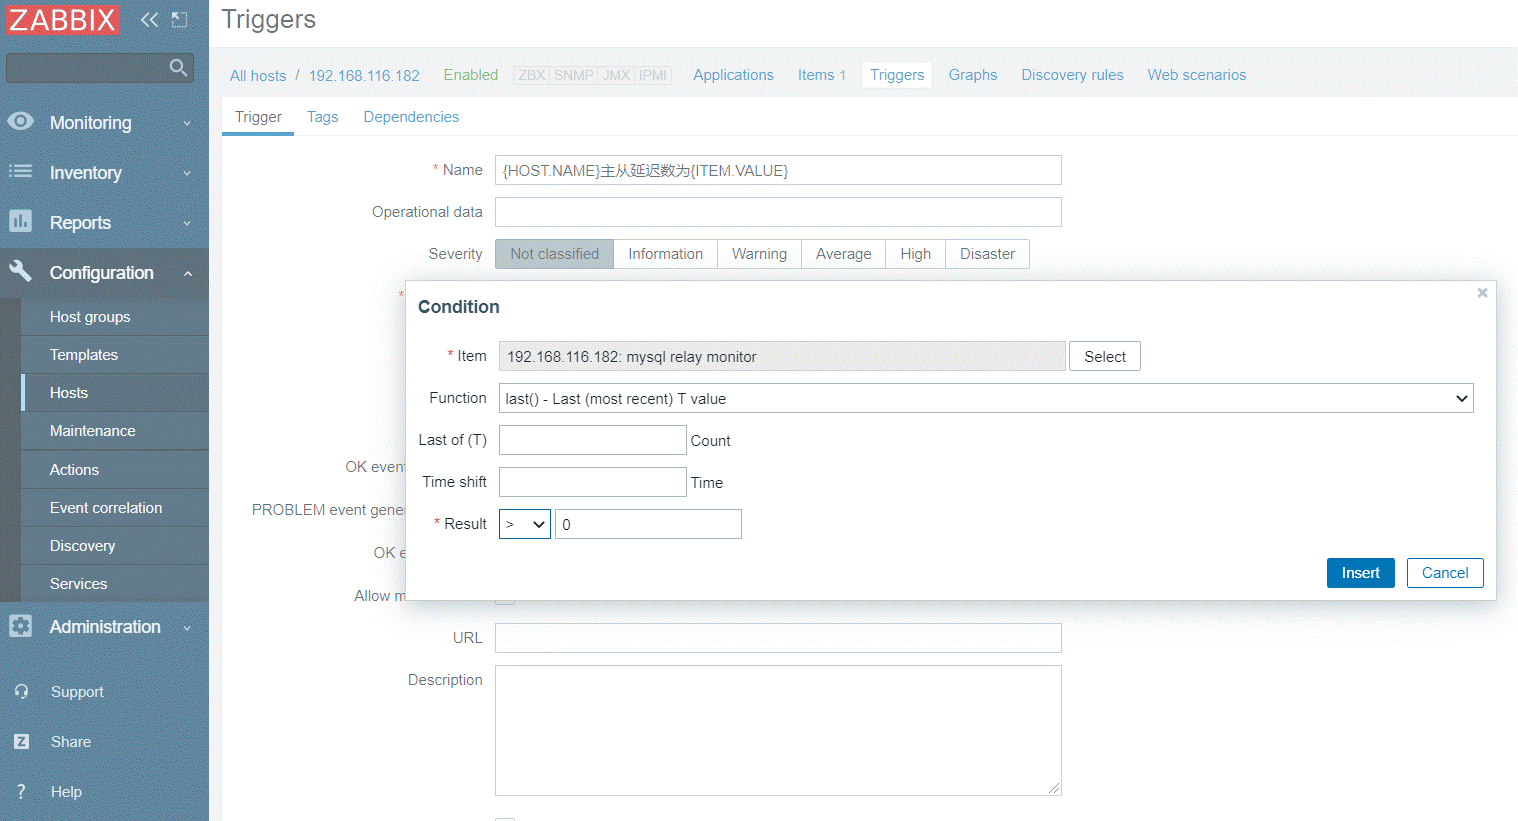
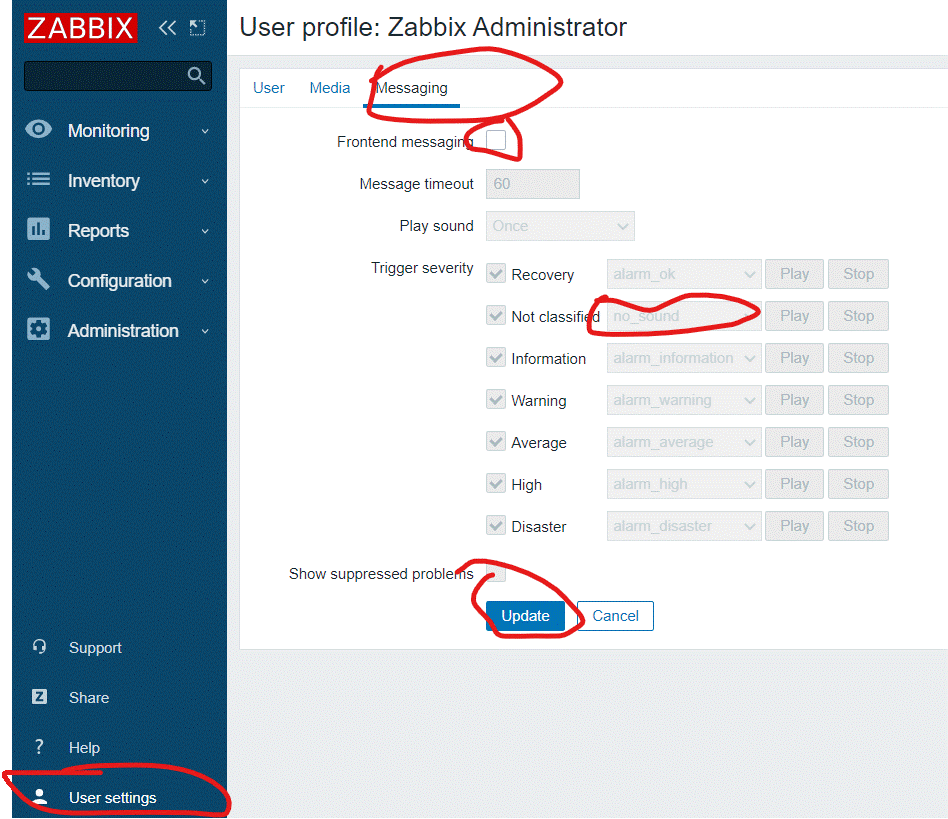
三.声音报警


 9457
9457


 被折叠的 条评论
为什么被折叠?
被折叠的 条评论
为什么被折叠?
 到【灌水乐园】发言


