


实现源码:https://github.com/iamKyun/flowable-examples/tree/master/example-1
代码实现
此实现的SpringBoot版本为
2.3.0,Flowable版本为6.5,不同的版本可能实现不一样,但是最终目的都是要让我们自己的身份管理服务实现类去把Flow able自动配置的给替换掉。
-
实现接口:
org.flowable.idm.api.IdmIdentityService,根据需求实现里面的查询器和查询方法// 这里直接继承了它的默认实现类 public class CustomIdmIdentityServiceImpl extends IdmIdentityServiceImpl { @Override public UserQuery createUserQuery() { // 自定义的用户查询器实现 return new CustomUserQueryImpl(); } } -
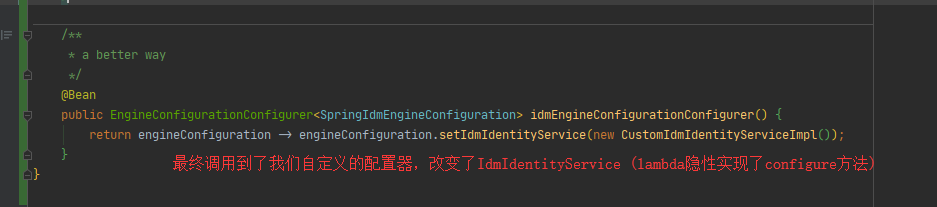
用Spring Bean的方式配置一个属于
SpringIdmEngineConfiguration的引擎配置器,在配置器里设置IdmIdentityService的自定义实现@Bean public EngineConfigurationConfigurer<SpringIdmEngineConfiguration> idmEngineConfigurationConfigurer() { return idmEngineConfiguration -> idmEngineConfiguration.setIdmIdentityService( new CustomIdmIdentityServiceImpl()); } -
测试
@SpringBootTest(classes = ExampleApplication.class)
class ExampleApplicationTests {

    @Autowired
    private IdentityService identityService;

    @Test
    @FormDeploymentAnnotation
    public void identityServiceTest() {
        // 查询方法最终调用了 CustomUserQueryImpl,里面的测试数据有3个用户,对应ID:["1","2","3"]
        long result1 = identityService.createUserQuery().userId("1").count();
        long result2 = identityService.createUserQuery().userId("4").count();
        long result3 = identityService.createUserQuery().userIds(Arrays.asList("1", "2", "4")).count();
        Assertions.assertEquals(1, result1);
        Assertions.assertEquals(0, result2);
        Assertions.assertEquals(2, result3);
    }

}
源码解析
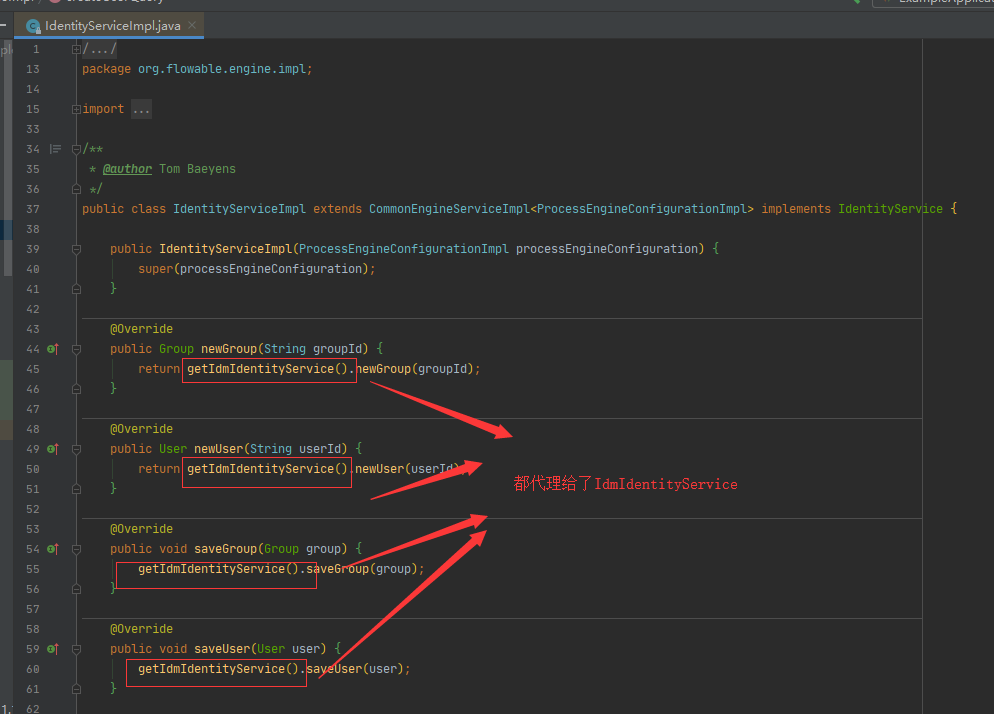
在org.flowable.engine.IdentityService执行查询的方法中,是代理给org.flowable.idm.api.IdmIdentityService去执行。
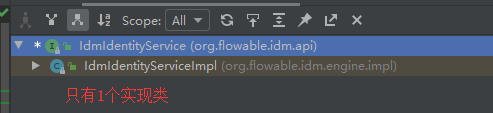
此接口的实现只有1个org.flowable.idm.engine.impl.IdmIdentityServiceImpl
查找调用处可以发现只有1处新建该类的对象 (org.flowable.idm.engine.IdmEngineConfiguration:100),所以最终的目的是:更改IdmEngineConfiguration的成员变量:idmIdentityService,让其变成我们自定义的IdmIdentityService (此处指上文的CustomIdmIdentityServiceImpl)。
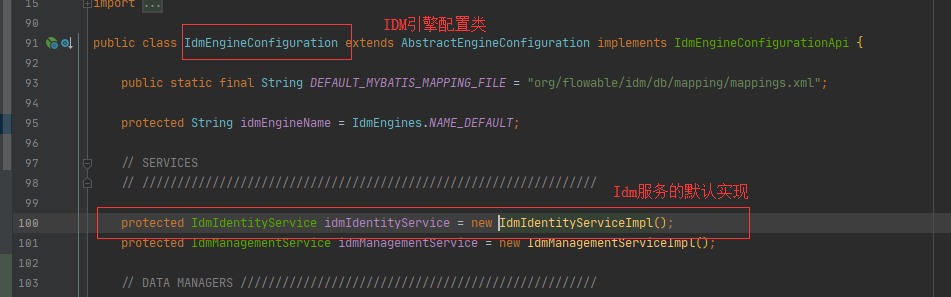
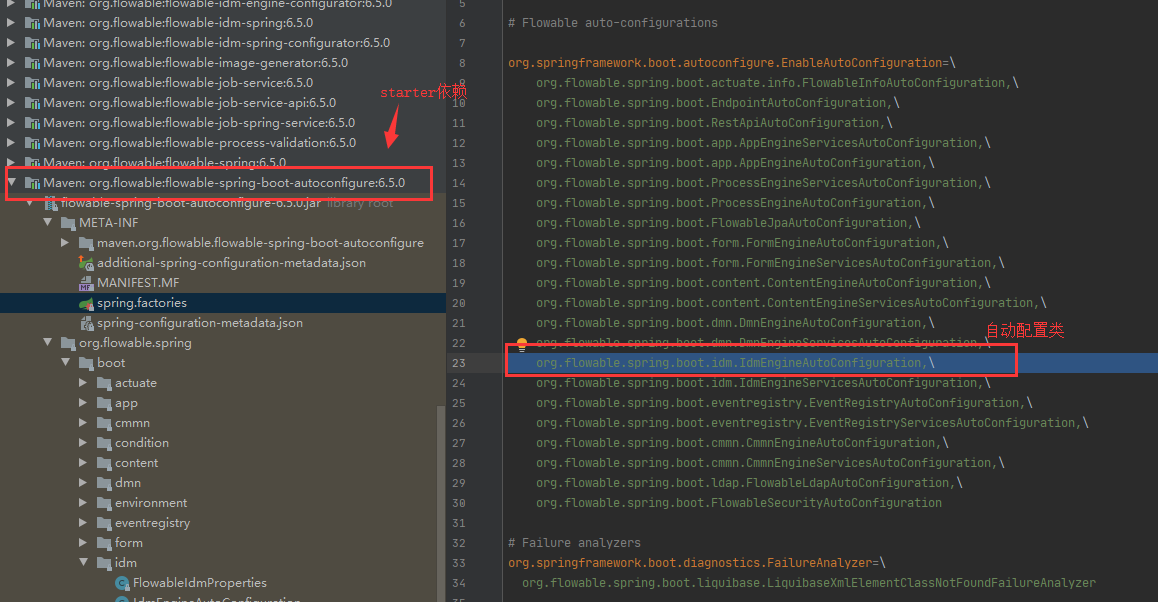
现在所处在的类是org.flowable.idm.engine.IdmEngineConfiguration,它是Flowable的IDM引擎配置类,在Spring环境下该类有一个子类名为:org.flowable.idm.spring.SpringIdmEngineConfiguration,而引入了flowable-spring-boot-starter之后,在SpringBoot的环境下,自动配置生效。使得SpringIdmEngineConfiguration自动成为一个Spring Bean。
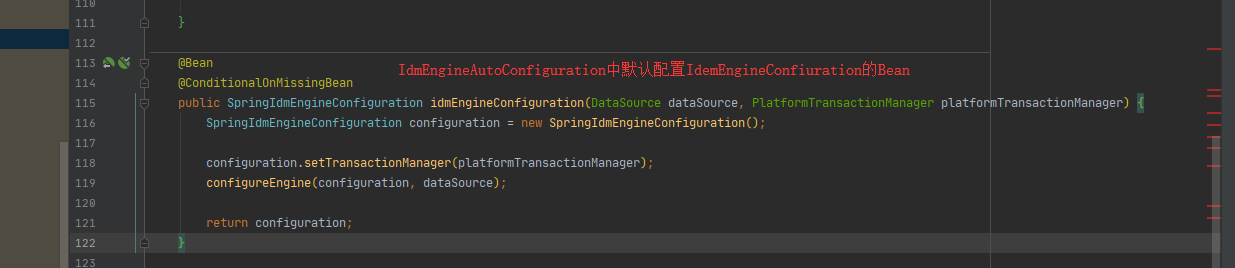
所以此时已经有一个方法了,只要改变此SpringIdmEngineConfiguration Bean的IdmIdentityService就可以替换IDM引擎。

这样也能达到目的,但是配置过于冗余,基本上是复制了一整段代码。
参考官方LDAP自动配置的实现,可以发现它只用一个Bean就完成了IdmIdentityService的替换,就是文章中一开始所展示的实现方式。
这种实现方式是怎么生效的呢?其中关键接口是org.flowable.spring.boot.EngineConfigurationConfigurer
由它的注释可以看到:
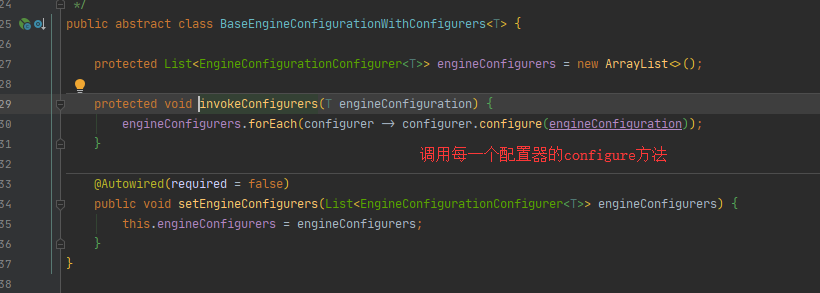
Interface to be implemented by a bean that does some extra configuration of a Flowable engines. If such a bean is defined, it will be called when the specific engine configuration is created and the default values have been set.
在Flowable引擎创建并设置好默认值时,这个接口是实现类会用来为这些Flowable引擎做一些额外的配置工作。
这个接口与IDM引擎关联的代码是在:org.flowable.spring.boot.idm.IdmEngineAutoConfiguration.IdmEngineAppConfiguration#idmEngineConfigurator
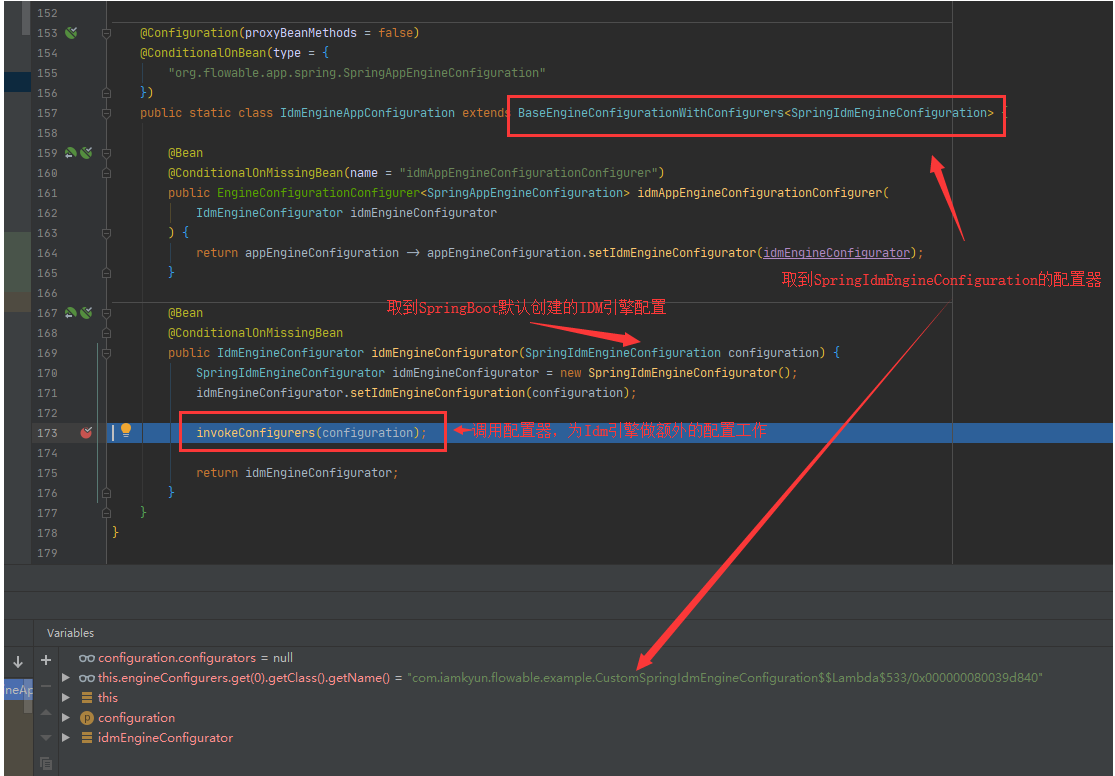
当SpringIdmEngineConfiguration 准备好时,它会调用invokeConfigurars()方法,让属于SpringIdmEngineConfiguration的配置器来为SpringIdmEngineConfiguration做一些额外的配置。
最后,就调用到了我们文中一开始所定义的配置器Bean,让我们自定义的IDM服务生效。


 4404
4404


 被折叠的 条评论
为什么被折叠?
被折叠的 条评论
为什么被折叠?
 到【灌水乐园】发言


