


SpringCloud分布式框架代码搭建记录
1.软件及版本背景
Idea 版本号 2023.02
jdk1.8
maven版本3.9.3//重复包导入会报错所以需要注意pom文件

idea的具体版本及注册方式等都丢下方链接自行下载
链接:https://pan.baidu.com/s/1sjnQbMZ4eGWo_TsUqqVMXg
提取码:1357

maven地址建议setting.xml更改为阿里云地址(本文基于阿里云
 <mirror>
		<id>aliyun</id>
		<name>aliyun Maven</name>
		<mirrorOf>*</mirrorOf>
		<url>http://maven.aliyun.com/nexus/content/groups/public/</url>
	</mirror>
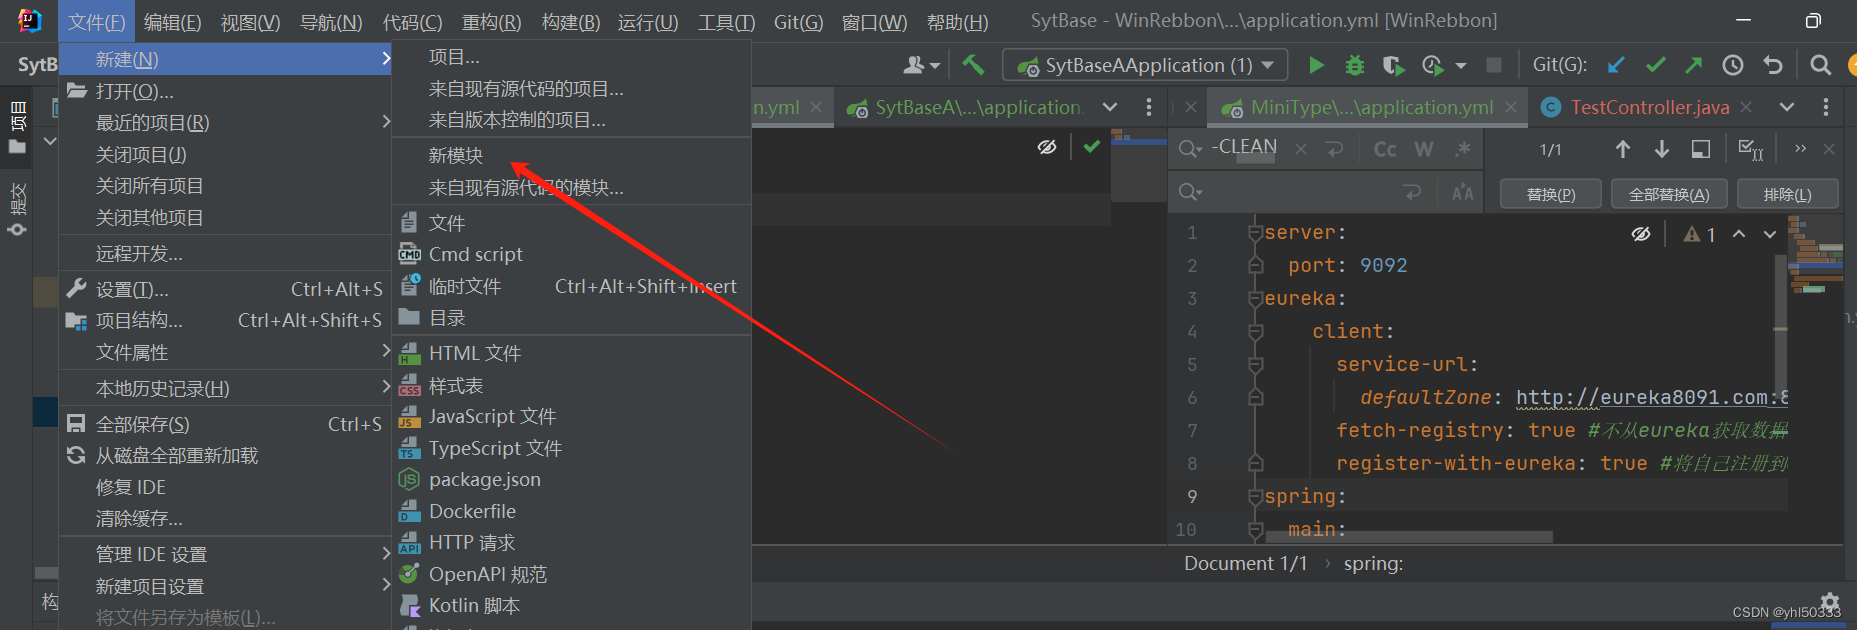
1.安装好idea后开始项目目录的创建
-
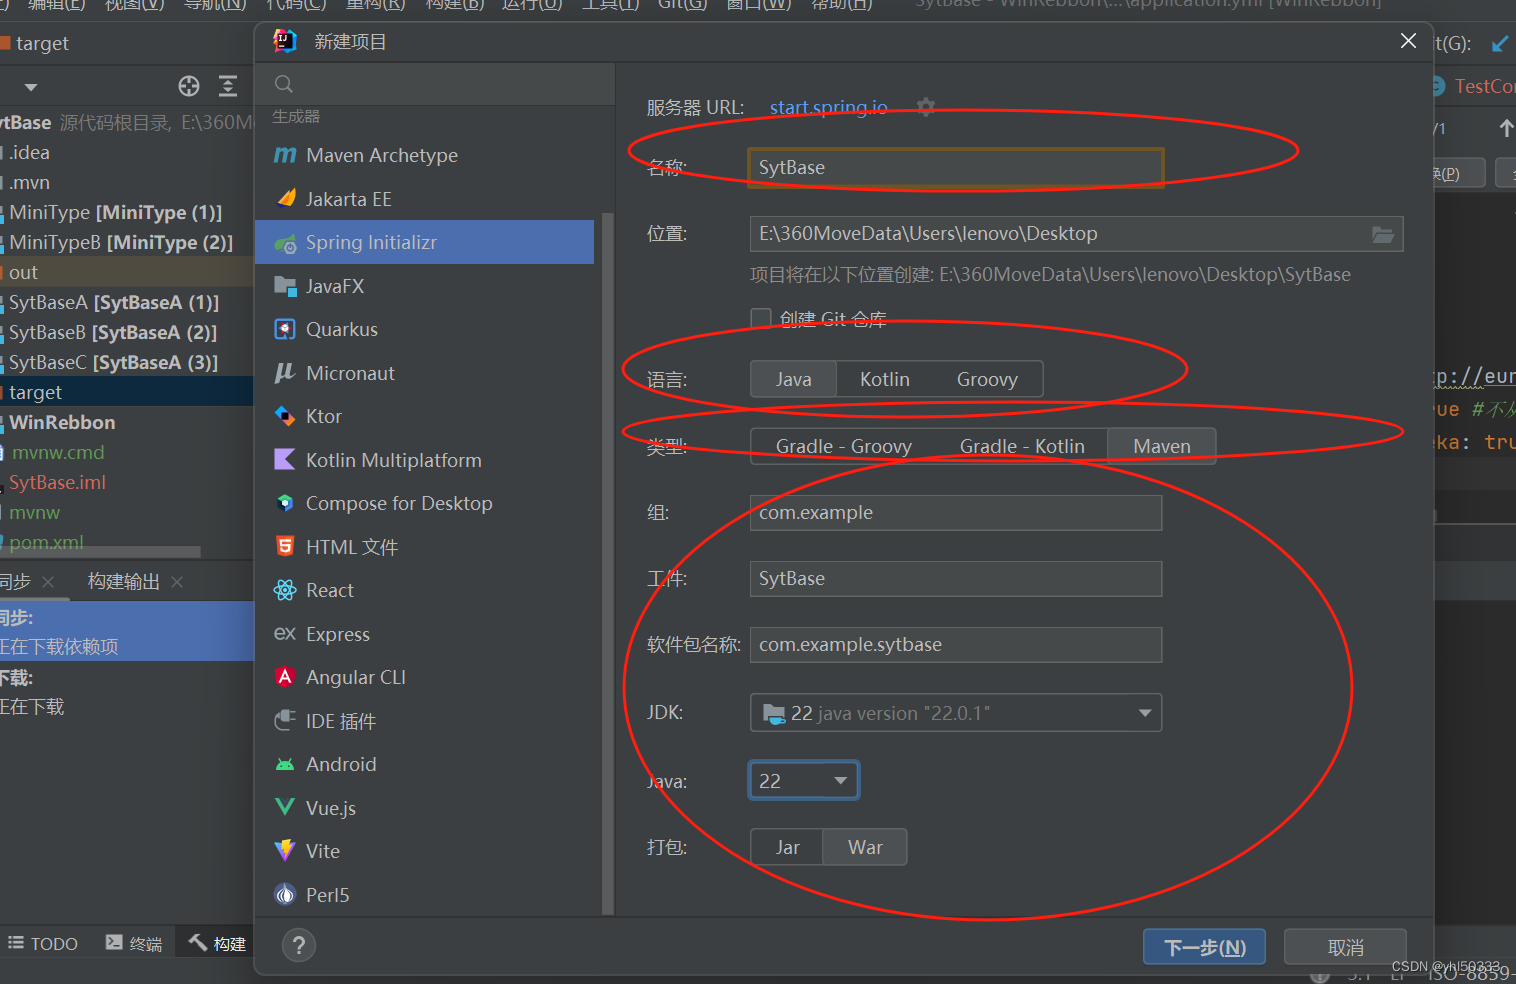
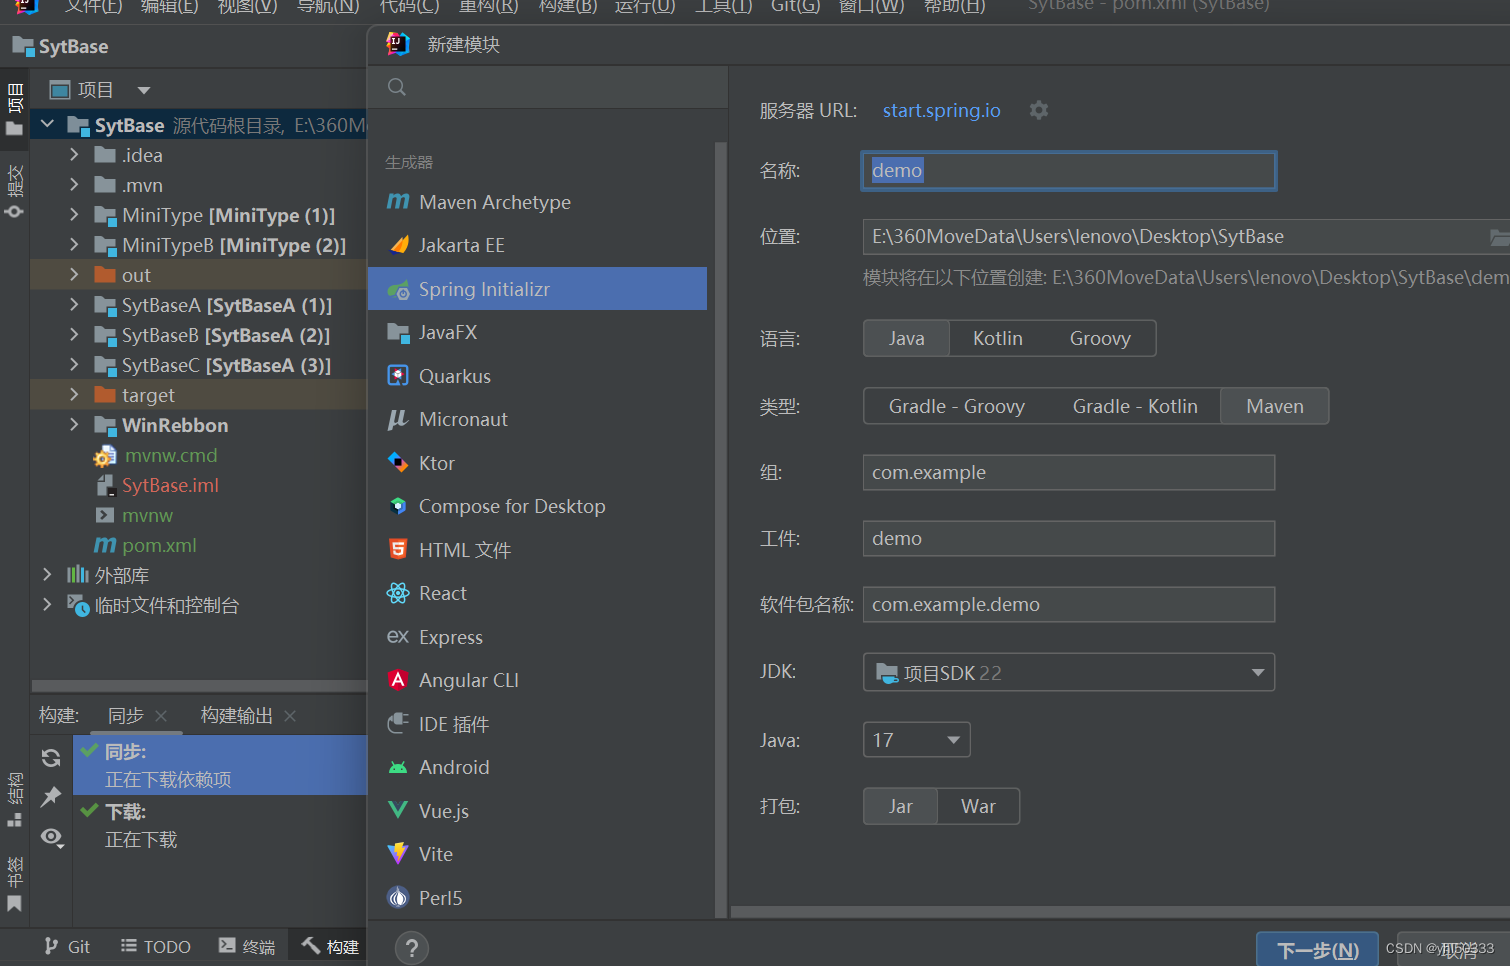
外部创建父工程(用于共享pom中的maven包
-
语言选择java 打包方式随意选择,因为父文件不会打包其他随意创建Springboot的分布式项目
-
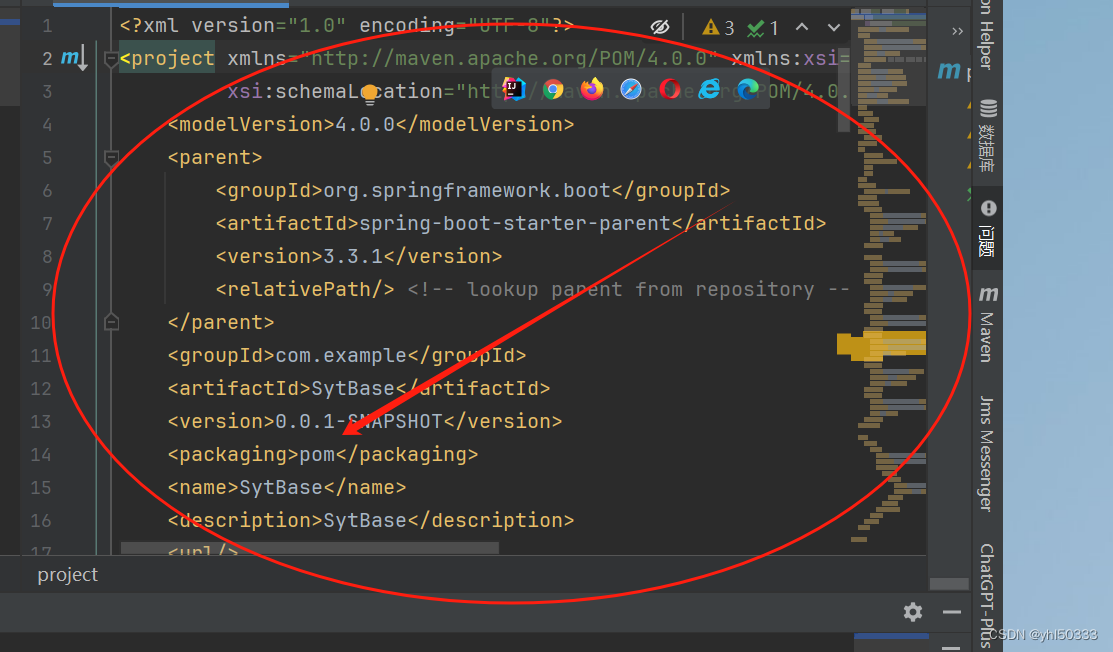
修改父目录下的packaging标签为pom方式,(此方式仅用于父对象,其他方式会报错
-
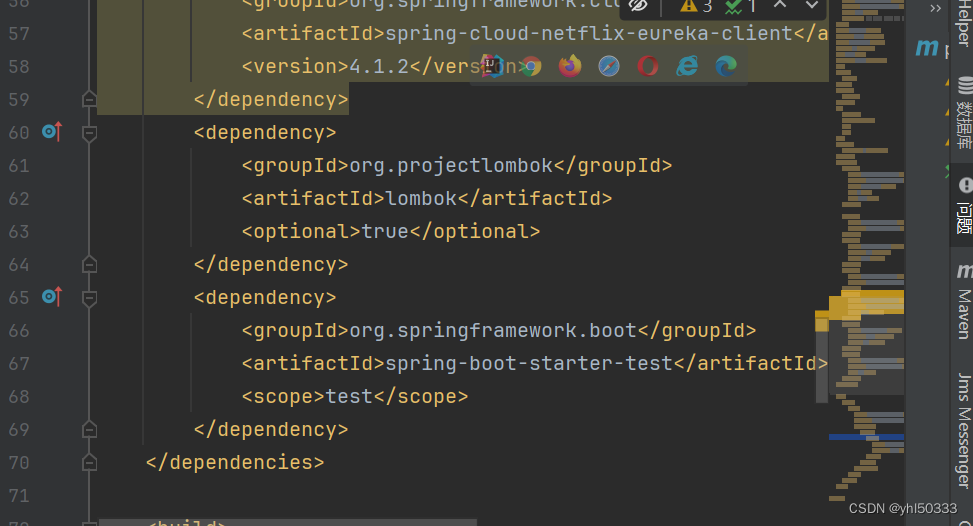
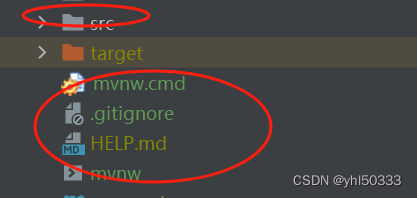
其他包用于防止重复引用所以都丢父目录的pom.xml中,src等其他无用包可以直接删除不影响
-
公共包如下
<?xml version="1.0" encoding="UTF-8"?>
<project xmlns="http://maven.apache.org/POM/4.0.0" xmlns:xsi="http://www.w3.org/2001/XMLSchema-instance"
         xsi:schemaLocation="http://maven.apache.org/POM/4.0.0 https://maven.apache.org/xsd/maven-4.0.0.xsd">
    <modelVersion>4.0.0</modelVersion>
    <parent>
        <groupId>org.springframework.boot</groupId>
        <artifactId>spring-boot-starter-parent</artifactId>
        <version>3.3.1</version>
        <relativePath/> <!-- lookup parent from repository -->
    </parent>
    <groupId>com.example</groupId>
    <artifactId>SytBase</artifactId>
    <version>0.0.1-SNAPSHOT</version>
    <packaging>pom</packaging>
    <name>SytBase</name>
    <description>SytBase</description>
    <url/>
    <licenses>
        <license/>
    </licenses>
    <developers>
        <developer/>
    </developers>
    <scm>
        <connection/>
        <developerConnection/>
        <tag/>
        <url/>
    </scm>
    <properties>
        <java.version>22</java.version>
    </properties>
    <dependencies>
        <dependency>
            <groupId>org.springframework.cloud</groupId>
            <artifactId>spring-cloud-dependencies</artifactId>
            <version>Greenwich.SR4</version>
            <type>pom</type>
            <scope>import</scope>
        </dependency>

        <dependency>
            <groupId>org.springframework.boot</groupId>
            <artifactId>spring-boot-starter-web</artifactId>
        </dependency>
        <dependency>
            <groupId>com.google.code.gson</groupId>
            <artifactId>gson</artifactId>
            <version>2.10.1</version>
        </dependency>
        <dependency>
            <groupId>org.springframework.boot</groupId>
            <artifactId>spring-boot-starter-web-services</artifactId>
        </dependency>
        <dependency>
            <groupId>org.springframework.cloud</groupId>
            <artifactId>spring-cloud-netflix-eureka-client</artifactId>
            <version>4.1.2</version>
        </dependency>
        <dependency>
            <groupId>org.projectlombok</groupId>
            <artifactId>lombok</artifactId>
            <optional>true</optional>
        </dependency>
        <dependency>
            <groupId>org.springframework.boot</groupId>
            <artifactId>spring-boot-starter-test</artifactId>
            <scope>test</scope>
        </dependency>
    </dependencies>

    <build>
        <plugins>
            <plugin>
                <groupId>org.springframework.boot</groupId>
                <artifactId>spring-boot-maven-plugin</artifactId>
                <configuration>
                    <excludes>
                        <exclude>
                            <groupId>org.projectlombok</groupId>
                            <artifactId>lombok</artifactId>
                        </exclude>
                    </excludes>
                </configuration>
            </plugin>
        </plugins>
    </build>

</project>
2.父目录工程创建好后创建子目录工程Eureka
- 鼠标放SytbBase上右击新建模块SytBaseA(用于作用eureka搭建)
 2. 修改parent中的groupId,artifactId,version标签跟父对象一致,表示跟引用父对象
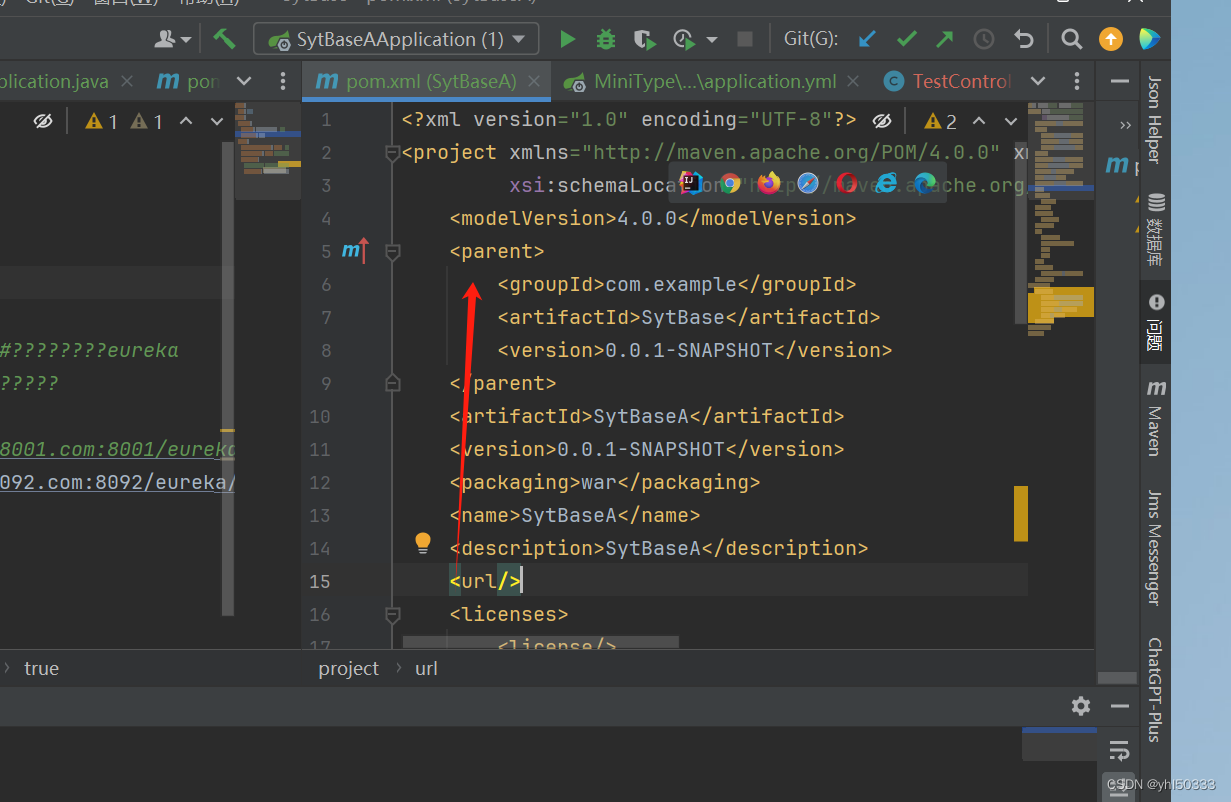
- 引用eureka.作用用于服务的注册以及管理服务等
<?xml version="1.0" encoding="UTF-8"?>
<project xmlns="http://maven.apache.org/POM/4.0.0" xmlns:xsi="http://www.w3.org/2001/XMLSchema-instance"
         xsi:schemaLocation="http://maven.apache.org/POM/4.0.0 https://maven.apache.org/xsd/maven-4.0.0.xsd">
    <modelVersion>4.0.0</modelVersion>
    <parent>
        <groupId>com.example</groupId>
        <artifactId>SytBase</artifactId>
        <version>0.0.1-SNAPSHOT</version>
    </parent>
    <artifactId>SytBaseA</artifactId>
    <version>0.0.1-SNAPSHOT</version>
    <packaging>war</packaging>
    <name>SytBaseA</name>
    <description>SytBaseA</description>
    <url/>
    <licenses>
        <license/>
    </licenses>
    <developers>
        <developer/>
    </developers>
    <scm>
        <connection/>
        <developerConnection/>
        <tag/>
        <url/>
    </scm>
    <properties>
        <java.version>22</java.version>
    </properties>
<dependencies>
    <dependency>
        <groupId>org.springframework.cloud</groupId>
        <artifactId>spring-cloud-starter-netflix-eureka-server</artifactId>
        <version>4.1.2</version>
        <type>pom</type>
    </dependency>
</dependencies>
</project>
- 配置Eureka服务
server:
  port: 8091 #端口号8091
eureka:
  instance:
    hostname: eureka8091.com  #注册中心的名称
    ip-address: true
  client:
    register-with-eureka: false # 不向euraka注册自己
    fetch-registry: false # false表示自己端就是注册中心,我的职责就是维护实例,并不需要去检索服务
    service-url:
      #defaultZone: http://eureka8001.com:8001/eureka/单机
      defaultZone: http://eureka8092.com:8092/eureka/,http://eureka8093.com:8093/eureka/ #搭建集群
  server:
    enable-self-preservation: false #关闭自我保护机制
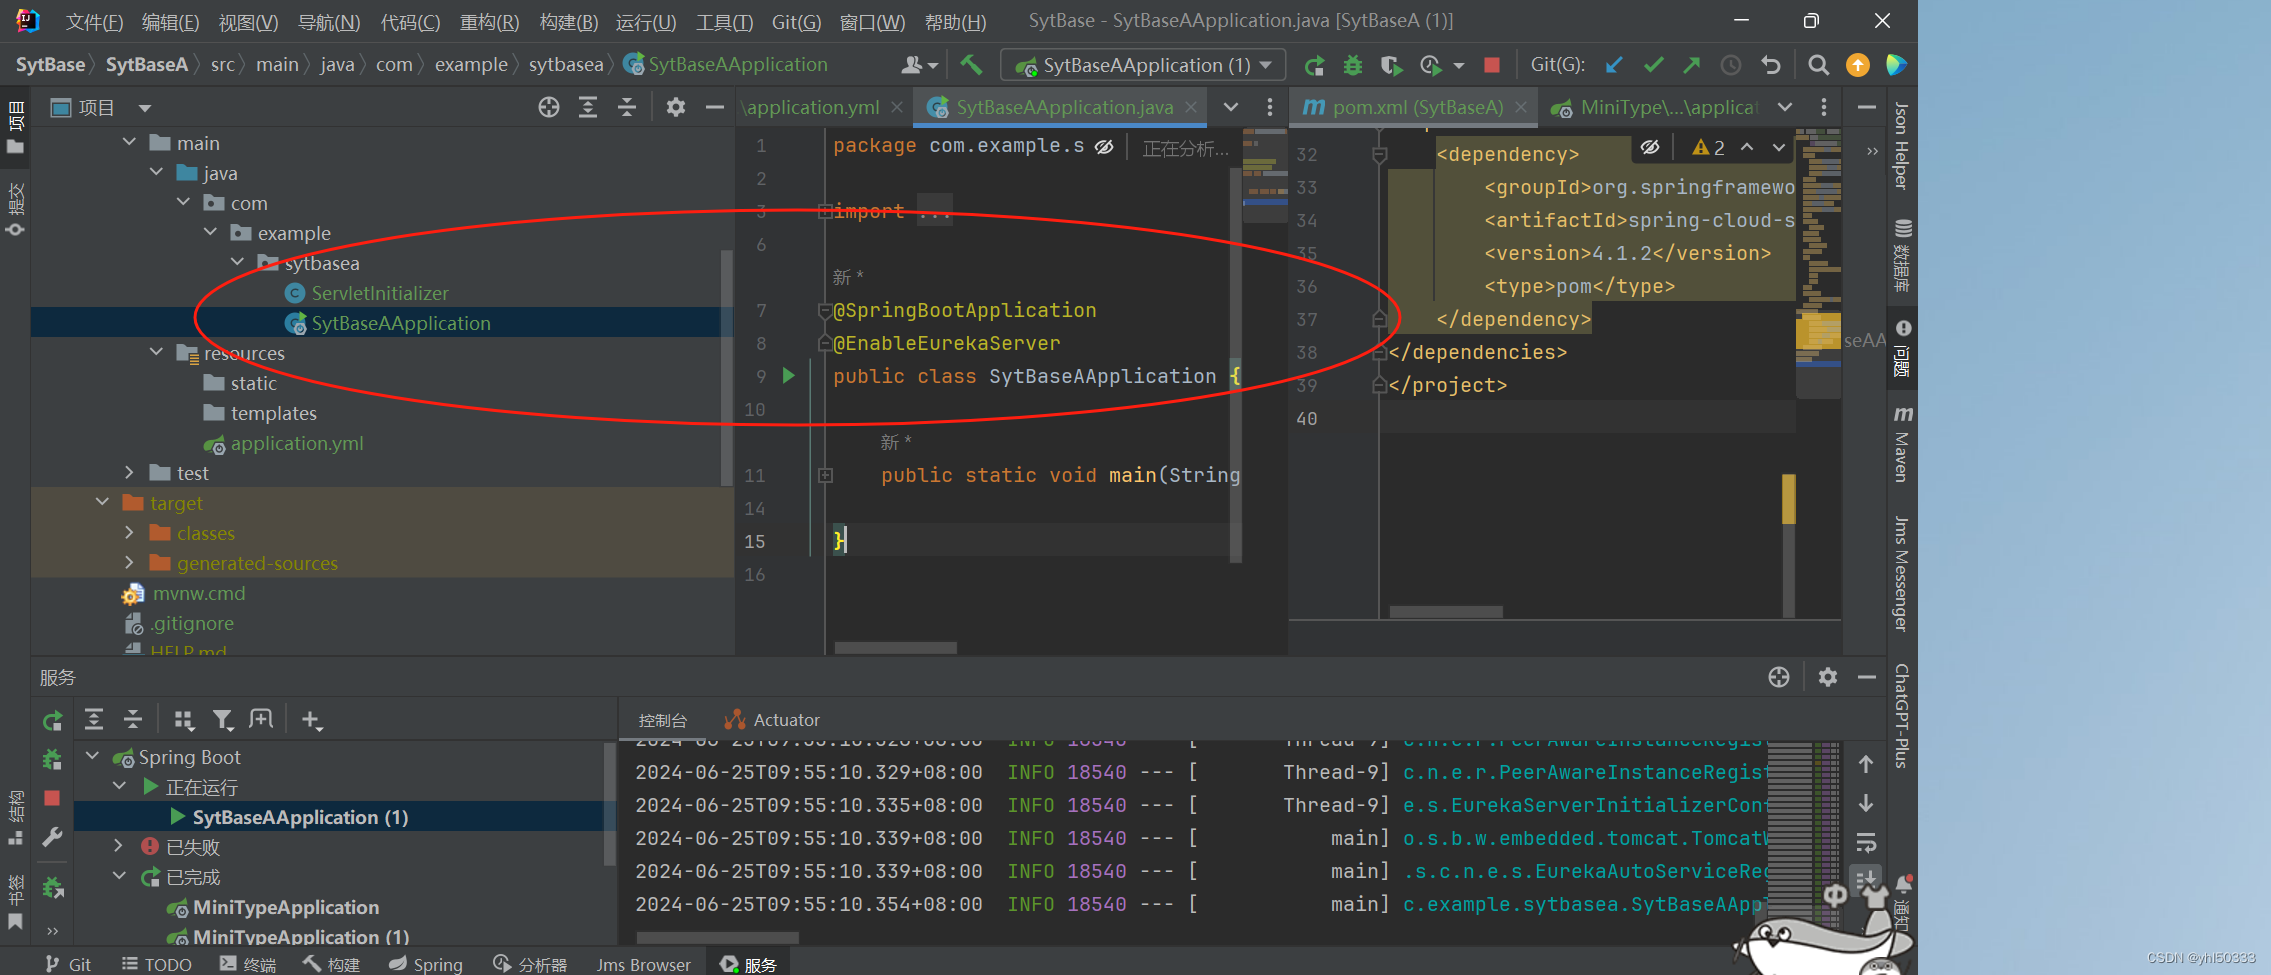
- 配置完成后添加注解@EnableEurekaServer在springboot的启动类中启动
-
搭建集群Eureka2直接Cv SytBaseA 改名SytBaseB 和 SytBaseC
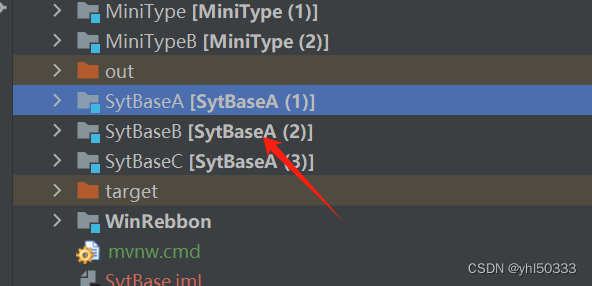
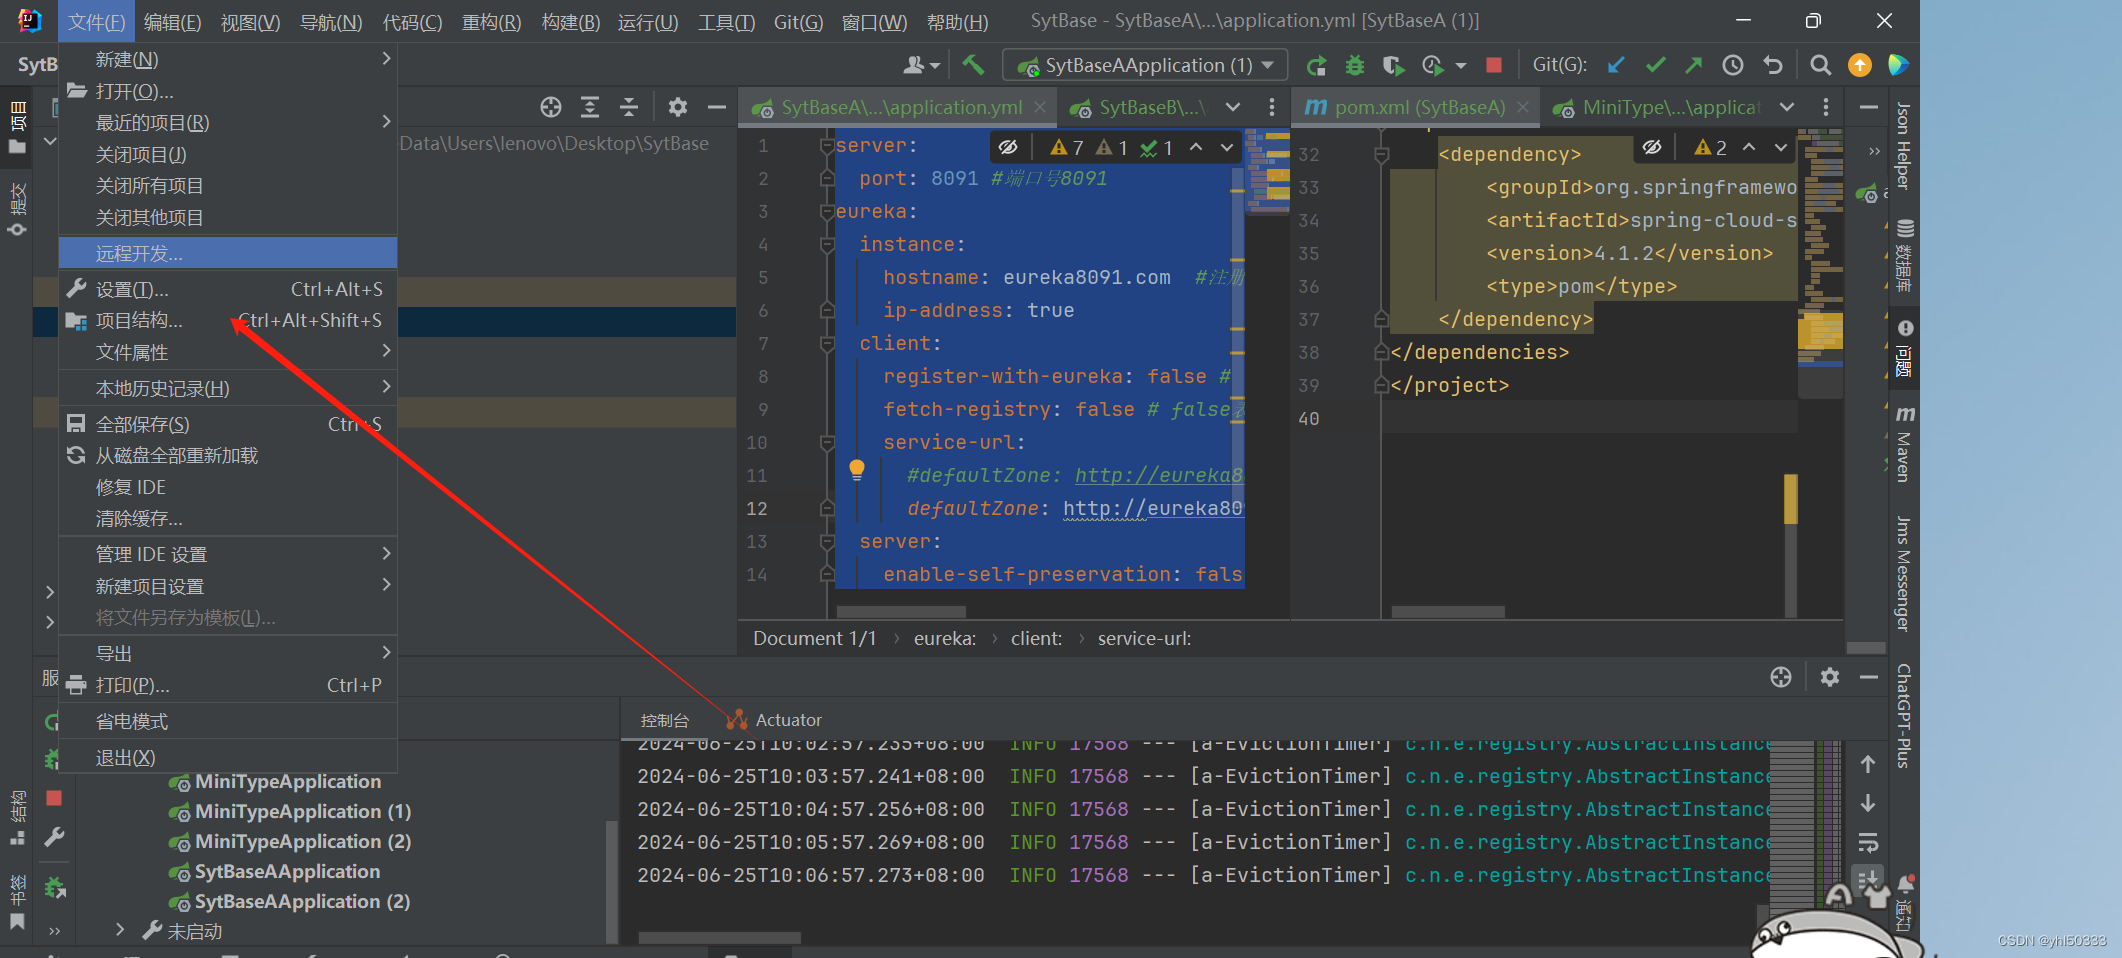
点击导入模块添加选择maven导入即可
-
修改Eureka2及Eureka3的pom.xml跟1相同
Eureka2.pom
<?xml version="1.0" encoding="UTF-8"?>
<project xmlns="http://maven.apache.org/POM/4.0.0" xmlns:xsi="http://www.w3.org/2001/XMLSchema-instance"
         xsi:schemaLocation="http://maven.apache.org/POM/4.0.0 https://maven.apache.org/xsd/maven-4.0.0.xsd">
    <modelVersion>4.0.0</modelVersion>
    <parent>
        <groupId>com.example</groupId>
        <artifactId>SytBase</artifactId>
        <version>0.0.1-SNAPSHOT</version>
    </parent>
    <artifactId>SytBaseB</artifactId>
    <version>0.0.1-SNAPSHOT</version>
    <packaging>war</packaging>
    <name>SytBaseB</name>
    <description>SytBaseB</description>
    <url/>
    <licenses>
        <license/>
    </licenses>
    <developers>
        <developer/>
    </developers>
    <scm>
        <connection/>
        <developerConnection/>
        <tag/>
        <url/>
    </scm>
    <properties>
        <java.version>22</java.version>
    </properties>
<dependencies>
    <dependency>
        <groupId>org.springframework.cloud</groupId>
        <artifactId>spring-cloud-starter-netflix-eureka-server</artifactId>
        <version>4.1.2</version>
        <type>pom</type>
    </dependency>
</dependencies>
</project>
Eureka3.pom
<?xml version="1.0" encoding="UTF-8"?>
<project xmlns="http://maven.apache.org/POM/4.0.0" xmlns:xsi="http://www.w3.org/2001/XMLSchema-instance"
         xsi:schemaLocation="http://maven.apache.org/POM/4.0.0 https://maven.apache.org/xsd/maven-4.0.0.xsd">
    <modelVersion>4.0.0</modelVersion>
    <parent>
        <groupId>com.example</groupId>
        <artifactId>SytBase</artifactId>
        <version>0.0.1-SNAPSHOT</version>
    </parent>
    <artifactId>SytBaseA</artifactId>
    <version>0.0.1-SNAPSHOT</version>
    <packaging>war</packaging>
    <name>SytBaseA</name>
    <description>SytBaseA</description>
    <url/>
    <licenses>
        <license/>
    </licenses>
    <developers>
        <developer/>
    </developers>
    <scm>
        <connection/>
        <developerConnection/>
        <tag/>
        <url/>
    </scm>
    <properties>
        <java.version>22</java.version>
    </properties>
<dependencies>
    <dependency>
        <groupId>org.springframework.cloud</groupId>
        <artifactId>spring-cloud-starter-netflix-eureka-server</artifactId>
        <version>4.1.2</version>
        <type>pom</type>
    </dependency>
</dependencies>
</project>
- 修改Eureka2.0中yml文件
server:
  port: 8092
eureka:
  instance:
    hostname: eureka8092.com  #??
    ip-address: true
  client:
    register-with-eureka: false  #????????eureka
    fetch-registry: false #???????????
    service-url:
      defaultZone: http://eureka8091.com:8091/eureka/,http://eureka8093.com:8093/eureka/ #集群设置1跟3
      server:
        enable-self-preservation: false
- 修改Eureka3.0中yml文件
server:
  port: 8093
eureka:
  instance:
    hostname: eureka8093.com
    ip-address: true
  client:
    register-with-eureka: false  #????????eureka
    fetch-registry: false #???????????
    service-url:
      defaultZone: http://eureka8091.com:8091/eureka/,http://eureka8092.com:8092/eureka/ #集群1和2
      server:
        enable-self-preservation: false
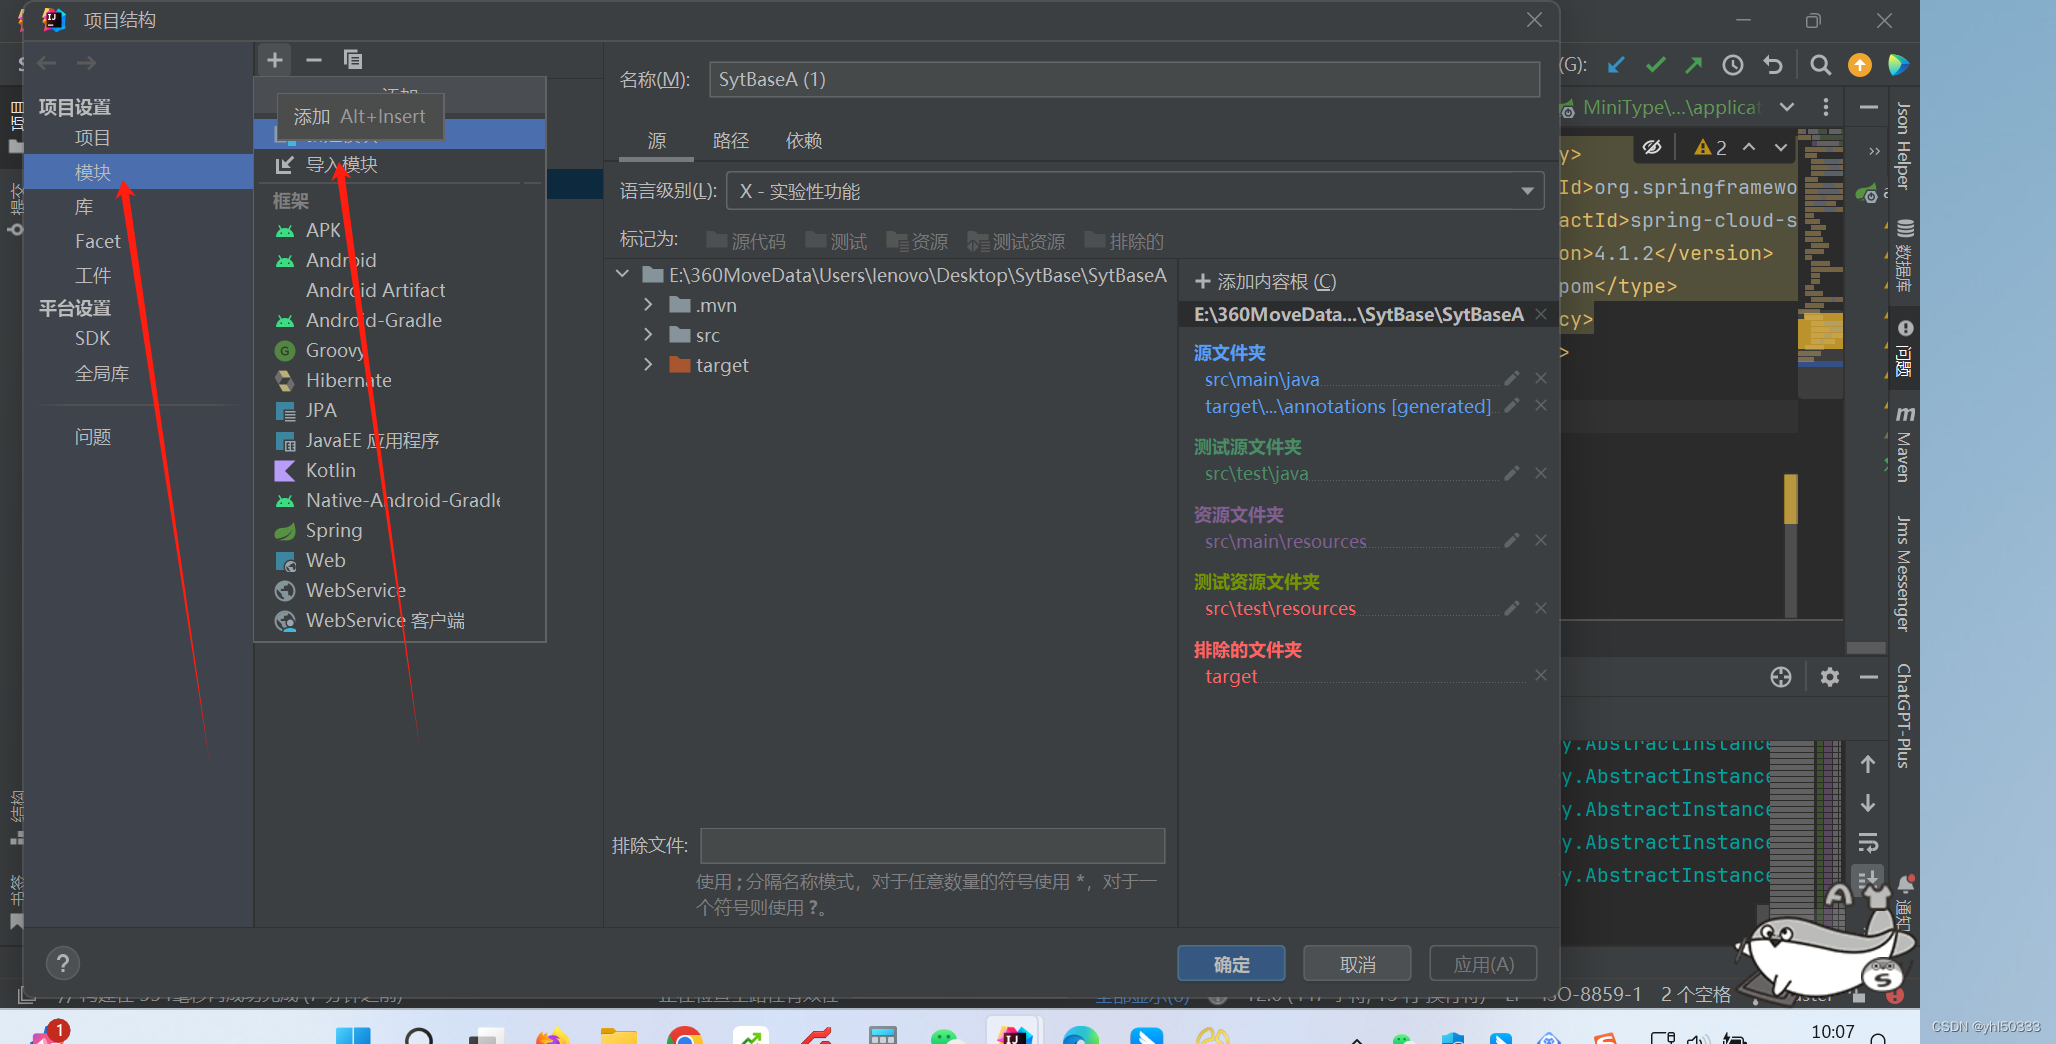
- 修改完成后统一在启动类中加上@EnableEurekaServer然后启动
启动成功后进入http://localhost:8091/就能看到3个集群

3.搭建提供生产者
-
父目录右击新建MiniType按照Eureka创建方式相同
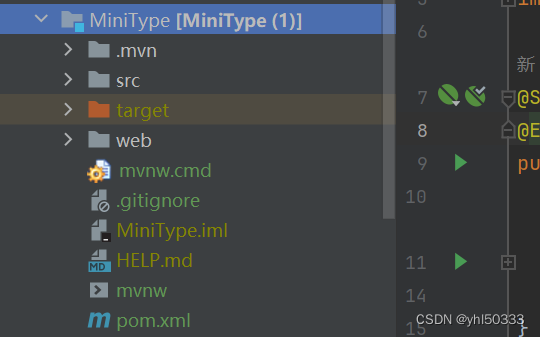
-
pom.xml文件如下
<?xml version="1.0" encoding="UTF-8"?>
<project xmlns="http://maven.apache.org/POM/4.0.0" xmlns:xsi="http://www.w3.org/2001/XMLSchema-instance"
         xsi:schemaLocation="http://maven.apache.org/POM/4.0.0 https://maven.apache.org/xsd/maven-4.0.0.xsd">
    <modelVersion>4.0.0</modelVersion>
    <parent>
        <groupId>com.example</groupId>
        <artifactId>SytBase</artifactId>
        <version>0.0.1-SNAPSHOT</version>
     </parent>
    <artifactId>MiniTypeA</artifactId>
    <version>0.0.1-SNAPSHOT</version>
    <name>MiniTypeA</name>
    <description>MiniTypeA</description>
    <url/>
    <licenses>
        <license/>
    </licenses>
    <developers>
        <developer/>
    </developers>
    <scm>
        <connection/>
        <developerConnection/>
        <tag/>
        <url/>
    </scm>
    <properties>
        <java.version>22</java.version>
    </properties>
    <dependencies>
        <dependency>
            <groupId>org.springframework.cloud</groupId>
            <artifactId>spring-cloud-commons</artifactId>
            <version>4.1.3</version>
            <scope>compile</scope>
        </dependency>


    </dependencies>
</project>
3.	修改yml中端口及注册中心应用名称用于后面访问使用

```yaml
server:
  port: 9092
eureka:
    client:
      service-url:
        defaultZone: http://eureka8091.com:8091/eureka/ #配置eureka的链接
      fetch-registry: true #从eureka获取数据
      register-with-eureka: true #将自己注册到eureka
spring:
  main:
    allow-bean-definition-overriding: true
  application:
    name: Eureka-Clean
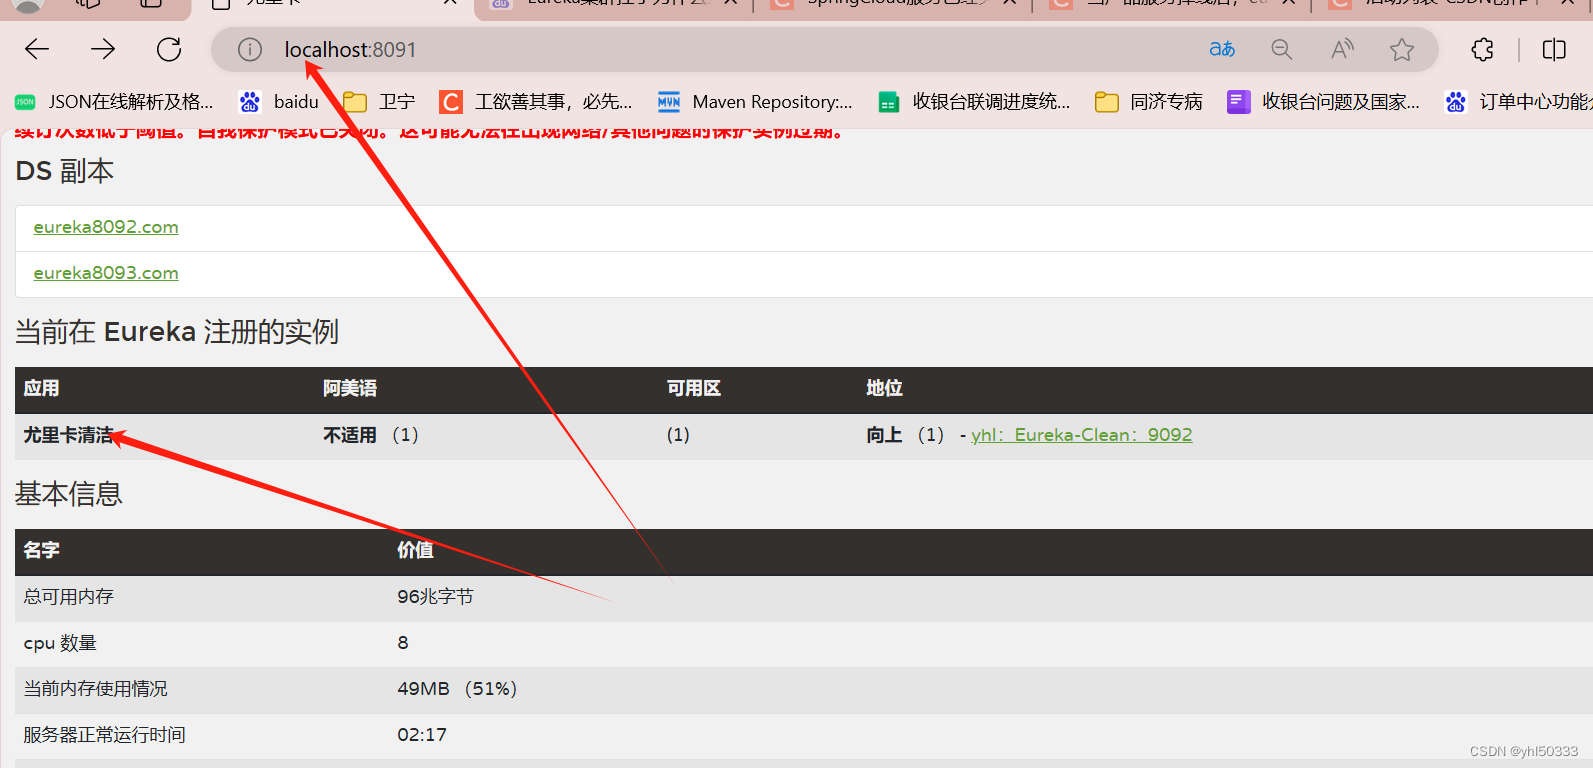
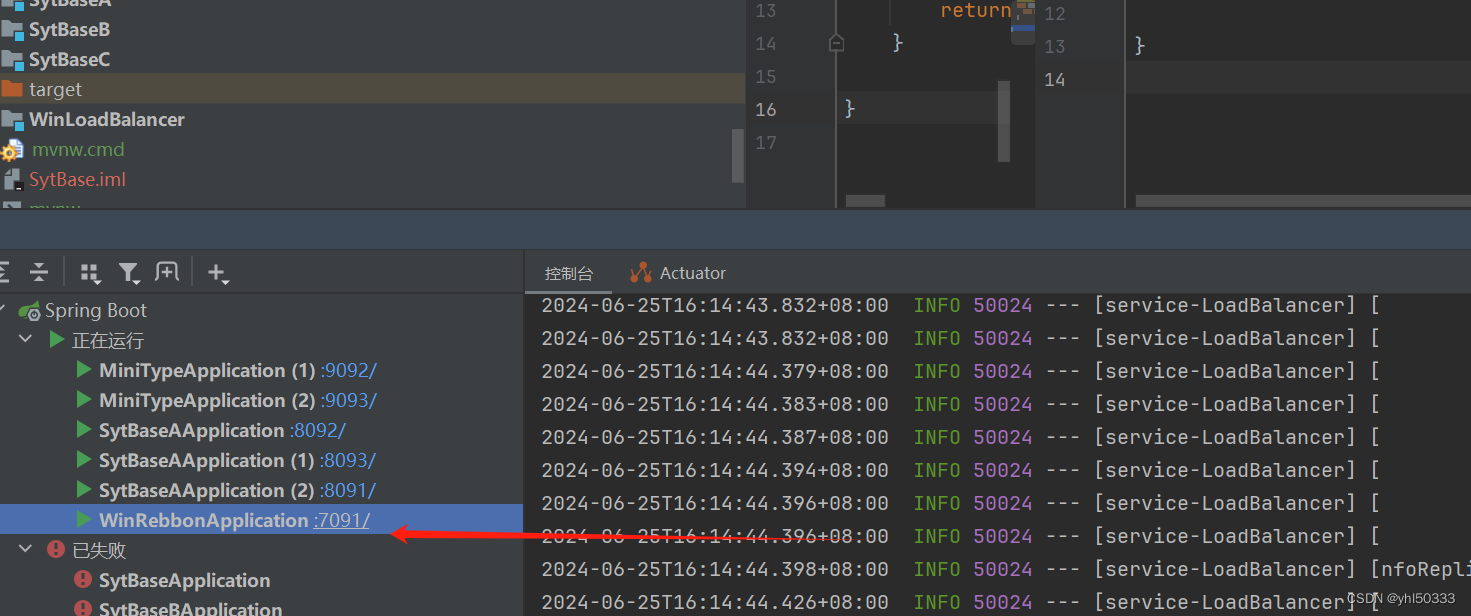
- 启动服务,可以看见服务已经注册到Eureka中
- 同理复制 miniTypeB 修改pom.xml文件及yml文件
<?xml version="1.0" encoding="UTF-8"?>
<project xmlns="http://maven.apache.org/POM/4.0.0" xmlns:xsi="http://www.w3.org/2001/XMLSchema-instance"
         xsi:schemaLocation="http://maven.apache.org/POM/4.0.0 https://maven.apache.org/xsd/maven-4.0.0.xsd">
    <modelVersion>4.0.0</modelVersion>
    <parent>
        <groupId>com.example</groupId>
        <artifactId>SytBase</artifactId>
        <version>0.0.1-SNAPSHOT</version>
     </parent>
    <artifactId>MiniTypeB</artifactId>
    <version>0.0.1-SNAPSHOT</version>
    <name>MiniTypeB</name>
    <description>MiniTypeB</description>
    <url/>
    <licenses>
        <license/>
    </licenses>
    <developers>
        <developer/>
    </developers>
    <scm>
        <connection/>
        <developerConnection/>
        <tag/>
        <url/>
    </scm>
    <properties>
        <java.version>22</java.version>
    </properties>
    <dependencies>
        <dependency>
            <groupId>org.springframework.cloud</groupId>
            <artifactId>spring-cloud-commons</artifactId>
            <version>4.1.3</version>
            <scope>compile</scope>
        </dependency>
    </dependencies>
</project>
server:
  port: 9093

eureka:
    client:
      service-url:
        defaultZone: http://eureka8091.com:8091/eureka/ #配置eureka的链接
      fetch-registry: true #不从eureka获取数据
      register-with-eureka: true #将自己注册到eureka
spring:
  main:
    allow-bean-definition-overriding: true
  application:
    name: Eureka-Clean #服务名称用于后期拿到使用
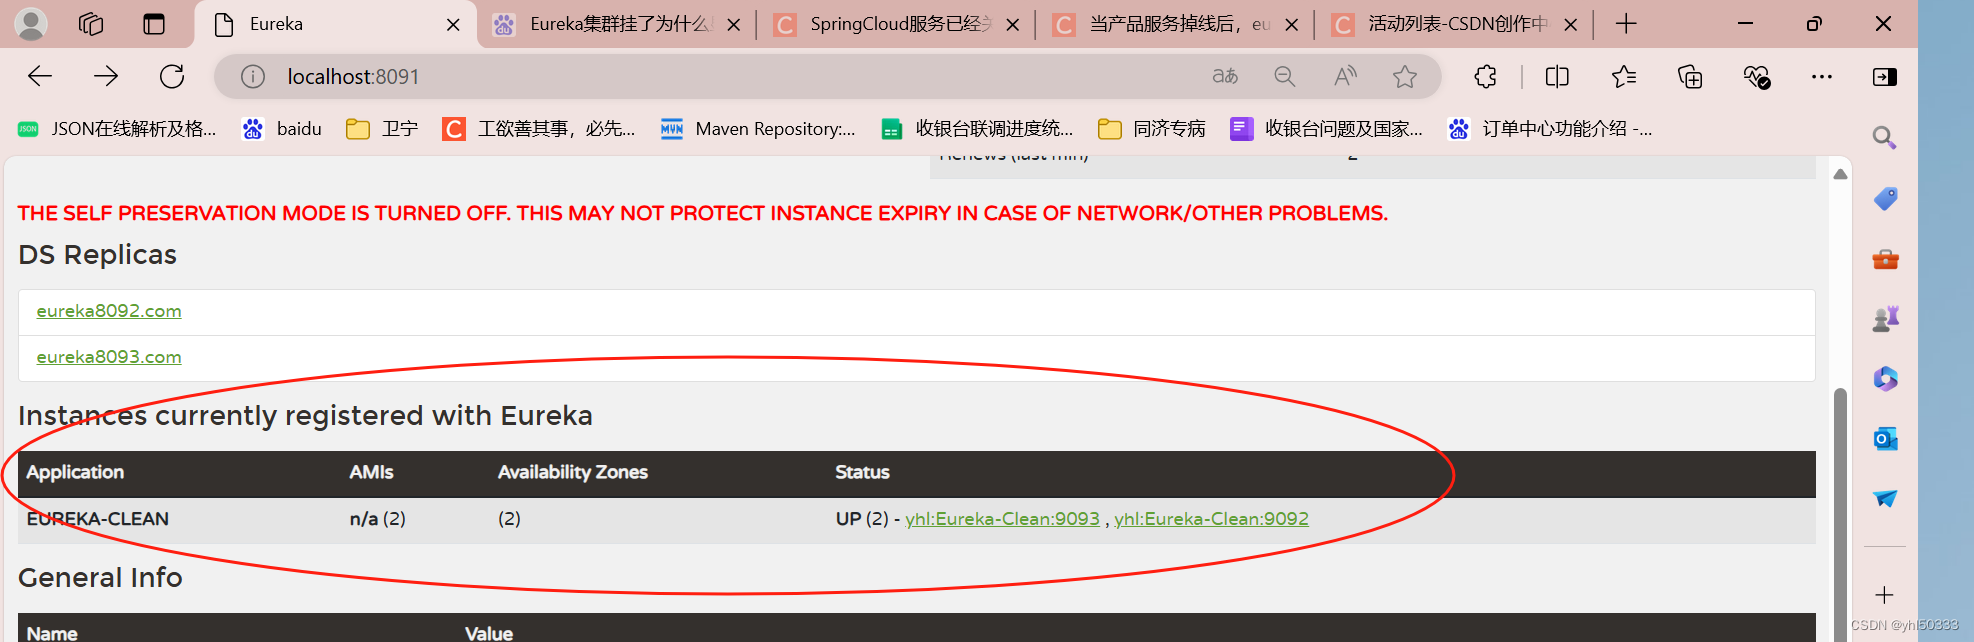
- 启动刷新Eureka,发现两台机器已在运行
4.搭建LoadBalancer做负载均衡策略(新版本springcloud已弃用ribbon)
- 新建WinLoadBalancer模块应用上层父模块pom.xml 文件
<?xml version="1.0" encoding="UTF-8"?>
<project xmlns="http://maven.apache.org/POM/4.0.0" xmlns:xsi="http://www.w3.org/2001/XMLSchema-instance"
         xsi:schemaLocation="http://maven.apache.org/POM/4.0.0 https://maven.apache.org/xsd/maven-4.0.0.xsd">
    <modelVersion>4.0.0</modelVersion>
    <parent>
        <groupId>com.example</groupId>
        <artifactId>SytBase</artifactId>
        <version>0.0.1-SNAPSHOT</version>
    </parent>
    <artifactId>WinLoadBalancer</artifactId>
    <version>0.0.1-SNAPSHOT</version>
    <name>WinRebbon</name>
    <description>WinRebbon</description>
    <url/>
    <licenses>
        <license/>
    </licenses>
    <developers>
        <developer/>
    </developers>
    <scm>
        <connection/>
        <developerConnection/>
        <tag/>
        <url/>
    </scm>
    <properties>
        <java.version>22</java.version>
    </properties>
    <dependencies>
        <dependency>
            <groupId>org.springframework.cloud</groupId>
            <artifactId>spring-cloud-starter-loadbalancer</artifactId>
            <version>4.1.3</version>
            <type>pom</type>
        </dependency>
    </dependencies>

</project>
- 添加yml文件中端口及Eureka
server:
  port: 7091
#向服务注册中心注册
eureka:
  client:
    service-url:
      defaultZone: http://eureka8091.com:8091/eureka/ #配置eureka的链接
    fetch-registry: true #不从eureka获取数据
    register-with-eureka: true #将自己注册到eureka
#本服务名称

spring:
  application:
    name: service-LoadBalancer
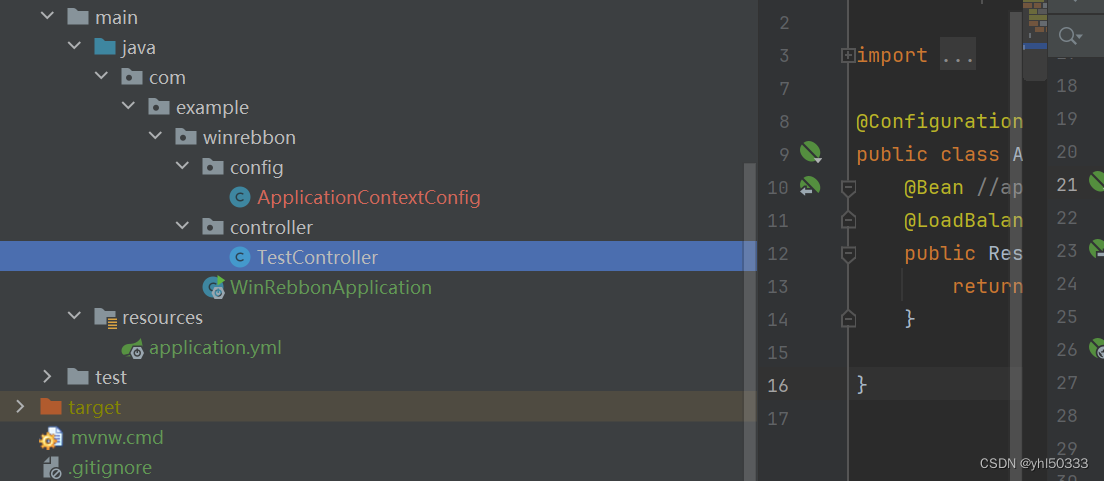
- 重写配置类ApplicationContextConfig用于LoadBalancer的轮训机制
package com.example.winrebbon.Config;

import org.springframework.cloud.client.loadbalancer.LoadBalanced;
import org.springframework.context.annotation.Bean;
import org.springframework.context.annotation.Configuration;
import org.springframework.web.client.RestTemplate;

@Configuration
public class ApplicationContextConfig {
    @Bean //applicationContext.xml <bean id="" class="">
    @LoadBalanced //使用自定义负载
    public RestTemplate getRestTemplate(){
        return new RestTemplate();
    }

}
- 添加启动类中@EnableDiscoveryClient用于Discovery使用
package com.example.winrebbon;

import org.springframework.boot.SpringApplication;
import org.springframework.boot.autoconfigure.SpringBootApplication;
import org.springframework.cloud.client.discovery.EnableDiscoveryClient;

@SpringBootApplication
@EnableDiscoveryClient
public class WinRebbonApplication {

    public static void main(String[] args) {
        SpringApplication.run(WinRebbonApplication.class, args);
    }

}
- 后添加测试类TestController用于测试是否轮训,消费者
package com.example.winrebbon.controller;

import com.google.gson.JsonArray;
import com.google.gson.JsonObject;
import jakarta.annotation.Resource;
import org.apache.commons.lang.StringUtils;
import org.springframework.beans.factory.annotation.Autowired;
import org.springframework.cloud.client.ServiceInstance;
import org.springframework.cloud.client.discovery.DiscoveryClient;
import org.springframework.http.ResponseEntity;
import org.springframework.web.bind.annotation.GetMapping;
import org.springframework.web.bind.annotation.PathVariable;
import org.springframework.web.bind.annotation.RequestMapping;
import org.springframework.web.bind.annotation.RestController;
import org.springframework.web.client.RestTemplate;

import java.util.HashMap;
import java.util.List;

@RestController
public class TestController {
    @Autowired
    RestTemplate restTemplate;

        @GetMapping(value = "/hello")
        public String hello() {
        //用于获取服务中的名称EUREKA-CLEAN为minitype的服务
            String forObject = restTemplate.getForObject("http://EUREKA-CLEAN/hello", String.class);
        return forObject;
        }

}
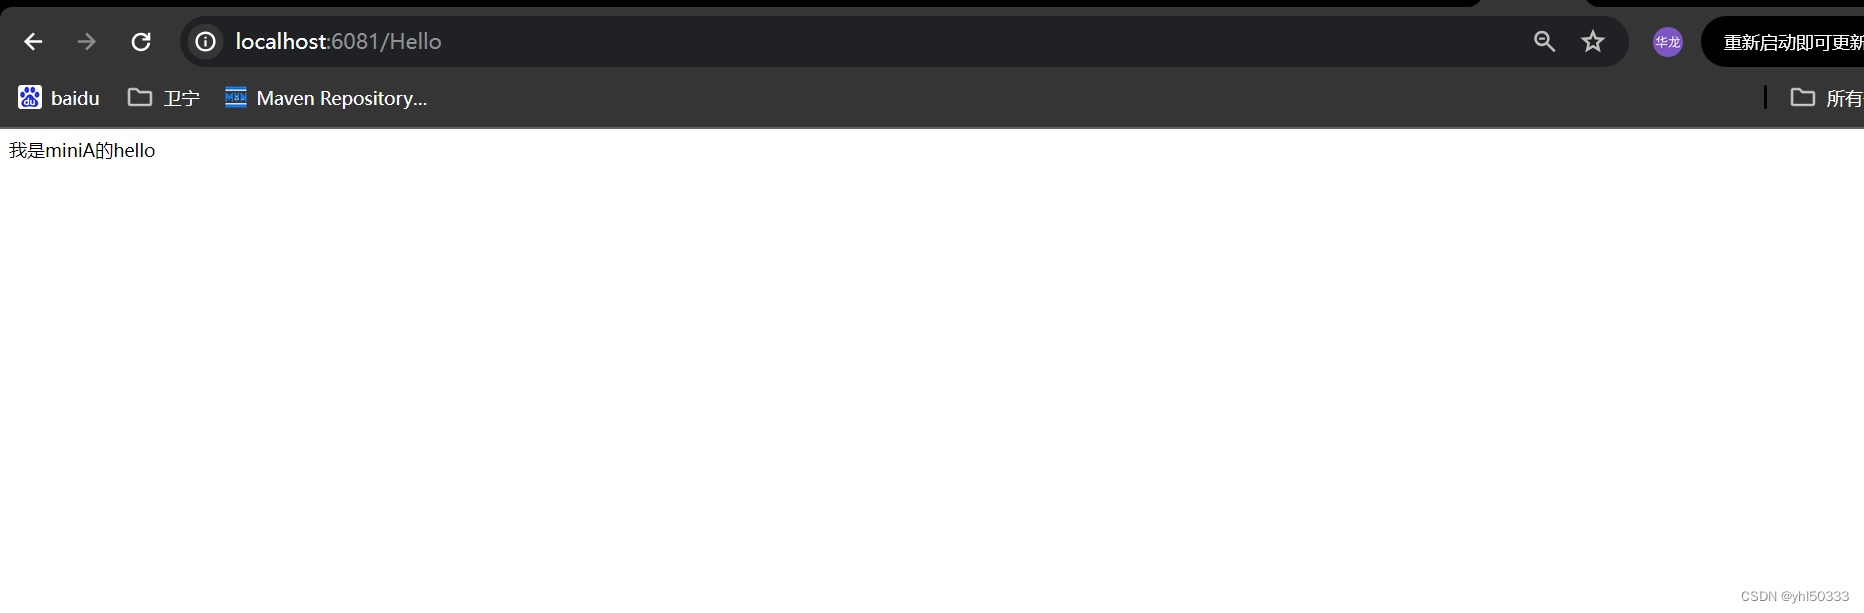
- 编写MiniA中的HelloController
package com.example.minitype.controller;
import org.springframework.web.bind.annotation.RequestMapping;
import org.springframework.web.bind.annotation.RestController;
@RestController
public class HelloController {
@RequestMapping("/hello")
public String getHello(){
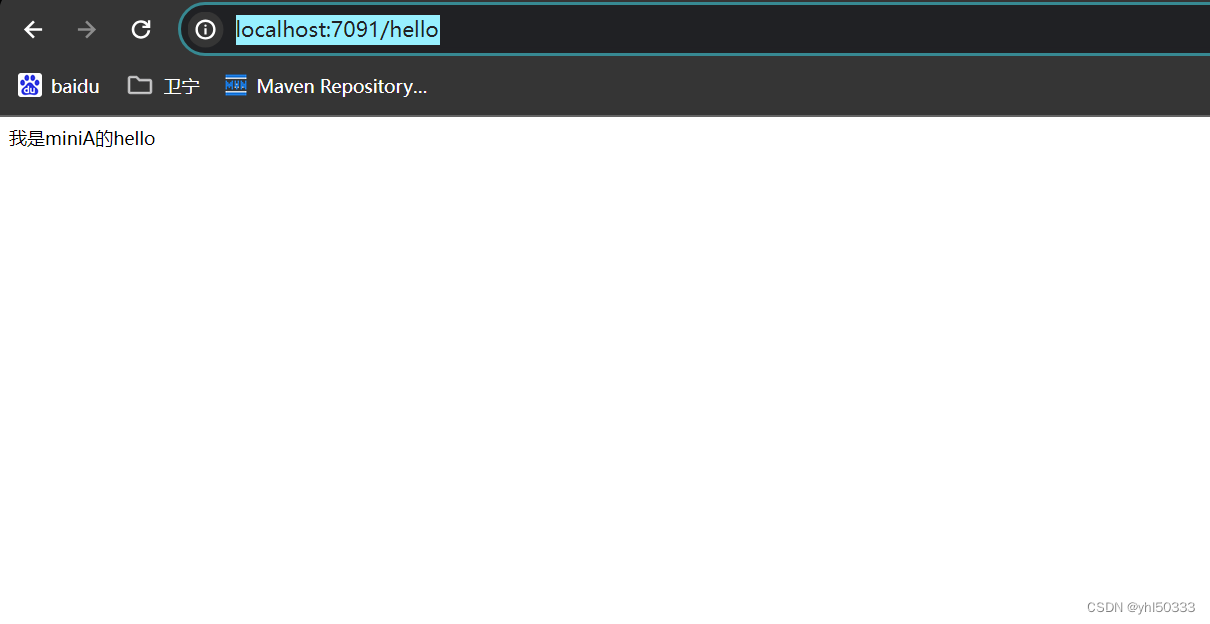
return "我是miniA的hello";
}
}
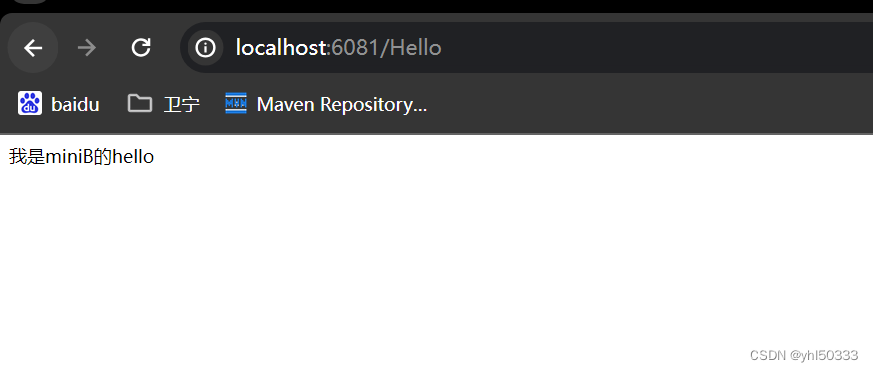
- 编写miniB中的HelloController
package com.example.minitype.controller;
import org.springframework.web.bind.annotation.RequestMapping;
import org.springframework.web.bind.annotation.RestController;
@RestController
public class HelloController {
@RequestMapping("/hello")
public String getHello(){
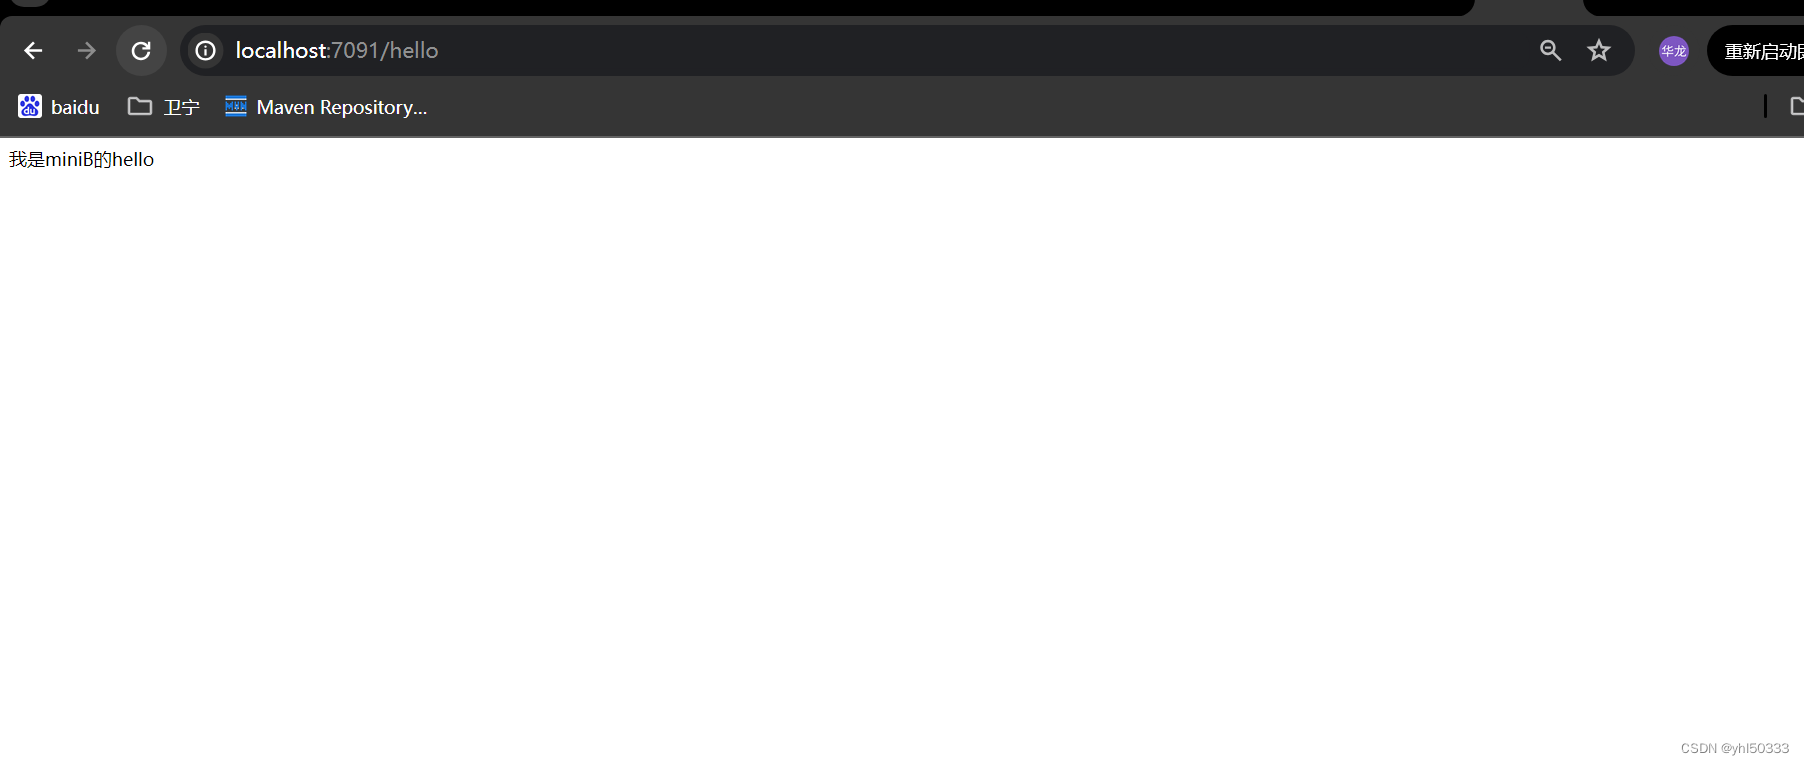
return "我是miniB的hello";
}
}
-
启动7091项目测试访问http://localhost:7091/hello
再刷新一次
-
至此springcloud组件Eureka,LoadBalancer组件搭建完成
-
项目提交https://gitee.com/yanghualong/syt-base/tree/dev/
5.搭建OpenFeign做网关测试,
- 同上述相同创建项目WinOpenFeign,修改yml文件及pom.xml
server:
  port: 6081

eureka:
  client:
    service-url:
      defaultZone: http://eureka8091.com:8091/eureka/ #配置eureka的链接

spring:
  application:
    name: openFeign
<?xml version="1.0" encoding="UTF-8"?>
<project xmlns="http://maven.apache.org/POM/4.0.0" xmlns:xsi="http://www.w3.org/2001/XMLSchema-instance"
         xsi:schemaLocation="http://maven.apache.org/POM/4.0.0 https://maven.apache.org/xsd/maven-4.0.0.xsd">
    <modelVersion>4.0.0</modelVersion>
    <parent>
        <groupId>com.example</groupId>
        <artifactId>SytBase</artifactId>
        <version>0.0.1-SNAPSHOT</version>
    </parent>
    <artifactId>WinOpenFeign</artifactId>
    <version>0.0.1-SNAPSHOT</version>
    <name>WinOpenFeign</name>
    <description>WinOpenFeign</description>
    <url/>
    <licenses>
        <license/>
    </licenses>
    <developers>
        <developer/>
    </developers>
    <scm>
        <connection/>
        <developerConnection/>
        <tag/>
        <url/>
    </scm>
    <properties>
        <java.version>22</java.version>
        <spring-cloud.version>2023.0.2</spring-cloud.version>
    </properties>
    <!--添加 OpenFeign 依赖-->
    <dependencies>
    <dependency>
        <groupId>org.springframework.cloud</groupId>
        <artifactId>spring-cloud-starter-openfeign</artifactId>
        <version>4.1.2</version>
    </dependency>
</dependencies>
</project>
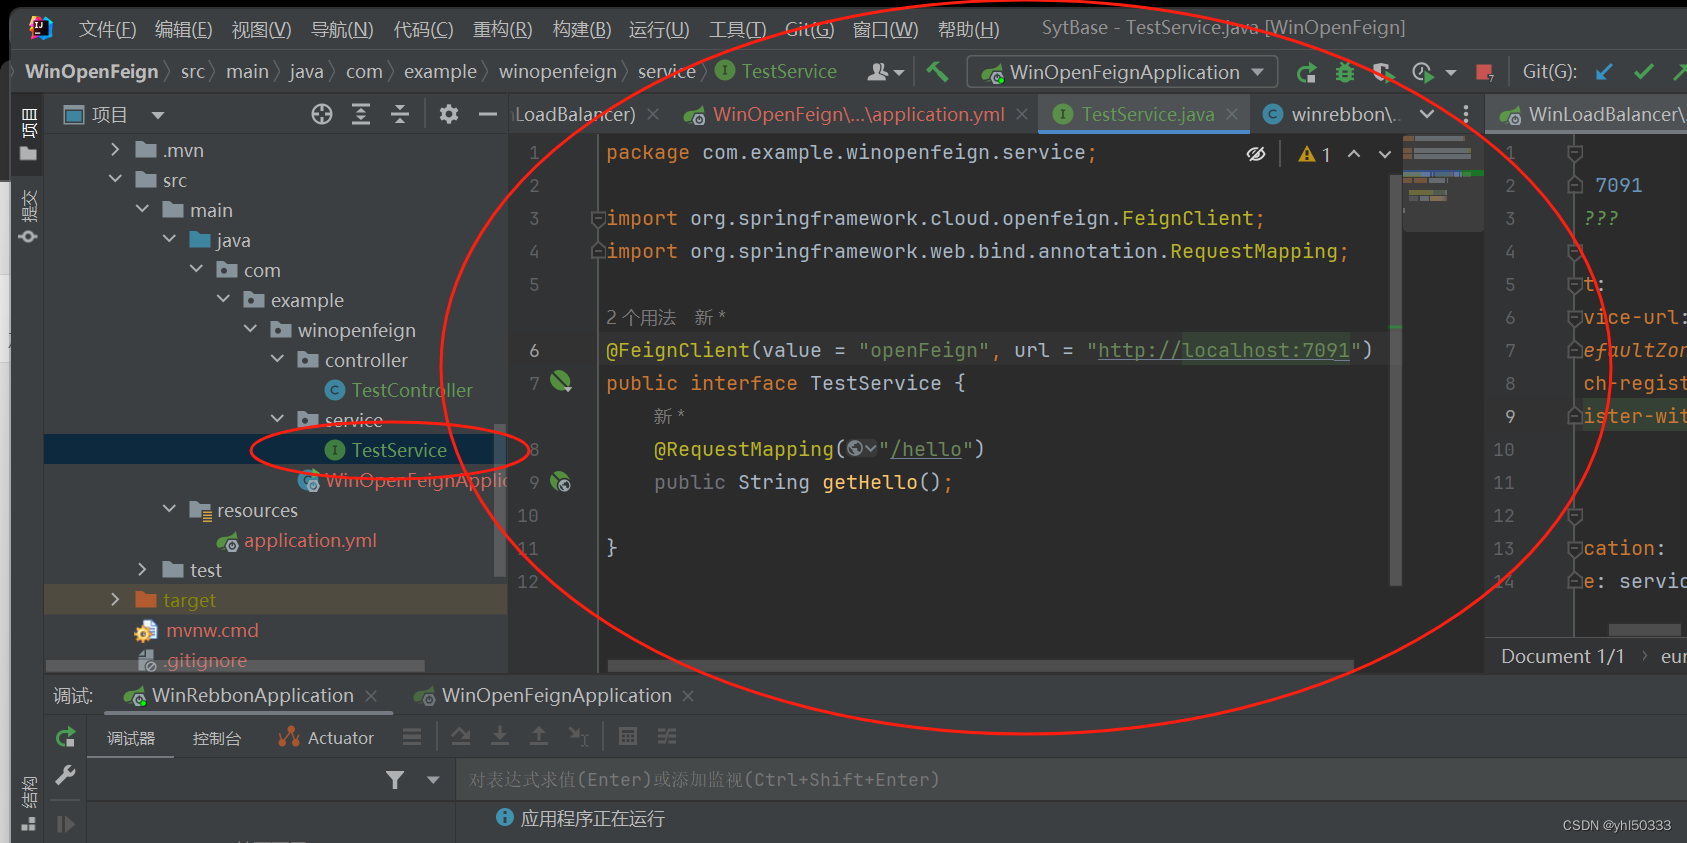
- 创建测试的Service用于测试接口数据获取,添加注解@FeignClient参数value用于springbean的名称,Url可以不填写,我这里配置生产者ip及端口是为了访问4中的轮训数据
package com.example.winopenfeign.service;

import org.springframework.cloud.openfeign.FeignClient;
import org.springframework.web.bind.annotation.RequestMapping;

@FeignClient(value = "openFeign1", url = "http://localhost:7091")
public interface TestService {
    @RequestMapping("/hello")
    public String getHello();

}
- 启动文件添加主启动类注解
package com.example.winopenfeign;

import org.springframework.boot.SpringApplication;
import org.springframework.boot.autoconfigure.SpringBootApplication;
import org.springframework.cloud.openfeign.EnableFeignClients;

@SpringBootApplication
@EnableFeignClients
public class WinOpenFeignApplication {

    public static void main(String[] args) {
        SpringApplication.run(WinOpenFeignApplication.class, args);
    }

}
- 写一个TestController用来测试OpenFeign 是否生效,
package com.example.winopenfeign.controller;

import com.example.winopenfeign.service.TestService;
import org.springframework.beans.factory.annotation.Autowired;
import org.springframework.web.bind.annotation.RequestMapping;
import org.springframework.web.bind.annotation.RestController;

@RestController
public class TestController {
    @Autowired
    TestService testService;
    @RequestMapping("Hello")
    public String getHello(){
        return testService.getHello();
    }
}
-
启动http://localhost:6081/Hello查看
-
总结:openFeign作用可用于不同ip内网模块,解耦性很高,虽然在配置中可以灵活加载,但维护成本过高。基于7091中loadbalancer的负载均衡引用的hello接口,6081可以直接远程调用
6.Resilience4j:Spring Cloud服务熔断与降级组件,由于最新版本springcloud 不维护Hystrix
- 按照老的方式创建模块命名为resilience4j

- 在pom.xml中引用最新版本的maven文件
<?xml version="1.0" encoding="UTF-8"?>
<project xmlns="http://maven.apache.org/POM/4.0.0" xmlns:xsi="http://www.w3.org/2001/XMLSchema-instance"
         xsi:schemaLocation="http://maven.apache.org/POM/4.0.0 https://maven.apache.org/xsd/maven-4.0.0.xsd">
    <modelVersion>4.0.0</modelVersion>
    <parent>
        <groupId>com.example</groupId>
        <artifactId>SytBase</artifactId>
        <version>0.0.1-SNAPSHOT</version>
    </parent>
    <artifactId>Resilience4j</artifactId>
    <version>0.0.1-SNAPSHOT</version>
    <name>Resilience4j</name>
    <description>Resilience4j</description>
    <url/>
    <licenses>
        <license/>
    </licenses>
    <developers>
        <developer/>
    </developers>
    <scm>
        <connection/>
        <developerConnection/>
        <tag/>
        <url/>
    </scm>
    <properties>
        <java.version>22</java.version>
    </properties>
    <dependencies>
        <dependency>
            <groupId>org.springframework.cloud</groupId>
            <artifactId>spring-cloud-circuitbreaker-resilience4j</artifactId>
            <version>3.1.1</version>
        </dependency>
        <dependency>
            <groupId>org.springframework.cloud</groupId>
            <artifactId>spring-cloud-commons</artifactId>
            <version>4.1.3</version>
        </dependency>
    </dependencies>

</project>
- 添加配置文件
spring:
  application:
    name: winhystrix
  main:
    allow-bean-definition-overriding: true #防止Bean重复


eureka:
  client: #将客户端注册到 eureka 服务列表内
    service-url:
    # defaultZone: http://eureka8091.com:8091/eureka/ #??eureka???
      #这个地址是 7001注册中心在 application.yml 中暴露出来额注册地址 (单机版)
      defaultZone: http://eureka8091.com:8091/eureka/,http://eureka8092.com:8092/eureka/,http://eureka8093.com:8093/eureka/  #将服务注册到 Eureka 集群
resilience4j.circuitbreaker:
  instances: #限流器初始化
    backendA: #限流器自定义名称
      registerHealthIndicator: true   # 是否启用健康检查
      slidingWindowSize: 10       #用于计算失败率的滑动窗口大小为10,即最近10次调用失败的情况会被考虑进去
      permittedNumberOfCallsInHalfOpenState: 3 # 断路器半开时允许最大的请求次数
      slidingWindowType: TIME_BASED #配置用于在CircuitBreaker关闭时记录调用结果的滑动窗口类型。 滑动窗口可以是基于计数或基于时间的。
      minimumNumberOfCalls: 5          # 熔断器开始计算失败率之前,至少需要的调用次数为5次
      waitDurationInOpenState: 5s      # 断路器打开后,尝试等待5秒进入半开状态
      failureRateThreshold: 20          # 当失败率达到20%时,断路器会打开,组织进一步的调用
      eventConsumerBufferSize: 10   #用于存储断路器相关事件的缓冲区大小为10,这些事件可用于被监控

#重试策略相关的配置
resilience4j.retry:
  instances:
    backendA:
      maxAttempts: 3              #最大重试次数
      waitDuration: 2s            #每次重试的时候间隔的等待时间
      enableExponentialBackoff: true
      exponentialBackoffMultiplier: 2
      retryExceptions:
        - java.lang.Exception

resilience4j.bulkhead:
  instances:
    backendA:
      maxConcurrentCalls: 10

resilience4j.thread-pool-bulkhead:
  instances:
    backendC:
      maxThreadPoolSize: 11      #配置最大线程池大小
      coreThreadPoolSize: 1     #配置核心线程池大小
      queueCapacity: 1          #配置队列的容量

#限流的配置
resilience4j.ratelimiter:
  instances:
    backendA:               # 限流器的名字
      limitForPeriod: 1     # 一个限制周期内可访问次数
      limitRefreshPeriod: 1s    # 限制周期,每个周期之后,速率限制器将重置回limitForPeriod值
      timeoutDuration: 10ms     # 线程等待允许执行时间
      registerHealthIndicator: true
      eventConsumerBufferSize: 100

server:
  port: 5081
- 添加自定义配置类,将配置文件中配置的每一种熔断器对应的项注册到spring的bean容器中,比如在配置文件中有一个实例名称为backendA;
package com.example.winhystrix.resilience4jConfig;
import io.github.resilience4j.common.circuitbreaker.configuration.CircuitBreakerConfigCustomizer;
import io.github.resilience4j.common.ratelimiter.configuration.RateLimiterConfigCustomizer;
import org.springframework.context.annotation.Bean;

public class ResilienceConfig {

    @Bean
    public CircuitBreakerConfigCustomizer circuitBreakerConfigCustomizer() {
        return CircuitBreakerConfigCustomizer
                .of("backendA", builder -> builder.slidingWindowSize(10));
    }

    @Bean
    public RateLimiterConfigCustomizer rateLimiterConfigCustomizer() {
        return RateLimiterConfigCustomizer
                .of("backendA", builder -> builder.limitForPeriod(1));
    }
}
- 在启动类上添加注册Eureka
package com.example.winhystrix;

import org.springframework.boot.SpringApplication;
import org.springframework.boot.autoconfigure.SpringBootApplication;
import org.springframework.cloud.client.discovery.EnableDiscoveryClient;

@SpringBootApplication
@EnableDiscoveryClient//开启 Eureka 客户端功能
public class WinHystrixApplication {

    public static void main(String[] args) {
        SpringApplication.run(WinHystrixApplication.class, args);
    }

}
- 添加TestServiceImlp用于测试其中Resilience4j 提供了一系列 API,帮助开发者实现服务的稳定性和弹性,其主要功能包括:
1.熔断器(Circuit Breaker):防止服务雪崩。
2.限流器(Rate Limiter):限制访问速率。
3.重试(Retry):失败后的重试机制。
4.隔离器(Bulkhead):隔离资源
package com.example.winhystrix.service;

import io.github.resilience4j.circuitbreaker.annotation.CircuitBreaker;
import io.github.resilience4j.retry.annotation.Retry;
import org.springframework.stereotype.Service;

@Service
public class TestServiceImlp {


    @CircuitBreaker(name = "backendA", fallbackMethod = "fallback")
    @Retry(name = "backendA")
    public String performTask() {
        // 模拟一个可能会抛出异常的操作
        if (Math.random() > 0.7) {
            throw new RuntimeException("任务执行失败");
        }
        return "任务执行成功";
    }
    public String fallback(Throwable t) {
        return "熔断器开启,执行降级策略";
    }
}
- 添加测试TestController


 328
328

 被折叠的 条评论
为什么被折叠?
被折叠的 条评论
为什么被折叠?
 到【灌水乐园】发言


