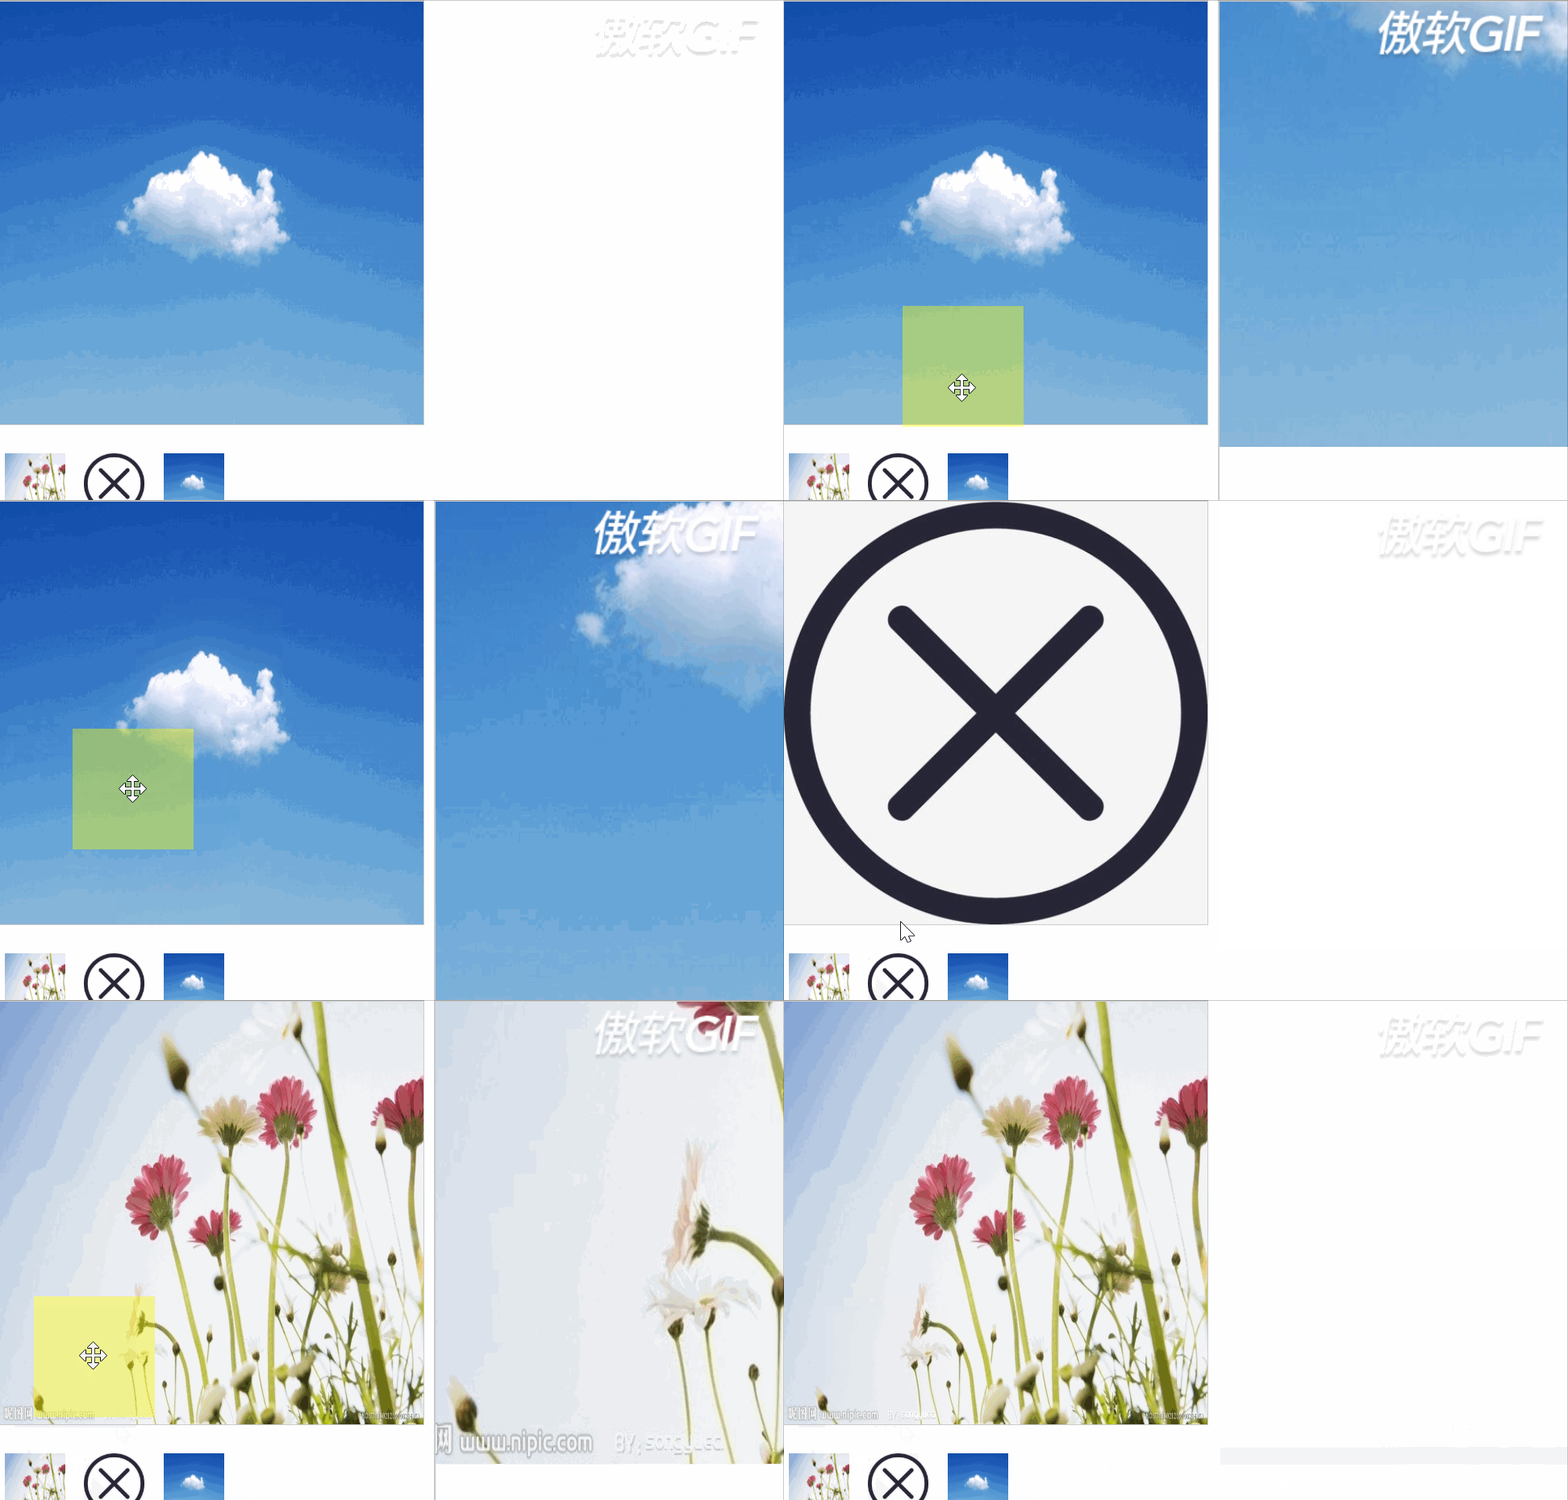
实现效果图

组成分析
1、外层DIV分成两个盒子,第一个盒子为中等大小的图片,第二个盒子就是放大特效展示的盒子
2,下面还有三个list
事件
1,鼠标停留于列表时,对应的中盒子中 img的src对应改变 2,当鼠标停留于中盒子时,有一个黄色正方形跟着鼠标移动 ,并且在中图盒子中,鼠标停留时光标为移动
3、在大盒子中,与中盒子中的黄色方块的移动同步 。往 左 移动时,大盒子往右移动 。放大至对应的比例
4,当鼠标 移出 中盒子时黄色正方形隐藏,以及旁边的大盒子也隐藏。
5,且鼠标始终位于黄方块的中间
实现/部分分析
1,中盒子上有黄色方块,很明显我们需要用到定位
2,黄色方块和鼠标一起移动,所以需要获取鼠标的位置
3,大盒子的变化可以依据比例尺原理
HTML
<div id="box">
    <div id="smallbox">
        <img src="图片/1.jpg" alt="">
        <span id="mask"></span>
    </div>
    <div id="bigbox">
        <img src="图片/1.jpg" alt="" style="position: absolute;left:0;top:0;">
    </div>
</div>
<div id="list">
    <img src="图片/1.jpg" alt="">
    <img src="图片/2.jpg" alt="">
    <img src="图片/3.jpg" alt="">
</div>
CSS
*{
            margin: 0;
            padding: 0;
            border:none;
        }
        img{
            vertical-align: top;
        }
        #list img{
            width: 50px;
            height: 50px;
            margin: 5px;
        }
        #smallbox img{
            width: 350px;
            height: 350px;

        }
        #bigbox img{
            width: 800px;
            height: 800px;
        }
        #box{
            width: 350px;
            height: 350px;
            background-color: red;
            margin:100px 0 0 100px;
            position: relative;
        }
        #smallbox{
            width:100%;
            height: 100%;
            border: 1px solid #ccc;
            position: relative;
        }
        #smallbox img{
            width: 350px;
            height: 350px;
        }
        #mask{
            width: 100px;
            height: 100px;
            background-color: rgba(255,255,0,0.4);
            position: absolute;
            left: 0;
            top: 0;
            cursor: move;
            display: none;
        }
        #bigbox{
            width: 600px;
            height: 600px;
            border: 1px solid #ccc;
            overflow: hidden;
            position: absolute;
            left: 360px;
            top: 0;
            display: none;
        }
        #list{
            margin:20px 0 0 100px;
        }
        #list img{
        }
JS
var box=document.getElementById("box");
        var smallbox=box.children[0];
        var bigbox=box.children[1];
        var mask=smallbox.children[1];
        var bigimg=bigbox.children[0];
        var listimg=document.getElementById("list").children;
        //2、监听鼠标进入小盒子
        smallbox.onmouseover = function () {
            //2、隐藏的内容显示
            mask.style.display = 'block';
            bigbox.style.display = 'block';
        smallbox.onmousemove = function(event) {
            var event = event || window.event;
            //求鼠标的坐标
            var pointX = event.clientX - smallbox.offsetParent.offsetLeft - mask.offsetWidth*0.5;
            var pointY = event.clientY - smallbox.offsetParent.offsetTop-mask.offsetHeight*0.5;
            //边检测
            if(pointX<0){pointX=0;}
            else if(pointX>=smallbox.offsetWidth-mask.offsetWidth){pointX=smallbox.offsetWidth-mask.offsetWidth;}
            if(pointY<0){pointY=0;}
            else if(pointY>=smallbox.offsetHeight-mask.offsetHeight){pointY=smallbox.offsetHeight-mask.offsetHeight;}
            //让盒子移动
            mask.style.left = pointX + "px";
            mask.style.top = pointY + "px";
            //公式
            bigimg.style.left = - pointX/(smallbox.offsetWidth/bigbox.offsetWidth)+"px";
            bigimg.style.top = - pointY/(smallbox.offsetHeight/bigbox.offsetHeight)+"px";
        }
        };
        smallbox.onmouseout = function () {
            //2、隐藏的内容显示
            mask.style.display = 'none';
            bigbox.style.display = 'none';
        };
        for(var i=0;i<listimg.length;i++)
        {
            var img=listimg[i];
            (function (i) {
                img.onmouseover = function () {
                    smallbox.children[0].src="图片/"+(i+1)+".jpg";
                    bigimg.src="图片/"+(i+1)+".jpg";
                }
            })(i);
        }
JS部分代码分析
var pointX = event.clientX - smallbox.offsetParent.offsetLeft - mask.offsetWidth*0.5;
var pointY = event.clientY - smallbox.offsetParent.offsetTop-mask.offsetHeight*0.5;
使用事件对象来获取事件触发时鼠标的坐标。简单图示:
最后减去offsetWidth*0.5:是为了让黄色图标的中心在鼠标的位置
offsetWidth:当前对象自身的宽度,包括border和padding。可读不可写。
if(pointX<0){pointX=0;}
    else if(pointX>=smallbox.offsetWidth-mask.offsetWidth){
    pointX=smallbox.offsetWidth-mask.offsetWidth;
    }
   if(pointY<0){pointY=0;}
      else if(pointY>=smallbox.offsetHeight-mask.offsetHeight){
      pointY=smallbox.offsetHeight-mask.offsetHeight;
   }
为了处理临界值
当盒子完全超过smallbox边框时,值为负数。直接让他变为0/消失
当盒子有一小部分超出边框时,让他固定处在挨着边框线上的位置
比例尺公式
bigimg.style.left=-pointX/(smallbox.offsetWidth/bigbox.offsetWidth)+"px";
bigimg.style.top = - pointY/(smallbox.offsetHeight/bigbox.offsetHeight)+"px";


 679
679


 被折叠的 条评论
为什么被折叠?


