


目录
安装
安装前可以先看看此篇文章《Magento2下载安装》
推荐在LAMP或者LNMP环境下安装此应用。
建议php.ini里开启opcache拓展。参考配置如下:
opcache.enable=1

opcache.enable_cli=1

opcache.memory_consumption=128

opcache.interned_strings_buffer=8

opcache.max_accelerated_files=4000

opcache.validate_timestamps=1

opcache.revalidate_freq=60

opcache.file_cache=/tmp
安装完成后如果访问显示空白,那么可能是因为程序运行环境不满足magento软件运行所需的要求。可以通过查看/var/log/debug.log来查找原因,然后一个个解决。
composer
composer方式安装是推荐的安装方式。
如果尝试用composer方式安装,《Magento2下载安装》里的那段安装代码里的链接已经失效了,会报错。得去megento官网上查阅介绍文档,或另找教程文档。
而且composer安装方式介绍文档里提到了要去官网注册一个账号,但是在官网里注册账号时会有一个邮箱验证的必填项,看起来这项填了,但是提交注册信息表单时如果还是有提示邮箱需要验证的错误,那么据上面提到的《Magento2下载安装》这篇文章里的一组评论来说,是因为表单里有一个google人机验证复选框需要勾选,如下图所示:

因为国内网络访问megento官网那个注册页面时看不见这个google人机验证复选框,所以会导致表单验证一直不通过,却又不清楚是为什么。一个解决办法是给浏览器安装帮助访问google的插件再刷新访问注册页面,另一个解决办法就是不从首页入口注册账号,而是访问magento下载页面:
Download Release, Patches and Tools
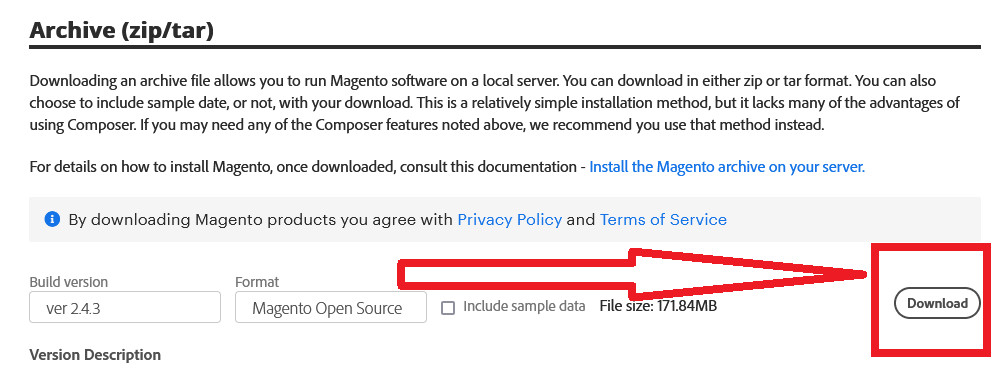
在这个页面里找到Archive板块,点击里面的download按钮,如下图所示:
然后会弹窗提示要登录,在弹窗里往下滑动可以看到一个注册按钮,如下图所示:

点击这个注册按钮会出现一个注册账号的弹窗,这个弹窗里没有那个国内网络可能看不见的“google人机验证”,
把信息符合规则地填写完整【例如密码里不能有First Name和Last Name项相同的字符串】后,点击提交按钮后,就能在注册账号时填写的邮箱账号里收到一封magento验证邮件,点击里面的验证按钮后邮箱验证就能成功。注意填写注册信息时,可以把填写的信息保存一份到本地备忘文档。
git
用git方式安装开发版,在安装目录下运行如下指令:
git clone https://github.com/magento/magento2.git .
下载完后,检查php.ini是否开启了intl、soap、sodium、xsl、sockets拓展,如果没有开启就开启。然后运行如下指令:
composer install
注意:
如果通过如上所示的git方式安装,下载的magento版本因为是开发版本,访问应用时可能不会出现分步骤安装页面的入口按钮。
HTTP下载
如果前面两种方式都不用,就可以参考《Magento2下载安装》里的HTTP下载方式,去如下网页
https://github.com/magento/magento2/releases
去挑选一个版本的完整版压缩包下载下来,为了避免版本过新环境不好配,本次并没有下载magento的最新完整版,而是下载了magento 2.3.2版本【php版本过高或过低都不行,本次用的php版本是7.1.33】。
然后解压magento 2.3.2版本到网站目录,在命令行里切换到magento根目录下运行
php -S localhost:8000
然后浏览器访问localhost:8000,看能否出现magento的设置页面。
如果显示空白那么可能是因为当前系统的一些软件版本不符合magento2 安装要求,如果显示报错信息那么就根据报错信息解决问题。
例如如果显示composer未安装,那么可能是magento根目录下的vendor文件夹为空导致的,这时候可以在magento根目录下运行
composer install
如果报错说php版本不对,那么就根据提示将符合安装条件的php版本的exe文件所在目录添加到环境变量后重启电脑。
如果报错说composer版本不对,那么就根据提示,可能需要在magento根目录下运行
composer update
没有报错后再运行
composer install
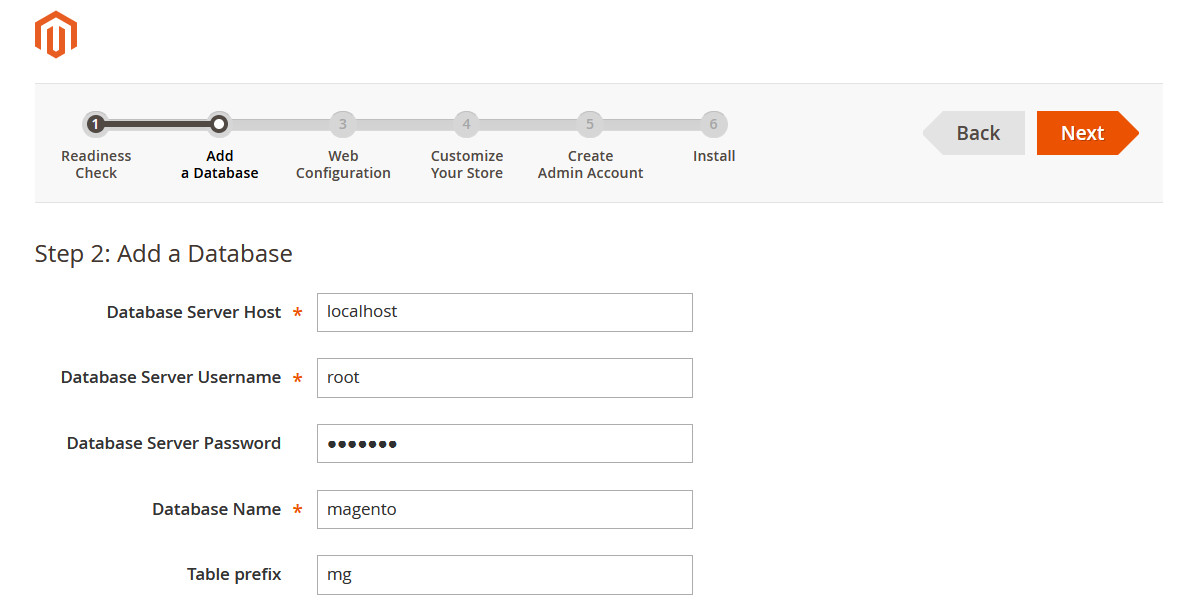
如果没有报错了,访问localhost:8000应该就能显示出如下图所示的设置页面。

注意接下来建议就不要用通过php -S localhost:8000开启的php内置服务器来安装magento了,而是应该在集成软件环境下安装。例如wampserver3.2.3里将网站根目录设置为magento所在的目录,然后用localhost访问,这时可能会出现Internal Server Error,造成这个服务器错误的一个可能原因是magento根目录下的.htaccess里的配置项导致的,例如:
    <Files composer.json>
        <IfVersion < 2.4>
            order allow,deny
            deny from all
        </IfVersion>
        <IfVersion >= 2.4>
            Require all denied
        </IfVersion>
    </Files>
    ......
    <Files .user.ini>
        <IfVersion < 2.4>
            order allow,deny
            deny from all
        </IfVersion>
        <IfVersion >= 2.4>
            Require all denied
        </IfVersion>
    </Files>
这时,可以去掉这些配置,然后继续用localhost访问magento完成安装。
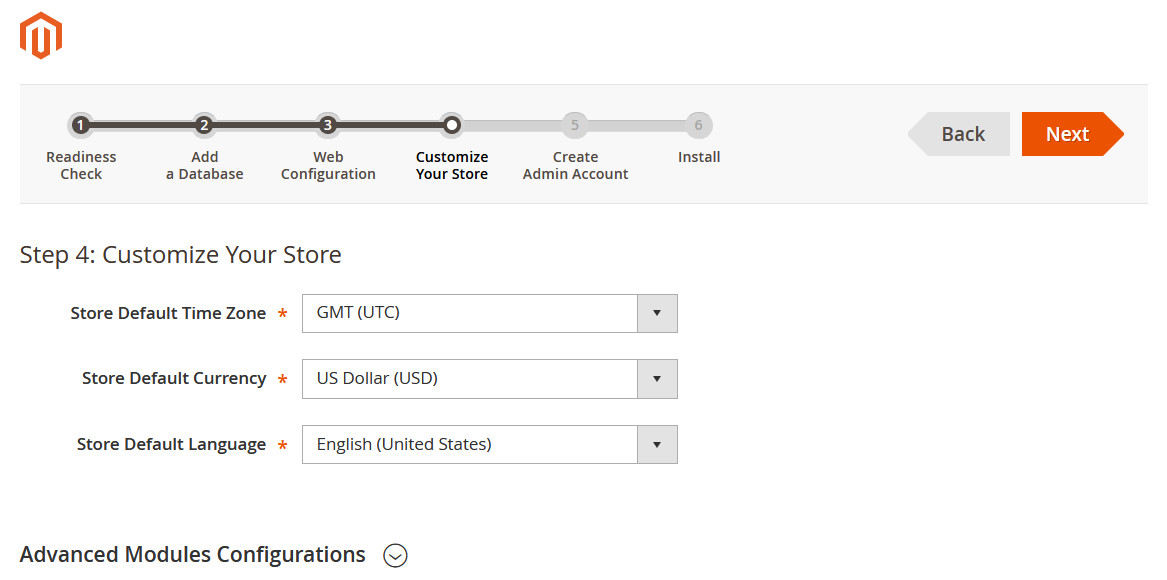
点击“Agree and Setup Magento”按钮,一步步地完成安装,遇到报错就解决报错,再进行下一步,安装过程中可以把一些设置信息以截图形式或者文字形式保存下来备忘。注意下方截图里的红色标识。


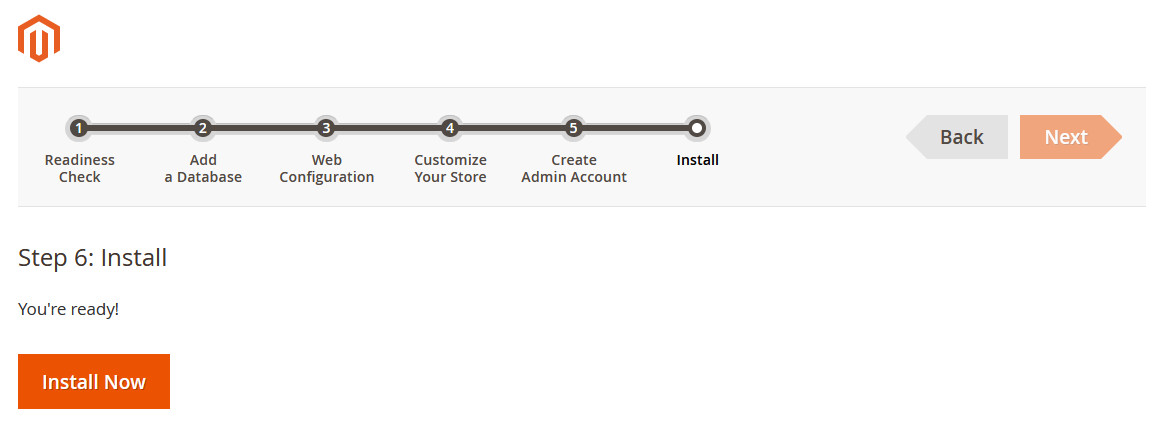 点击上图中的“Install Now”,页面会提示正在安装,耐心等待一会后就能出现安装结果信息。例如:

访问后台如果出现空白页,那么可以将应用根目录下\lib\internal\Magento\Framework\View\Element\Template\File\Validator.php里的
$realPath = $this->fileDriver->getRealPath($path);这行代码替换为
$realPath = str_replace('\\', '/', $this->fileDriver->getRealPath($path));然后就可以看到登录页面了。但是页面可能没有样式,登录进去后也不能正常使用功能,查看日志网上搜索解决方案也难以搜索到相应的Windows操作系统下有效的解决方案,所以实在不推荐在windows操作系统下安装此应用。


 1万+
1万+


 被折叠的 条评论
为什么被折叠?
被折叠的 条评论
为什么被折叠?
 到【灌水乐园】发言


