


起源
在Qt的示例中看到了一个有趣的demo,截图如下:
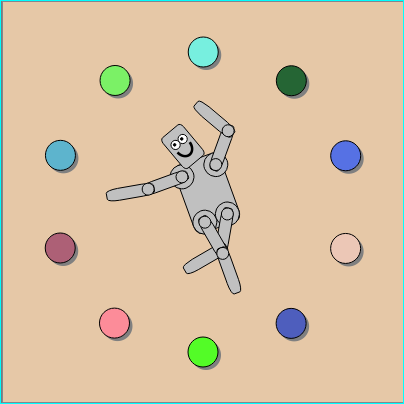
这个demo的名字叫Drag and Drop Robot,简单概括而言,在这个demo中,可以把机器人四周的颜色拖动到机器人的各个部位,比如说头,臂,身躯等,然后这个部位就会变成相应的颜色,类似于换装小游戏。
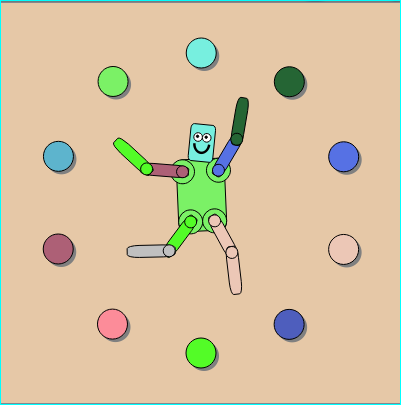
上图就是经过愚下的拖动颜色使其简略换装后的样子。
当然,拖动颜色使部件变色的功能并不难实现,关键在于这个机器人是动态的,我们要研究的就恰恰是这个机器人动画是怎么做出来的。
光凭两张图片我们无法知道这个动画到底是什么样子的,大家可以参考本次用html5移植到浏览器平台的demo:
http://yuehaowang.github.io/demo/drag_and_drop_robot/
截图如下:

由于愚下对人体运动了解不深,所以demo里的机器人运动得不是很和谐。各位看官可以在文末下载源代码,通过本次讲解,拿回去自己改改,让这个机器人动得更带感一点。
以下是实现过程。
准备工作
先来看看文件结构:
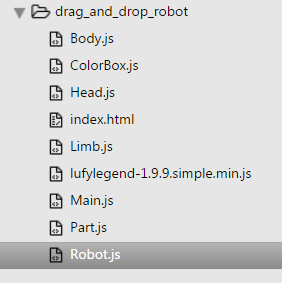
其中,lufylegend-1.9.9.simple.min.js是html5引擎lufylegend里的文件,由于该引擎带有缓动类,所以实现本次效果会容易一些。
引擎官方地址:http://lufylegend.com
中文文档地址:http://lufylegend.com/api/zh_CN/out/index.html
由于下文的代码中会多次出现一些引擎里的类和方法,所以我把这些类和方法在文档里的地址放在下面,供大家参考:
- LExtends:http://lufylegend.com/api/zh_CN/out/classes/%E5%85%A8%E5%B1%80%E5%87%BD%E6%95%B0.html#method_LExtends
- LLoadManage:http://lufylegend.com/api/zh_CN/out/classes/LLoadManage.html
- LInit:http://lufylegend.com/api/zh_CN/out/classes/%E5%85%A8%E5%B1%80%E5%87%BD%E6%95%B0.html#method_LInit
- LSprite:http://lufylegend.com/api/zh_CN/out/classes/LSprite.html
- LTextField:http://lufylegend.com/api/zh_CN/out/classes/LTextField.html
- LDropShadowFilter:http://lufylegend.com/api/zh_CN/out/classes/LDropShadowFilter.html
- LTweenLite:http://lufylegend.com/api/zh_CN/out/classes/LTweenLite.html
- LGraphics:http://lufylegend.com/api/zh_CN/out/classes/LGraphics.html
实现过程
Main.js
完整代码:
LInit(50, "mydemo", 800, 600, loadRes);

var stageLayer, selectedColorBox = null, partList = null;

function loadRes () {

    var loadList = [
        {path : "./Robot.js"},
        {path : "./Part.js"},
        {path : "./Body.js"},
        {path : "./Head.js"},
        {path : "./Limb.js"},
        {path : "./ColorBox.js"}
    ];

    var loadingTxt = new LTextField();
    loadingTxt.text = "Loading...";
    addChild(loadingTxt);

    LLoadManage.load(loadList, null, function () {

        loadingTxt.remove();

        initStageLayer();
        addRobot();
        addColors();
    });
}

function initStageLayer () {

    stageLayer = new LSprite();
    stageLayer.graphics.drawRect(0, "", [0, 0, LGlobal.width, LGlobal.height]);
    addChild(stageLayer);

    stageLayer.addEventListener(LMouseEvent.MOUSE_MOVE, function () {

        if (selectedColorBox) {
            selectedColorBox.x = mouseX;
            selectedColorBox.y = mouseY;
        }
    });

    stageLayer.addEventListener(LMouseEvent.MOUSE_UP, function () {

        if (selectedColorBox) {
            if (partList) {
                for (var i = 0, l = partList.length; i < l; i++) {
                    va
最低0.47元/天 解锁文章


 214
214


 被折叠的 条评论
为什么被折叠?
被折叠的 条评论
为什么被折叠?
 到【灌水乐园】发言


