


添加水印的原理主要是利用OpenGL ES绘制多次,把不同的纹理如图片、文本等绘制到纹理或窗口上,达到添加水印的效果,需要注意的地方就是要确定好需要在屏幕上绘制的位置坐标。
添加水印的原理:
利用OpenGL ES绘制多次,把不同的纹理如图片、文本等绘制到纹理或窗口上,达到添加水印的效果。
- 图片水印,直接绑定bitmap到纹理;
- 文字水印,先将文字转为bitmap,再绑定到纹理。
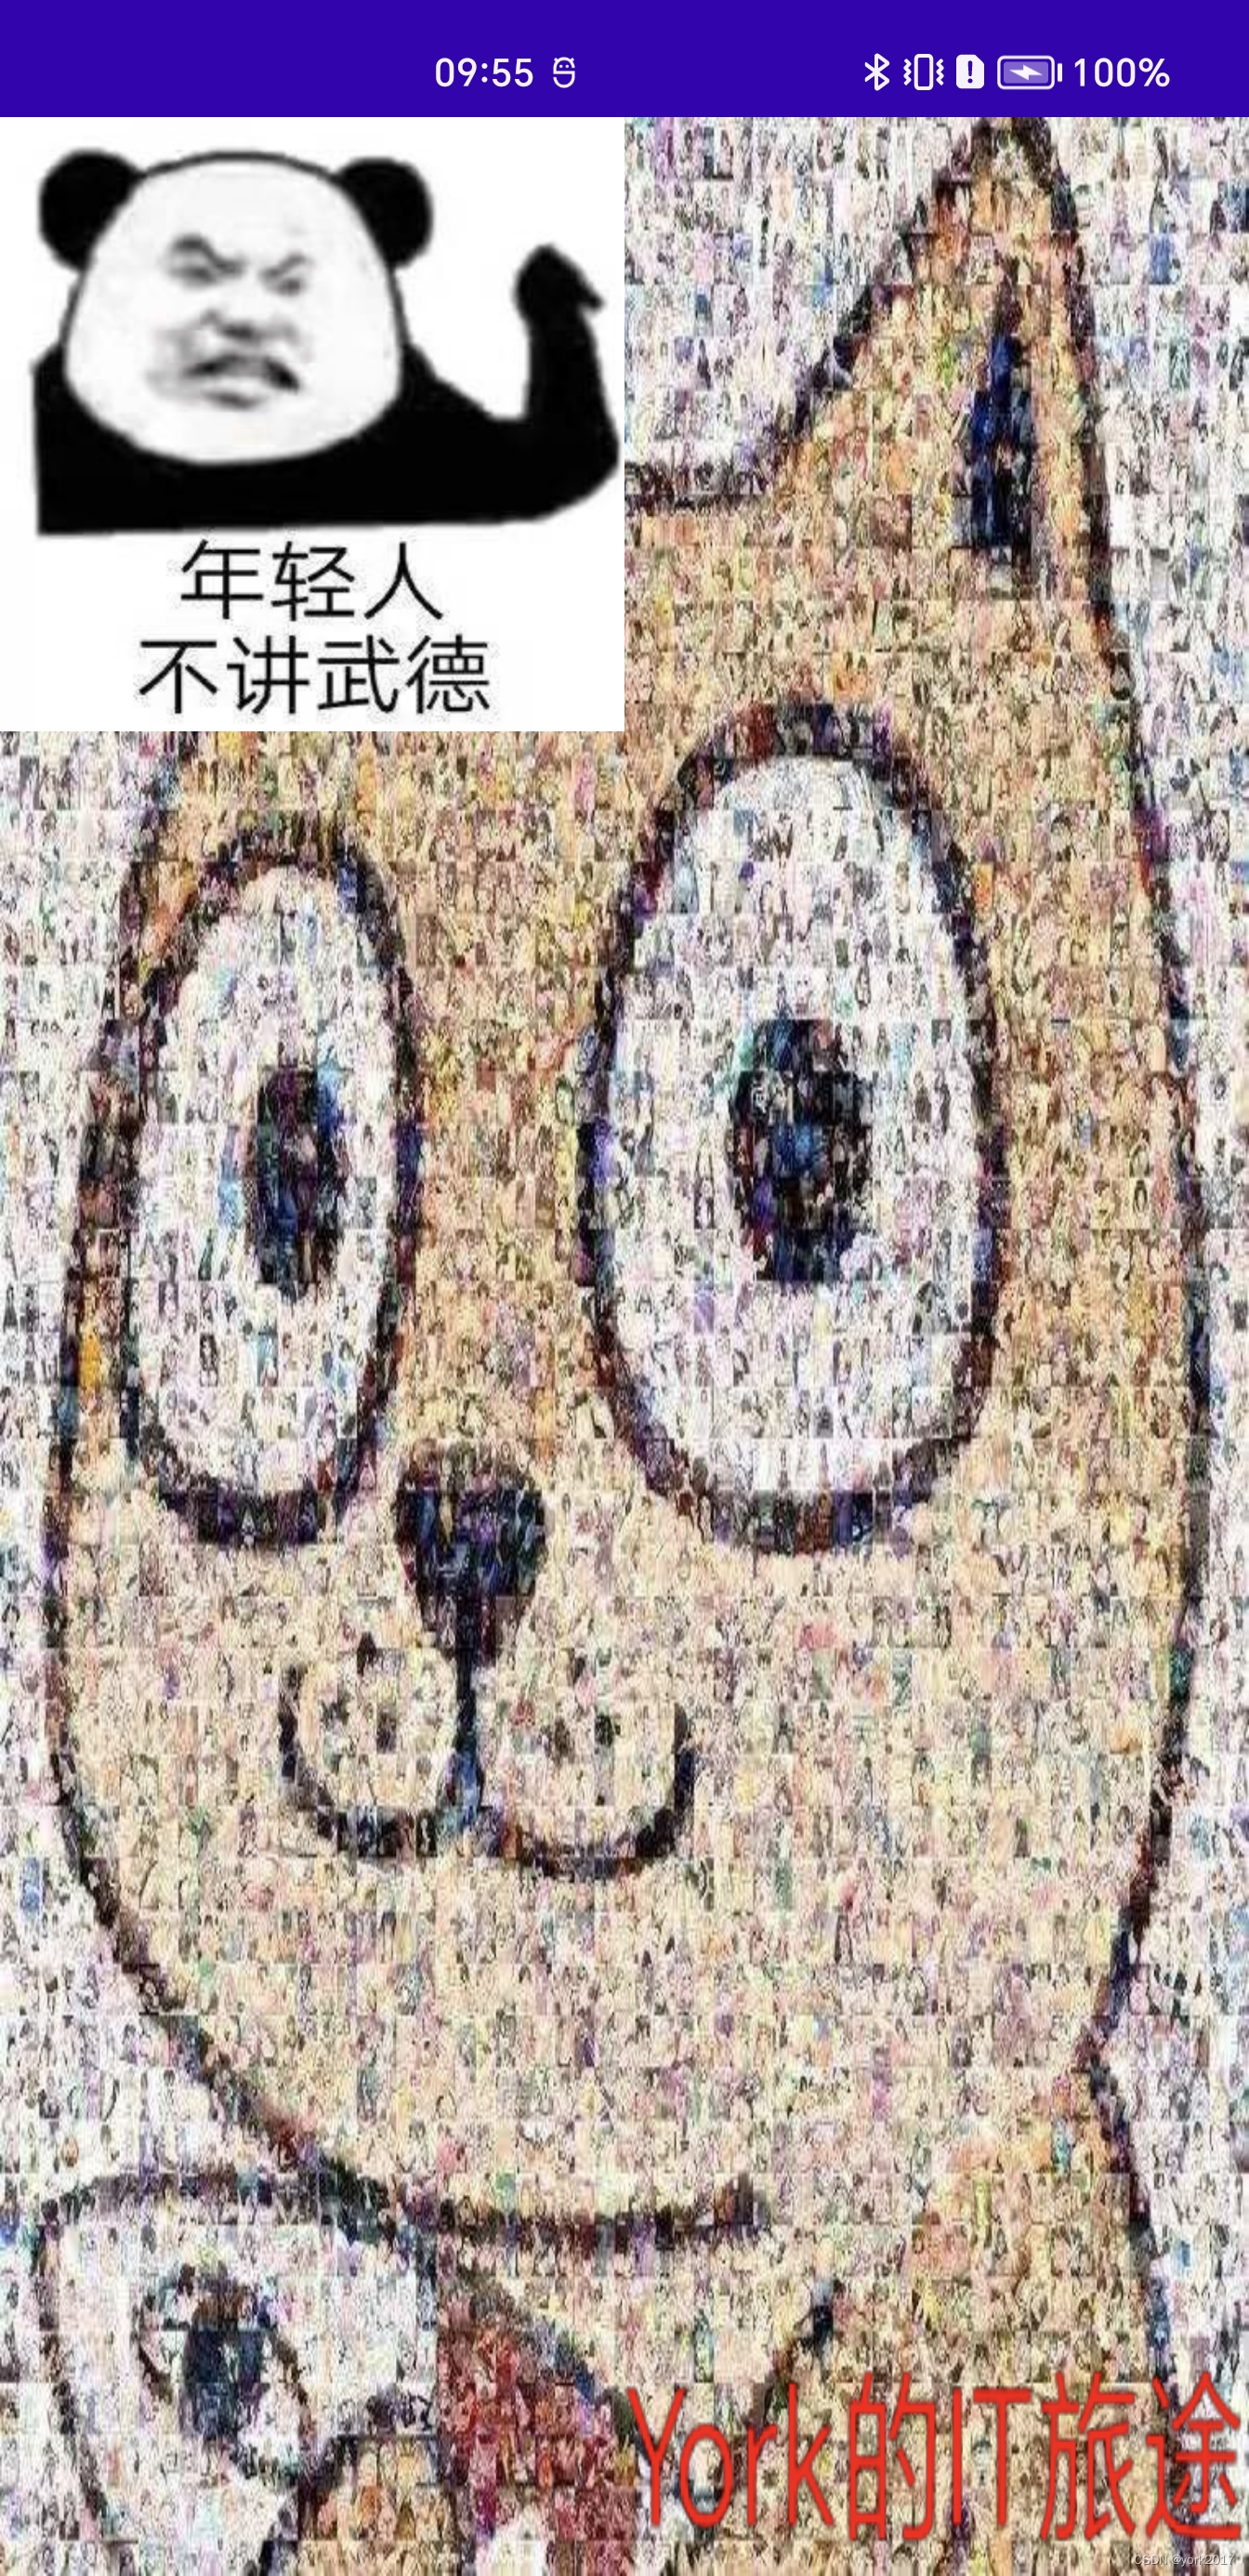
先看效果:
添加水印的步骤:
- 首先确认水印添加的位置
- 设置水印的大小
- 根据水印图片长宽比计算水印的顶点坐标
- 接下来就是跟绘制图片纹理没区别了
1.在顶点坐标数组里预留水印的坐标点
    //顶点坐标
    float[] vertexData = {
            -1f, -1f,
            1f, -1f,
            -1f, 1f,
            1f, 1f,
            //用来 加一个 图片水印 到左上角
            -1f, 0.5f,
            0f, 0.5f,
            -1f, 1f,
            0f, 1f,

            //用来 加一个文字水印 到右下角
            0f, -1f,
            1f, -1f,
            0f, -0.8f,
            1f, -0.8f
    };
2.获取到水印的纹理ID
这里直接给出个工具类:
package com.york.media.opengl.egl;

import android.content.Context;
import android.graphics.Bitmap;
import android.graphics.BitmapFactory;
import android.graphics.Canvas;
import android.graphics.Color;
import android.graphics.Paint;
import android.opengl.GLES20;
import android.opengl.GLUtils;

import java.nio.ByteBuffer;

/**
 * author : York
 * date   : 2020/12/20 20:13
 * desc   : 纹理工具
 */
public class TextureUtils {

    /**
     * 加载图片为 2D纹理
     *
     * @param context 上下文
     * @param rawID   资源ID
     * @return 生成的纹理
     */
    public static int createImageTexture(Context context, int rawID) {
        //生产一个纹理
        int[] textureIds = new int[1];
        GLES20.glGenTextures(1, textureIds, 0);
        //绑定为 2D纹理
        GLES20.glBindTexture(GLES20.GL_TEXTURE_2D, textureIds[0]);
        //设置环绕模式
        GLES20.glTexParameteri(GLES20.GL_TEXTURE_2D, GLES20.GL_TEXTURE_WRAP_S, GLES20.GL_REPEAT);
        GLES20.glTexParameteri(GLES20.GL_TEXTURE_2D, GLES20.GL_TEXTURE_WRAP_T, GLES20.GL_REPEAT);
        //设置过滤模式
        GLES20.glTexParameteri(GLES20.GL_TEXTURE_2D, GLES20.GL_TEXTURE_MIN_FILTER, GLES20.GL_LINEAR);
        GLES20.glTexParameteri(GLES20.GL_TEXTURE_2D, GLES20.GL_TEXTURE_MAG_FILTER, GLES20.GL_LINEAR);

        Bitmap bitmap = BitmapFactory.decodeResource(context.getResources(), rawID);
        //绑定 bitmap到 textureIds[0] 这个2D纹理上
        GLUtils.texImage2D(GLES20.GL_TEXTURE_2D, 0, bitmap, 0);
        //退出 纹理的设置,进入下一环节
        GLES20.glBindTexture(GLES20.GL_TEXTURE_2D, 0);
        return textureIds[0];

    }

    /**
     * 设置文字水印
     *
     * @param text      文本内容
     * @param textSize  文字大小
     * @param textColor 文字颜色
     * @param bgColor   文字背景颜色 #00000000
     * @param padding   文字与边距距离
     * @return 文字水印的 bitmap
     */
    public static Bitmap createTextImage(String text, int textSize, String textColor, String bgColor, int padding) {

        Paint paint = new Paint();
        paint.setColor(Color.parseColor(textColor));
        paint.setTextSize(textSize);
        paint.setStyle(Paint.Style.FILL);
        paint.setAntiAlias(true);

        float width = paint.measureText(text, 0, text.length());
        float top = paint.getFontMetrics().top;
        float bottom = paint.getFontMetrics().bottom;

        Bitmap bm = Bitmap.createBitmap((int) (width + padding * 2), (int) ((bottom - top) + padding * 2), Bitmap.Config.ARGB_8888);
        Canvas canvas = new Canvas(bm);
        canvas.drawColor(Color.parseColor(bgColor));
        canvas.drawText(text, padding, -top + padding, paint);
        return bm;
    }

    /**
     * 加载 bitmap为 2D纹理
     *
     * @param bitmap 图片 bitmap
     * @return 纹理
     */
    public static int loadBitmapTexture(Bitmap bitmap) {
        int[] textureIds = new int[1];
        GLES20.glGenTextures(1, textureIds, 0);
        GLES20.glBindTexture(GLES20.GL_TEXTURE_2D, textureIds[0]);
        GLES20.glTexParameteri(GLES20.GL_TEXTURE_2D, GLES20.GL_TEXTURE_WRAP_S, GLES20.GL_REPEAT);
        GLES20.glTexParameteri(GLES20.GL_TEXTURE_2D, GLES20.GL_TEXTURE_WRAP_T, GLES20.GL_REPEAT);
        GLES20.glTexParameteri(GLES20.GL_TEXTURE_2D, GLES20.GL_TEXTURE_MIN_FILTER, GLES20.GL_LINEAR);
        GLES20.glTexParameteri(GLES20.GL_TEXTURE_2D, GLES20.GL_TEXTURE_MAG_FILTER, GLES20.GL_LINEAR);

        ByteBuffer bitmapBuffer = ByteBuffer.allocate(bitmap.getHeight() * bitmap.getWidth() * 4);
        bitmap.copyPixelsToBuffer(bitmapBuffer);
        bitmapBuffer.flip();

        GLES20.glTexImage2D(GLES20.GL_TEXTURE_2D, 0, GLES20.GL_RGBA, bitmap.getWidth(),
                bitmap.getHeight(), 0, GLES20.GL_RGBA, GLES20.GL_UNSIGNED_BYTE, bitmapBuffer);
        return textureIds[0];
    }
}
3.改变从顶点数组取点的位置
vertexBuffer.position(index);
GLES20.glVertexAttribPointer(vPosition, 2, GLES20.GL_FLOAT, false, 8,index);
index:内存中起始位置(字节)
也可以从VBO里取点的位置
  		//图片水印
        //从VBO中获取图片水印的坐标,并使能
        GLES20.glEnableVertexAttribArray(vPosition);
        GLES20.glVertexAttribPointer(vPosition, 2, GLES20.GL_FLOAT, false, 8,32);
        GLES20.glEnableVertexAttribArray(fPosition);
        GLES20.glVertexAttribPointer(fPosition, 2, GLES20.GL_FLOAT, false, 8,vertexData.length * 4);
4.绑定纹理进行绘制
 		GLES20.glBindTexture(GLES20.GL_TEXTURE_2D, bitmapTextureId);
        GLES20.glDrawArrays(GLES20.GL_TRIANGLE_STRIP, 0, 4);
        GLES20.glBindTexture(GLES20.GL_TEXTURE_2D, 0);
5.完整代码
package com.york.media.opengl.demo.bitmap;

import android.content.Context;
import android.graphics.Bitmap;
import android.graphics.BitmapFactory;
import android.opengl.GLES20;
import android.opengl.GLUtils;

import com.york.media.opengl.R;
import com.york.media.opengl.egl.TextureUtils;
import com.york.media.opengl.egl.YGLSurfaceView;
import com.york.media.opengl.egl.YShaderUtil;

import java.nio.ByteBuffer;
import java.nio.ByteOrder;
import java.nio.FloatBuffer;

/**
 * author : York
 * date   : 2020/12/21 4:16
 * desc   :
 */
public class YWaterMarkRender implements YGLSurfaceView.YGLRender {
    private final Context mContext;
    private final FloatBuffer vertexBuffer;
    private final FloatBuffer fragmentBuffer;
    private int program;
    private int vPosition;
    private int fPosition;
    private int[] textureIds;
    private int bitmapTextureId;
    private int textTextureId;
    private int vboId;

    //顶点坐标
    float[] vertexData = {
            -1f, -1f,
            1f, -1f,
            -1f, 1f,
            1f, 1f,
            //用来 加一个 图片水印 到左上角
            -1f, 0.5f,
            0f, 0.5f,
            -1f, 1f,
            0f, 1f,

            //用来 加一个文字水印 到右下角
            0f, -1f,
            1f, -1f,
            0f, -0.8f,
            1f, -0.8f
    };
    //纹理坐标
    float[] fragmentData = {
            0f, 1f,
            1f, 1f,
            0f, 0f,
            1f, 0f
    };

    public YWaterMarkRender(Context context) {
        this.mContext = context;
        //读取顶点坐标
        vertexBuffer = ByteBuffer.allocateDirect(vertexData.length * 4).order(ByteOrder.nativeOrder()).asFloatBuffer().put(vertexData);
        vertexBuffer.position(0);

        //读取纹理坐标
        fragmentBuffer = ByteBuffer.allocateDirect(fragmentData.length * 4).order(ByteOrder.nativeOrder()).asFloatBuffer().put(fragmentData);
        fragmentBuffer.position(0);


    }

    @Override
    public void onSurfaceCreated() {
        //加载顶点着色器 shader
        String vertexSource = YShaderUtil.getRawResource(mContext, R.raw.screen_vert);
        //加载片元着色器 shader
        String fragmentSource = YShaderUtil.getRawResource(mContext, R.raw.screen_frag);
        //获取源程序
        program = YShaderUtil.createProgram(vertexSource, fragmentSource);
        //从渲染程序中得到着顶点色器中的属性
        vPosition = GLES20.glGetAttribLocation(program, "vPosition");
        //从渲染程序中得到片元着色器中的属性
        fPosition = GLES20.glGetAttribLocation(program, "fPosition");

        //设置文字支持透明
        GLES20.glEnable(GLES20.GL_BLEND);
        GLES20.glBlendFunc(GLES20.GL_SRC_ALPHA, GLES20.GL_ONE_MINUS_SRC_ALPHA);

        int [] vbo_s = new int[1];
        GLES20.glGenBuffers(1, vbo_s, 0);
        vboId = vbo_s[0];

        GLES20.glBindBuffer(GLES20.GL_ARRAY_BUFFER, vboId);
        GLES20.glBufferData(GLES20.GL_ARRAY_BUFFER, vertexData.length * 4 + fragmentData.length * 4, null, GLES20. GL_STATIC_DRAW);
        GLES20.glBufferSubData(GLES20.GL_ARRAY_BUFFER, 0, vertexData.length * 4, vertexBuffer);
        GLES20.glBufferSubData(GLES20.GL_ARRAY_BUFFER, vertexData.length * 4, fragmentData.length * 4, fragmentBuffer);
        GLES20.glBindBuffer(GLES20.GL_ARRAY_BUFFER, 0);


        //创建 1个纹理,放入到 int [] textureIds, 一共有 30多个 纹理
        textureIds = new int[1];
        GLES20.glGenTextures(1, textureIds, 0);//第三个参数是指从哪儿开始取
        GLES20.glBindTexture(GLES20.GL_TEXTURE_2D, textureIds[0]);
        //设置纹理的环绕方式
        GLES20.glTexParameteri(GLES20.GL_TEXTURE_2D, GLES20.GL_TEXTURE_WRAP_S, GLES20.GL_REPEAT);
        GLES20.glTexParameteri(GLES20.GL_TEXTURE_2D, GLES20.GL_TEXTURE_WRAP_T, GLES20.GL_REPEAT);
        //设置纹理的过滤方式
        GLES20.glTexParameteri(GLES20.GL_TEXTURE_2D, GLES20.GL_TEXTURE_MIN_FILTER, GLES20.GL_LINEAR);
        GLES20.glTexParameteri(GLES20.GL_TEXTURE_2D, GLES20.GL_TEXTURE_MAG_FILTER, GLES20.GL_LINEAR);
        //解绑纹理 指的是离开对 纹理的配置,进入下一个状态
        GLES20.glBindTexture(GLES20.GL_TEXTURE_2D, 0);

        bitmapTextureId = TextureUtils.createImageTexture(mContext, R.drawable.bjwd);

        Bitmap txtBitmap = TextureUtils.createTextImage("York的IT旅途", 36, "#ff0000", "#00000000", 0);
        textTextureId = TextureUtils.loadBitmapTexture(txtBitmap);
        txtBitmap.recycle();
    }

    @Override
    public void onSurfaceChanged(int width, int height) {
        //设置窗口大小
        GLES20.glViewport(0, 0, width, height);
    }

    @Override
    public void onDrawFrame() {
        //清除屏幕,此处用的是红色
        GLES20.glClear(GLES20.GL_COLOR_BUFFER_BIT);
        GLES20.glClearColor(1f, 0f, 0f, 1f);

        //使用着色器源程序
        GLES20.glUseProgram(program);

        GLES20.glBindBuffer(GLES20.GL_ARRAY_BUFFER, vboId);

        GLES20.glEnableVertexAttribArray(vPosition);
        GLES20.glVertexAttribPointer(vPosition, 2, GLES20.GL_FLOAT, false, 8,0);

        GLES20.glEnableVertexAttribArray(fPosition);
        GLES20.glVertexAttribPointer(fPosition, 2, GLES20.GL_FLOAT, false, 8,vertexData.length * 4);

        GLES20.glBindTexture(GLES20.GL_TEXTURE_2D, textureIds[0]);
        GLES20.glDrawArrays(GLES20.GL_TRIANGLE_STRIP, 0, 4);

        //绑定 textureIds[0] 到已激活的 2D纹理 GL_TEXTURE0上
        GLES20.glBindTexture(GLES20.GL_TEXTURE_2D, textureIds[0]);
        //获取图片的 bitmap
        Bitmap bitmap = BitmapFactory.decodeResource(mContext.getResources(), R.drawable.byg);
        //绑定 bitmap 到textureIds[0]纹理
        GLUtils.texImage2D(GLES20.GL_TEXTURE_2D, 0, bitmap, 0);
        bitmap.recycle();//用完及时回收
        //绘制原图片
        GLES20.glDrawArrays(GLES20.GL_TRIANGLE_STRIP, 0, 4);
        //解绑 2D纹理
        GLES20.glBindTexture(GLES20.GL_TEXTURE_2D, 0);

        //图片水印
        //从VBO中获取图片水印的坐标,并使能
        GLES20.glEnableVertexAttribArray(vPosition);
        GLES20.glVertexAttribPointer(vPosition, 2, GLES20.GL_FLOAT, false, 8,32);
        GLES20.glEnableVertexAttribArray(fPosition);
        GLES20.glVertexAttribPointer(fPosition, 2, GLES20.GL_FLOAT, false, 8,vertexData.length * 4);

        GLES20.glBindTexture(GLES20.GL_TEXTURE_2D, bitmapTextureId);
        GLES20.glDrawArrays(GLES20.GL_TRIANGLE_STRIP, 0, 4);
        GLES20.glBindTexture(GLES20.GL_TEXTURE_2D, 0);

        //文字水印
        //从VBO中获取图片水印的坐标,并使能
        GLES20.glEnableVertexAttribArray(vPosition);
        GLES20.glVertexAttribPointer(vPosition, 2, GLES20.GL_FLOAT, false, 8,64);
        GLES20.glEnableVertexAttribArray(fPosition);
        GLES20.glVertexAttribPointer(fPosition, 2, GLES20.GL_FLOAT, false, 8,vertexData.length * 4);

        GLES20.glBindTexture(GLES20.GL_TEXTURE_2D, textTextureId);
        //绘制水印
        GLES20.glDrawArrays(GLES20.GL_TRIANGLE_STRIP, 0, 4);
        //解绑纹理
        GLES20.glBindTexture(GLES20.GL_TEXTURE_2D, 0);


        //解绑 VBO
        GLES20.glBindBuffer(GLES20.GL_ARRAY_BUFFER, 0);
    }
}
看:


 1024
1024


 被折叠的 条评论
为什么被折叠?
被折叠的 条评论
为什么被折叠?
 到【灌水乐园】发言


