


目录
一、安装nginx
1、关闭防火墙
[root@lnmp ~] systemctl stop firewalld
[root@lnmp ~] setenforce 0
[root@lnmp ~] iptables -F
2.创建管理nginx用户
[root@lnmp ~] useradd -M -s /sbin/nologin nginx3.配置nginx
[root@lnmp ~] tar xf nginx-1.16.0.tar.gz -C /usr/src/
[root@lnmp ~] cd /usr/src/nginx-1.16.0/
[root@lnmp nginx-1.16.0] yum -y install gcc gcc-c++
[root@lnmp nginx-1.16.0] yum -y install pcre-devel zlib-devel
[root@lnmp nginx-1.16.0] ./configure --prefix=/usr/local/nginx --with-http_stub_status_module --user=nginx &&make && make install
4.命令优化
[root@lnmp ~] ln -s /usr/local/nginx/sbin/* /usr/local/bin/5.创建nginx脚本
[root@lnmp ~] nginx -t
nginx: the configuration file /usr/local/nginx/conf/nginx.conf syntax is ok
nginx: configuration file /usr/local/nginx/conf/nginx.conf test is successful

[root@lnmp ~] vim /etc/init.d/nginx
#!/bin/bash
#chkconfig:2345 99 20
# description: Nginx Server Control Script
PROG="/usr/local/nginx/sbin/nginx"
PIDF="/usr/local/nginx/logs/nginx.pid"
PROG_FPM="/usr/local/sbin/php-fpm"
PIDF_FPM="/usr/local/php5/var/run/php-fpm.pid"

case "$1" in
start)
        $PROG
        $PROG_FPM
;;
stop)
        kill -s QUIT $(cat $PIDF)
        kill -s QUIT $(cat $PIDF_FPM)
;;
restart)
        $0 stop
        $0 start
;;
reload)
        kill -s HUP $(cat $PIDF)
;;
*)
        echo "Usage: $0 (start|stop|restart|reload)"
        exit 1
esac
exit 0
[root@lnmp ~] chmod +x /etc/init.d/nginx
[root@lnmp ~] chkconfig --add nginx
二、安装mysql数据库
#下载依赖
[root@lnmp ~] yum -y install libaio

[root@lnmp ~] rz
#安装二进制包
[root@lnmp ~] tar xf mysql-5.7.24-linux-glibc2.12-x86_64.tar.gz -C /usr/local/
[root@lnmp ~] cd /usr/local/
[root@lnmp local] mv mysql-5.7.24-linux-glibc2.12-x86_64/ mysql #解压改名
[root@lnmp local] useradd -s /sbin/nologin mysql  #添加用户
[root@lnmp local] cd mysql/
[root@lnmp mysql] chown -R mysql:mysql ./  #递归修改属主和属组
[root@lnmp mysql]/usr/local/mysql/bin/mysqld --user=mysql --basedir=/usr/local/mysql --datadir=/usr/local/mysql/data --initialize #初始化数据库
修改配置文件
[root@lnmp mysql] vim /etc/my.cnf

[mysqld]
datadir=/usr/local/mysql/data
socket=/tmp/mysql.sock

[mysqld_safe]
log-error=/usr/local/mysql/data/mysql.log
pid-file=/usr/local/mysql/data/mysql.pid


[root@lnmp mysql] ./support-files/mysql.server start   #重启服务
Starting MySQL.Logging to '/usr/local/mysql/data/mysql.log'.
 SUCCESS!
[root@lnmp mysql] cp support-files/mysql.server /etc/init.d/mysqld  #把mysql服务加到系统

[root@lnmp mysql] chmod +x /etc/init.d/mysqld #给脚本加入执行权限
[root@lnmp mysql] chkconfig --add mysqld   #优化命令
[root@lnmp mysql] systemctl start mysqld    #启动
[root@lnmp mysql] ln -s /usr/local/mysql/bin/* /usr/bin/
[root@lnmp mysql]  mysqladmin -uroot -p'nbJjM_VkN5,b' password 123456[root@lnmp mysql]#  mysqladmin -uroot -p'nbJjM_VkN5,b' password 123456  #修改密码
[root@lnmp mysql] mysql -uroot -p123456  #登录mysql
mysql: [Warning] Using a password on the command line interface can be insecure.
Welcome to the MySQL monitor.  Commands end with ; or \g.
Your MySQL connection id is 6
Server version: 5.7.24 MySQL Community Server (GPL)

Copyright (c) 2000, 2018, Oracle and/or its affiliates. All rights reserved.

Oracle is a registered trademark of Oracle Corporation and/or its
affiliates. Other names may be trademarks of their respective
owners.

Type 'help;' or '\h' for help. Type '\c' to clear the current input statement.

mysql>
三、安装PHP
1.上传php安装包
[root@localhost ~] yum -y install gd libxml2-devel.x86_64 libjpeg-devel libpng-devel
[root@lnmp mysql] tar xf php-5.6.39.tar.gz -C /usr/src #解压
[root@lnmp mysql] cd /usr/src/php-5.6.39/
[root@lnmp php-5.6.39]  ./configure --prefix=/usr/local/php5 --with-gd --with-zlib --with-mysql=/usr/local/mysql --with-mysqli=/usr/local/mysql/bin/mysql_config --with-config-file-path=/usr/local/php5 --enable-mbstring --enable-fpm --with-jbeg-dir=/usr/lib && make && make install  #编译安装
[root@lnmp php-5.6.39] cp php.ini-production /usr/local/php5/php.ini #准备配置文件
[root@lnmp php-5.6.39]  ln -s /usr/local/php5/bin/* /usr/local/bin/  #优化命令
[root@lnmp php-5.6.39]  ln -s /usr/local/php5/sbin/* /usr/local/sbin/
2.上传 zend-loader-hph5.6
[root@lnmp php-5.6.39] tar xf zend-loader-php5.6-linux-x86_64_update1.tar.gz
[root@lnmp php-5.6.39] cd zend-loader-php5.6-linux-x86_64/
[root@lnmp zend-loader-php5.6-linux-x86_64] cp ZendGuardLoader.so /usr/local/php5/lib/php/

[root@lnmp zend-loader-php5.6-linux-x86_64] vim /usr/local/php5/php.ini #最下面写入
zend_extension=/usr/local/php5/lib/php/ZendGuardLoader.so
zend_loader.enable=1

[root@lnmp zend-loader-php5.6-linux-x86_64] cd /usr/local/php5/etc/
[root@lnmp etc] ls
pear.conf  php-fpm.conf.default

[root@lnmp etc] mv php-fpm.conf.default php-fpm.conf   #调整
[root@lnmp etc] vim php-fpm.conf  #进入主配置文件
149 user = php
150 group = php
241 pm.max_children = 50
246 pm.start_servers = 20
251 pm.min_spare_servers = 5
256 pm.max_spare_servers = 35
3.创建用户
[root@lnmp etc] useradd -M -s /sbin/nologin php
[root@lnmp etc] /usr/local/sbin/php-fpm  #启动
[root@lnmp etc] vim /usr/local/nginx/conf/nginx.conf  #进入主配置文件

location / {
            root   html;
            index  index.html index.htm index.php;  #第一个location添加index.php
        }
location ~ \.php$ {     #一定要写在location下边
            root html;
            fastcgi_pass 127.0.0.1:9000;
            fastcgi_index index.php;
            include fastcgi.conf;
        }
[root@lnmp etc] /usr/local/nginx/sbin/nginx -t
nginx: the configuration file /usr/local/nginx/conf/nginx.conf syntax is ok
nginx: configuration file /usr/local/nginx/conf/nginx.conf test is successful
[root@lnmp etc] systemctl restart nginx  #重启
[root@lnmp etc] vim /usr/local/nginx/html/php.php #编写测试文件
<?php
phpinfo();
?>

[root@lnmp etc] vim /usr/local/nginx/html/mysql.php

<?php
$link=mysqli_connect('localhost','root','123456');
if($link) echo"<h1>大功告成</h1>";
mysqli_close();
?>
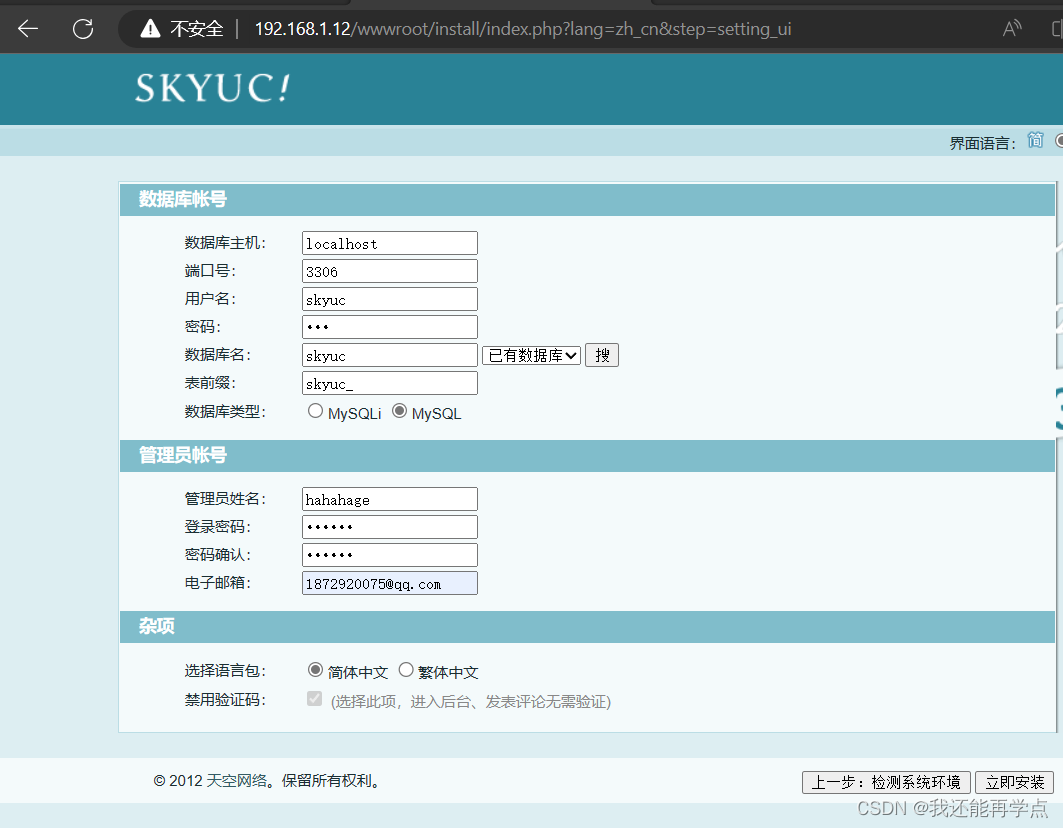
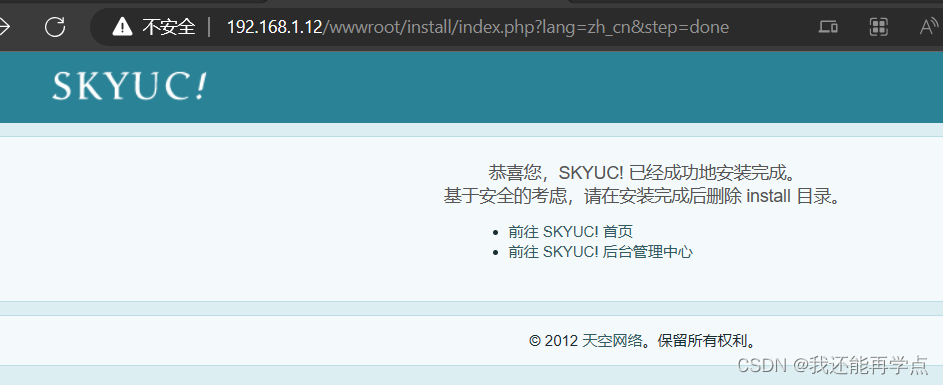
四、LNMP平台中部署skyuc电影网站
1.解压 SKYUC.v3.4.2.srouce
[root@lnmp ~] unzip SKYUC.v3.4.2.SOURCE.zip
[root@lnmp ~] cd SKYUC.v3.4.2.SOURCE/
[root@lnmp SKYUC.v3.4.2.SOURCE] rm -rf /usr/local/nginx/html/*
[root@lnmp SKYUC.v3.4.2.SOURCE] cp -rf wwwroot/ /usr/local/nginx/html/
[root@lnmp SKYUC.v3.4.2.SOURCE] cd /usr/local/nginx/html/
[root@lnmp html] cd wwwroot/
[root@lnmp wwwroot] chown -R php:php admincp/ data/ templates/ upload/ #修改这4个文件属主属组
2.创建数据库和授权用户
[root@lnmp wwwroot] mysql -u root -p123456
mysql> create database skyuc;
Query OK, 1 row affected (0.00 sec)

mysql> grant all on skyuc.* to skyuc@localhost identified by '123';
Query OK, 0 rows affected, 1 warning (0.01 sec)

mysql> flush privileges;
Query OK, 0 rows affected (0.00 sec)


 242
242

 被折叠的 条评论
为什么被折叠?
被折叠的 条评论
为什么被折叠?
 到【灌水乐园】发言


