


3、SpringMVC使用
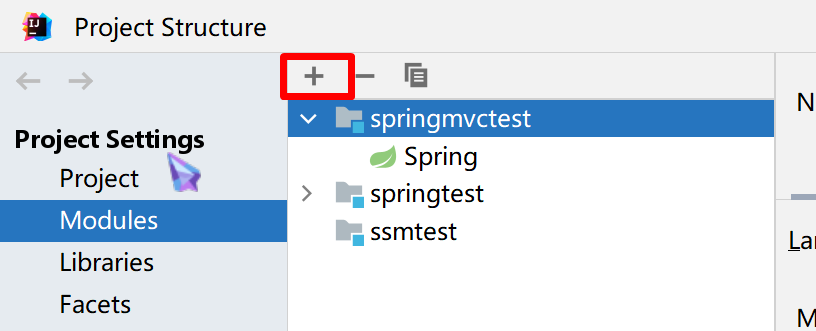
3.1、搭建项目
3.1.1、前期工作
使用SpringMVC创建项目需要添加相关的依赖:
-
创建项目(如果Archetype选择了wabapp,会自动创建webapp相关包,但是java、resources、test等文件夹需要自己手动创建)

-
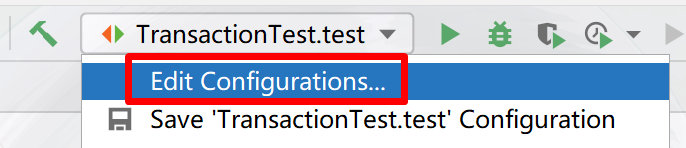
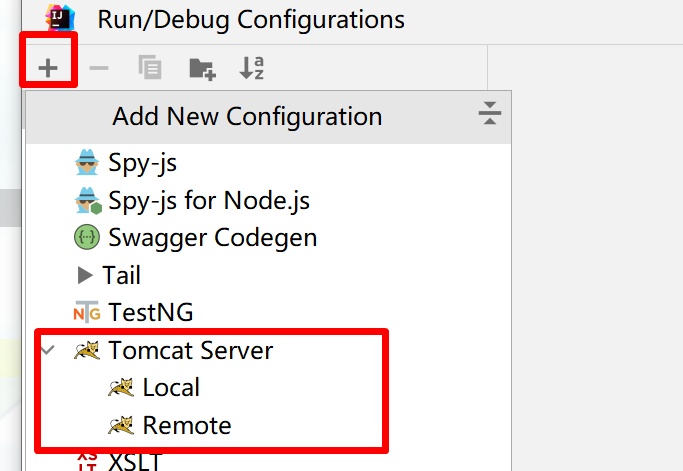
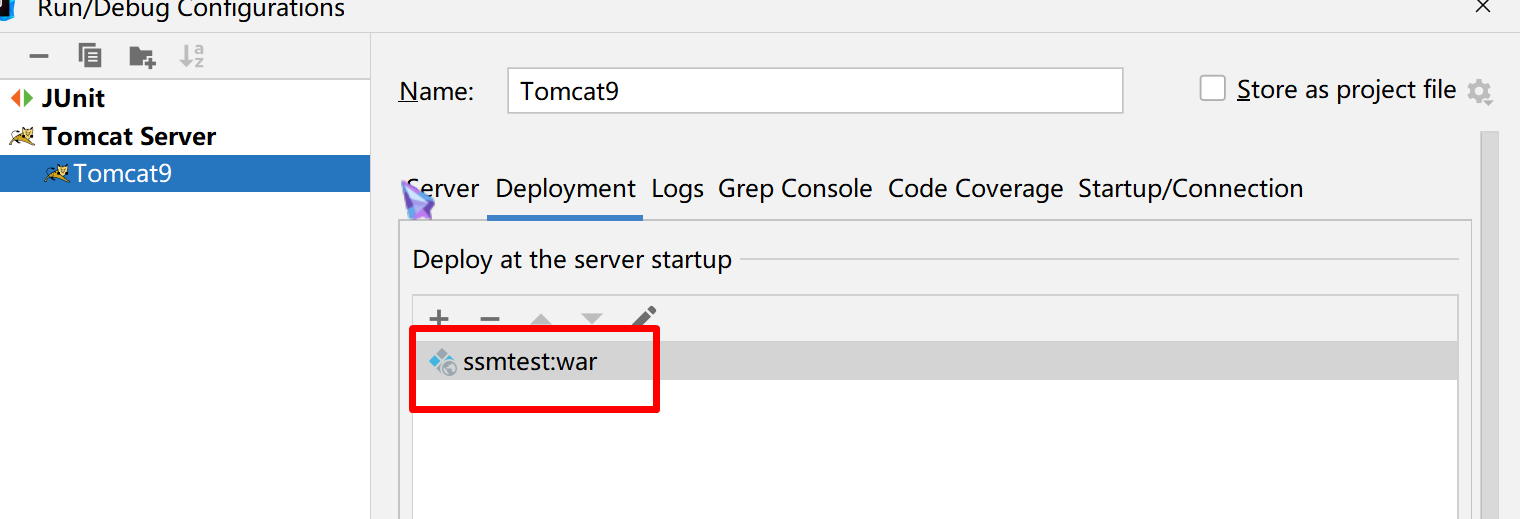
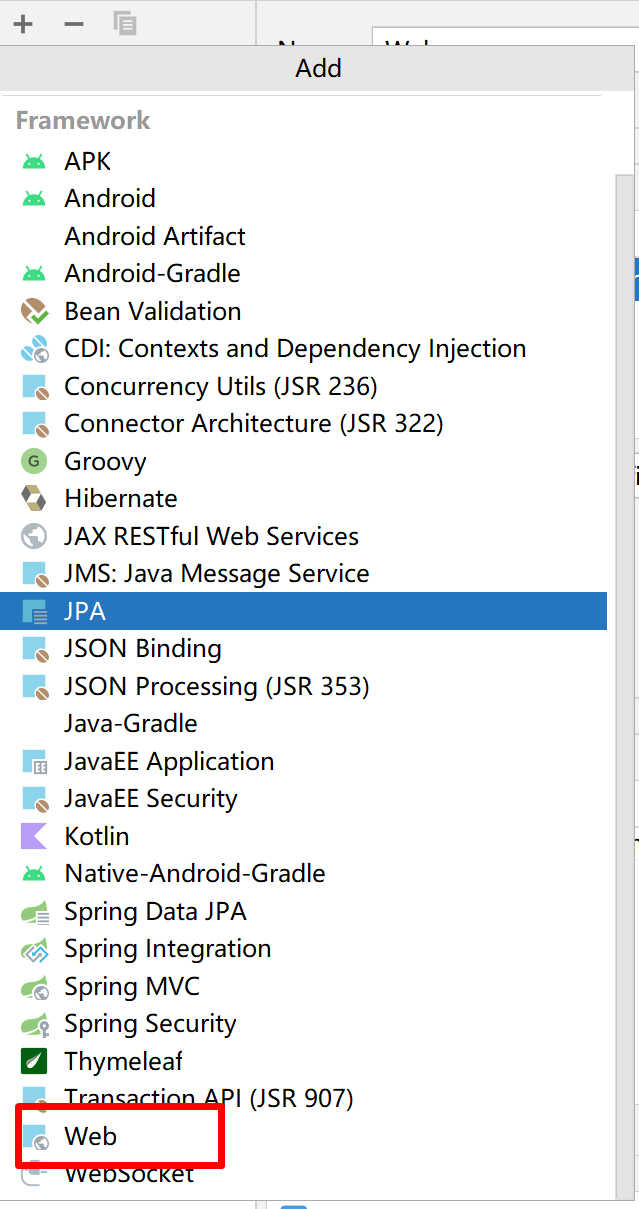
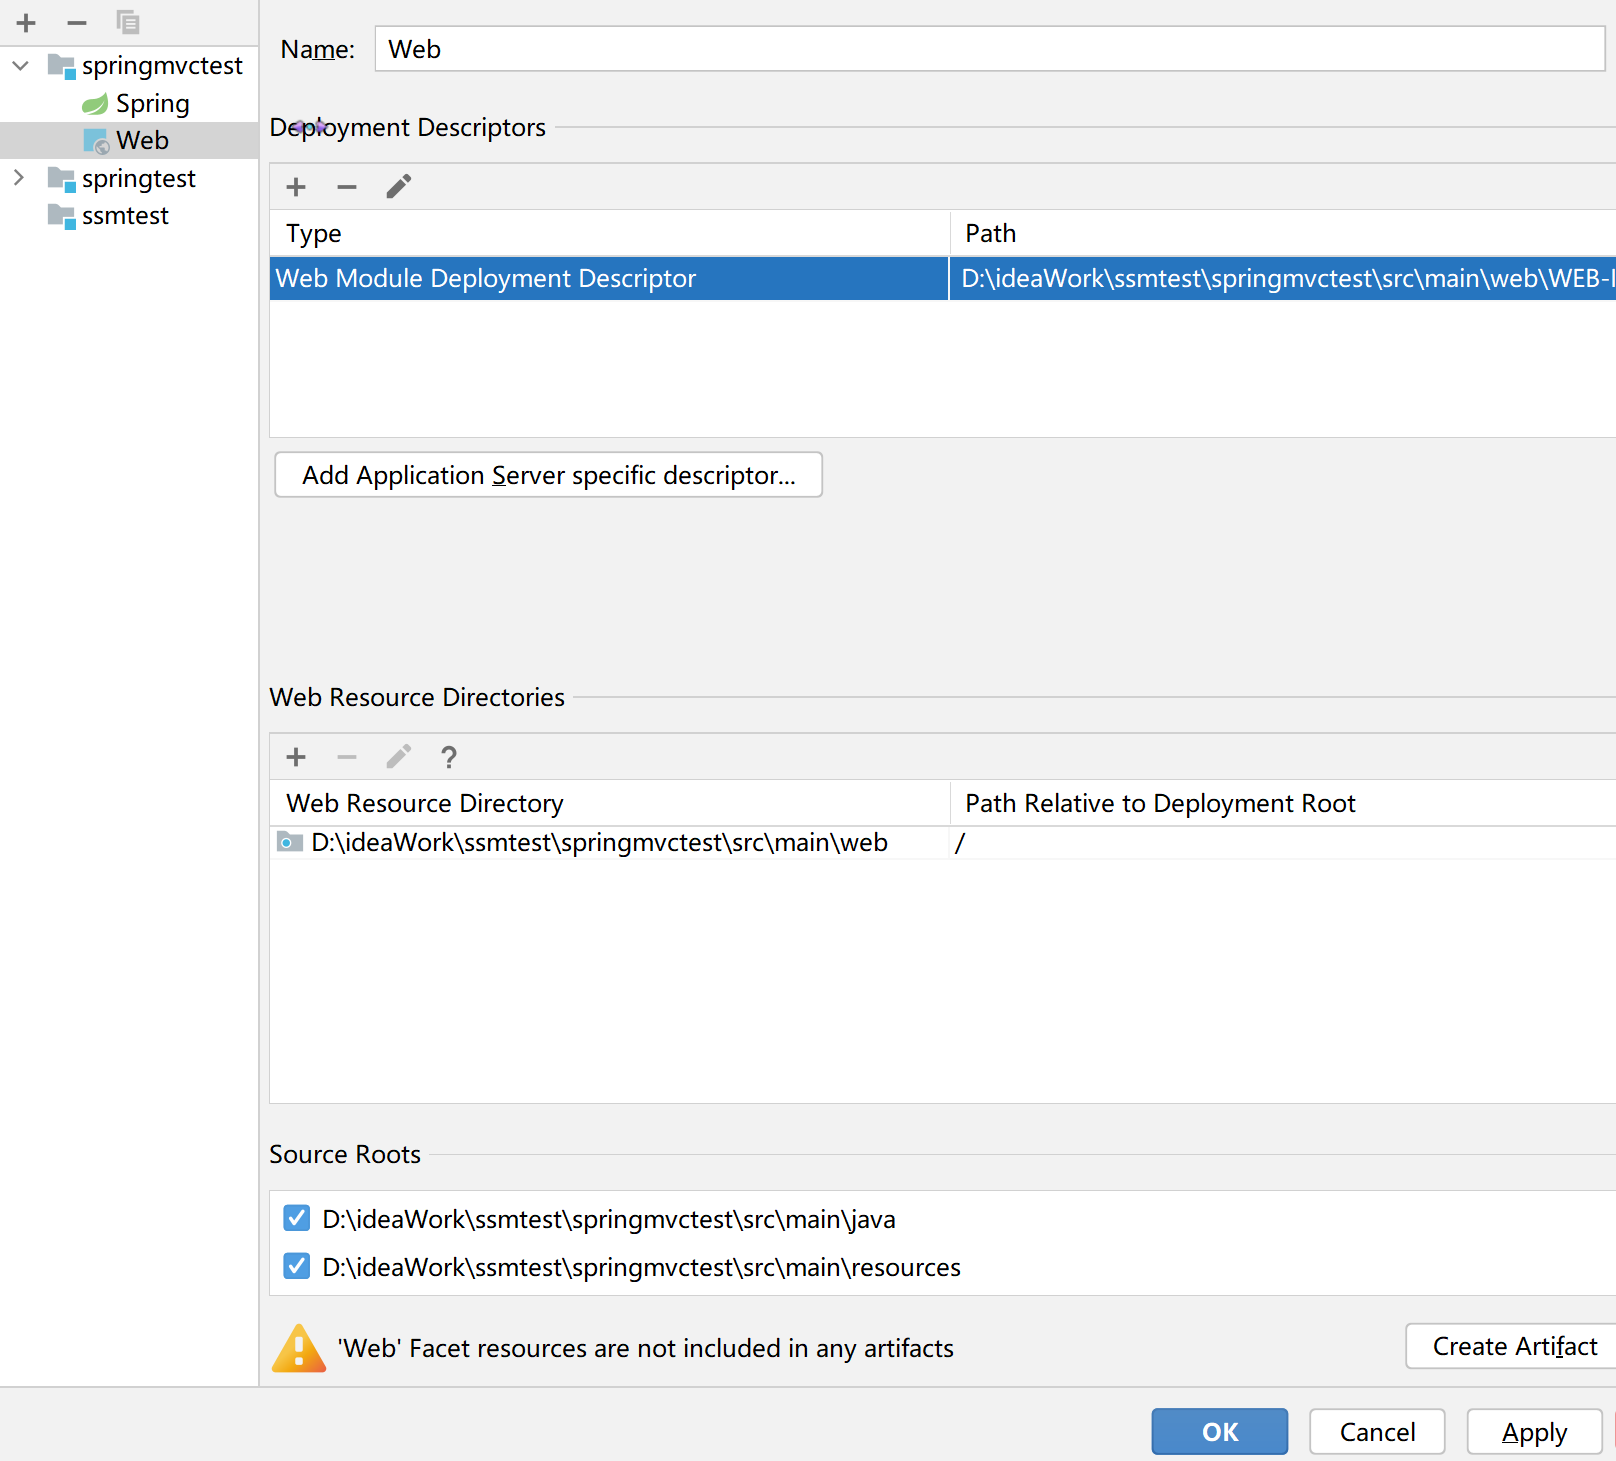
添加TomCat服务器(需要注意spring的版本,如果是spring6需要加载的TomCat10.1以上的版本)
根据使用的spring版本改变tomcat的版本

-
添加依赖
-
springmvc6
<!-- Spring 核心依赖 --> <dependency> <groupId>org.springframework</groupId> <artifactId>spring-context</artifactId> <version>6.0.3</version> </dependency> <!-- SpringMVC依赖--> <dependency> <groupId>org.springframework</groupId> <artifactId>spring-webmvc</artifactId> <version>6.0.3</version> </dependency> <!-- servlet依赖--> <!-- 甲骨文已经把Java EE捐献给Eclipse基金会数年了。Java EE的名称也变更为了Jarkarta EE,包名也相应地从javax变更为jakarta。 如果使用6以前的需要 导入javax.servlet-api 如果使用的是6版本需要导入jakarta.servlet-api --> <dependency> <groupId>jakarta.servlet</groupId> <artifactId>jakarta.servlet-api</artifactId> <version>6.0.0</version> <scope>provided</scope> </dependency> -
springmvc5
<!--  SpringMVC5 的依赖-->
<dependency>
    <groupId>org.springframework</groupId>
    <artifactId>spring-webmvc</artifactId>
    <version>5.3.22</version>
</dependency>

<!-- 甲骨文已经把Java EE捐献给Eclipse基金会数年了。Java EE的名称也变更为了Jarkarta EE,包名也相应地从javax变更为jakarta。
	如果使用6以前的需要 导入javax.servlet-api
	如果使用的是6版本需要导入jakarta.servlet-api
-->
<dependency>
  <groupId>javax.servlet</groupId>
  <artifactId>javax.servlet-api</artifactId>
  <version>4.0.1</version>
  <scope>provided</scope>
</dependency>
-
-
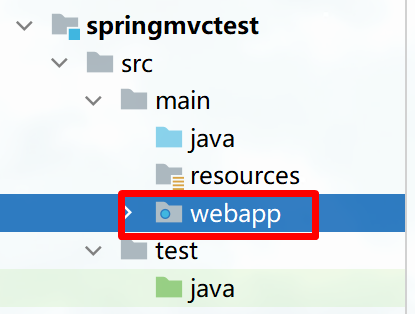
创建webapp文件
-
DispatcherServlet其实也是一个Servlet,而servlet必须要在web.xml中配置,Spring才能找得到(设置成spring启动时就初始化 )
<?xml version="1.0" encoding="UTF-8"?>
<web-app xmlns="http://xmlns.jcp.org/xml/ns/javaee"
         xmlns:xsi="http://www.w3.org/2001/XMLSchema-instance"
         xsi:schemaLocation="http://xmlns.jcp.org/xml/ns/javaee http://xmlns.jcp.org/xml/ns/javaee/web-app_4_0.xsd"
         version="4.0">

    <!--加载xml配置,该元素用来声明应用范围(整个WEB项目)内的上下文初始化参数。-->
    <context-param>
        <param-name>contextConfigLocation</param-name>
        <param-value>classpath:*.xml</param-value>
    </context-param>

    <!--配置过滤器解决乱码的问题(必须先注册 CharacterEncodingFilter,再注册 HiddenHttpMethodFilter【Rest风格,URL路径的映射】等过滤器),编码过滤器在最前面-->
    <filter>
        <filter-name>encodingFilter</filter-name>
        <filter-class>org.springframework.web.filter.CharacterEncodingFilter</filter-class>
        <init-param>
            <param-name>encoding</param-name>
            <param-value>UTF-8</param-value>
        </init-param>
        <!--如果不设置forceEncoding,则只设置请求编码,如果设为true则设置请求和响应编码-->
        <init-param>
            <param-name>forceEncoding</param-name>
            <param-value>true</param-value>
        </init-param>
    </filter>
    <filter-mapping>
        <filter-name>encodingFilter</filter-name>
        <url-pattern>/*</url-pattern>
    </filter-mapping>

    <!--配置一个DispatchServlet,springMVC的核心-->
    <servlet>
        <servlet-name>springmvc</servlet-name>
        <servlet-class>org.springframework.web.servlet.DispatcherServlet</servlet-class>
        <!-- springMVC的配置文件默认在WEB-INF下,如果在resources下创建了,需要使用 init-param 加载-->
        <init-param>
            <param-name>contextConfigLocation</param-name>
            <param-value>classpath:springmvc.xml</param-value>
        </init-param>
        <!--启动级别1:项目启动时直接进行:类加载->实例化->init初始化 -->
        <load-on-startup>1</load-on-startup>
    </servlet>
    <servlet-mapping>
        <servlet-name>springmvc</servlet-name>
        <!-- /所匹配的请求可以是/login或.html或.js或.css方式的请求路径,但是/不能匹配.jsp请求路径的请求
             /*则能够匹配所有请求
        -->
        <url-pattern>/</url-pattern>
    </servlet-mapping>

</web-app>
3.1.2、搭建JSP页面
先导入支持JSP页面的依赖
<!--使用jsp页面的依赖 -->
<dependency>
  <groupId>javax.servlet.jsp</groupId>
  <artifactId>jsp-api</artifactId>
  <version>2.2</version>
</dependency>
<dependency>
  <groupId>javax.servlet</groupId>
  <artifactId>jstl</artifactId>
  <version>1.2</version>
</dependency>
在resources下配置SpringMVC的 xml配置文件,创建视图解析器,用于拼接jsp相关页面
<?xml version="1.0" encoding="UTF-8"?>
<beans xmlns="http://www.springframework.org/schema/beans"
       xmlns:xsi="http://www.w3.org/2001/XMLSchema-instance"
       xmlns:mvc="http://www.springframework.org/schema/mvc"
       xmlns:context="http://www.springframework.org/schema/context"
       xsi:schemaLocation="http://www.springframework.org/schema/beans
           http://www.springframework.org/schema/beans/spring-beans.xsd
           http://www.springframework.org/schema/mvc
           http://www.springframework.org/schema/mvc/spring-mvc.xsd
           http://www.springframework.org/schema/context
           http://www.springframework.org/schema/context/spring-context.xsd">

    <!-- jsp的视图解析器,用来查找视图,前缀++后缀 自动组装-->
    <bean id="InternalResourceViewResolver" class="org.springframework.web.servlet.view.InternalResourceViewResolver">
        <property name="viewClass" value="org.springframework.web.servlet.view.JstlView"/>
        <property name="prefix" value="/WEB-INF/"/>
        <property name="suffix" value=".jsp"/>
    </bean>

    <!--配置包的自动扫描。springMVC会在这些包下面扫描controller注解-->
    <context:component-scan base-package="controller路径"/>

    <!--开启mvc注解驱动,解决乱码问题-->
    <mvc:annotation-driven>
        <mvc:message-converters>
            <bean class="org.springframework.http.converter.StringHttpMessageConverter">
                <property name="supportedMediaTypes">
                    <list>
                        <value>text/plain;charset=UTF-8</value>
                        <value>text/html;charset=UTF-8</value>
                        <value>application/json;charset=UTF-8</value>
                        <value>application/x-www-form-urlencoded;charset=UTF-8</value>
                    </list>
                </property>
            </bean>
        </mvc:message-converters>
    </mvc:annotation-driven>
</beans>
配置好前面那些其实就已经可以运行了,运行后会自动打开 index.jsp页面
创建页面和controller进行视图跳转
<%@ page contentType="text/html;charset=UTF-8" language="java" %>
<html>
<head>
    <title>Title</title>
</head>
<body>
	${msg}
</body>
</html>
@Controller		//注解表示为一个控制器,要配置包的扫描
public class HelloController {

	//访问到这个方法的路径
    @RequestMapping("/hello")
    public String test(Model model){	//model操作视图内容
        model.addAttribute("msg","欢迎你啊!!!!");
       //跳转到jsp页面。路径为:视图解析器前缀+jsppage/hello+后缀
       return "jsppage/hello";
    }
}
3.1.3、Thymeleaf模板
Thymeleaf 是一款模板引擎,主要用于前后端分离时使用,它既可以静态显示,也可以通过web访问实现动态显示,是SpringBoot中大力推崇的一套模板引擎。
它是用来代替JSP使用的,JSP 页面中常常会掺杂这一些后端的 Java 代码,不太符合前后端分离的思想,所以现在都陆续使用其他技术来代替 JSP ,而 Thymeleaf 就是其中较为优秀的技术之一。
SpringMVC使用 Thymeleaf 需要先导入相关的依赖:
<!--  thymeleaf的依赖  -->
<dependency>
    <groupId>org.thymeleaf</groupId>
    <artifactId>thymeleaf-spring5</artifactId>
    <version>3.0.15.RELEASE</version>
</dependency>

<!--  html、xml解析器-->
<dependency>
    <groupId>org.attoparser</groupId>
    <artifactId>attoparser</artifactId>
    <version>2.0.5.RELEASE</version>
</dependency>

<!--转义反转义词库-->
<dependency>
    <groupId>org.unbescape</groupId>
    <artifactId>unbescape</artifactId>
    <version>1.1.6.RELEASE</version>
</dependency>
然后在springmvc的配置文件中配置Thymeleaf的视图解析器,Thymeleaf 使用的HTML 页面,所以需要重新配置视图解析器,使用 Thymeleaf,并解析HTML页面。
<?xml version="1.0" encoding="UTF-8"?>
<beans xmlns="http://www.springframework.org/schema/beans"
       xmlns:xsi="http://www.w3.org/2001/XMLSchema-instance"
       xmlns:mvc="http://www.springframework.org/schema/mvc"
       xmlns:context="http://www.springframework.org/schema/context"
       xsi:schemaLocation="http://www.springframework.org/schema/beans
           http://www.springframework.org/schema/beans/spring-beans.xsd
           http://www.springframework.org/schema/mvc
           http://www.springframework.org/schema/mvc/spring-mvc.xsd
           http://www.springframework.org/schema/context
           http://www.springframework.org/schema/context/spring-context.xsd">

    <!--配置包的自动扫描。springMVC会在这些包下面扫描controller注解-->
    <context:component-scan base-package="controller路径"/>

    <!--视图解析器 解析thymeleaf -->
    <bean class="org.thymeleaf.spring5.view.ThymeleafViewResolver">
        <property name="order" value="1"/>
        <property name="characterEncoding" value="UTF-8"/>
        <property name="templateEngine">
            <bean class="org.thymeleaf.spring5.SpringTemplateEngine">
                <property name="templateResolver">
                    <bean class="org.thymeleaf.spring5.templateresolver.SpringResourceTemplateResolver">
                        <!-- 视图前缀 -->
                        <property name="prefix" value="/WEB-INF/templates/"/>
                        <!-- 视图后缀 -->
                        <property name="suffix" value=".html"/>
                        <property name="templateMode" value="HTML5"/>
                        <property name="characterEncoding" value="UTF-8"/>
                    </bean>
                </property>
            </bean>
        </property>
    </bean>
</beans>
编写 HTML页面,然后使用Controller进行跳转:
<!DOCTYPE html>
<html lang="en" xmlns:th="http://www.thymeleaf.org">
    <head>
        <meta charset="UTF-8">
        <title>Title</title>
    </head>
    <body>
        <!--th:text="${name}+你好啊" 模板属性,只有web访问时才会解析进行显示-->
        <h1 th:text="${name}+你好啊">hello</h1>
    </body>
</html>
@Controller
public class SpringMVC5TestController {
    //跳转到主页
    @RequestMapping({"/","/index"})
    public String intdex(){
        return "index";
    }

    @RequestMapping("/hello")
    public void hello(Model model){
        System.out.println("执行");
        model.addAttribute("name","yu");
    }
}
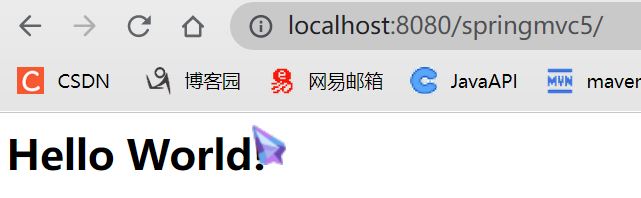
不用web访问时静态页面:

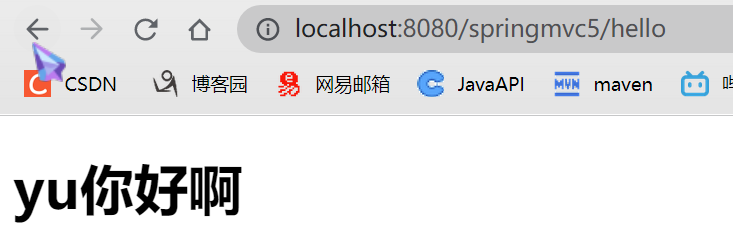
web访问动态页面


 324
324


 被折叠的 条评论
为什么被折叠?
被折叠的 条评论
为什么被折叠?
 到【灌水乐园】发言


