


前言
通过断点调试理解 NodeJS & CommonJS 的模块机制,先说结论:
- NodeJS 中每个文件视作一个模块,每个模块默认可以访问
module、exports、require、__filename、__dirname变量 - NodeJS 中通过将模块源码包裹在 Wrapper 函数中,并通过调用函数传递参数的方式传递默认变量
- 通过
vm模块 的runInThisContext方法 生成 Wrapper 函数,使用eval和new Function的方式生成都会出现作用域问题,eval的作用域为当前上下文,new Function的作用域为全局上下文
示例代码:
const path = require("path");
const fs = require("fs");
const vm = require("vm");

function myRequire(_path) {
  // 计算决定路径
  const absolatePath = /* ... */;
  // 计算文件名
  const filename = /* ... */;

  // 读取文件源码
  const sourceCode = fs.readFileSync(absolatePath, 'utf-8');
  // 生成 Wrapper 函数
  const fn = vm.runInThisContext(
    `(function (exports, module, require, __filename, __dirname) { ${sourceCode} });`
  );

  // 定义 module
  const module = { exports: {} };

  // 调用 Wrapper 函数,此时 module 代码执行,并为 module.exports 赋值
  fn.apply(module.exports, [module.exports, module, myRequire, filename, absolatePath]);

  return module.exports;
}
大致的流程如此,后面是调试流程,长文警告。
准备调试
调试流程:
新建目录,在目录根路径执行:
npm init -y
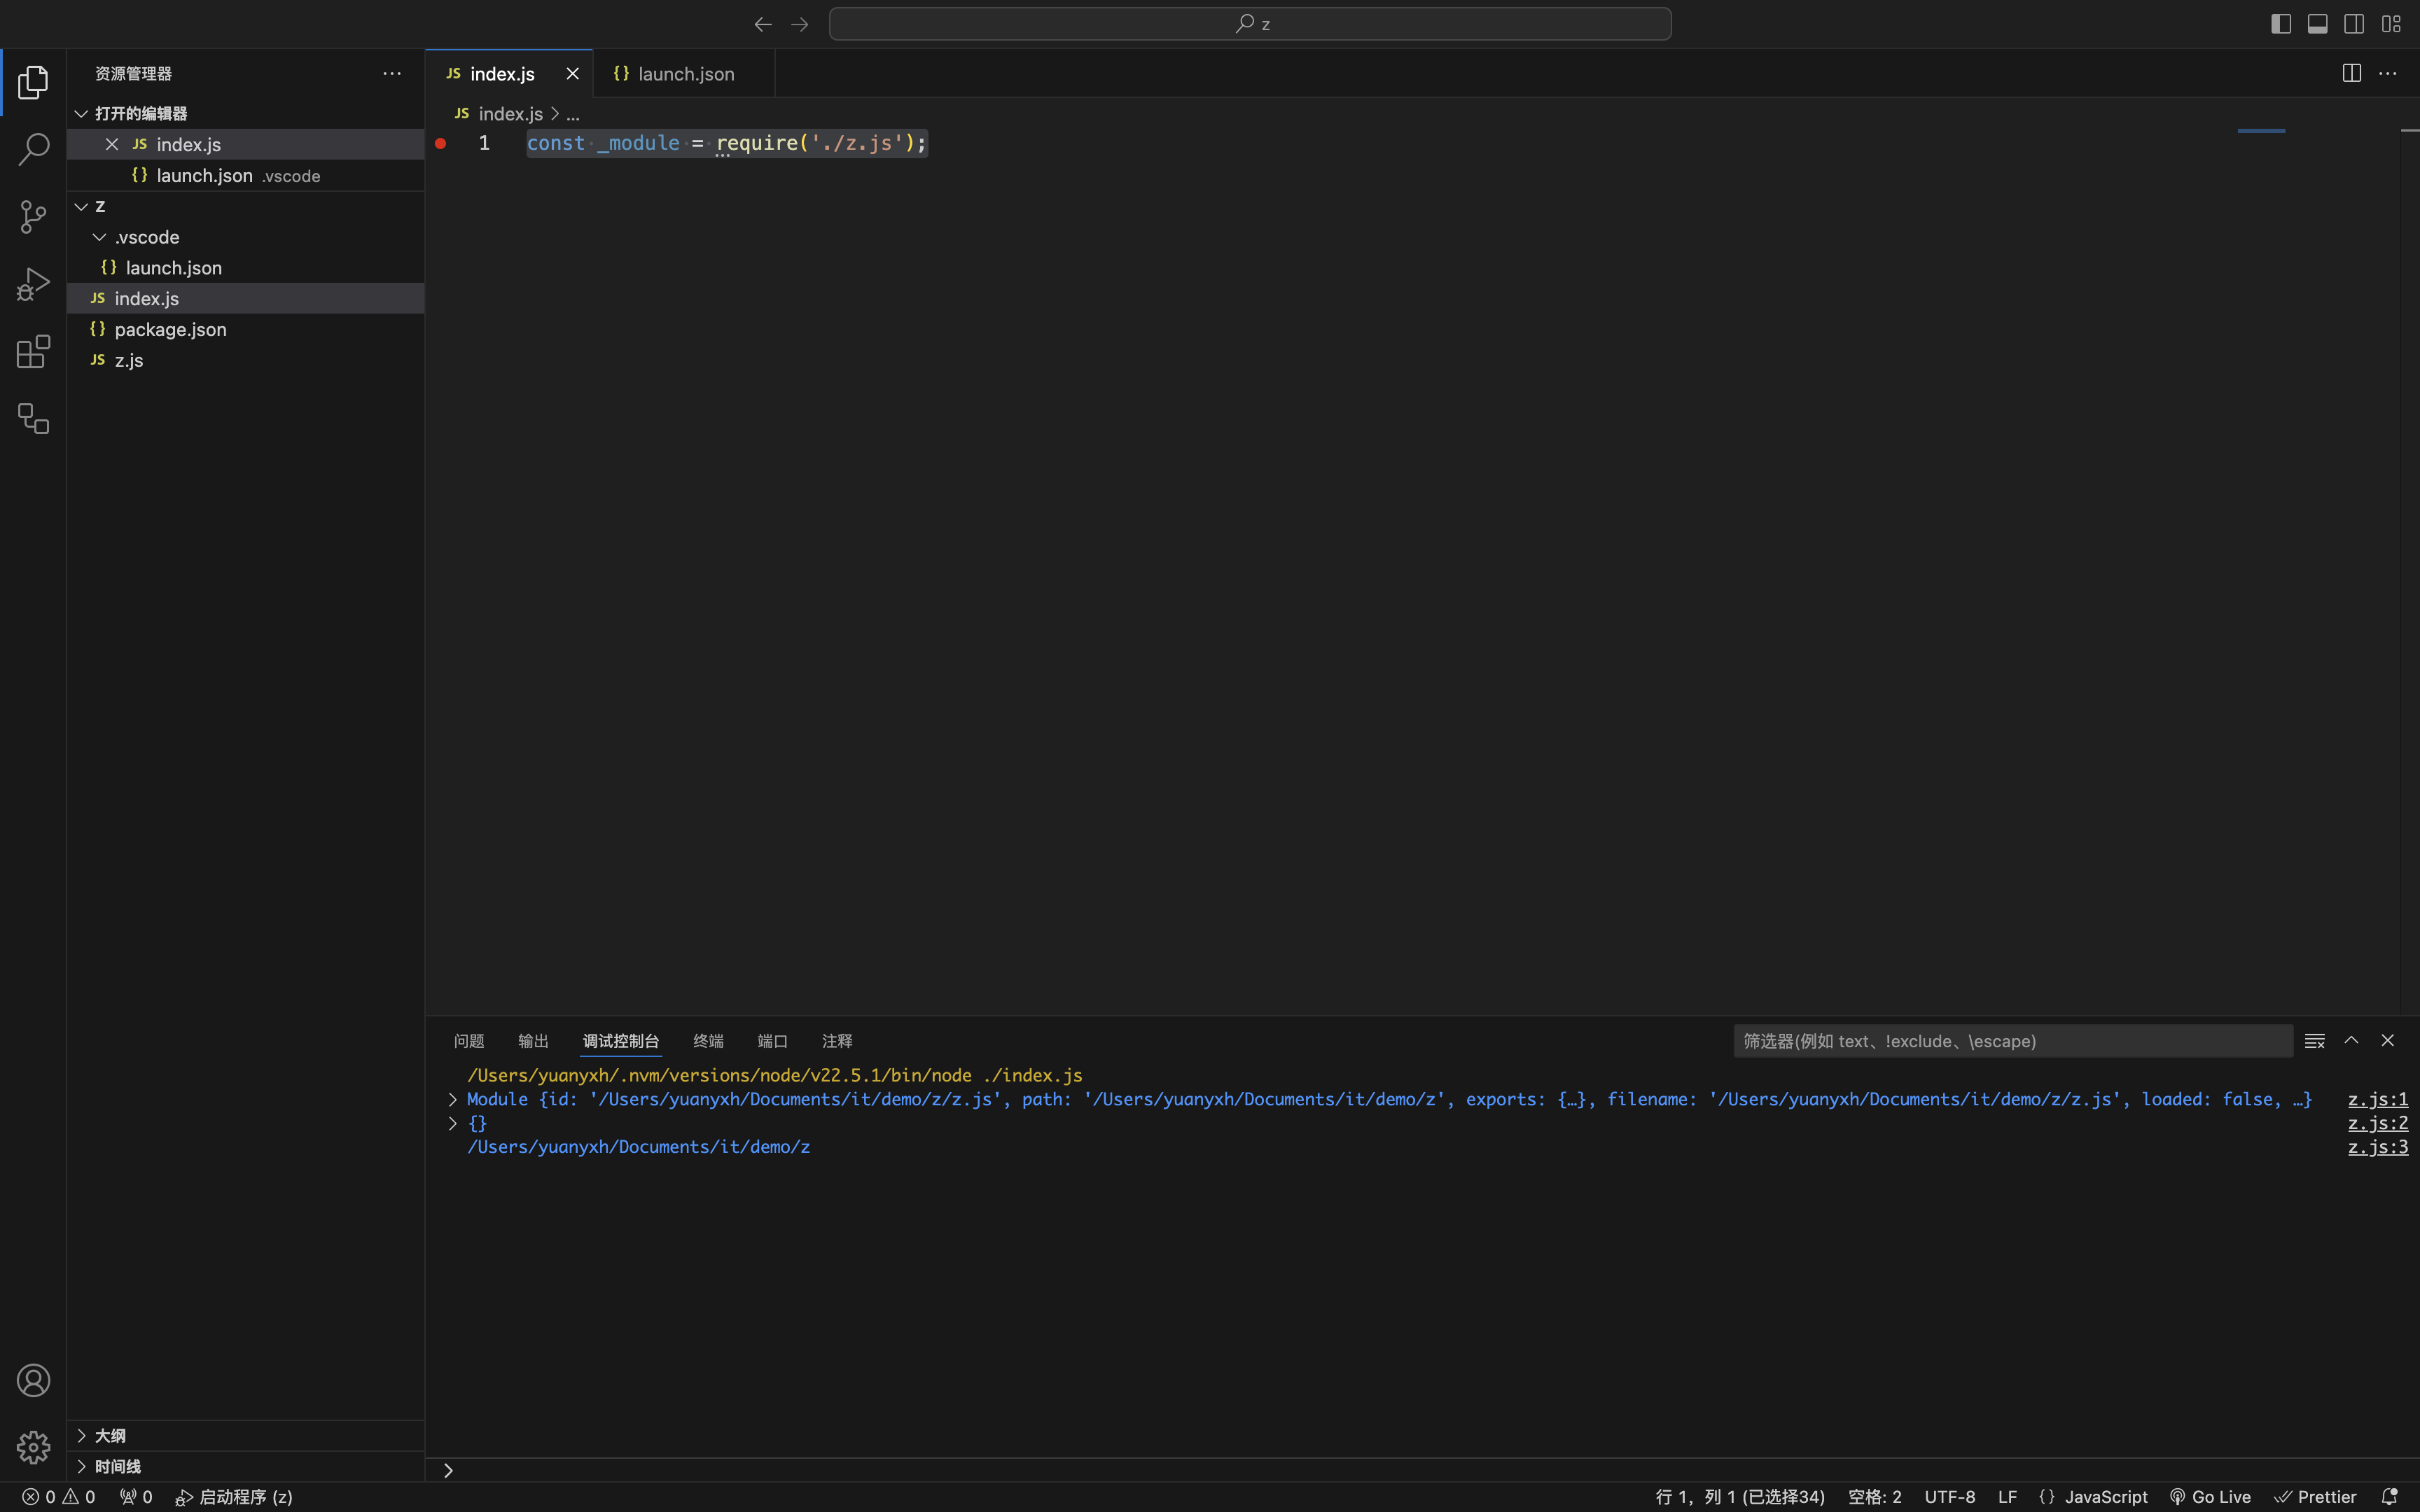
新建 index.js 文件,写点代码,并在首行代码处打上断点:
新建 /.vscode/launch.json vscode 调试配置文件:
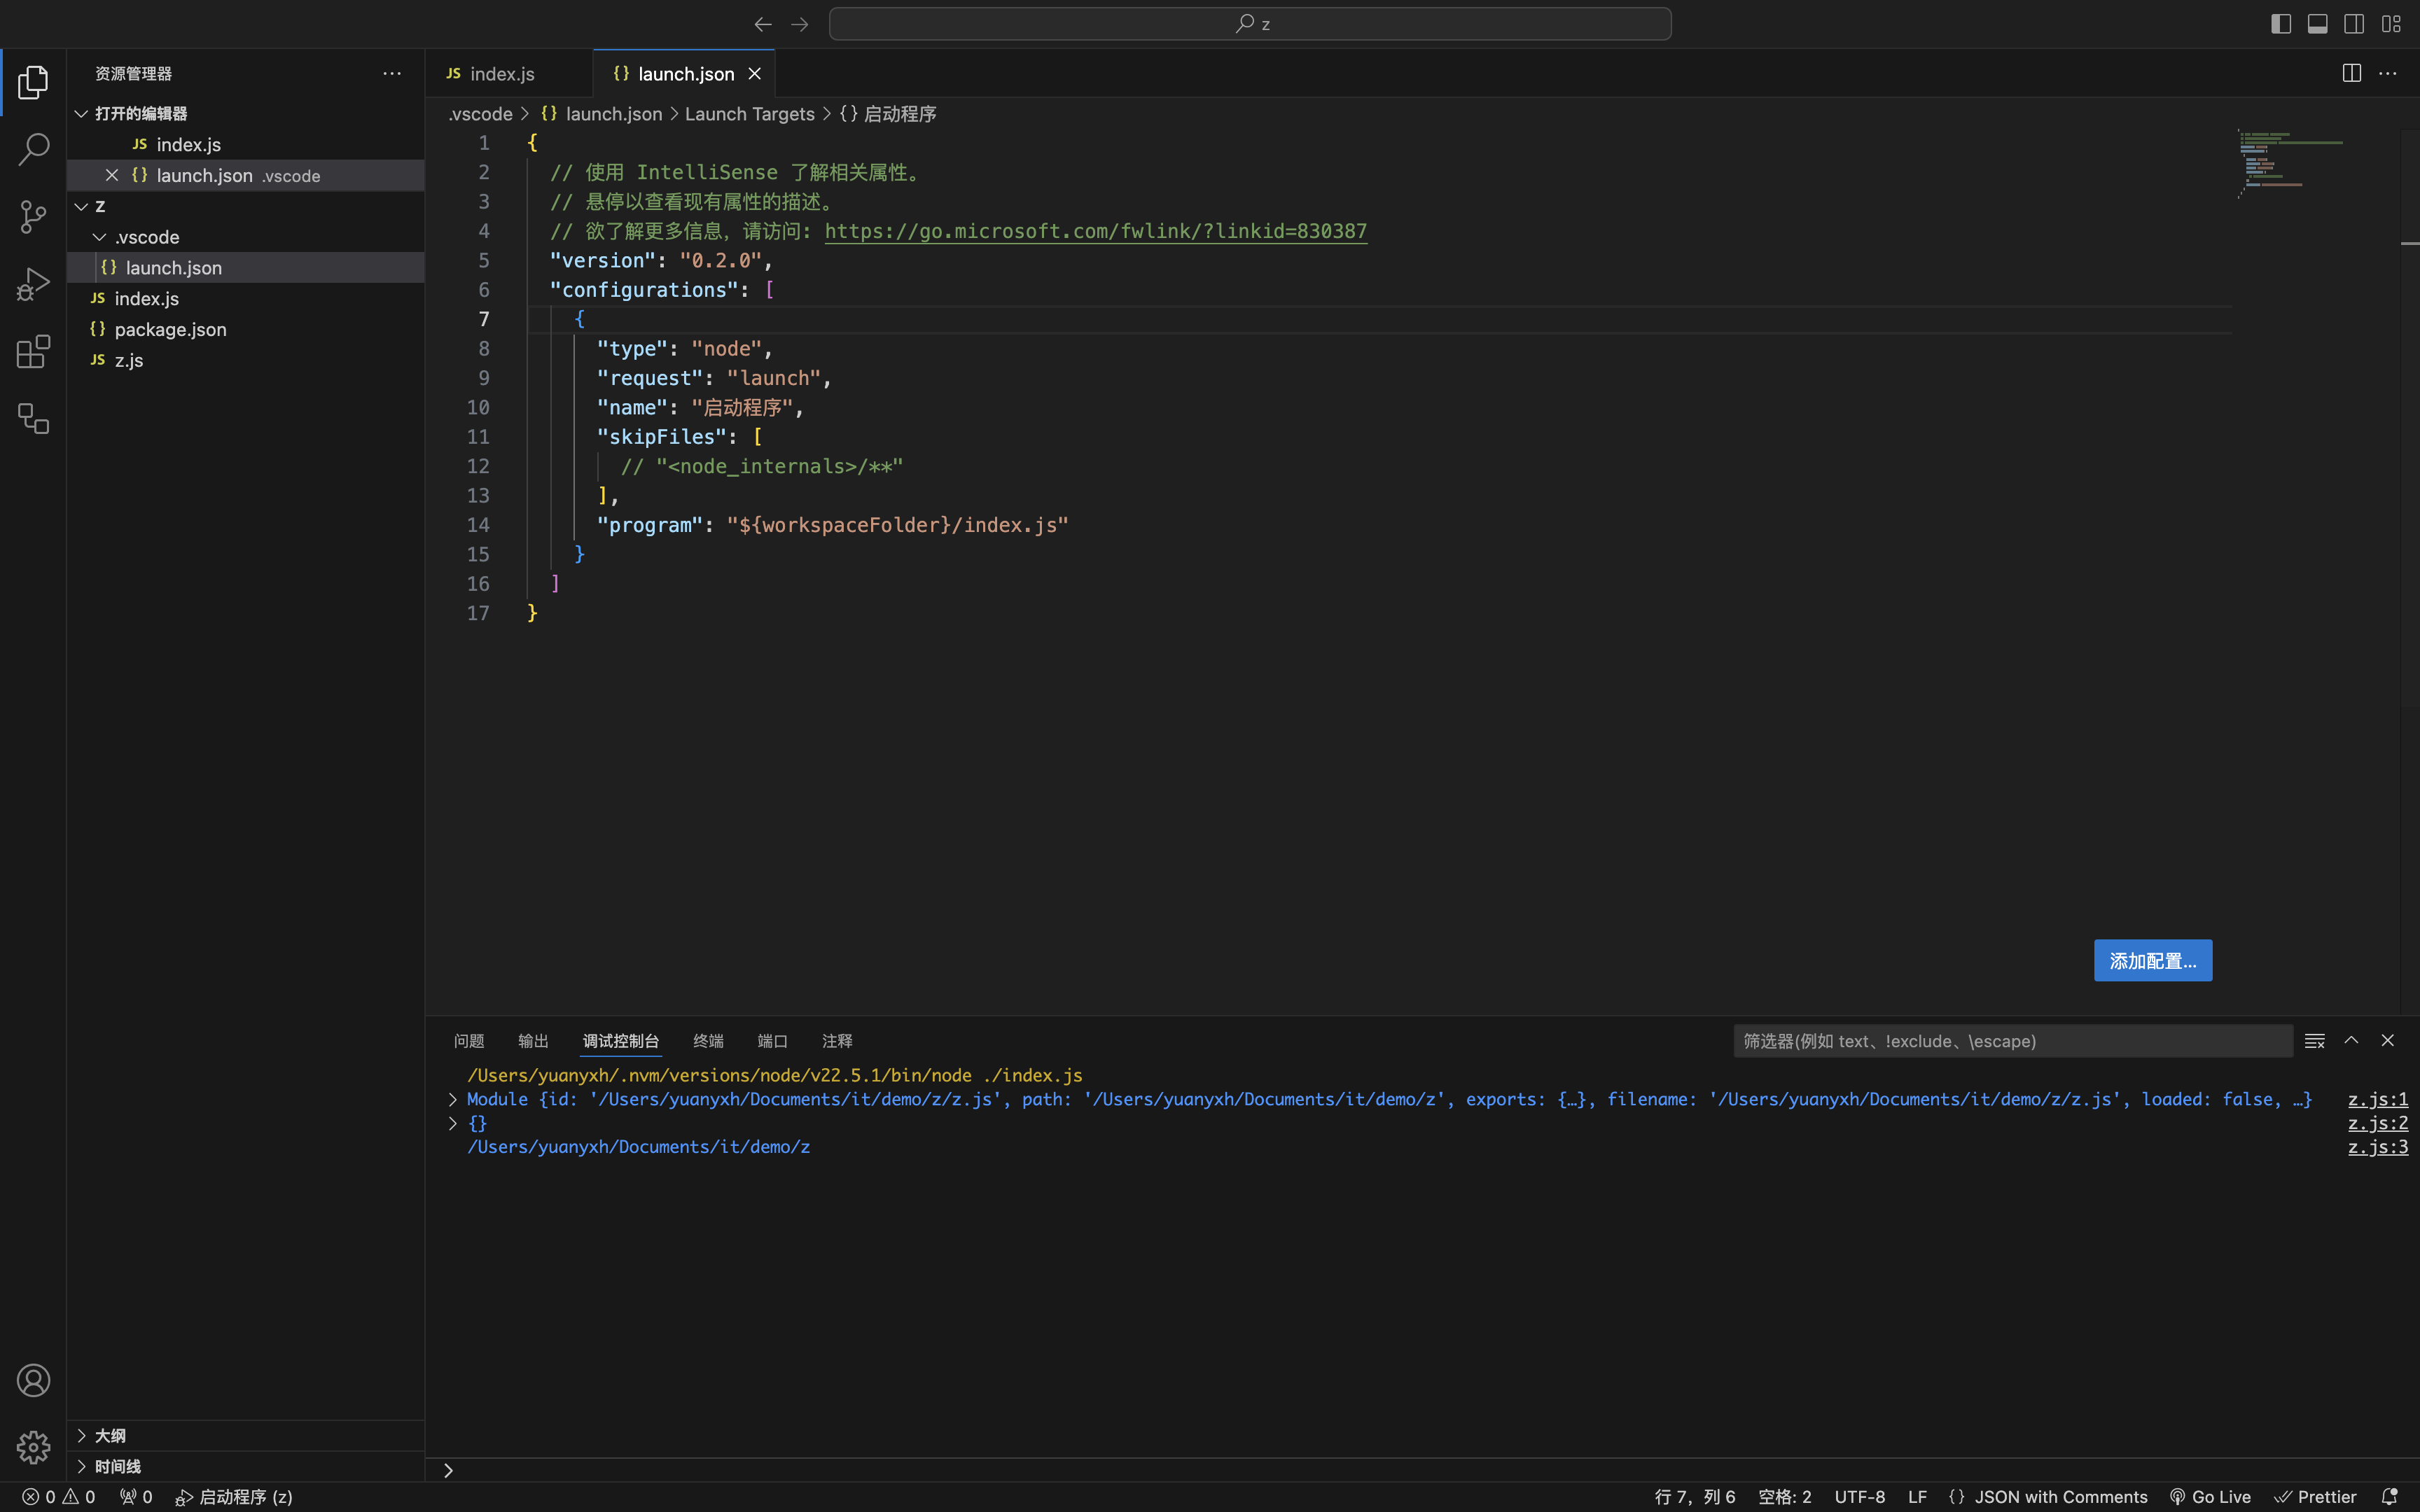
简单说下调试配置项:
- type:调试类型,node 表示 node 程序
- request:请求类型,这里是启动
- name:调试配置名称
- skipFiles:配置调试过程中跳过的文件,默认跳过 node 内部代码文件,我们需要调试 node 的启动流程,所以这里将他注释
- program:程序所在的位置
在 vscode 左侧调试面板中,选择我们的配置并运行调试,默认会跳过 node 的启动流程,直接断到我们编写的程序中:
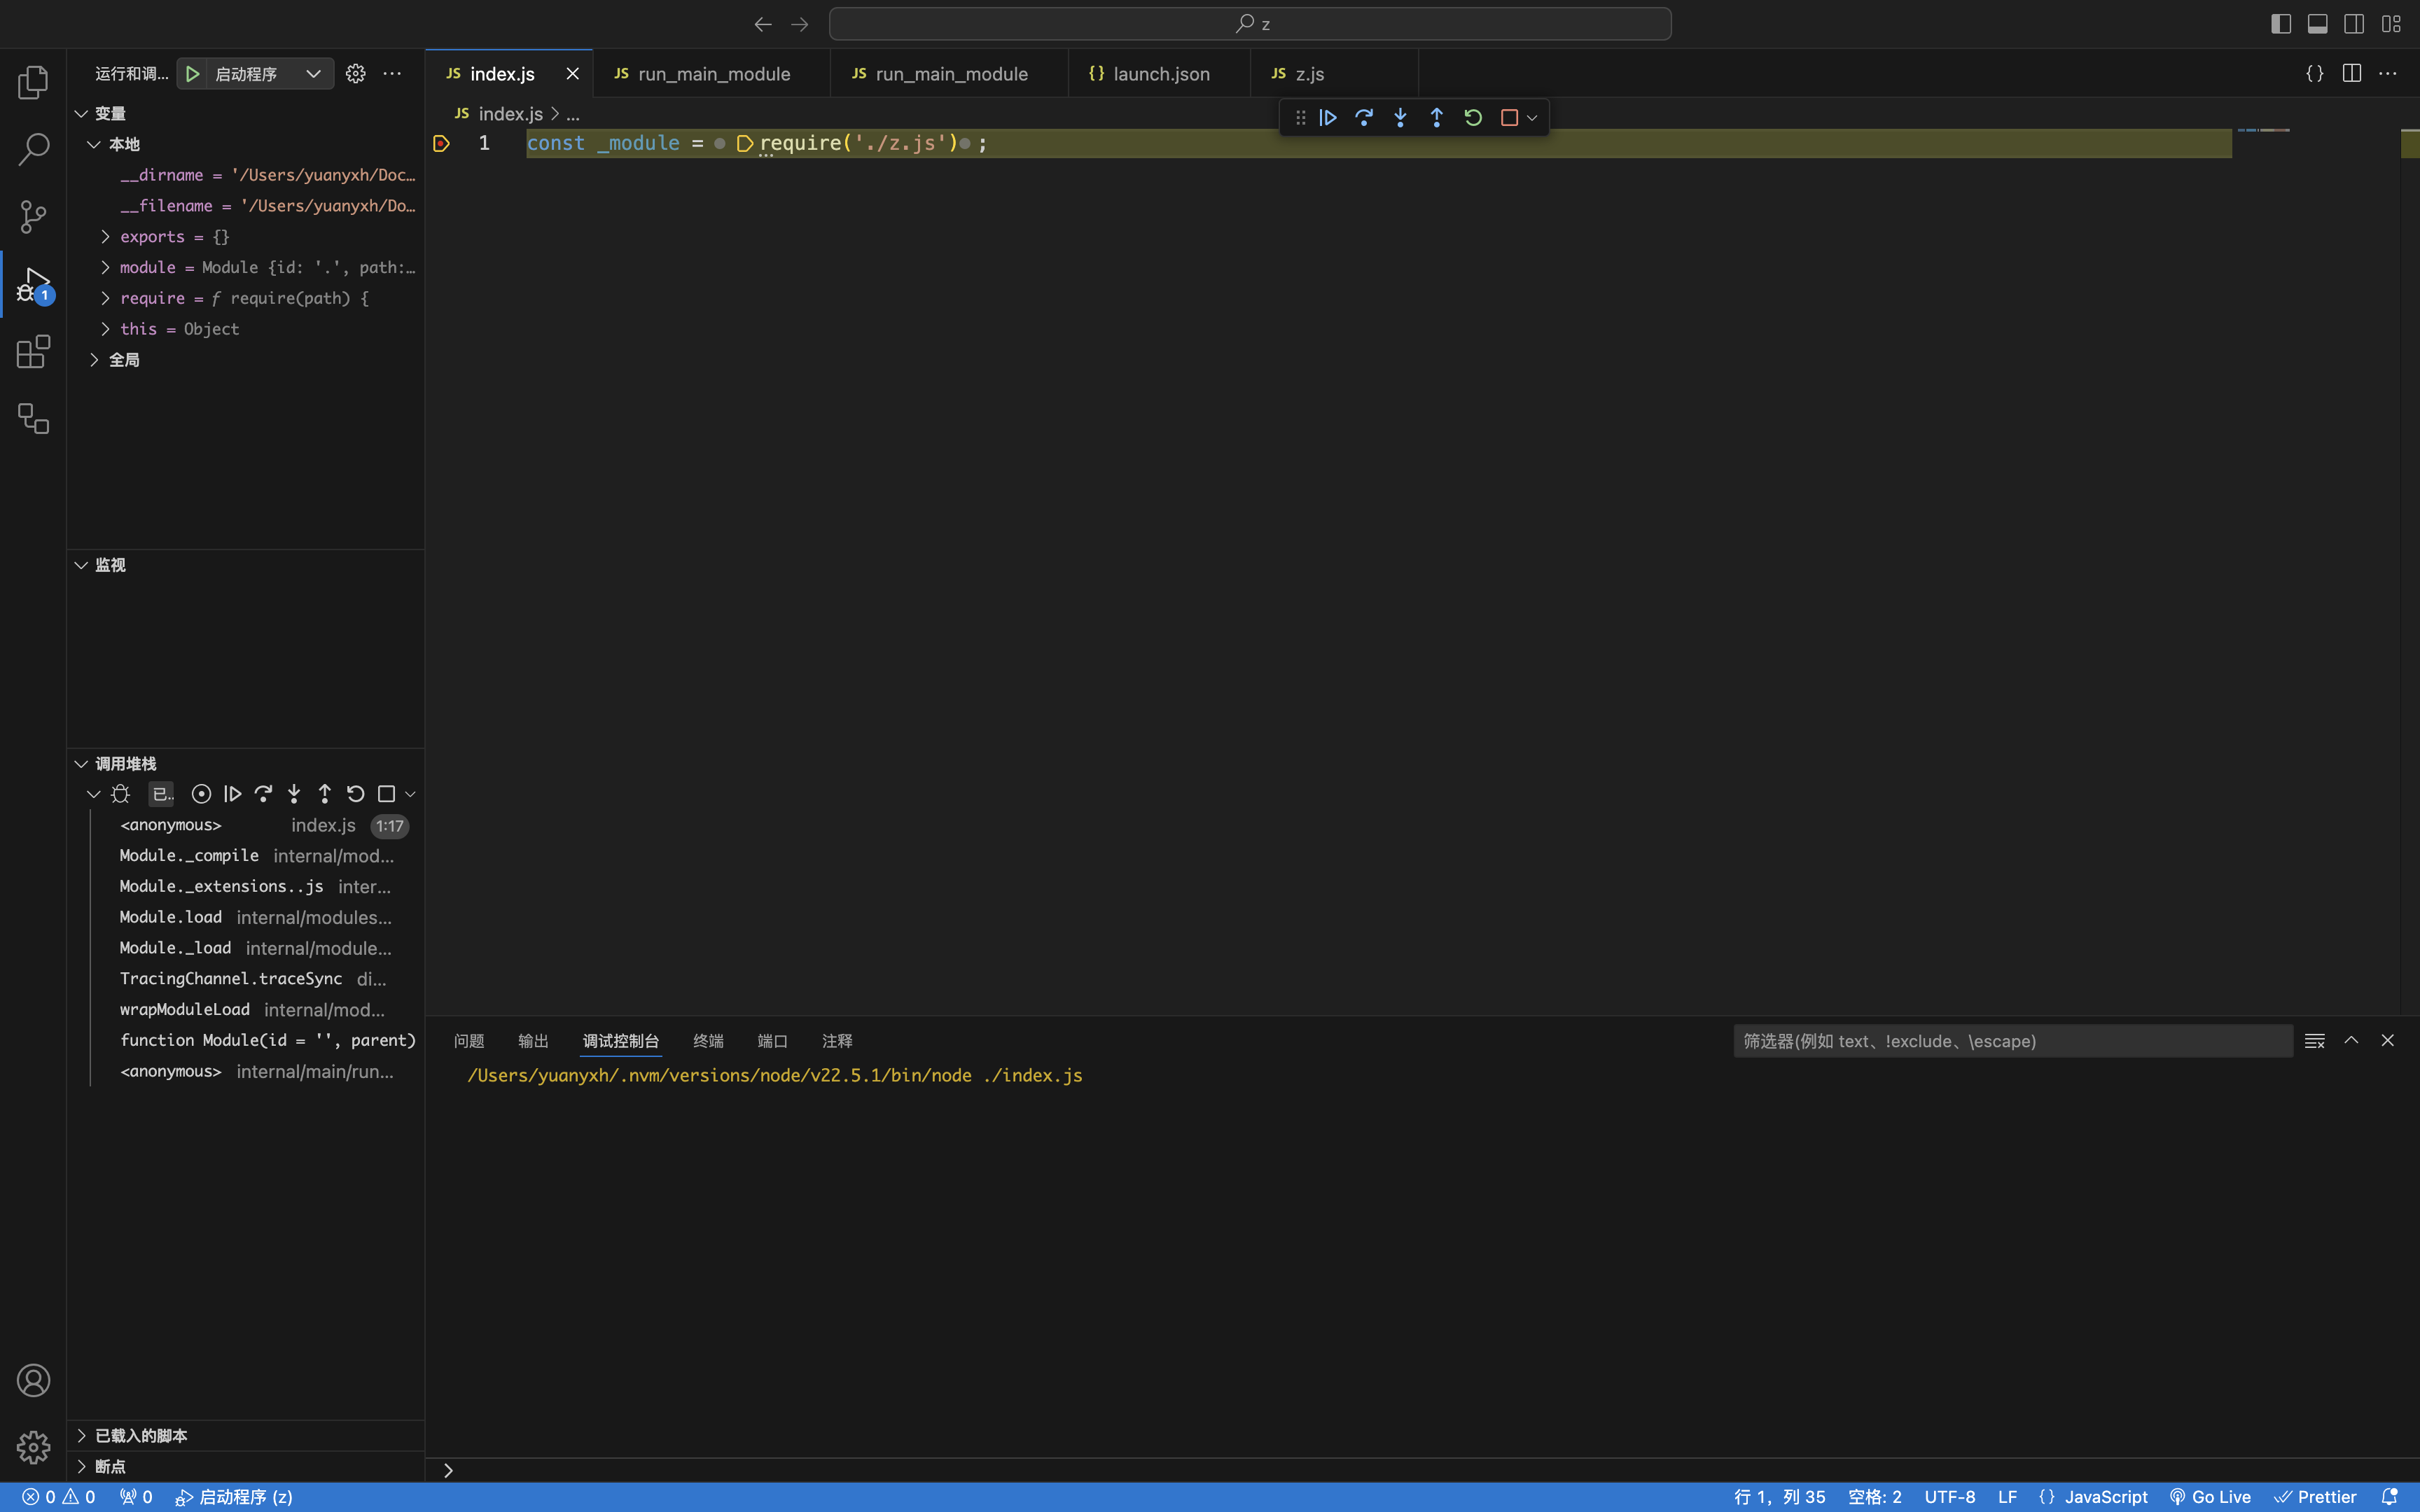
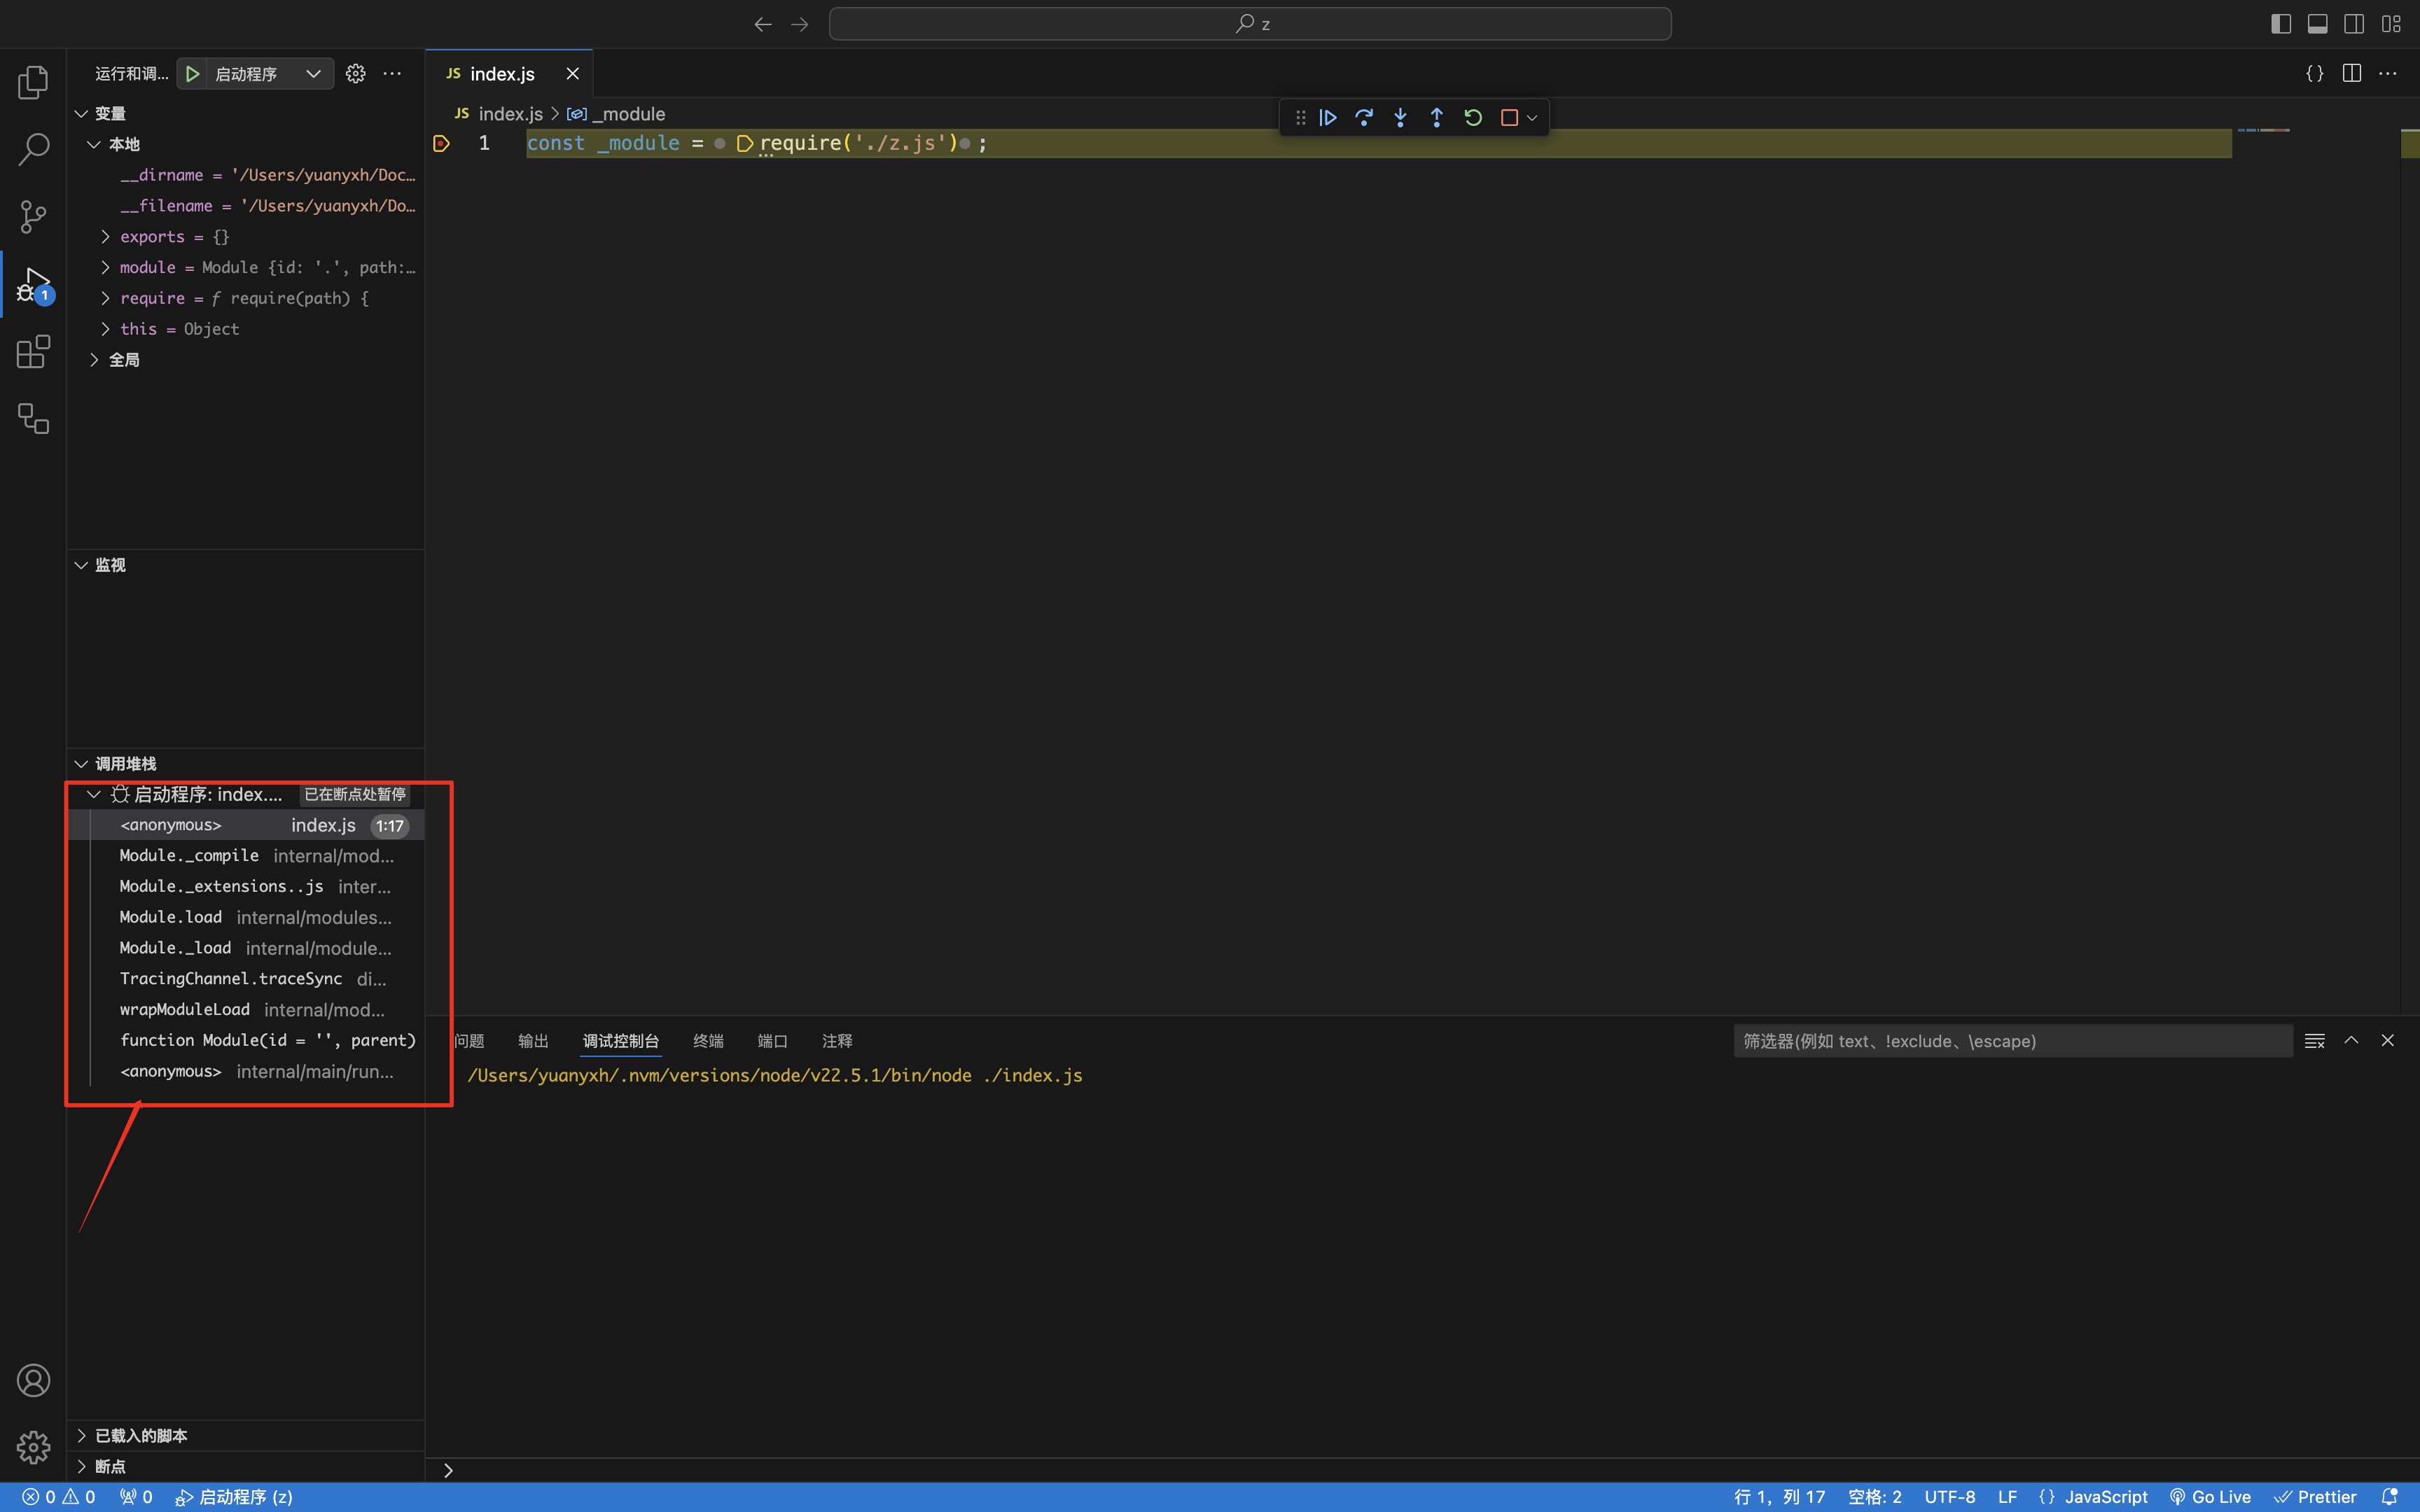
但是可以看到左下角列出来经过的全部程序,我们直接在首先启动的程序文件中打上断点:
接下来就可以开始愉快的调试了。
流程调试
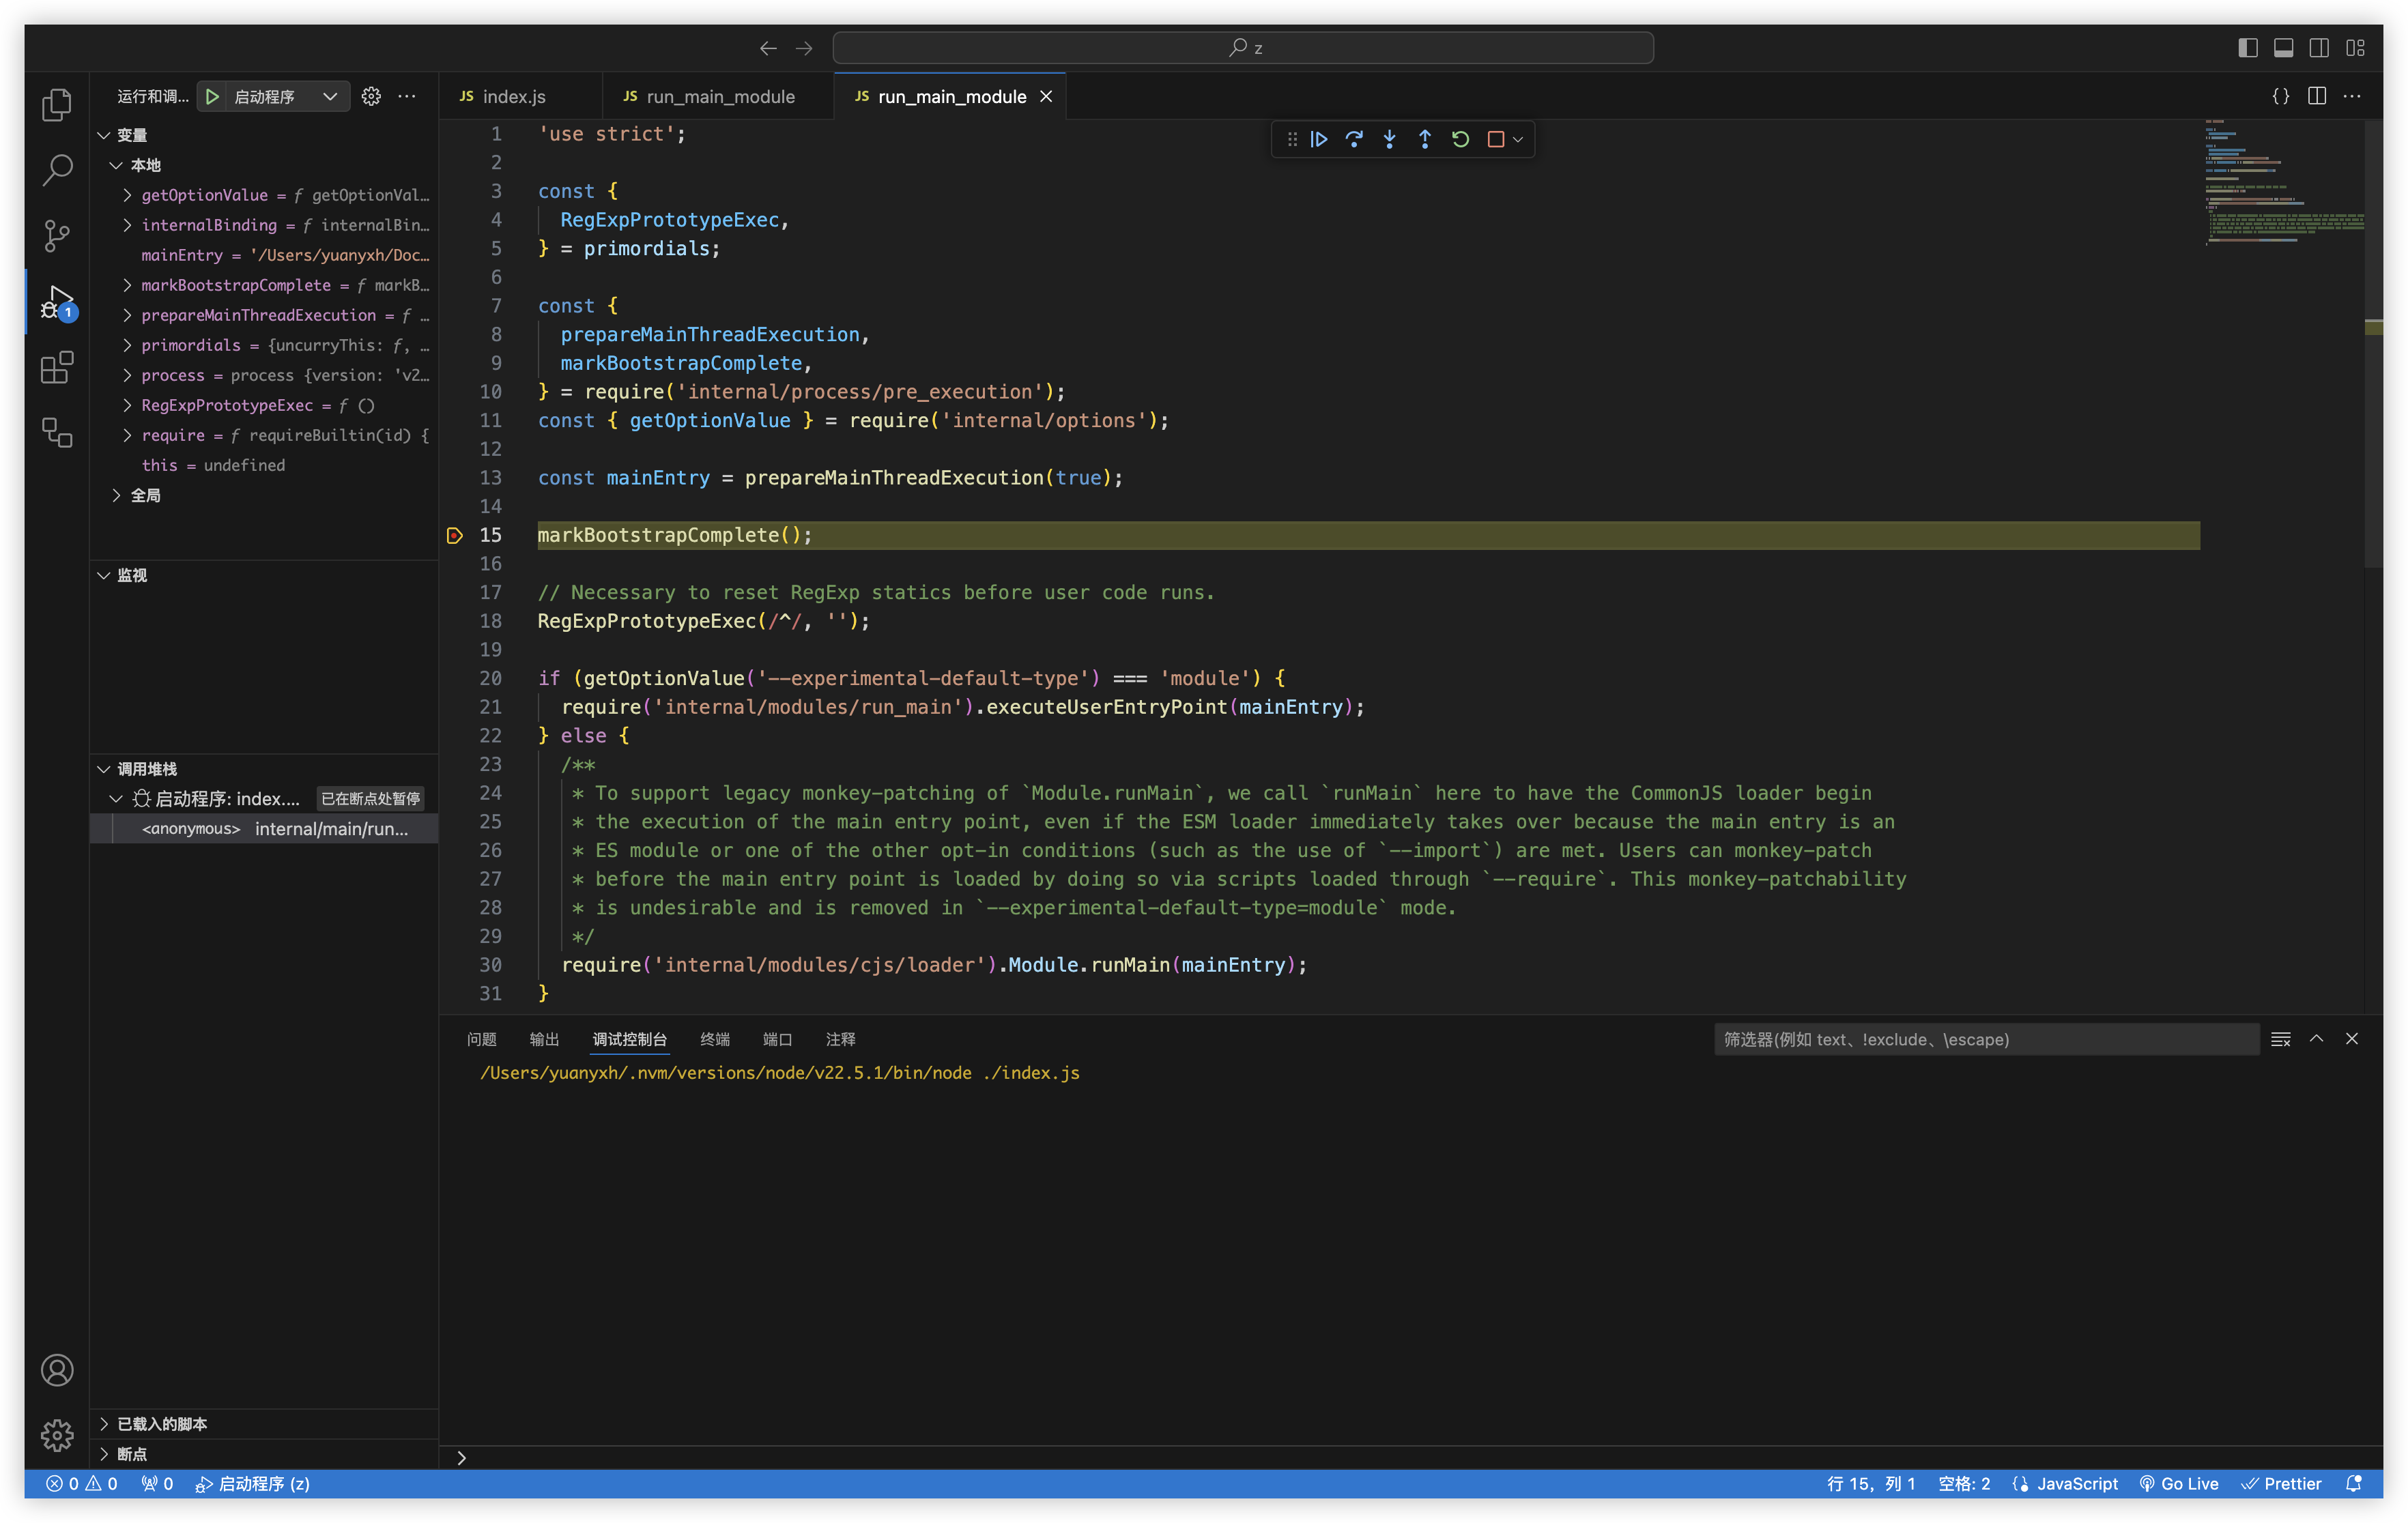
查看最先执行的程序代码:
/**
 * other code in here...
 */

if (getOptionValue('--experimental-default-type') === 'module') {
  require('internal/modules/run_main').executeUserEntryPoint(mainEntry);
} else {
  require('internal/modules/cjs/loader').Module.runMain(mainEntry);
}
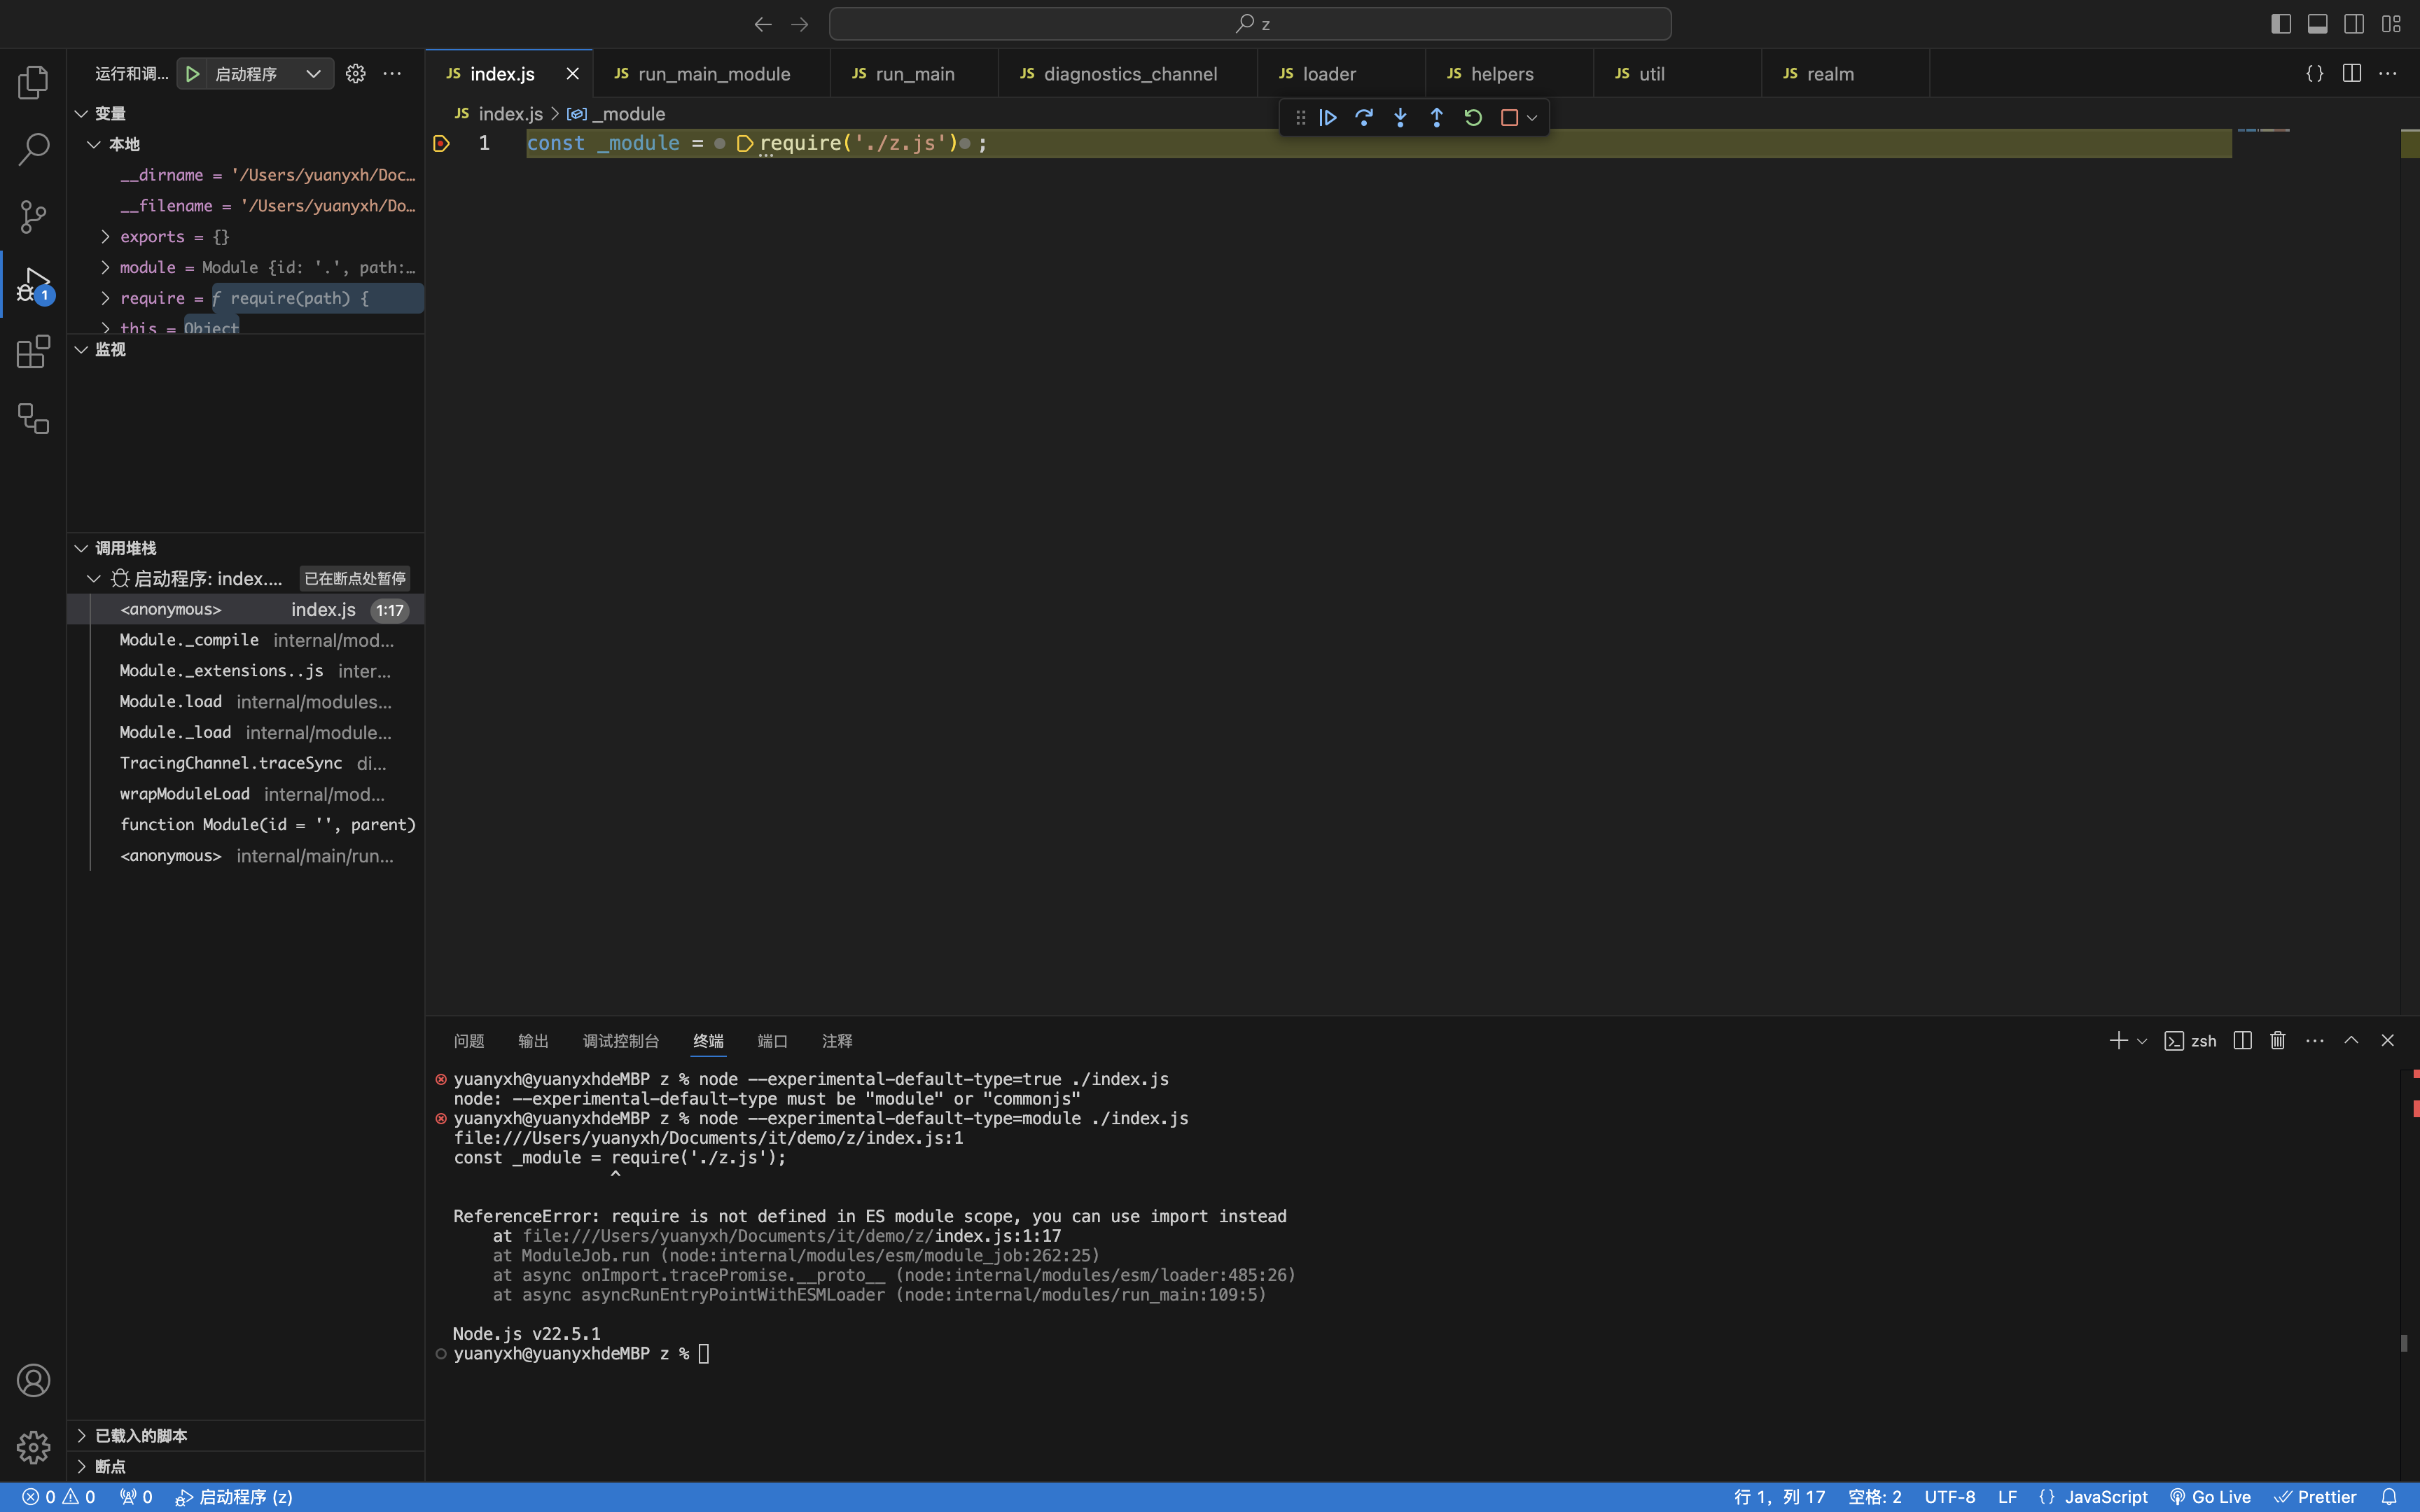
getOptionValue 获取到 nodejs 对应选项的配置值,这里判断 --experimental-default-type 属性值是否是 module,如果是则使用 esm 加载器来执行,可以通过 node --experimental-default-type=module 来进入这个条件。
在调试时可以在调试配置中添加 "runtimeArgs": ["--experimental-default-type=module"] 来配置运行时参数。
我们不关注 type=module 的情况,所以这里直接忽略,进入 else 的判断。
接下来进入 runMain 方法,代码如下:
/**
 * other code in here...
 */

function executeUserEntryPoint(main = process.argv[1]) {
  /** 获取入口代码的路径 */
  const resolvedMain = resolveMainPath(main);

  /** 判断是否应该使用 esm loader */
  const useESMLoader = shouldUseESMLoader(resolvedMain);

  let mainURL;

  if (!useESMLoader) {
    /** 使用 commonjs loader */
    const cjsLoader = require('internal/modules/cjs/loader');
    const { wrapModuleLoad } = cjsLoader;
    wrapModuleLoad(main, null, true);
  } else {
    /** 使用 esm loader */
    const mainPath = resolvedMain || main;
    if (mainURL === undefined) {
      mainURL = pathToFileURL(mainPath).href;
    }

    runEntryPointWithESMLoader((cascadedLoader) => {
      return cascadedLoader.import(mainURL, undefined, { __proto__: null }, true);
    });
  }
}
resolveMainPath 函数比较简单,就是用一堆工具函数来找到真实的入口文件路径,这里不进行说明,来看看 shouldUseESMLoader 的函数的代码:
/** 判断是否应该使用 esm loader */
function shouldUseESMLoader(mainPath) {
  if (getOptionValue('--experimental-default-type') === 'module') {
    return true;
  }

  /** 用户注册的自定义 loader 列表 */
  const userLoaders = getOptionValue('--experimental-loader');

  /** 用户注册的预加载模块列表 */
  const userImports = getOptionValue('--import');

  if (userLoaders.length > 0 || userImports.length > 0) {
    return true;
  }

  /** 解析入口文件的文件后缀,如果为 mjs 则是 esm,如果是 cjs 则是 commonjs */
  if (mainPath && StringPrototypeEndsWith(mainPath, '.mjs')) {
    return true;
  }
  if (!mainPath || StringPrototypeEndsWith(mainPath, '.cjs')) {
    return false;
  }

  /** 这里是获取到 package.json 中的 type 定义 */
  const type = getNearestParentPackageJSONType(mainPath);

  if (type === undefined || type === 'none') {
    return false;
  }

  /** type 为 module 则为 esm 模块 */
  return type === 'module';
}
这里可以看到满足以下几个条件之一则使用 esm loader:
- 运行时设置
--experimental-default-type=module - 运行时指定了自定义 loader
- 运行时指定了预加载的模块
- 入口文件后缀为 .mjs
- 当前项目的 package.json 中 type 指定为 module
我们依然不关心 esm loader 的相关逻辑,走到 wrapModuleLoad 方法,代码如下:
/**
 * other code in here...
 */

/** 这是对内部方法 Module._load 的包装,request 是加载的模块,parent 是父模块,isMain 表示入口模块 */
function wrapModuleLoad(request, parent, isMain) {
  /* ... */
  try {
    return onRequire().traceSync(
      Module._load,
      {
        __proto__: null,
        parentFilename: parent?.filename,
        id: request
      },
      Module,
      request,
      parent,
      isMain
    );
  } finally {
    /* ... */
  }
}
traceSync 方法就是对函数的一层封装,在执行函数前后添加了 hook 代码,主要用于跟踪函数执行,这里执行的是 Module._load 方法,我们继续查看他的代码:
Module._load = function (request, parent, isMain) {
  /** TIPS: 省略了大部分代码,完整的代码建议自己调试查看 */

  /** 判断请求的模块路径是否以 node: 开头,node: 开头的是 nodejs 内置模块 */
  if (StringPrototypeStartsWith(request, 'node:')) {
    const id = StringPrototypeSlice(request, 5);

    if (!BuiltinModule.canBeRequiredByUsers(id)) {
      throw new ERR_UNKNOWN_BUILTIN_MODULE(request);
    }

    const module = loadBuiltinModule(id, request);

    return module.exports;
  }

  /** 获取模块的决定路径 */
  const filename = Module._resolveFilename(request, parent, isMain);
  /** 获取缓存 */
  const cachedModule = Module._cache[filename];

  /** 返回被缓存且已加载完成的模块 */
  if (cachedModule !== undefined) {
    if (cachedModule.loaded) {
      return cachedModule.exports;
    }
  }

  /** 获取缓存模块或构建新模块 */
  const module = cachedModule || new Module(filename, parent);

  /** 标识模块信息 */
  if (!cachedModule) {
    if (isMain) {
      setOwnProperty(process, 'mainModule', module);
      setOwnProperty(module.require, 'main', process.mainModule);
      module.id = '.';
      module[kIsMainSymbol] = true;
    } else {
      module[kIsMainSymbol] = false;
    }

    /** 缓存模块 */
    Module._cache[filename] = module;
  }

  let threw = true;

  try {
    /** 尝试加载模块 */
    module.load(filename);

    threw = false;
  } finally {
    /** 模块加载失败需要清理残留 */
    if (threw) {
      delete Module._cache[filename];
    }
  }

  /** 返回模块 */
  return module.exports;
};
核心的加载代码在 module.load 方法中,代码如下:
Module.prototype.load = function (filename) {
  this.filename = filename;
  this.paths = Module._nodeModulePaths(path.dirname(filename));

  /** 通过文件后缀查找已注册的扩展 */
  const extension = findLongestRegisteredExtension(filename);

  /** 如果文件以 .mjs 为后缀,且没有注册 .mjs 的扩展,则抛出错误 */
  if (StringPrototypeEndsWith(filename, '.mjs') && !Module._extensions['.mjs']) {
    throw new ERR_REQUIRE_ESM(filename, true);
  }

  /** 调用对应文件后缀的扩展,将 module 实例和模块路径传递 */
  Module._extensions[extension](this, filename);

  /** 标识已被加载 */
  this.loaded = true;

  const exports = this.exports;
  this[kModuleExport] = exports;
};
load 方法内部通过 findLongestRegisteredExtension 方法查找对应的扩展名,最后调用指定扩展来加载模块,这里的扩展名为 .js,默认在 Module._extension 中注册,他的代码如下:
Module._extensions['.js'] = function (module, filename) {
  /** 获取模块源码 */
  const content = getMaybeCachedSource(module, filename);

  let format;
  if (StringPrototypeEndsWith(filename, '.js')) {
    /** 获取 package.json 配置 */
    const pkg = packageJsonReader.getNearestParentPackageJSON(filename);

    if (pkg?.data.type === 'module') {
      /** 如果启用了 --experimental-require-module,则允许在 type=module 的情况下使用 require */
      if (getOptionValue('--experimental-require-module')) {
        /** 以 esm 模式编译模块 */
        module._compile(content, filename, 'module');
        return;
      }

      /** 构造错误信息 */
      const parent = module[kModuleParent];
      const parentPath = parent?.filename;
      const packageJsonPath = path.resolve(pkg.path, 'package.json');
      const usesEsm = containsModuleSyntax(content, filename);
      const err = new ERR_REQUIRE_ESM(filename, usesEsm, parentPath, packageJsonPath);
      // Attempt to reconstruct the parent require frame.
      if (Module._cache[parentPath]) {
        let parentSource;
        try {
          parentSource = fs.readFileSync(parentPath, 'utf8');
        } catch {
          // Continue regardless of error.
        }
        if (parentSource) {
          const errLine = StringPrototypeSplit(
            StringPrototypeSlice(err.stack, StringPrototypeIndexOf(err.stack, '    at ')),
            '\n',
            1
          )[0];
          const { 1: line, 2: col } = RegExpPrototypeExec(/(\d+):(\d+)\)/, errLine) || [];
          if (line && col) {
            const srcLine = StringPrototypeSplit(parentSource, '\n')[line - 1];
            const frame = `${parentPath}:${line}\n${srcLine}\n${StringPrototypeRepeat(
              ' ',
              col - 1
            )}^\n`;
            setArrowMessage(err, frame);
          }
        }
      }
      throw err;
    } else if (pkg?.data.type === 'commonjs') {
      format = 'commonjs';
    }
  } else if (StringPrototypeEndsWith(filename, '.cjs')) {
    format = 'commonjs';
  }

  /** 以 commonjs 模式编译源码 */
  module._compile(content, filename, format);
};
继续查看 module._compile 方法,代码如下:
Module.prototype._compile = function (content, filename, format) {
  /** 删除大部分代码,建议自行调试查看 */

  let redirects;

  let compiledWrapper;
  if (format !== 'module') {
    /** wrapSafe 方法包装模块源码并生成函数,函数作用域与外界隔离 */
    const result = wrapSafe(filename, content, this, format);

    /** compiledWrapper 即是生成的函数 */
    compiledWrapper = result.function;
  }

  /** 获取模块所在目录 */
  const dirname = path.dirname(filename);
  /**
   *
   * 构建 require 函数,对 module.require 方法的包装, module.require 方法又是对开头介绍的 wrapModuleLoad 函数的包装
   * */
  const require = makeRequireFunction(this, redirects);

  let result;

  const exports = this.exports;
  const thisValue = exports;
  const module = this;

  /** 执行生成的包装函数并传递参数 */
  result = ReflectApply(compiledWrapper, thisValue, [exports, require, module, filename, dirname]);

  return result;
};
当执行到 ReflectApply 函数内部时,会执行生成的包装函数,继续向下执行会发现断到了我们编写的模块内部:
此时流程基本已经结束,可以看到核心的逻辑基本与 Module 类相关,下面我用 ts 给出 Module 类的主要定义(部分内容忽略)。
Module 类型定义
declare type Exports = { [key: string | symbol]: any };

declare class Module {
  constructor(id: string, parent: Module);

  /** 模块 id,一般为模块绝对路径 */
  id: string;

  /** 模块路径 */
  path: string;

  /** module.exports,模块中通过给这个对象新增属性来达到导出目的 */
  exports: Exports;

  /** 文件名 */
  filename: string | null;

  /** 是否加载完成 */
  loaded: boolean;

  /** 外层包裹函数字符串的代理 ["function(module, exports, require, __filename, __dirname) {", "};"] */
  wrapper: [string, string];

  /** 父模块 */
  parent?: Module;

  /** 子模块 */
  children?: Module[];

  /** 缓存模块 */
  static _cache: Record<string, Module>;
  /** 缓存路径 */
  static _pathCache: Record<string, Module>;
  /** 注册扩展 */
  static _extensions: Record<string, (module: Module, filename: string) => void>;
  /** 全局路径 */
  static globalPaths: string[];

  /** 生成包裹函数 */
  wrap(script: string): string;

  /** 加载模块 */
  load(filename: string): void;

  /** 请求模块 */
  require(id: string): Exports;

  private _compile(
    content: string,
    filename: string,
    format: 'module' | 'commonjs' | undefined
  ): Exports;

  /** 创建 require 函数 */
  static createRequire(filename: string | URL): (id: string) => Exports;

  /**
   * 如果用户覆盖了内置模块的导出,此函数可以确保覆盖用于 CommonJS 和 ES 模块上下文
   */
  static syncBuiltinESMExports(): void;

  /** 查找路径 */
  private static _findPath(request: string, paths: string[], isMain: boolean): string | false;

  /** 根据给定路径查找 node_modules 路径 */
  private static _nodeModulePaths(from: string): string[];

  /** 获取模块解析路径 */
  private static _resolveLookupPaths(request: string, parent: Module): string[];

  /** 加载模块 */
  private static _load(request: string, parent: Module, isMain: boolean): Exports;

  /** 解析模块绝对路径 */
  private static _resolveFilename(
    request: string,
    parent: Module,
    isMain: boolean,
    options: object,
    paths: string[]
  ): string;

  /** 定义用于解析模块的路径 */
  private static _initPaths(): void;

  /** 处理通过 “--require” 加载的模块 */
  private static _preloadModules(requests: string[]): void;
}
–end


 1190
1190

 被折叠的 条评论
为什么被折叠?
被折叠的 条评论
为什么被折叠?
 到【灌水乐园】发言


