


一、创建Maven工程
注意pom.xml中的dependency配置,需要引入这三个包:(特别注意,引入的这三个包的版本要一致,否则会报奇怪的错误)
<project xmlns="http://maven.apache.org/POM/4.0.0" xmlns:xsi="http://www.w3.org/2001/XMLSchema-instance"
    xsi:schemaLocation="http://maven.apache.org/POM/4.0.0 http://maven.apache.org/xsd/maven-4.0.0.xsd">
    <modelVersion>4.0.0</modelVersion>
    <groupId>com.rvho</groupId>
    <artifactId>cxfstandalone</artifactId>
    <version>0.0.1-SNAPSHOT</version>

    <properties>
        <!-- 文件拷贝编码 -->
        <project.build.sourceEncoding>UTF-8</project.build.sourceEncoding>
        <!-- 输出编码 -->
        <project.reporting.outputEncoding>UTF-8</project.reporting.outputEncoding>
        <!-- 编译编码 -->
        <maven.compiler.encoding>UTF-8</maven.compiler.encoding>
        <!-- CXF版本 -->
        <cxf.version>3.0.0</cxf.version>
    </properties>

    <dependencies>
        <!-- CXF -->
        <dependency>
            <groupId>org.apache.cxf</groupId>
            <artifactId>cxf-rt-frontend-jaxws</artifactId>
            <version>${cxf.version}</version>
        </dependency>
        <dependency>
            <groupId>org.apache.cxf</groupId>
            <artifactId>cxf-rt-transports-http</artifactId>
            <version>${cxf.version}</version>
        </dependency>
        <dependency>
            <!-- 如果CXF不集成到Web服务器中,必须添加该引用 -->
            <groupId>org.apache.cxf</groupId>
            <artifactId>cxf-rt-transports-http-jetty</artifactId>
            <version>${cxf.version}</version>
        </dependency>
        <!-- End CXF -->
    </dependencies>

    <build>
        <plugins>
            <plugin>
                <groupId>org.apache.maven.plugins</groupId>
                <artifactId>maven-compiler-plugin</artifactId>
                <version>3.3</version>
                <configuration>
                    <!-- 指定source和target的jdk版本是1.8 -->
                    <source>1.8</source>
                    <target>1.8</target>
                </configuration>
            </plugin>
        </plugins>
    </build>
</project>
二、服务端代码
1、写一个对外发布的接口
package com.cah.ddi3.ws;

import javax.jws.WebMethod;
import javax.jws.WebParam;
import javax.jws.WebService;

@WebService
public interface WebServiceI {

	@WebMethod
	String sayHello(@WebParam(name="name") String name);

	@WebMethod
	String saveInfo(@WebParam(name="name") String name,@WebParam(name="info") String info);

}
2、实现这个接口
package com.cah.ddi3.ws;

import javax.jws.WebParam;
import javax.jws.WebService;

@WebService
public class WebServiceImpl implements WebServiceI {

	@Override
	public String sayHello(@WebParam(name="name") String name) {
		// TODO Auto-generated method stub
		System.out.println("WebService sayHello "+name);
		return "sayHello "+name;
	}

	@Override
	public String saveInfo(@WebParam(name="name") String name,@WebParam(name="info") String info) {
		// TODO Auto-generated method stub
		System.out.println(name+"调用WebService接口,save:"+info);
		return "save Success";
	}
}
3、发布这个服务
package com.cah.ddi3.ws;

import javax.xml.ws.Endpoint;

import org.apache.cxf.frontend.ServerFactoryBean;

public class WebServicePublish {

	public static void main(String[] args) {
		String address = "http://localhost:8080/WS_Server/Webservice";
		Endpoint.publish(address , new WebServiceImpl());
		System.out.println("发布webservice成功!");
//		ServerFactoryBean sf=new ServerFactoryBean();
//		//服务实现类
//		sf.setServiceClass(WebServiceImpl.class);
//		//服务的发布地址
//		sf.setAddress("http://localhost:8080/WS_Server/Webservice");
//		//服务的实例
//		sf.setServiceBean(new WebServiceImpl());
//		//发布服务
//		sf.create();
//		System.out.println("server ready……");
	}
}
4、验证
运行上面的类,在浏览器中键入:http://localhost:8080/WS_Server/Webservice?wsdl,如果打开了如下的wsdl文档,说明发布成功。
This XML file does not appear to have any style information associated with it. The document tree is shown below.
<wsdl:definitions xmlns:xsd="http://www.w3.org/2001/XMLSchema" xmlns:wsdl="http://schemas.xmlsoap.org/wsdl/" xmlns:tns="http://ws.ddi3.cah.com/" xmlns:soap="http://schemas.xmlsoap.org/wsdl/soap/" xmlns:ns1="http://schemas.xmlsoap.org/soap/http" name="WebServiceImplService" targetNamespace="http://ws.ddi3.cah.com/">
<wsdl:types>
<xs:schema xmlns:xs="http://www.w3.org/2001/XMLSchema" xmlns:tns="http://ws.ddi3.cah.com/" elementFormDefault="unqualified" targetNamespace="http://ws.ddi3.cah.com/" version="1.0">
<xs:element name="saveInfo" type="tns:saveInfo"/>
<xs:element name="saveInfoResponse" type="tns:saveInfoResponse"/>
<xs:element name="sayHello" type="tns:sayHello"/>
<xs:element name="sayHelloResponse" type="tns:sayHelloResponse"/>
<xs:complexType name="sayHello">
<xs:sequence>
<xs:element minOccurs="0" name="name" type="xs:string"/>
</xs:sequence>
</xs:complexType>
<xs:complexType name="sayHelloResponse">
<xs:sequence>
<xs:element minOccurs="0" name="return" type="xs:string"/>
</xs:sequence>
</xs:complexType>
<xs:complexType name="saveInfo">
<xs:sequence>
<xs:element minOccurs="0" name="name" type="xs:string"/>
<xs:element minOccurs="0" name="info" type="xs:string"/>
</xs:sequence>
</xs:complexType>
<xs:complexType name="saveInfoResponse">
<xs:sequence>
<xs:element minOccurs="0" name="return" type="xs:string"/>
</xs:sequence>
</xs:complexType>
</xs:schema>
</wsdl:types>
<wsdl:message name="sayHello">
<wsdl:part element="tns:sayHello" name="parameters"></wsdl:part>
</wsdl:message>
<wsdl:message name="sayHelloResponse">
<wsdl:part element="tns:sayHelloResponse" name="parameters"></wsdl:part>
</wsdl:message>
<wsdl:message name="saveInfo">
<wsdl:part element="tns:saveInfo" name="parameters"></wsdl:part>
</wsdl:message>
<wsdl:message name="saveInfoResponse">
<wsdl:part element="tns:saveInfoResponse" name="parameters"></wsdl:part>
</wsdl:message>
<wsdl:portType name="WebServiceI">
<wsdl:operation name="sayHello">
<wsdl:input message="tns:sayHello" name="sayHello"></wsdl:input>
<wsdl:output message="tns:sayHelloResponse" name="sayHelloResponse"></wsdl:output>
</wsdl:operation>
<wsdl:operation name="saveInfo">
<wsdl:input message="tns:saveInfo" name="saveInfo"></wsdl:input>
<wsdl:output message="tns:saveInfoResponse" name="saveInfoResponse"></wsdl:output>
</wsdl:operation>
</wsdl:portType>
<wsdl:binding name="WebServiceImplServiceSoapBinding" type="tns:WebServiceI">
<soap:binding style="document" transport="http://schemas.xmlsoap.org/soap/http"/>
<wsdl:operation name="sayHello">
<soap:operation soapAction="" style="document"/>
<wsdl:input name="sayHello">
<soap:body use="literal"/>
</wsdl:input>
<wsdl:output name="sayHelloResponse">
<soap:body use="literal"/>
</wsdl:output>
</wsdl:operation>
<wsdl:operation name="saveInfo">
<soap:operation soapAction="" style="document"/>
<wsdl:input name="saveInfo">
<soap:body use="literal"/>
</wsdl:input>
<wsdl:output name="saveInfoResponse">
<soap:body use="literal"/>
</wsdl:output>
</wsdl:operation>
</wsdl:binding>
<wsdl:service name="WebServiceImplService">
<wsdl:port binding="tns:WebServiceImplServiceSoapBinding" name="WebServiceImplPort">
<soap:address location="http://localhost:8080/WS_Server/Webservice"/>
</wsdl:port>
</wsdl:service>
</wsdl:definitions>
三、客户端代码
创建一个WebService客户端测试项目,借助jdk的wsimort.exe工具生成客户端代码,wsimort.exe工具位于Jdk的bin目录下,打开命令行窗口,切换到src目录,执行"wsimport -keep http://localhost:8080/WS_Server/Webservice?wsdl"生成客户端代码,如下图所示:
在客户端工程的src目录下可以生成如下代码:


创建WsClient.java类,代码如下:
package com.cah.ddi3.ws;
public class WsClient {
public static void main(String[] args) {
// TODO Auto-generated method stub
WebServiceImplService factory = new WebServiceImplService();
WebServiceI wsImpl = factory.getWebServiceImplPort();
String resResult = wsImpl.sayHello("小鱼儿");
System.out.println("调用WebService的sayHello方法返回的结果是:"+resResult);
System.out.println("---------------------------------------------------");
resResult = wsImpl.saveInfo("小鱼儿", "欢迎你!");
System.out.println("调用WebService的saveInfo方法返回的结果是:"+resResult);
}
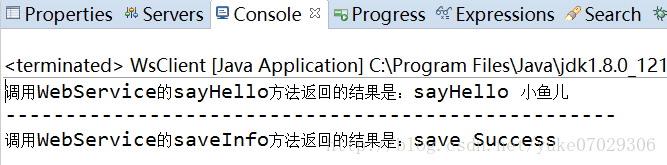
}运行上述类,控制台打出:
调用成功!


 1784
1784

 被折叠的 条评论
为什么被折叠?
被折叠的 条评论
为什么被折叠?
 到【灌水乐园】发言


