


环境介绍:
vmware
centos 6.5 64位
sameersbn/gitlab6.9.2
docker 1.7.1
连接docker容器
[root@ixxxxxx ~]# docker exec -it 61e9ffce7c85 /bin/bash
root@gitlab:/# ls
app boot etc lib media opt root sbin sys usr
bin dev home lib64 mnt proc run srv tmp var
运行
docker run --name=gitlab -d -h git.local.host \
-p 10022:22 -p 10080:80 \
-e "GITLAB_PORT=10080" -e "GITLAB_SSH_PORT=10022" \
-v /opt/gitlab/data:/home/git/data \
-v /opt/gitlab/mysql:/var/lib/mysql \
-e "GITLAB_HOST=git.local.host" \
sameersbn/gitlab:6.9.2
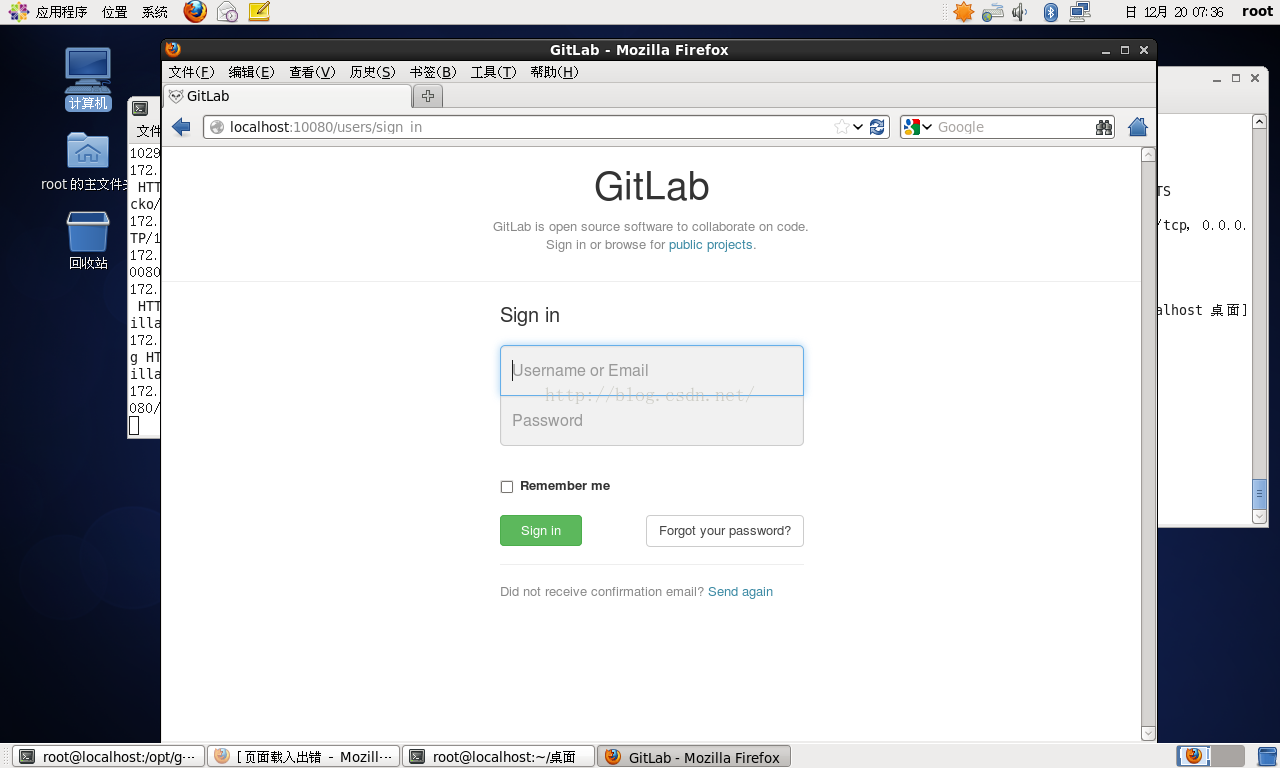
上图:
gitlab备份和恢复(迁移)
#老的数据目录/opt/gitlab
docker run --name=gitlab -i -t --rm -v /opt/gitlab/data:/home/git/data -v /opt/gitlab/mysql:/var/lib/mysql sameersbn/gitlab:6.9.2 app:rake gitlab:backup:create
/opt/gitlab/data/backups/1461162078_gitlab_backup.tar
#新的目录/data/gitlab
cp /opt/gitlab/data/backups/1461162078_gitlab_backup.tar /tmp
docker run --name=gitlab -i -t --rm -v /tmp:/home/git/gitlab/tmp/backups -v /data/gitlab/data:/home/git/data -v /data/gitlab/mysql:/var/lib/mysql sameersbn/gitlab:6.9.2 app:rake gitlab:backup:restore
参考文档
Table of Contents
Introduction
Version
Changelog
Hardware Requirements
CPU
Memory
Storage
Supported Web Browsers
Installation
Quick Start
Configuration
Data Store
Database
MySQL
Internal MySQL Server
External MySQL Server
Linking to MySQL Container
PostgreSQL
External PostgreSQL Server
Linking to PostgreSQL Container
Redis
Internal Redis Server
External Redis Server
Linking to Redis Container
Mail
SSL
Generation of Self Signed Certificates
Strengthening the server security
Installation of the Certificates
Enabling HTTPS support
Using HTTPS with a load balancer
Establishing trust with your server
Installing Trusted SSL Server Certificates
Putting it all together
Run under sub URI
Available Configuration Parameters
Maintenance
SSH Login
Creating Backups
Restoring Backups
Automated Backups
Upgrading
Rake Tasks
Links
Announcements
Issues
References
Introduction
Dockerfile to build a GitLab container image.
Version
Current Version: 6.9.2
Hardware Requirements
CPU
1 core works for under 100 users but the responsiveness might suffer
2 cores is the recommended number of cores and supports up to 100 users
4 cores supports up to 1,000 users
8 cores supports up to 10,000 users
Memory
512MB is too little memory, GitLab will be very slow and you will need 250MB of swap
768MB is the minimal memory size but we advise against this
1GB supports up to 100 users (with individual repositories under 250MB, otherwise git memory usage necessitates using swap space)
2GB is the recommended memory size and supports up to 1,000 users
4GB supports up to 10,000 users
Storage
The necessary hard drive space largely depends on the size of the repos you want to store in GitLab. But as a rule of thumb you should have at least twice as much free space as your all repos combined take up. You need twice the storage because GitLab satellites contain an extra copy of each repo.
If you want to be flexible about growing your hard drive space in the future consider mounting it using LVM so you can add more hard drives when you need them.
Apart from a local hard drive you can also mount a volume that supports the network file system (NFS) protocol. This volume might be located on a file server, a network attached storage (NAS) device, a storage area network (SAN) or on an Amazon Web Services (AWS) Elastic Block Store (EBS) volume.
If you have enough RAM memory and a recent CPU the speed of GitLab is mainly limited by hard drive seek times. Having a fast drive (7200 RPM and up) or a solid state drive (SSD) will improve the responsiveness of GitLab.
Supported Web Browsers
Chrome (Latest stable version)
Firefox (Latest released version)
Safari 7+ (Know problem: required fields in html5 do not work)
Opera (Latest released version)
IE 10+
Installation
Pull the latest version of the image from the docker index. This is the recommended method of installation as it is easier to update image in the future. These builds are performed by the Docker Trusted Build service.
docker pull sameersbn/gitlab:latest
Since version 6.3.0, the image builds are being tagged. You can now pull a particular version of gitlab by specifying the version number. For example,
docker pull sameersbn/gitlab:6.9.2
Alternately you can build the image yourself.
git clone https://github.com/sameersbn/docker-gitlab.git
cd docker-gitlab
docker build --tag="$USER/gitlab" .
Quick Start
Run the gitlab image
docker run --name='gitlab' -i -t --rm \
-p 127.0.0.1:10022:22 -p 127.0.0.1:10080:80 \
-e "GITLAB_PORT=10080" -e "GITLAB_SSH_PORT=10022" \
sameersbn/gitlab:6.9.2
NOTE: Please allow a couple of minutes for the GitLab application to start.
Point your browser to http://localhost:10080 and login using the default username and password:
username: admin@local.host
password: 5iveL!fe
You should now have the GitLab application up and ready for testing. If you want to use this image in production the please read on.
Configuration
Data Store
GitLab is a code hosting software and as such you don't want to lose your code when the docker container is stopped/deleted. To avoid losing any data, you should mount a volume at,
/home/git/data
Volumes can be mounted in docker by specifying the '-v' option in the docker run command.
mkdir /opt/gitlab/data
docker run --name=gitlab -d \
-v /opt/gitlab/data:/home/git/data \
sameersbn/gitlab:6.9.2
Database
GitLab uses a database backend to store its data.
MySQL
Internal MySQL Server
Warning
The internal mysql server will soon be removed from the image.
Please use a linked mysql or postgresql container instead. Or else connect with an external mysql or postgresql server.
You've been warned.
This docker image is configured to use a MySQL database backend. The database connection can be configured using environment variables. If not specified, the image will start a mysql server internally and use it. However in this case, the data stored in the mysql database will be lost if the container is stopped/deleted. To avoid this you should mount a volume at /var/lib/mysql.
mkdir /opt/gitlab/mysql
docker run --name=gitlab -d \
-v /opt/gitlab/data:/home/git/data \
-v /opt/gitlab/mysql:/var/lib/mysql sameersbn/gitlab:6.9.2
This will make sure that the data stored in the database is not lost when the image is stopped and started again.
External MySQL Server
The image can be configured to use an external MySQL database instead of starting a MySQL server internally. The database configuration should be specified using environment variables while starting the GitLab image.
Before you start the GitLab image create user and database for gitlab.
CREATE USER 'gitlab'@'%.%.%.%' IDENTIFIED BY 'password';
CREATE DATABASE IF NOT EXISTS `gitlabhq_production` DEFAULT CHARACTER SET `utf8` COLLATE `utf8_unicode_ci`;
GRANT SELECT, LOCK TABLES, INSERT, UPDATE, DELETE, CREATE, DROP, INDEX, ALTER ON `gitlabhq_production`.* TO 'gitlab'@'%.%.%.%';
To make sure the database is initialized start the container with app:rake gitlab:setup option.
Assuming that the mysql server host is 192.168.1.100
docker run --name=gitlab -i -t --rm \
-e "DB_HOST=192.168.1.100" -e "DB_NAME=gitlabhq_production" -e "DB_USER=gitlab" -e "DB_PASS=password" \
-v /opt/gitlab/data:/home/git/data \
sameersbn/gitlab:6.9.2 app:rake gitlab:setup
NOTE: The above setup is performed only for the first run.
This will initialize the gitlab database. Now that the database is initialized, start the container normally.
docker run --name=gitlab -d \
-e "DB_HOST=192.168.1.100" -e "DB_NAME=gitlabhq_production" -e "DB_USER=gitlab" -e "DB_PASS=password" \
-v /opt/gitlab/data:/home/git/data \
sameersbn/gitlab:6.9.2
Linking to MySQL Container
You can link this image with a mysql container for the database requirements. The alias of the mysql server container should be set to mysql while linking with the gitlab image.
If a mysql container is linked, only the DB_HOST and DB_PORT settings are automatically retrieved using the linkage. You may still need to set other database connection parameters such as the DB_NAME, DB_USER, DB_PASS and so on.
To illustrate linking with a mysql container, we will use the sameersbn/mysql image. When using docker-mysql in production you should mount a volume for the mysql data store. Please refer the README of docker-mysql for details.
First, lets pull the mysql image from the docker index.
docker pull sameersbn/mysql:latest
For data persistence lets create a store for the mysql and start the container.
mkdir -p /opt/mysql/data
docker run --name=mysql -d \
-v /opt/mysql/data:/var/lib/mysql \
sameersbn/mysql:latest
You should now have the mysql server running. By default the sameersbn/mysql image does not assign a password for the root user and allows remote connections for the root user from the 172.17.%.% address space. This means you can login to the mysql server from the host as the root user.
Now, lets login to the mysql server and create a user and database for the GitLab application.
mysql -uroot -h $(docker inspect mysql | grep IPAddres | awk -F'"' '{print $4}')
CREATE USER 'gitlab'@'172.17.%.%' IDENTIFIED BY 'password';
CREATE DATABASE IF NOT EXISTS `gitlabhq_production` DEFAULT CHARACTER SET `utf8` COLLATE `utf8_unicode_ci`;
GRANT SELECT, LOCK TABLES, INSERT, UPDATE, DELETE, CREATE, DROP, INDEX, ALTER ON `gitlabhq_production`.* TO 'gitlab'@'172.17.%.%';
FLUSH PRIVILEGES;
Now that we have the database created for gitlab, lets install the database schema. This is done by starting the gitlab container with the app:rake gitlab:setup command.
docker run --name=gitlab -i -t --rm --link mysql:mysql \
-e "DB_USER=gitlab" -e "DB_PASS=password" \
-e "DB_NAME=gitlabhq_production" \
-v /opt/gitlab/data:/home/git/data \
sameersbn/gitlab:6.9.2 app:rake gitlab:setup
NOTE: The above setup is performed only for the first run.
We are now ready to start the GitLab application.
docker run --name=gitlab -d --link mysql:mysql \
-e "DB_USER=gitlab" -e "DB_PASS=password" \
-e "DB_NAME=gitlabhq_production" \
-v /opt/gitlab/data:/home/git/data \
sameersbn/gitlab:6.9.2
PostgreSQL
External PostgreSQL Server
The image also supports using an external PostgreSQL Server. This is also controlled via environment variables.
CREATE ROLE gitlab with LOGIN CREATEDB PASSWORD 'password';
CREATE DATABASE gitlabhq_production;
GRANT ALL PRIVILEGES ON DATABASE gitlabhq_production to gitlab;
To make sure the database is initialized start the container with app:rake gitlab:setup option.
Assuming that the PostgreSQL server host is 192.168.1.100
docker run --name=gitlab -i -t --rm \
-e "DB_TYPE=postgres" -e "DB_HOST=192.168.1.100" -e "DB_NAME=gitlabhq_production" -e "DB_USER=gitlab" -e "DB_PASS=password" \
-v /opt/gitlab/data:/home/git/data \
sameersbn/gitlab:6.9.2 app:rake gitlab:setup
NOTE: The above setup is performed only for the first run.
This will initialize the gitlab database. Now that the database is initialized, start the container normally.
docker run --name=gitlab -d \
-e "DB_TYPE=postgres" -e "DB_HOST=192.168.1.100" -e "DB_NAME=gitlabhq_production" -e "DB_USER=gitlab" -e "DB_PASS=password" \
-v /opt/gitlab/data:/home/git/data \
sameersbn/gitlab:6.9.2
Linking to PostgreSQL Container
You can link this image with a postgresql container for the database requirements. The alias of the postgresql server container should be set to postgresql while linking with the gitlab image.
If a postgresql container is linked, only the DB_HOST and DB_PORT settings are automatically retrieved using the linkage. You may still need to set other database connection parameters such as the DB_NAME, DB_USER, DB_PASS and so on.
To illustrate linking with a postgresql container, we will use the sameersbn/postgresql image. When using postgresql image in production you should mount a volume for the postgresql data store. Please refer the README of docker-postgresql for details.
First, lets pull the postgresql image from the docker index.
docker pull sameersbn/postgresql:latest
For data persistence lets create a store for the postgresql and start the container.
mkdir -p /opt/postgresql/data
docker run --name=postgresql -d \
-v /opt/postgresql/data:/var/lib/postgresql \
sameersbn/postgresql:latest
You should now have the postgresql server running. The password for the postgres user can be found in the logs of the postgresql image.
docker logs postgresql
Now, lets login to the postgresql server and create a user and database for the GitLab application.
POSTGRESQL_IP=$(docker inspect postgresql | grep IPAddres | awk -F'"' '{print $4}')
psql -U postgres -h ${POSTGRESQL_IP}
CREATE ROLE gitlab with LOGIN CREATEDB PASSWORD 'password';
CREATE DATABASE gitlabhq_production;
GRANT ALL PRIVILEGES ON DATABASE gitlabhq_production to gitlab;
Now that we have the database created for gitlab, lets install the database schema. This is done by starting the gitlab container with the app:rake gitlab:setup command.
docker run --name=gitlab -i -t --rm --link postgresql:postgresql \
-e "DB_USER=gitlab" -e "DB_PASS=password" \
-e "DB_NAME=gitlabhq_production" \
-v /opt/gitlab/data:/home/git/data \
sameersbn/gitlab:6.9.2 app:rake gitlab:setup
NOTE: The above setup is performed only for the first run.
We are now ready to start the GitLab application.
docker run --name=gitlab -d --link postgresql:postgresql \
-e "DB_USER=gitlab" -e "DB_PASS=password" \
-e "DB_NAME=gitlabhq_production" \
-v /opt/gitlab/data:/home/git/data \
sameersbn/gitlab:6.9.2
Redis
Internal Redis Server
Warning
The internal redis server will soon be removed from the image.
Please use a linked redis container or a external redis server
You've been warned.
GitLab uses the redis server for its key-value data store. The redis server connection details can be specified using environment variables. If not specified, the starts a redis server internally, no additional configuration is required.
External Redis Server
The image can be configured to use an external redis server instead of starting a redis server internally. The configuration should be specified using environment variables while starting the GitLab image.
Assuming that the redis server host is 192.168.1.100
docker run --name=gitlab -i -t --rm \
-e "REDIS_HOST=192.168.1.100" -e "REDIS_PORT=6379" \
sameersbn/gitlab:6.9.2
Linking to Redis Container
You can link this image with a redis container to satisfy gitlab's redis requirement. The alias of the redis server container should be set to redisio while linking with the gitlab image.
To illustrate linking with a redis container, we will use the sameersbn/redis image. Please refer the README of docker-redis for details.
First, lets pull the redis image from the docker index.
docker pull sameersbn/redis:latest
Lets start the redis container
docker run --name=redis -d sameersbn/redis:latest
We are now ready to start the GitLab application.
docker run --name=gitlab -d --link redis:redisio \
sameersbn/gitlab:6.9.2
Mail
The mail configuration should be specified using environment variables while starting the GitLab image. The configuration defaults to using gmail to send emails and requires the specification of a valid username and password to login to the gmail servers.
The following environment variables need to be specified to get mail support to work.
SMTP_DOMAIN (defaults to www.gmail.com)
SMTP_HOST (defaults to smtp.gmail.com)
SMTP_PORT (defaults to 587)
SMTP_USER
SMTP_PASS
SMTP_STARTTLS (defaults to true)
SMTP_AUTHENTICATION (defaults to 'login' if SMTP_USER is set)
docker run --name=gitlab -d \
-e "SMTP_USER=USER@gmail.com" -e "SMTP_PASS=PASSWORD" \
-v /opt/gitlab/data:/home/git/data \
sameersbn/gitlab:6.9.2
SSL
Access to the gitlab application can be secured using SSL so as to prevent unauthorized access to the data in your repositories. While a CA certified SSL certificate allows for verification of trust via the CA, a self signed certificates can also provide an equal level of trust verification as long as each client takes some additional steps to verify the identity of your website. I will provide instructions on achieving this towards the end of this section.
To secure your application via SSL you basically need two things:
Private key (.key)
SSL certificate (.crt)
When using CA certified certificates, these files are provided to you by the CA. When using self-signed certificates you need to generate these files yourself. Skip the following section if you are armed with CA certified SSL certificates.
Jump to the Using HTTPS with a load balancer section if you are using a load balancer such as hipache, haproxy or nginx.
Generation of Self Signed Certificates
Generation of self-signed SSL certificates involves a simple 3 step procedure.
STEP 1: Create the server private key
openssl genrsa -out gitlab.key 2048
STEP 2: Create the certificate signing request (CSR)
openssl req -new -key gitlab.key -out gitlab.csr
STEP 3: Sign the certificate using the private key and CSR
openssl x509 -req -days 365 -in gitlab.csr -signkey gitlab.key -out gitlab.crt
Congratulations! you have now generated an SSL certificate thats valid for 365 days.
Strengthening the server security
This section provides you with instructions to strengthen your server security. To achieve this we need to generate stronger DHE parameters.
openssl dhparam -out dhparam.pem 2048
Installation of the SSL Certificates
Out of the four files generated above, we need to install the gitlab.key, gitlab.crt and dhparam.pem files at the gitlab server. The CSR file is not needed, but do make sure you safely backup the file (in case you ever need it again).
The default path that the gitlab application is configured to look for the SSL certificates is at /home/git/data/certs, this can however be changed using the SSL_KEY_PATH, SSL_CERTIFICATE_PATH and SSL_DHPARAM_PATH configuration options.
If you remember from above, the /home/git/data path is the path of the data store, which means that we have to create a folder named certs inside /opt/gitlab/data/ and copy the files into it and as a measure of security we will update the permission on the gitlab.key file to only be readable by the owner.
mkdir -p /opt/gitlab/data/certs
cp gitlab.key /opt/gitlab/data/certs/
cp gitlab.crt /opt/gitlab/data/certs/
cp dhparam.pem /opt/gitlab/data/certs/
chmod 400 /opt/gitlab/data/certs/gitlab.key
Great! we are now just a step away from having our application secured.
Enabling HTTPS support
HTTPS support can be enabled by setting the GITLAB_HTTPS option to true. Additionally, when using self-signed SSL certificates you need to the set SSL_SELF_SIGNED option to true as well. Assuming we are using self-signed certificates
docker run --name=gitlab -d \
-e "GITLAB_HTTPS=true" -e "SSL_SELF_SIGNED=true" \
-v /opt/gitlab/data:/home/git/data \
sameersbn/gitlab:6.9.2
In this configuration, any requests made over the plain http protocol will automatically be redirected to use the https protocol. However, this is not optimal when using a load balancer.
Using HTTPS with a load balancer
Load balancers like haproxy/hipache talk to backend applications over plain http and as such, installation of ssl keys and certificates in the container are not required when using a load balancer.
When using a load balancer, you should set the GITLAB_HTTPS_ONLY option to false with the GITLAB_HTTPS options set to true and the SSL_SELF_SIGNED option to the appropriate value. With this in place, you should also configure the load balancer to support handling of https requests. But that is out of the scope of this document. Please refer to Using SSL/HTTPS with HAProxy for information on the subject.
Note that when the GITLAB_HTTPS_ONLY is disabled, the application does not perform the automatic http to https redirection and this functionality has to be configured at the load balancer which is also described in the link above. Unfortunately hipache does not come with an option to perform http to https redirection, so the only choice you really have is to switch to using haproxy or nginx for load balancing.
In summation, the docker command would look something like this:
docker run --name=gitlab -d \
-e "GITLAB_HTTPS=true" -e "SSL_SELF_SIGNED=true" \
-e "GITLAB_HTTPS_ONLY=false" \
-v /opt/gitlab/data:/home/git/data \
sameersbn/gitlab:6.9.2
Again, drop the -e "SSL_SELF_SIGNED=true" option if you are using CA certified SSL certificates.
Establishing trust with your server
This section deals will self-signed ssl certificates. If you are using CA certified certificates, your done.
This section is more of a client side configuration so as to add a level of confidence at the client to be 100 percent sure they are communicating with whom they think they.
This is simply done by adding the servers certificate into their list of trusted ceritficates. On ubuntu, this is done by appending the contents of the gitlab.crt file to the /etc/ssl/certs/ca-certificates.crt file.
Again, this is a client side configuration which means that everyone who is going to communicate with the server should perform this configuration on their machine. In short, distribute the gitlab.crt file among your developers and ask them to add it to their list of trusted ssl certificates. Failure to do so will result in errors that look like this:
git clone https://git.local.host/gitlab-ce.git
fatal: unable to access 'https://git.local.host/gitlab-ce.git': server certificate verification failed. CAfile: /etc/ssl/certs/ca-certificates.crt CRLfile: none
You can do the same at the web browser. Instructions for installing the root certificate for firefox can be found here. You will find similar options chrome, just make sure you install the certificate under the authorities tab of the certificate manager dialog.
There you have it, thats all there is to it.
Installing Trusted SSL Server Certificates
If your GitLab CI server is using self-signed SSL certificates then you should make sure the GitLab CI server certificate is trusted on the GitLab server for them to be able to talk to each other.
The default path image is configured to look for the trusted SSL certificates is at /home/git/data/certs/ca.crt, this can however be changed using the CA_CERTIFICATES_PATH configuration option.
Copy the ca.crt file into the certs directory on the datastore. The ca.crt file should contain the root certificates of all the servers you want to trust. With respect to GitLab CI, this will be the contents of the gitlab_ci.crt file as described in the README of the docker-gitlab-ci container.
By default, our own server certificate gitlab.crt is added to the trusted certificates list.
Putting it all together
docker run --name=gitlab -d -h git.local.host \
-v /opt/gitlab/data:/home/git/data \
-v /opt/gitlab/mysql:/var/lib/mysql \
-e "GITLAB_HOST=git.local.host" -e "GITLAB_EMAIL=gitlab@local.host" -e "GITLAB_SUPPORT=support@local.host" \
-e "SMTP_USER=USER@gmail.com" -e "SMTP_PASS=PASSWORD" \
sameersbn/gitlab:6.9.2
If you are using an external mysql database
docker run --name=gitlab -d -h git.local.host \
-v /opt/gitlab/data:/home/git/data \
-e "DB_HOST=192.168.1.100" -e "DB_NAME=gitlabhq_production" -e "DB_USER=gitlab" -e "DB_PASS=password" \
-e "GITLAB_HOST=git.local.host" -e "GITLAB_EMAIL=gitlab@local.host" -e "GITLAB_SUPPORT=support@local.host" \
-e "SMTP_USER=USER@gmail.com" -e "SMTP_PASS=PASSWORD" \
sameersbn/gitlab:6.9.2
Run under sub URI
If you like to serve the GitLab under sub URI like http://localhost/gitlab, set GITLAB_RELATIVE_URL_ROOT=/gitlab or anything you like. The path should start with slash, and should not have any trailing slashes.
docker run --name=gitlab -d \
-v /opt/gitlab/data:/home/git/data \
-e "GITLAB_RELATIVE_URL_ROOT=/gitlab" \
sameersbn/gitlab:6.9.2
When you change the sub URI path, you need to recompile all precompiled assets. This can be done with either deleting tmp/cache/VERSION file under data store, or just rm -Rf /PATH/TO/DATA_STORE/tmp. After cleaning up cache files, restart the container.
Available Configuration Parameters
Below is the complete list of available options that can be used to customize your gitlab installation.
GITLAB_HOST: The hostname of the GitLab server. Defaults to localhost
GITLAB_PORT: The port of the GitLab server. Defaults to 80
GITLAB_EMAIL: The email address for the GitLab server. Defaults to 80 for plain http and 443 when https is enabled.
GITLAB_SUPPORT: The support email address for the GitLab server. Defaults to support@localhost.
GITLAB_SIGNUP: Enable or disable user signups. Default is false.
GITLAB_SIGNIN: If set to false, standard login form won't be shown on the sign-in page. Default is true.
GITLAB_PROJECTS_LIMIT: Set default projects limit. Defaults to 100.
GITLAB_PROJECTS_VISIBILITY: Set default projects visibility level. Possible values 'public', 'private' and 'internal'. Defaults to 'private'.
GITLAB_BACKUPS: Setup cron job to automatic backups. Possible values disable, daily or monthly. Disabled by default
GITLAB_BACKUP_EXPIRY: Configure how long to keep backups before they are deleted. By default when automated backups are disabled backups are kept forever (0 seconds), else the backups expire in 7 days (604800 seconds).
GITLAB_SSH_PORT: The ssh port number. Defaults to 22.
GITLAB_RELATIVE_URL_ROOT: The sub URI of the GitLab server, e.g. /gitlab. No default.
GITLAB_HTTPS: Set to true to enable https support, disabled by default.
GITLAB_HTTPS_ONLY: Configure access over plain http when GITLAB_HTTPS is enabled. Should be set to false when using a load balancer. Defaults to true.
SSL_SELF_SIGNED: Set to true when using self signed ssl certificates. false by default.
SSL_CERTIFICATE_PATH: Location of the ssl certificate. Defaults to /home/git/data/certs/gitlab.crt
SSL_KEY_PATH: Location of the ssl private key. Defaults to /home/git/data/certs/gitlab.key
SSL_DHPARAM_PATH: Location of the dhparam file. Defaults to /home/git/data/certs/dhparam.pem
CA_CERTIFICATES_PATH: List of SSL certificates to trust. Defaults to /home/git/data/certs/ca.crt.
NGINX_MAX_UPLOAD_SIZE: Maximum acceptable upload size. Defaults to 20m.
REDIS_HOST: The hostname of the redis server. Defaults to localhost
REDIS_PORT: The connection port of the redis server. Defaults to 6379.
UNICORN_WORKERS: The number of unicorn workers to start. Defaults to 2.
UNICORN_TIMEOUT: Sets the timeout of unicorn worker processes. Defaults to 60 seconds.
SIDEKIQ_CONCURRENCY: The number of concurrent sidekiq jobs to run. Defaults to 5
DB_TYPE: The database type. Possible values: mysql, postgres. Defaults to mysql.
DB_HOST: The database server hostname. Defaults to localhost.
DB_PORT: The database server port. Defaults to 3306 for mysql and 5432 for postgresql.
DB_NAME: The database database name. Defaults to gitlabhq_production
DB_USER: The database database user. Defaults to root
DB_PASS: The database database password. Defaults to no password
DB_POOL: The database database connection pool count. Defaults to 10.
SMTP_DOMAIN: SMTP domain. Defaults to www.gmail.com
SMTP_HOST: SMTP server host. Defaults to smtp.gmail.com.
SMTP_PORT: SMTP server port. Defaults to 587.
SMTP_USER: SMTP username.
SMTP_PASS: SMTP password.
SMTP_STARTTLS: Enable STARTTLS. Defaults to true.
SMTP_AUTHENTICATION: Specify the SMTP authentication method. Defaults to 'login' if SMTP_USER is set.
LDAP_ENABLED: Enable LDAP. Defaults to false
LDAP_HOST: LDAP Host
LDAP_PORT: LDAP Port. Defaults to 636
LDAP_UID: LDAP UID. Defaults to sAMAccountName
LDAP_METHOD: LDAP method, Possible values are ssl, tls and plain. Defaults to ssl
LDAP_BIND_DN: No default.
LDAP_PASS: LDAP password
LDAP_ALLOW_USERNAME_OR_EMAIL_LOGIN: If enabled, GitLab will ignore everything after the first '@' in the LDAP username submitted by the user on login. Defaults to false if LDAP_UID is userPrincipalName, else true.
LDAP_BASE: Base where we can search for users. No default.
LDAP_USER_FILTER: Filter LDAP users. No default.
Maintenance
SSH Login
There are two methods to gain root login to the container, the first method is to add your public rsa key to the authorized_keys file and build the image.
The second method is use the dynamically generated password. Every time the container is started a random password is generated using the pwgen tool and assigned to the root user. This password can be fetched from the docker logs.
docker logs gitlab 2>&1 | grep '^User: ' | tail -n1
This password is not persistent and changes every time the image is executed.
Creating backups
Gitlab defines a rake task to easily take a backup of your gitlab installation. The backup consists of all git repositories, uploaded files and as you might expect, the sql database.
Before taking a backup, please make sure that the gitlab image is not running for obvious reasons
docker stop gitlab
To take a backup all you need to do is run the gitlab rake task to create a backup.
docker run --name=gitlab -i -t --rm [OPTIONS] \
sameersbn/gitlab:6.9.2 app:rake gitlab:backup:create
A backup will be created in the backups folder of the Data Store
Restoring Backups
Gitlab defines a rake task to easily restore a backup of your gitlab installation. Before performing the restore operation please make sure that the gitlab image is not running.
docker stop gitlab
To restore a backup, run the image in interactive (-i -t) mode and pass the "app:restore" command to the container image.
docker run --name=gitlab -i -t --rm [OPTIONS] \
sameersbn/gitlab:6.9.2 app:rake gitlab:backup:restore
The restore operation will list all available backups in reverse chronological order. Select the backup you want to restore and gitlab will do its job.
Automated Backups
The image can be configured to automatically take backups on a daily or monthly basis. Adding -e "GITLAB_BACKUPS=daily" to the docker run command will enable daily backups, while -e "GITLAB_BACKUPS=monthly" will enable monthly backups.
Daily backups are created at 4 am (UTC) everyday, while monthly backups are created on the 1st of every month at the same time as the daily backups.
By default, when automated backups are enabled, backups are held for a period of 7 days. While when automated backups are disabled, the backups are held for an infinite period of time. This can behaviour can be configured via the GITLAB_BACKUP_EXPIRY option.
Upgrading
GitLabHQ releases new versions on the 22nd of every month, bugfix releases immediately follow. I update this project almost immediately when a release is made (at least it has been the case so far). If you are using the image in production environments I recommend that you delay updates by a couple of days after the gitlab release, allowing some time for the dust to settle down.
To upgrade to newer gitlab releases, simply follow this 5 step upgrade procedure.
Step 1: Stop the currently running image
docker stop gitlab
Step 2: Backup the application data.
docker run --name=gitlab -i -t --rm [OPTIONS] \
sameersbn/gitlab:6.9.2 app:rake gitlab:backup:create
Step 3: Update the docker image.
docker pull sameersbn/gitlab:6.9.2
Step 4: Migrate the database.
docker run --name=gitlab -i -t --rm [OPTIONS] \
sameersbn/gitlab:6.9.2 app:rake db:migrate
Step 5: Start the image
docker run --name=gitlab -d [OPTIONS] sameersbn/gitlab:6.9.2
Rake Tasks
The app:rake command allows you to run gitlab rake tasks. To run a rake task simply specify the task to be executed to the app:rake command. For example, if you want to gather information about GitLab and the system it runs on.
docker run --name=gitlab -d [OPTIONS] \
sameersbn/gitlab:6.9.2 app:rake gitlab:env:info
Similarly, to import bare repositories into GitLab project instance
docker run --name=gitlab -d [OPTIONS] \
sameersbn/gitlab:6.9.2 app:rake gitlab:import:repos
For a complete list of available rake tasks please refer https://github.com/gitlabhq/gitlabhq/tree/master/doc/raketasks or the help section of your gitlab installation.
References
https://github.com/gitlabhq/gitlabhq
https://github.com/gitlabhq/gitlabhq/blob/master/doc/install/installation.md
https://github.com/gitlabhq/gitlabhq/blob/master/doc/install/requirements.md
http://wiki.nginx.org/HttpSslModule
https://raymii.org/s/tutorials/Strong_SSL_Security_On_nginx.html
https://github.com/gitlabhq/gitlab-recipes/blob/master/web-server/nginx/gitlab-ssl


 2012
2012

 被折叠的 条评论
为什么被折叠?
被折叠的 条评论
为什么被折叠?
 到【灌水乐园】发言


