


springcloud学习记录–Eureka
一、eureka服务发现与注册中心
简介:
Spring Cloud Eureka是Spring Cloud Netflix项目下的服务治理模块,负责服务的注册与发现。
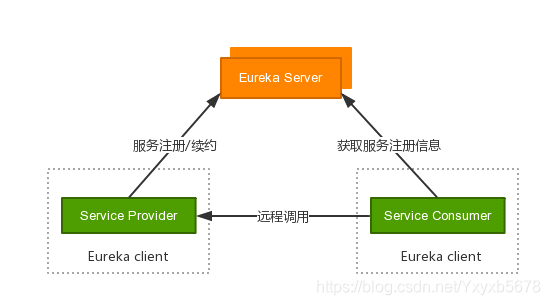
组成:
由两个组件组成:Eureka Server和Eureka Client,其中Eureka client可以再分为Service Provider和Service Consumer
Eureka Server:服务的注册中心,负责维护注册的服务列表。
•
Service Provider:服务提供方,作为一个Eureka Client,向Eureka Server做服务注册、续约和下线等操作,注册的主要数据包括服务名、机器ip、端口号、域名等等,Eureka Server会存储这些信息
•
Service Consumer:服务消费方,作为一个Eureka Client,向Eureka Server获取Service Provider的注册信息,并通过远程调用与Service Provider进行通信。
eureka集群
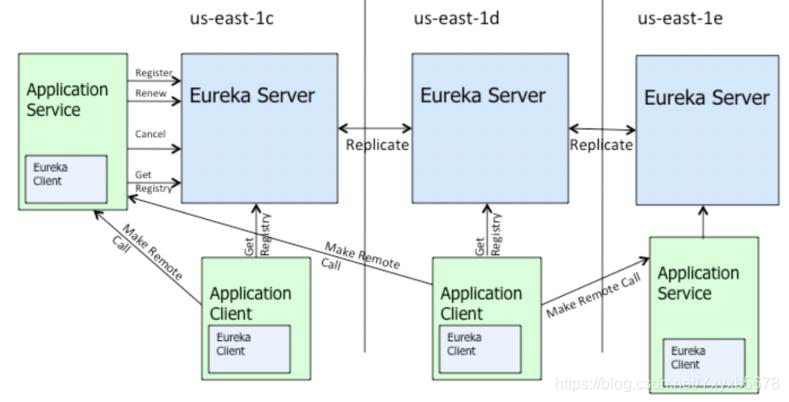
上图为Eureka官方wiki的架构图。
Eureka Server:表示注册中心集群
us-east-xxx:表示集群所在的区域
Application Service:表示服务提供者
Application Client:表示服务消费者
Eureka Client:表示Eureka客户端
如图所示,现在有三个区us-east-1c,us-east-1d,us-east-1e,每个区里都有一个Eureka Server集群,以及不定的Application Service和Application Client。
•
值得注意的是,注册、续约、下线的请求默认优先选择本区域内的Eureka Server,只有当本区内的Eureka Server都不可用,才会选择其他区的Eureka Server。

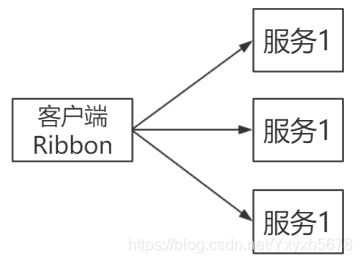
ribbon
Spring Cloud Ribbon
是一个基于HTTP和TCP的客户端负载均衡工具,它基于Netflix Ribbon实现。
通过Spring Cloud的封装,可以让我们轻松地将面向服务的REST模版请求自动转换成客户端负载均衡的服务调用。
Spring Cloud Ribbon虽然只是一个工具类框架,它不像服务注册中心、配置中心、API网关那样需要独立部署,但是它几乎存在于每一个Spring Cloud构建的微服务和基础设施中。
Ribbon 自带的负载均衡策略有如下几个:
RoundRibbonRule:
RoundRibbonRule:
轮询。
RandomRule:
随机。
AvailabilityFilteringRule:
先过滤掉由于多次访问故障而处于断路器跳闸状态的服务,以及并发连接数超过阈值的服务,剩下的服务,使用轮询策略。
WeightedResponseTimeRule:
根据平均响应时间计算所有服务的权重,响应越快的服务权重越高,越容易被选中。一开始启动时,统计信息不足的情况下,使用轮询。
RetryRule:
先轮询,如果获取失败则在指定时间内重试,重新轮询可用的服务。
BestAvailableRule:
先过滤掉由于多次访问故障而处于断路器跳闸状态的服务,然后选择一个并发量最小的服务。
ZoneAvoidanceRule:
复合判断 server 所在区域的性能和 server 的可用性选择服务器
环境搭建+代码
一、Eureka-server
1.新建一个空文件夹用IDEA打开 springcloudtest
2.在springcloudtest中新建Module:erueka_server1(erueka_server2,erueka_server3相同,只是yml配置文件不同)
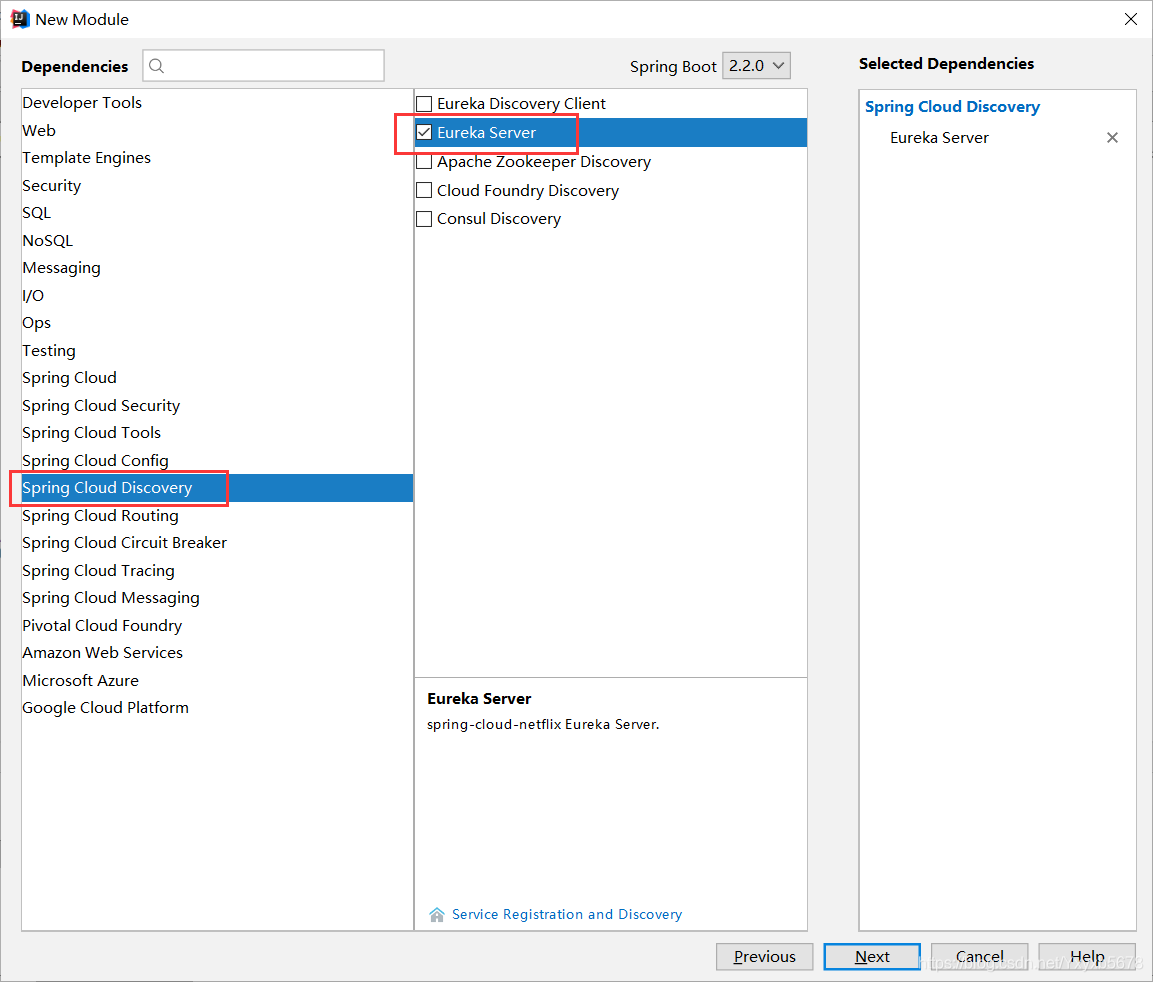
pom选择如上图。生成的pom依赖如下
<?xml version="1.0" encoding="UTF-8"?>
<project xmlns="http://maven.apache.org/POM/4.0.0" xmlns:xsi="http://www.w3.org/2001/XMLSchema-instance"
         xsi:schemaLocation="http://maven.apache.org/POM/4.0.0 https://maven.apache.org/xsd/maven-4.0.0.xsd">
    <modelVersion>4.0.0</modelVersion>
    <parent>
        <groupId>org.springframework.boot</groupId>
        <artifactId>spring-boot-starter-parent</artifactId>
        <version>2.1.5.RELEASE</version>
        <relativePath/> <!-- lookup parent from repository -->
    </parent>
    <groupId>com.yxl</groupId>
    <artifactId>eureka_sever1</artifactId>
    <version>0.0.1-SNAPSHOT</version>
    <name>eureka_sever1</name>
    <description>Demo project for Spring Boot</description>

	<!--注意springcloud和springboot版本对应-->
    <properties>
        <java.version>1.8</java.version>
        <spring-cloud.version>Greenwich.SR2</spring-cloud.version>
    </properties>

    <dependencies>
        <dependency>
            <groupId>org.springframework.cloud</groupId>
            <artifactId>spring-cloud-starter-netflix-eureka-server</artifactId>
        </dependency>

        <dependency>
            <groupId>org.springframework.boot</groupId>
            <artifactId>spring-boot-starter-test</artifactId>
            <scope>test</scope>
        </dependency>
    </dependencies>

    <dependencyManagement>
        <dependencies>
            <dependency>
                <groupId>org.springframework.cloud</groupId>
                <artifactId>spring-cloud-dependencies</artifactId>
                <version>${spring-cloud.version}</version>
                <type>pom</type>
                <scope>import</scope>
            </dependency>
        </dependencies>
    </dependencyManagement>

    <build>
        <plugins>
            <plugin>
                <groupId>org.springframework.boot</groupId>
                <artifactId>spring-boot-maven-plugin</artifactId>
            </plugin>
        </plugins>
    </build>

</project>
在启动类上加上注释:@EnableEurekaServer
@SpringBootApplication
@EnableEurekaServer
public class EurekaSever1Application {

    public static void main(String[] args) {
        SpringApplication.run(EurekaSever1Application.class, args);
    }

}
yml配置如下:
#erueka_server1
spring:
  application:
    name: eureka-server1  #需要指明 spring.application.name,这个很重要,这在以后的服务与服务之间相互调用一般都是根据这个 name

server:
  port: 8761  #(eureka 默认端口为:8761)

eureka:
  instance:
    hostname: eureka1 #需要在当前电脑中进行ip映射:C:\Windows\System32\drivers\etc
  client:
    registerWithEureka: true #是否注册到eureka,如果是做服务端的服务注册与发现,则需将这两个配置改为false,默认为true
    fetch-registry: true  # 是否从eureka获取注册信息,不需要同步其他eureka server节点,则可以设置为false
    serviceUrl:
	#      defaultZone: http://eureka1:8761/eureka/ #只有一个server的时候
      defaultZone: http://eureka2:8762/eureka/,http://eureka3:8763/eureka/  #集群的时候
#erueka_server2
spring:
 application:
   name: eureka-server2

server:
 port: 8762

eureka:
 instance:
   hostname: eureka2
 client:
   registerWithEureka: true
   fetch-registry: true
   serviceUrl:
     defaultZone: http://eureka1:8762/eureka/,http://eureka3:8763/eureka/
#erueka_server3
spring:
 application:
   name: eureka-server3

server:
 port: 8763

eureka:
 instance:
   hostname: eureka3
 client:
   registerWithEureka: true
   fetch-registry: true
   serviceUrl:
     defaultZone: http://eureka2:8761/eureka/,http://eureka3:8762/eureka/
注意: yml中的hostname: eureka1 需要在当前电脑中进行ip映射:C:\Windows\System32\drivers\etc\hosts中添加
127.0.0.1       eureka1
127.0.0.1       eureka2
127.0.0.1       eureka3
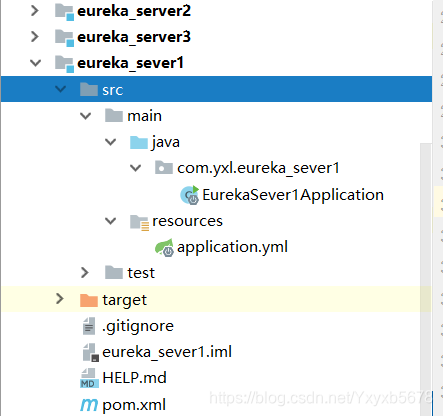
目录结构如下图
二、Eureka-client
在这里又将Eureka-client分为provider和consumer
先看provider的:
1.新建module:eureka_client_provider
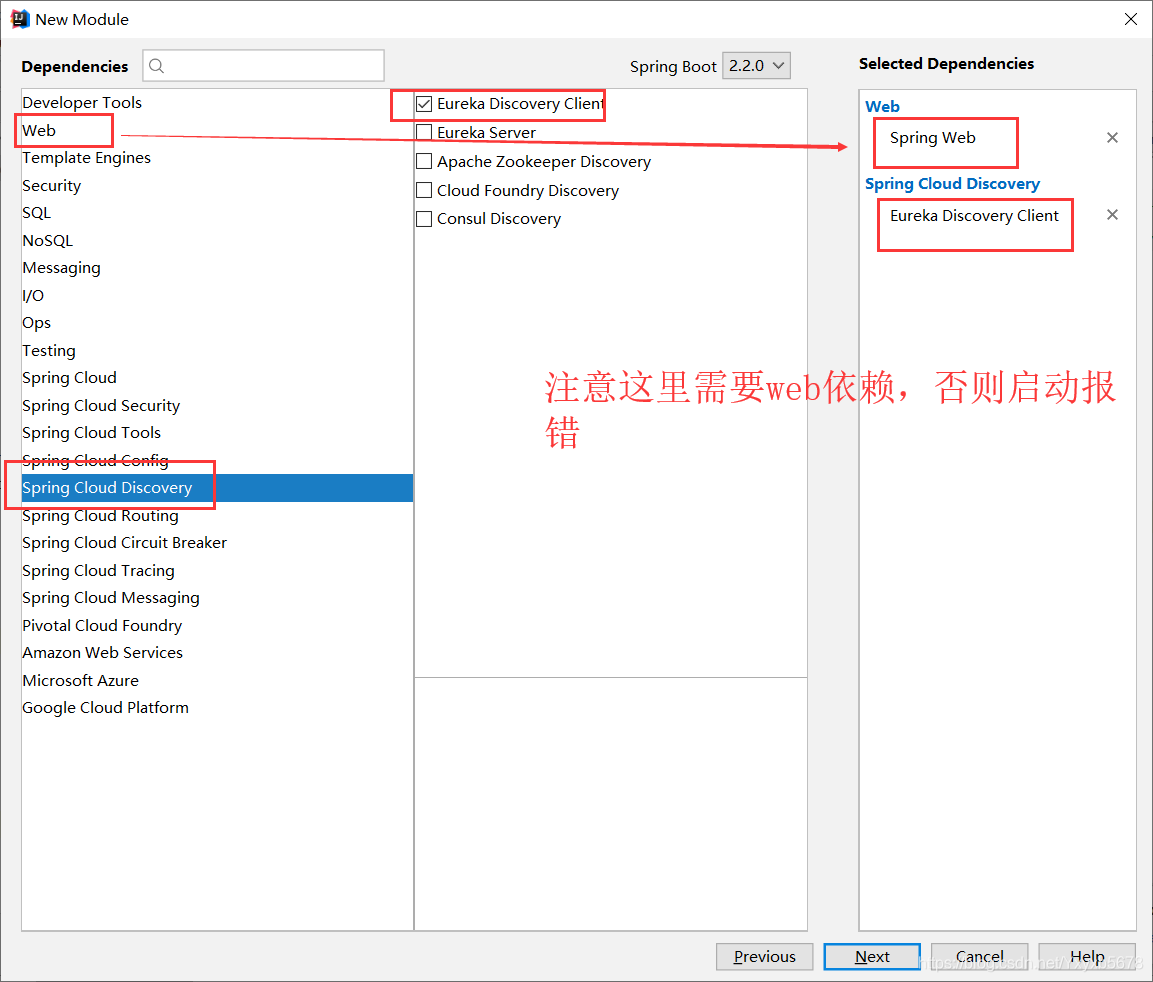
pom.xml中依赖为:
    <dependencies>
        <dependency>
            <groupId>org.springframework.boot</groupId>
            <artifactId>spring-boot-starter-web</artifactId>
        </dependency>
        <dependency>
            <groupId>org.springframework.cloud</groupId>
            <artifactId>spring-cloud-starter-netflix-eureka-client</artifactId>
        </dependency>

        <dependency>
            <groupId>org.springframework.boot</groupId>
            <artifactId>spring-boot-starter-test</artifactId>
            <scope>test</scope>
        </dependency>
    </dependencies>
2.然后在启动类上加注解:@EnableDiscoveryClient
 @SpringBootApplication
 @EnableDiscoveryClient
 public class EurekaClientProviderApplication {

    public static void main(String[] args) {
    	 	SpringApplication.run(EurekaClientProviderApplication.class, args);
 	}

 }
3.ym配置如下:
server:
  port: 8001

spring:
  application:
    name: eureka-client-provider

eureka:
  client:
    serviceUrl:
      defaultZone: http://eureka1:8761/eureka/,http://eureka2:8762/eureka/,http://eureka3:8763/eureka/
4.写一个简单的测试,provider作为consumer的提供者
写一个serviceProviderController类,为consumer调用provider返回一个端口信息。
@RestController
public class serviceProviderController {
    @Value("${server.port}")
    private String port;

//    @GetMapping(value = "hiya")
    @GetMapping("/hiya")
    public String  sayHi(@RequestParam("message") String message){
        return "hi,here is serviceProvider1:"+port+",your message is:"+message;
    }
}
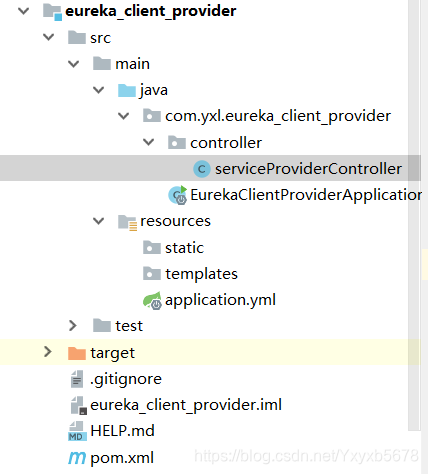
项目的目录机构如下:
如果有多个提供者写法同上。
再来看consumer的
1.新建module:eureka_client_consumer

pom.xml依赖:
    <dependencies>
        <dependency>
            <groupId>org.springframework.boot</groupId>
            <artifactId>spring-boot-starter-web</artifactId>
        </dependency>
        <dependency>
            <groupId>org.springframework.cloud</groupId>
            <artifactId>spring-cloud-starter-netflix-eureka-client</artifactId>
        </dependency>

        <dependency>
            <groupId>org.springframework.boot</groupId>
            <artifactId>spring-boot-starter-test</artifactId>
            <scope>test</scope>
        </dependency>
    </dependencies>
2.在启动类上添加注解:@EnableDiscoveryClient
@SpringBootApplication
@EnableDiscoveryClient
public class EurekaClientConsumerApplication {

    public static void main(String[] args) {
        SpringApplication.run(EurekaClientConsumerApplication.class, args);
    }

}
3.yml配置
server:
  port: 8011

spring:
  application:
    name: eurekaconsumer1

eureka:
  client:
    serviceUrl:
       defaultZone: http://eureka1:8761/eureka/,http://eureka2:8762/eureka/,http://eureka3:8763/eureka/
4.开启ribbon的负载均衡功能
写RestTemplateConfiguration类,加上注释:@LoadBalanced
@Configuration
public class RestTemplateConfiguration {

    @Bean
    @LoadBalanced //表明开启负载均衡访问功能
    public RestTemplate restTemplate(){
        return new RestTemplate();
    }
}
5.写一个简单的测试
@RestController
public class ribbonController {

    @Autowired
    private RestTemplate restTemplate;

    @GetMapping(value = "hi")
    public  String sayHi(String message){
        return restTemplate.getForObject("http://eureka-client-provider/hiya?message={1}" , String.class,message);
    }
}
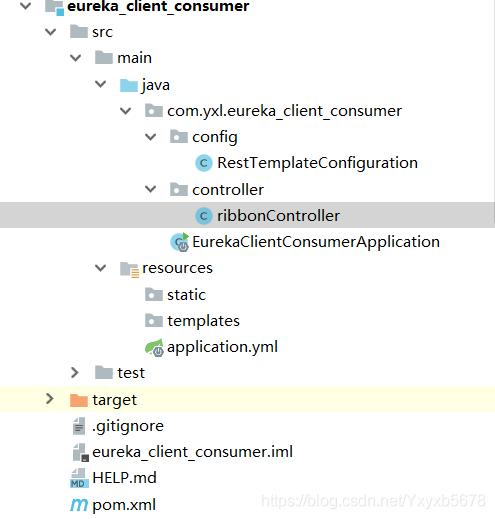
目录结构如下:
需要多个consumer的时候和上面写法一样。
测试
启动后,访问consumer即可,项目没开就不截图了。


 4934
4934


 被折叠的 条评论
为什么被折叠?
被折叠的 条评论
为什么被折叠?
 到【灌水乐园】发言


