


这篇博客主要介绍事务对象已经被封装成了代理对象,那代理对象是怎么执行事务的目标方法的。
1. 代理对象执行目标放方法的整体逻辑。
public class Main {

	public static void main(String[] args) throws Exception {
		// 创建容器。
        AnnotationConfigApplicationContext applicationContext = new AnnotationConfigApplicationContext(
				JdbcConfig.class);

		// 从容器中拿出 bean,此时 userService 已经是代理对象了。
        UserService userService = applicationContext.getBean(UserService.class);
		// 代理对象执行事务方法。
        userService.testTranscation();
		// 代理对象执行非事物方法。
		userService.printAndRestore();
	}
}
这里使用的是 JDK 动态代理,当执行userService.testTranscation(); 时,aop 代理对象会直接执行 invoke 方法。
// JdkDynamicAopProxy.java

// proxy 是 UserService 的代理对象,method 是 testTranscation 方法。 args 是空数组。
public Object invoke(Object proxy, Method method, Object[] args) throws Throwable {
    Object oldProxy = null;
    boolean setProxyContext = false;
    // 获取到我们的目标对象。
    TargetSource targetSource = this.advised.targetSource;
    Object target = null;

    try {
        if (!this.equalsDefined && AopUtils.isEqualsMethod(method)) {
            // The target does not implement the equals(Object) method itself.
            return equals(args[0]);
        }
        else if (!this.hashCodeDefined && AopUtils.isHashCodeMethod(method)) {
            // The target does not implement the hashCode() method itself.
            return hashCode();
        }
        else if (method.getDeclaringClass() == DecoratingProxy.class) {
            // There is only getDecoratedClass() declared -> dispatch to proxy config.
            return AopProxyUtils.ultimateTargetClass(this.advised);
        }
        else if (!this.advised.opaque && method.getDeclaringClass().isInterface() &&
                 method.getDeclaringClass().isAssignableFrom(Advised.class)) {
            return AopUtils.invokeJoinpointUsingReflection(this.advised, method, args);
        }

        Object retVal;
        if (this.advised.exposeProxy) {
            // Make invocation available if necessary.
            oldProxy = AopContext.setCurrentProxy(proxy);
            setProxyContext = true;
        }

        // 获取目标对象。
        target = targetSource.getTarget();
        // 获取目标对象的 class 对象。
        Class<?> targetClass = (target != null ? target.getClass() : null);

        // 以 类名+方法名 作为key,从代理对象中获取 method 上的拦截器。保存在 chain 中。
        List<Object> chain = this.advised.getInterceptorsAndDynamicInterceptionAdvice(method, targetClass);

        if (chain.isEmpty()) {
            // 如果拦截器链为空,表示 当前方法不需要增强,直接执行就好了。
            // 先获取方法的入口参数。
            Object[] argsToUse = AopProxyUtils.adaptArgumentsIfNecessary(method, args);
            // 再通过反执行方法。
            retVal = AopUtils.invokeJoinpointUsingReflection(target, method, argsToUse);
        }
        else {
            // We need to create a method invocation...
            // 如果拦截器不为空,就要织入了。所谓织入就是在执行目标方法的时候,将它的通知在恰当的地方一并执行。
            // 先创建 MethodInvocation 对象,将所有需要的信息都封装在里面。
            // (代理、目标对象、目标方法、方法参数、目标对象的Class对象 、拦截链)
            MethodInvocation invocation =
                new ReflectiveMethodInvocation(proxy, target, method, args, targetClass, chain);
            // Proceed to the joinpoint through the interceptor chain.
            // 开始执行链式调用。
            retVal = invocation.proceed();
        }

        // Massage return value if necessary.
        Class<?> returnType = method.getReturnType();
        if (retVal != null && retVal == target &&
            returnType != Object.class && returnType.isInstance(proxy) &&
            !RawTargetAccess.class.isAssignableFrom(method.getDeclaringClass())) {
            // Special case: it returned "this" and the return type of the method
            // is type-compatible. Note that we can't help if the target sets
            // a reference to itself in another returned object.
            retVal = proxy;
        }
        else if (retVal == null && returnType != Void.TYPE && returnType.isPrimitive()) {
            throw new AopInvocationException(
                "Null return value from advice does not match primitive return type for: " + method);
        }
        return retVal;
    }
    finally {
        if (target != null && !targetSource.isStatic()) {
            // Must have come from TargetSource.
            targetSource.releaseTarget(target);
        }
        if (setProxyContext) {
            // Restore old proxy.
            AopContext.setCurrentProxy(oldProxy);
        }
    }
}
事务的aop 和 普通的aop在 代理对象执行目标方法时的整体逻辑是没有区别的。
区别在哪里呢?
区别在两者从代理对象中拿出来的增强器不一样,所以织入的业务逻辑也就不一样了。
方法的增强器(或者方法的拦截器)是怎么被拿出来的呢?
上面有行代码:
List<Object> chain = this.advised.getInterceptorsAndDynamicInterceptionAdvice(method, targetClass);
传入的参数是 类对象和方法名。
/** Cache with Method as key and advisor chain List as value. */
private transient Map<MethodCacheKey, List<Object>> methodCache;

public List<Object> getInterceptorsAndDynamicInterceptionAdvice(Method method, @Nullable Class<?> targetClass) {
    // 以全限定类名+方法名作为 key。
    MethodCacheKey cacheKey = new MethodCacheKey(method);
    // 根据 key 从增强器缓存中拿出对应的增强器。作用在该方法上增强器可能不止一个,所以拿出来的是个list。
    List<Object> cached = this.methodCache.get(cacheKey);
    if (cached == null) {
       	// 如果缓存中没有该方法的增强器。那就调用 增强器工厂方法 为其创建增强器。
        cached = this.advisorChainFactory.getInterceptorsAndDynamicInterceptionAdvice(
            this, method, targetClass);
        // 缓存创建的增强器。cached 可能是 null。
        this.methodCache.put(cacheKey, cached);
    }
    // 返回拿到的增强器,可能是 null。
    return cached;
}
所以,方法的增强器(拦截器)是通过 全限定类名+ 方法名 从代理对象中拿到的。

事务只有一个增强器 TransactionInterceptor。
2. 增强器的执行过程
执行 retVal = invocation.proceed();后,逻辑就走到了 TransactionInterceptor 中,所以事务的核心方法都在这个类里面。
// TransactionInterceptor.java
public Object invoke(MethodInvocation invocation) throws Throwable {
    Class<?> targetClass = (invocation.getThis() != null ? AopUtils.getTargetClass(invocation.getThis()) : null);
    // 在事务中执行调用。
    return invokeWithinTransaction(invocation.getMethod(), targetClass, invocation::proceed);
}
2.1 事务执行的整体过程
事务的执行分为两种方式:声明式事务 和 编程式事务。这里只介绍 声明式事务。
// TransactionInterceptor.java
protected Object invokeWithinTransaction(Method method, @Nullable Class<?> targetClass,
                                         final InvocationCallback invocation) throws Throwable {

    // 获取 TransactionAttributeSource,它里面存着已经解析好的 method 上的事务的属性。
    // 在事务的配置文件中,TransactionAttributeSource 的实现类 AnnotationTransactionAttributeSource 作为成员变量,
    // 注到了 TransactionInterceptor。
    TransactionAttributeSource tas = getTransactionAttributeSource();
    // 根据 全限定类名+方法名 从 TransactionAttributeSource 中拿已经解析好的事物属性:TransactionAttribute。
    final TransactionAttribute txAttr = (tas != null ? tas.getTransactionAttribute(method, targetClass) : null);
    // 根据事务属性,获取事务管理器。
    final TransactionManager tm = determineTransactionManager(txAttr);
    // 这里响应式事务,SpringFrameWork 5.2 以后,支持响应式事务。(这个先不用管)
    if (this.reactiveAdapterRegistry != null && tm instanceof ReactiveTransactionManager) {
        ReactiveTransactionSupport txSupport = this.transactionSupportCache.computeIfAbsent(method, key -> {
            if (KotlinDetector.isKotlinType(method.getDeclaringClass()) && KotlinDelegate.isSuspend(method)) {
                throw new TransactionUsageException(
                    "Unsupported annotated transaction on suspending function detected: " + method +
                    ". Use TransactionalOperator.transactional extensions instead.");
            }
            ReactiveAdapter adapter = this.reactiveAdapterRegistry.getAdapter(method.getReturnType());
            if (adapter == null) {
                throw new IllegalStateException("Cannot apply reactive transaction to non-reactive return type: " +
                                                method.getReturnType());
            }
            return new ReactiveTransactionSupport(adapter);
        });
        return txSupport.invokeWithinTransaction(
            method, targetClass, invocation, txAttr, (ReactiveTransactionManager) tm);
    }
    // 获取事务管理器:ptm 向下转型。
    PlatformTransactionManager ptm = asPlatformTransactionManager(tm);
    // 采用 类名+方法名+事务,创建事务的id。就是一个字符串,格式是:全限定类名+方法名
    final String joinpointIdentification = methodIdentification(method, targetClass, txAttr);
    // 如果前事务是声明式事务。
    if (txAttr == null || !(ptm instanceof CallbackPreferringPlatformTransactionManager)) {
        // 创建一个事务
        TransactionInfo txInfo = createTransactionIfNecessary(ptm, txAttr, joinpointIdentification);
        Object retVal;
        try {
            // 执行目标方法。就是被 @Transactional 注解的那个方法。
            retVal = invocation.proceedWithInvocation();
        }
        catch (Throwable ex) {
            // 目标方抛出异常,执行异常处理。
            completeTransactionAfterThrowing(txInfo, ex);
            throw ex;
        }
        finally {
            // 目标方法执行结束了。
            // 清空事务。因为事务信息都保存在当前的线程中,所以要清空。
            // 将 ThreadLocal 中的一些信息清掉了。
            cleanupTransactionInfo(txInfo);
        }

        if (retVal != null && vavrPresent && VavrDelegate.isVavrTry(retVal)) {
            // 获取事务状态。
            TransactionStatus status = txInfo.getTransactionStatus();
            if (status != null && txAttr != null) {
                retVal = VavrDelegate.evaluateTryFailure(retVal, txAttr, status);
            }
        }
        // 提交事务。
        commitTransactionAfterReturning(txInfo);
        return retVal;
    }
    else {
        // 编程式事务的代码这里就不贴了。
    }
}
抛开那些校验逻辑,单独把事务的执行逻辑摘出来:
// 创建事务。
TransactionInfo txInfo = createTransactionIfNecessary(ptm, txAttr, joinpointIdentification);
try {
    // 执行目标方法。
    retVal = invocation.proceedWithInvocation();
}
catch (Throwable ex) {
    // 异常处理。
    completeTransactionAfterThrowing(txInfo, ex);
    throw ex;
}
finally {
    // 清空事务。
    cleanupTransactionInfo(txInfo);
}
// 提交事务。
commitTransactionAfterReturning(txInfo);
四件事情:
- 创建事务。
- 目标方法,这就是程序员写的业务代码了,一般都是在操作数据库。
- 如果业务代码抛异常,捕获后执行异常处理。
- 业务代码执行完毕后,清空事务。
- 提交事务。
从这里可以看出,无论目标方法执行结果如何,清空事务和提交事务是一定会执行的。
除了第二件事情以外,分别看下其他事情具体都是在干什么?
2.2 创建事务
这个过程很复杂,我尽量一层一层写清楚。
// TransactionAspectSupport.java

// tm 是事务管理器。txAttr 是方法上的事务属性(事务定义)。joinpointIdentification 是计算出来的事物id(全限定类名 + 方法名)
protected TransactionInfo createTransactionIfNecessary(@Nullable PlatformTransactionManager tm,
                                                       @Nullable TransactionAttribute txAttr, final String joinpointIdentification) {
    // 如果没有手动给事务指定名字,那就把 joinpointIdentification 作为事务的名字。
    if (txAttr != null && txAttr.getName() == null) {
        txAttr = new DelegatingTransactionAttribute(txAttr) {
            @Override
            public String getName() {
                return joinpointIdentification;
            }
        };
    }

    TransactionStatus status = null;
    if (txAttr != null) {
        if (tm != null) {
            // 获取事务状态对象。(这里涉及事务传播特性、老事务挂起,新事务创建、自动提交关闭等等设置)
            status = tm.getTransaction(txAttr);
        }
        else {
            if (logger.isDebugEnabled()) {
                logger.debug("Skipping transactional joinpoint [" + joinpointIdentification +
                             "] because no transaction manager has been configured");
            }
        }
    }
    // 创建事务信息对象,事务信息中有事务装填,事务定义等等。
    return prepareTransactionInfo(tm, txAttr, joinpointIdentification, status);
}
// ---
// tm 事务管理器,txAttr 事务属性(就是事务的定义),joinpointIdentification 事务id,status 事务状态对象。
protected TransactionInfo prepareTransactionInfo(@Nullable PlatformTransactionManager tm,
                                                 @Nullable TransactionAttribute txAttr, String joinpointIdentification,
                                                 @Nullable TransactionStatus status) {
    // 创建新的事务信息对象。
    TransactionInfo txInfo = new TransactionInfo(tm, txAttr, joinpointIdentification);

    if (txAttr != null) {
        if (logger.isTraceEnabled()) {
            logger.trace("Getting transaction for [" + txInfo.getJoinpointIdentification() + "]");
        }
        // 将事务状态set到新创建的事务中。
        txInfo.newTransactionStatus(status);
    }
    else {
        if (logger.isTraceEnabled()) {
            logger.trace("No need to create transaction for [" + joinpointIdentification +
                         "]: This method is not transactional.");
        }
    }
	// 将新创建事务绑定到当前线程中。就是将事务放到了threadlocal 中。
    txInfo.bindToThread();
    // 返回新创建的事物。
    return txInfo;
}
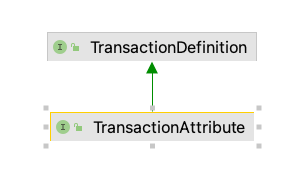
TransactionAttribute 对象中保存的是 @Transactional 注解解析后的内容,它可以被叫做事务属性,也可以被叫做事务定义,这么说是有根据的:
整个创建过程做了四件事情:
- 确定事务id。
- 创建事务状态对象:TransactionStatus。
- 创建事务信息对象:TransactionInfo。
- 将创建的事物信息绑定到当前线程中。
这四件事情中,1、3、4 很简单不再赘述,主要看下 2 具体都是在干什么?
2.2.1 创建事务状态对象
TransactionStatus status = null;
status = tm.getTransaction(txAttr);
根据传播特性,返回一个已有的事物或者创建一个新的事物。
// AbstractPlatformTransactionManager.java

// definition 是事务定义。
public final TransactionStatus getTransaction(@Nullable TransactionDefinition definition)
    throws TransactionException {

    // 获取当前事务定义。(如果没有传入事务定义,就使用默认的,一般都是有传入的)。
    TransactionDefinition def = (definition != null ? definition : TransactionDefinition.withDefaults());
    // 创建事务,一个 DatasetSourceTransactionObject 类型的对象。
    // 它里面有个通向数据源的连接:ConnectionHolder 对象。
    Object transaction = doGetTransaction();
    boolean debugEnabled = logger.isDebugEnabled();
    // 判断已有事务是否存在。
    if (isExistingTransaction(transaction)) {
        // 如果事务已经存在,执行事务传播处理。
        return handleExistingTransaction(def, transaction, debugEnabled);
    }
    // (能走到这里,表示外围事务不存在)
    // 如果事务定义设定的超时时间小于 -1,报异常。
    if (def.getTimeout() < TransactionDefinition.TIMEOUT_DEFAULT) {
        throw new InvalidTimeoutException("Invalid transaction timeout", def.getTimeout());
    }

    // 外围方法不存在事务,但当前事务传播特性是 PROPAGATION_MANDATORY,报异常。
    if (def.getPropagationBehavior() == TransactionDefinition.PROPAGATION_MANDATORY) {
        throw new IllegalTransactionStateException(
            "No existing transaction found for transaction marked with propagation 'mandatory'");
    }
    // 外围方法不存在事务,如果当前事务的传播特性是:PROPAGATION_REQUIRED、PROPAGATION_REQUIRES_NEW、PROPAGATION_NESTED
    // 创建新的事务。(管你有没有,我都要创建新事务)
    else if (def.getPropagationBehavior() == TransactionDefinition.· ||
             def.getPropagationBehavior() == TransactionDefinition.PROPAGATION_REQUIRES_NEW ||
             def.getPropagationBehavior() == TransactionDefinition.PROPAGATION_NESTED) {
        // 创建挂起对象,空挂起。
        SuspendedResourcesHolder suspendedResources = suspend(null);
        if (debugEnabled) {
            logger.debug("Creating new transaction with name [" + def.getName() + "]: " + def);
        }
        try {
            // 开启一个新事务。
            // def: 要创建的事务的定义,transaction: 当前事务对象,debugEnabled: 启动 debug,suspendedResources: 挂起的事务对象。
            // 挂起的事物为什么要加到新的事物中去?因为新的事务执行完了,还要再执行挂起的事物。
            return startTransaction(def, transaction, debugEnabled, suspendedResources);
        }
        catch (RuntimeException | Error ex) {
            resume(null, suspendedResources);
            throw ex;
        }
    }
    else {
        // Create "empty" transaction: no actual transaction, but potentially synchronization.
        if (def.getIsolationLevel() != TransactionDefinition.ISOLATION_DEFAULT && logger.isWarnEnabled()) {
            logger.warn("Custom isolation level specified but no actual transaction initiated; " +
                        "isolation level will effectively be ignored: " + def);
        }
        // 以非事务方式运行。
        boolean newSynchronization = (getTransactionSynchronization() == SYNCHRONIZATION_ALWAYS);
        return prepareTransactionStatus(def, null, true, newSynchronization, debugEnabled, null);
    }
}
创建事务状态对象的逻辑:
- 获取当前事务的定义;
- 创建事务对象:
DatasetSourceTransactionObject,里面有个通向数据库的连接。 - 判断隔离级别,可能会执行挂起老事务、创建新事务或者抛异常。
- 如果不报异常,那肯定会再创建一个新的事物状态对象:
TransactionStatus,并启动事务。 - 返回创建的事物状态对象。
在创建新事务后,要判断事务是否已经存在了,按照事务传播特性分为两种执行逻辑。
第一种:外围方法没有事务,执行流程如上所示:
- case1:
PROPAGATION_MANDATORY类型直接抛异常。 - Case2:
PROPAGATION_REQUIRED或PROPAGATION_REQUIRES_NEW或PROPAGATION_NESTED类型,空挂起(可以理解为啥都没干),新建事务并启动。
第二种:外围方法有事务:
根据不同的传播特性执行不同的逻辑代码。
// AbstractPlatformTransactionManager.java

// transaction 是已存在的事务,definition 是新事务的定义。
private TransactionStatus handleExistingTransaction(
    TransactionDefinition definition, Object transaction, boolean debugEnabled)
    throws TransactionException {
    // 如果已经存在了事务,但是新事务的传播特性是 PROPAGATION_NEVER,报异常。
    if (definition.getPropagationBehavior() == TransactionDefinition.PROPAGATION_NEVER) {
        throw new IllegalTransactionStateException(
            "Existing transaction found for transaction marked with propagation 'never'");
    }
    // 如果已经存在了事务,但是新事务的传播特性是 PROPAGATION_NOT_SUPPORTED。
    if (definition.getPropagationBehavior() == TransactionDefinition.PROPAGATION_NOT_SUPPORTED) {
        if (debugEnabled) {
            logger.debug("Suspending current transaction");
        }
        // 挂起已存在的事务,
        Object suspendedResources = suspend(transaction);
        // 新事务标记
        boolean newSynchronization = (getTransactionSynchronization() == SYNCHRONIZATION_ALWAYS);
        // 创建一个新的事务状态,以非事务状态运行。
        // 参数2 事务对象为null,参数3 是否为新事务,参数6 挂起的事务信息。
        return prepareTransactionStatus(
            definition, null, false, newSynchronization, debugEnabled, suspendedResources);
    }
    // 如果已经存在了事务,当前事务的传播特性为 PROPAGATION_REQUIRES_NEW,挂起已有的事务,子方法新建一个事务。
    if (definition.getPropagationBehavior() == TransactionDefinition.PROPAGATION_REQUIRES_NEW) {
        if (debugEnabled) {
            logger.debug("Suspending current transaction, creating new transaction with name [" +
                         definition.getName() + "]");
        }
        // 挂起当前事务
        SuspendedResourcesHolder suspendedResources = suspend(transaction);
        try {
            // 创建一个新的事务。
            return startTransaction(definition, transaction, debugEnabled, suspendedResources);
        }
        catch (RuntimeException | Error beginEx) {
            resumeAfterBeginException(transaction, suspendedResources, beginEx);
            throw beginEx;
        }
    }
    // 如果已经存在了事务,子方法的传播类型是 PROPAGATION_NESTED
    if (definition.getPropagationBehavior() == TransactionDefinition.PROPAGATION_NESTED) {
        if (!isNestedTransactionAllowed()) {
            throw new NestedTransactionNotSupportedException(
                "Transaction manager does not allow nested transactions by default - " +
                "specify 'nestedTransactionAllowed' property with value 'true'");
        }
        if (debugEnabled) {
            logger.debug("Creating nested transaction with name [" + definition.getName() + "]");
        }
        if (useSavepointForNestedTransaction()) {
            // Create savepoint within existing Spring-managed transaction,
            // through the SavepointManager API implemented by TransactionStatus.
            // Usually uses JDBC 3.0 savepoints. Never activates Spring synchronization.
            // 嵌套事务,设置一个事务保存点。
            // 这里虽然也创建了一个事务状态,但它传入的当前事务的状态。而且是否是新事务标记为 false。
            DefaultTransactionStatus status =
                prepareTransactionStatus(definition, transaction, false, false, debugEnabled, null);
            // 设置一个保存点,意思是说,可以回滚到这里来。
            status.createAndHoldSavepoint();
            return status;
        }
        else {
            // Nested transaction through nested begin and commit/rollback calls.
            // Usually only for JTA: Spring synchronization might get activated here
            // in case of a pre-existing JTA transaction.
            // 其他情况创建一个新事务。
            return startTransaction(definition, transaction, debugEnabled, null);
        }
    }

    // Assumably PROPAGATION_SUPPORTS or PROPAGATION_REQUIRED.
    if (debugEnabled) {
        logger.debug("Participating in existing transaction");
    }
    if (isValidateExistingTransaction()) {
        if (definition.getIsolationLevel() != TransactionDefinition.ISOLATION_DEFAULT) {
            Integer currentIsolationLevel = TransactionSynchronizationManager.getCurrentTransactionIsolationLevel();
            if (currentIsolationLevel == null || currentIsolationLevel != definition.getIsolationLevel()) {
                Constants isoConstants = DefaultTransactionDefinition.constants;
                throw new IllegalTransactionStateException("Participating transaction with definition [" +
                                                           definition + "] specifies isolation level which is incompatible with existing transaction: " +
                                                           (currentIsolationLevel != null ?
                                                            isoConstants.toCode(currentIsolationLevel, DefaultTransactionDefinition.PREFIX_ISOLATION) :
                                                            "(unknown)"));
            }
        }
        if (!definition.isReadOnly()) {
            if (TransactionSynchronizationManager.isCurrentTransactionReadOnly()) {
                throw new IllegalTransactionStateException("Participating transaction with definition [" +
                                                           definition + "] is not marked as read-only but existing transaction is");
            }
        }
    }
    boolean newSynchronization = (getTransactionSynchronization() != SYNCHRONIZATION_NEVER);
    return prepareTransactionStatus(definition, transaction, false, newSynchronization, debugEnabled, null);
}
问题0: 怎么创建的事务?
新建一个 DataSourceTransactionObject 对象,接着从事物管理器中获取一个连接 set 到新建的事务中。
这个连接很重要,事务对象是新建的,如果拿的连接是已经存在的,那这个事务也就是已经存在的事物了。
protected Object doGetTransaction() {
    // 新建事务对象。
    DataSourceTransactionObject txObject = new DataSourceTransactionObject();
    // 允许设置保存点。
    txObject.setSavepointAllowed(isNestedTransactionAllowed());
    // 从事物同步管理器中获取连接。
    ConnectionHolder conHolder =
        (ConnectionHolder) TransactionSynchronizationManager.getResource(());
    // 设置连接到事务中。
    txObject.setConnectionHolder(conHolder, false);
    // 返回新建的事物。
    return txObject;
}
问题1:怎么判断事务是否已经存在?
如果事务有连接并且这个链接是活跃的,那就说明事务已经存在了。
protected boolean isExistingTransaction(Object transaction) {
    // 类型转换
    DataSourceTransactionObject txObject = (DataSourceTransactionObject) transaction;
    // 判断事务对象是否有活动可用的连接。
    return (txObject.hasConnectionHolder() && txObject.getConnectionHolder().isTransactionActive());
}
问题2: 事务挂起是做了什么?
A 方法执行调用了 B 方法,而且两个方法上都有事务,根据传播特性,B 事务要挂起 A 事务。”挂起“ 简答说就是 当 A 方法执行到 B 方法时,B 方法将 A 事务暂停了,B 方法自己开启一个事务,并且在新开启的事物中运行自己的逻辑,跟 A 事务没有任何关系,等到 A 事务执行完了,B 事务再恢复执行。
事务创建后会被绑定到当前线程中,但是一个线程执行能绑定一个事务。B 事务把 A 事务挂起,就是 B 事务将 A 事务从线程中拿出来(保存到一个对象中),接着把自己(B)绑定到线程,等 B 事务执行完了,(要恢复 A 事务)再把自己(B)从线程中拿出来,再将 A 事务再绑进去。
那具体细节呢?
// AbstractPlatformTransactionManager.java

// 挂起事务前,先要暂停事务管理同步器,再调用 doSuspend 方法挂起事务。
// transaction 是已经存在的事物。
protected final SuspendedResourcesHolder suspend(@Nullable Object transaction) throws TransactionException {
    // 如果事务管理同步器目前还是活跃的。
    if (TransactionSynchronizationManager.isSynchronizationActive()) {
        // 先暂停事务管理同步器。
        List<TransactionSynchronization> suspendedSynchronizations = doSuspendSynchronization();
        try {
            Object suspendedResources = null;
            if (transaction != null) {
                // 在 DataSource 的状态下,是取出连接的持有者对象。
                suspendedResources = doSuspend(transaction);
            }
            //(下面这些还是将当前线程中事物相关数值取出,并且清空。这些值都是保存在 threadlocal 中)。
            // 事务名字
            String name = TransactionSynchronizationManager.getCurrentTransactionName();
            TransactionSynchronizationManager.setCurrentTransactionName(null);
            // 只读
            boolean readOnly = TransactionSynchronizationManager.isCurrentTransactionReadOnly();
            TransactionSynchronizationManager.setCurrentTransactionReadOnly(false);
            // 隔离级别
            Integer isolationLevel = TransactionSynchronizationManager.getCurrentTransactionIsolationLevel();
            TransactionSynchronizationManager.setCurrentTransactionIsolationLevel(null);
            // 是否活跃.
            boolean wasActive = TransactionSynchronizationManager.isActualTransactionActive();
            TransactionSynchronizationManager.setActualTransactionActive(false);
            // 将已有的事物相关的信息封装到 SuspendedResourcesHolder 对象中。
            return new SuspendedResourcesHolder(
                suspendedResources, suspendedSynchronizations, name, readOnly, isolationLevel, wasActive);
        }
        catch (RuntimeException | Error ex) {
            // doSuspend failed - original transaction is still active...
            doResumeSynchronization(suspendedSynchronizations);
            throw ex;
        }
    }
    else if (transaction != null) {
        // 同步器已经不活跃了,那就直接挂起事务。
        Object suspendedResources = doSuspend(transaction);
        return new SuspendedResourcesHolder(suspendedResources);
    }
    else {
   		// 没有活跃的同步器,也没有事务,直接返回null。(空挂起可能就在这里)
        return null;
    }
}

// ---
protected Object doSuspend(Object transaction) {
    // 类型转换。
    DataSourceTransactionObject txObject = (DataSourceTransactionObject) transaction;
    // 将事务对象中的 ConnectionHolder 清空
    txObject.setConnectionHolder(null);
    // 将线程中的该事物相关的 value 取出来,返回。同时删除线程中的这些 value。
    return TransactionSynchronizationManager.unbindResource(obtainDataSource());
}
问题3:根据隔离级别,新的事务状态对象是怎么被新建出来的?
这里根据不同的传播特性,创建新事务时用给的入口参数都不一样,就不一一列举了。
这里选择其中一个做解释。
// definition 新事务的定义,transaction 新的事务对象, suspendedResources 已经存在的事务的临时保存。
private TransactionStatus startTransaction(TransactionDefinition definition, Object transaction,
                                           boolean debugEnabled, @Nullable SuspendedResourcesHolder suspendedResources) {

    boolean newSynchronization = (getTransactionSynchronization() != SYNCHRONIZATION_NEVER);
    // 创建一个新的事务状态对象。 transaction 直接赋值到了 status 内部的 transaction 字段上了。
    DefaultTransactionStatus status = newTransactionStatus(
        definition, transaction, true, newSynchronization, debugEnabled, suspendedResources);
    // 启动事务。
    doBegin(transaction, definition);
    // 事务同步到本地线程。
    // 将事务对象、隔离级别、名称等放在当前线程的 ThreadLocal 中。
    prepareSynchronization(status, definition);
    // 返回事务状态对象。
    return status;
}
protected void doBegin(Object transaction, TransactionDefinition definition) {
    // 类型转换。
    DataSourceTransactionObject txObject = (DataSourceTransactionObject) transaction;
    // 创建连接。
    Connection con = null;

    try {
        // 新的事务,没有连接就获取一个新的连接。
        if (!txObject.hasConnectionHolder() ||
            txObject.getConnectionHolder().isSynchronizedWithTransaction()) {
            // 从数据源中获取一个连接。
            Connection newCon = obtainDataSource().getConnection();
            if (logger.isDebugEnabled()) {
                logger.debug("Acquired Connection [" + newCon + "] for JDBC transaction");
            }
            // 将新拿到的连接设置到事务中。
            txObject.setConnectionHolder(new ConnectionHolder(newCon), true);
        }
        // 将连接标记为与事务同步。
        txObject.getConnectionHolder().setSynchronizedWithTransaction(true);
        // 从事物中拿出连接。
        con = txObject.getConnectionHolder().getConnection();
        // 设置隔离级别,(如果没有手动设置隔离级别,就会使用数据库默认的,如果有手动设置则会将 con 的隔离级别重新调整,并且并返回)
        Integer previousIsolationLevel = DataSourceUtils.prepareConnectionForTransaction(con, definition);
        txObject.setPreviousIsolationLevel(previousIsolationLevel);
        // 设置是否只读。
        txObject.setReadOnly(definition.isReadOnly());

        // Switch to manual commit if necessary. This is very expensive in some JDBC drivers,
        // so we don't want to do it unnecessarily (for example if we've explicitly
        // configured the connection pool to set it already).
        // 将事务本身的自动提交关闭,事务提交由 spring 管理。
        // 如果 con 的自动提交是 true。
        if (con.getAutoCommit()) {
            // 设置事务的自动提交是 true。
            txObject.setMustRestoreAutoCommit(true);
            if (logger.isDebugEnabled()) {
                logger.debug("Switching JDBC Connection [" + con + "] to manual commit");
            }
            // 设置 con 的自动提交是 false。(关闭)
            con.setAutoCommit(false);
        }
        // 事务开启之前的准备(按照需求设置事务是否只读)
        prepareTransactionalConnection(con, definition);
        // 设置标记当前连接的事务已经激活。
        txObject.getConnectionHolder().setTransactionActive(true);
        // 设置超时时间。如果超时时间不是默认的,那就以给定的为准。
        int timeout = determineTimeout(definition);
        if (timeout != TransactionDefinition.TIMEOUT_DEFAULT) {
            txObject.getConnectionHolder().setTimeoutInSeconds(timeout);
        }

        // Bind the connection holder to the thread.
        // 把新的连接绑定到当前线程(当前线程的 Threadlocal 中有一个 map)
        // 这里绑定的只是一个连接而已,像事务的只读、超时时间等都还没放进去。
        if (txObject.isNewConnectionHolder()) {
            // 挂起的时候将 Threadlocal从中的 map 给清空了,现在要将新事务的信息放进去。
            TransactionSynchronizationManager.bindResource(obtainDataSource(), txObject.getConnectionHolder());
        }
    }

    catch (Throwable ex) {
        if (txObject.isNewConnectionHolder()) {
            DataSourceUtils.releaseConnection(con, obtainDataSource());
            txObject.setConnectionHolder(null, false);
        }
        throw new CannotCreateTransactionException("Could not open JDBC Connection for transaction", ex);
    }
}
这里有点看明白了。
spring 事务的底层调用调用了 JDBC。
新创建的 DataSourceTransactionObject 对象中有 connection 以及设置了一些其他的信息,事务对象被绑定到了线程里面。
(connection 在这里关闭了数据库的自动提交功能,那么接下来对数据库的所有操作都必须手动提交,所以数据库的提交操作就交给了spring来管理)
我们写的操作数据库的代码用的是 mybatis 框架,底层也调用的是 JDBC。
mybatis 从当前线程中获取 connection,执行自己的操作语句。
问题四:再看看 Spring 事务。
再贴一遍核心代码。
// 创建事务。
TransactionInfo txInfo = createTransactionIfNecessary(ptm, txAttr, joinpointIdentification);
try {
    // 执行目标方法。
    retVal = invocation.proceedWithInvocation();
}
catch (Throwable ex) {
    // 异常处理。
    completeTransactionAfterThrowing(txInfo, ex);
    throw ex;
}
finally {
    // 清空事务。
    cleanupTransactionInfo(txInfo);
}
// 提交事务。
commitTransactionAfterReturning(txInfo);
创建事务的时候创建了 TransactionInfo 对象,它里面有个通向数据源的连接 connection,而且关闭了数据库的自动提交功能,txInfo 中其他的属性就不描述了。接下来 txInfo 被绑定到了当前线程的 threadlocal 中。执行目标方法操作数据库通常使用的是 mybatis 框架,它的底层也是调用 JDBC,完全可以从当前线程中拿出这个连接执行SQL语句。异常处理、清空事务、提交事务 是直接将 txInfo 给传了进去。再配合上 try…catch 代码块,目标方法抛异常就回滚。
Spring 事务是个什么东西?
try...catch 代码块 和 TransactionInfo 站在 java 的层级实现操控了 InnoDB 的事务管理。
2.2.2 异常处理
目标方法抛出异常,会被catch代码块捕捉到。有事务就回滚,没有事务就直接抛异常。
这里这只对 RuntimeException 和 Error 做回滚,其他异常照常执行提交,如果有异常直接抛。
里面还有好多细节,比如将挂起的事物恢复,这里不写了。
protected void completeTransactionAfterThrowing(@Nullable TransactionInfo txInfo, Throwable ex) {
    if (txInfo != null && txInfo.getTransactionStatus() != null) {
        if (logger.isTraceEnabled()) {
            logger.trace("Completing transaction for [" + txInfo.getJoinpointIdentification() +
                         "] after exception: " + ex);
        }
        // 如果有事务,而且满足回滚条件(默认情况下只对 RuntimeException 和 Error 做回滚) 才执行回滚操作。
        if (txInfo.transactionAttribute != null && txInfo.transactionAttribute.rollbackOn(ex)) {
            try {
                // 底层调用的 jdbc。
                txInfo.getTransactionManager().rollback(txInfo.getTransactionStatus());
            }
            catch (TransactionSystemException ex2) {
                logger.error("Application exception overridden by rollback exception", ex);
                ex2.initApplicationException(ex);
                throw ex2;
            }
            catch (RuntimeException | Error ex2) {
                logger.error("Application exception overridden by rollback exception", ex);
                throw ex2;
            }
        }
        else {
            // 否则,继续提交事务,并且将异常跑出去。
            try {
                // 提交事务。
                txInfo.getTransactionManager().commit(txInfo.getTransactionStatus());
            }
            // 抛异常。
            catch (TransactionSystemException ex2) {
                logger.error("Application exception overridden by commit exception", ex);
                ex2.initApplicationException(ex);
                throw ex2;
            }
            catch (RuntimeException | Error ex2) {
                logger.error("Application exception overridden by commit exception", ex);
                throw ex2;
            }
        }
    }
}
2.2.3 清空事务
清空事务逻辑很简单,目标方法也执行完了,应该清空绑定在当前线程中的事务信息。
protected void cleanupTransactionInfo(@Nullable TransactionInfo txInfo) {
    if (txInfo != null) {
        txInfo.restoreThreadLocalStatus();
    }
}
// ---
private void restoreThreadLocalStatus() {
    // Use stack to restore old transaction TransactionInfo.
    // Will be null if none was set.
    transactionInfoHolder.set(this.oldTransactionInfo);
}
2.2.4 提交事务
protected void commitTransactionAfterReturning(@Nullable TransactionInfo txInfo) {
    // 判断有没有事务,只有当事物存在时,才提交。
    if (txInfo != null && txInfo.getTransactionStatus() != null) {
        if (logger.isTraceEnabled()) {
            logger.trace("Completing transaction for [" + txInfo.getJoinpointIdentification() + "]");
        }
        txInfo.getTransactionManager().commit(txInfo.getTransactionStatus());
    }
}
细节好多,只写了一部分。


 907
907

 被折叠的 条评论
为什么被折叠?
被折叠的 条评论
为什么被折叠?
 到【灌水乐园】发言


