


1.zuul网关
只要实现了对服务请求
主要实现了对服务请求的路由功能
url:localhost:8080/login可以根据url判断当前请求转发给哪个服务(productservice cartservice userservice orderservice…)
2.eureka+ribbon+zuul实现order-user的微服务架构的整合
架构角度:
eureka注册中心
zuul网关
服务角度:
order:eureka client ,ribbon
user :eureka client
3.easymall 微服务框架的整改
3.1项目的开发架构
自定义的parent父工程
作用:统一资源
springcloud springboot
mybatis druid redis rabbitmq es数据库
resource资源工程
可以将多个子工程同时使用的,经常被调用的代码提取到资源工程
domin :user order
utils:CookieUtils MD5util…
vo :和前端对话使用的模板 javabean(JavaBean domain entity dto vo pojo…)
业务工程的开发
parent 继承
resource 依赖
resource和parent继承
3.2开发业务功能(product商品微服务)
分页查询
单个商品查询
单个商品的新增
单个商品的更新
通过接口文件实现功能代码的编写
结构展示:

访问网址:http://localhost:9004/hi?name=王老师(通过端口访问ribbon)
http://www.ssm.com/hello?name=wang(没有ribbon,访问了client)
http:www.ssm.com/hi?name=wang----->sercice-ribbon(有ribbon,然后访问client)
springcloud-zuul网关组件
1.zuul组件
1.1介绍
zuul是springcloud中提供的网关组件,可以实现整体微服务集群对外访问的入口,其它的任何服务的提供者(eureka client),服务的调用者(ribbon)的外界访问,都必须通过zuul来实现
1.2zuul测试工程
pom 继承springboot-parent 导入springcloud资源
依赖eureka client zuul(底层封装了ribbon)
application.properties
端口:8103
关闭敏感头 zuul。sensitive-headers=
网关zuul默认过滤掉一些敏感header 其中就有cookie 关闭拦截敏感头,使得cookie生效(否则用户登录失效)
配置网关的路由规则(什么样的url访问到zuul之后,转给哪个服务去处理)
zuul的服务名称:zuul-service
eureka的注册中心的地址
启动:
@SpringbootApplication
@EnableEurekaClient
@EnableZuuleProxy
配置文件中,提供的路由转发规则自定义
#service-ribbon service-hi
zuul.routes.hi.path=/zuul-hi/**
zuul.routes.hi.serviceId=service-hi(直接找eureka client 不经过ribbon)
所有的请求都要经过网关才能访问集群中的服务
hi:自定义的路由名称
一对zuul.routes.hi.**相互关联的
path:访问zuul网关的工程 url匹配到这个路由规则
? 匹配到一个字符/zuul/a /zuul/b 可以匹配到/zuul/? ,但是无法配置字符串和多级目录
999999999
*
匹配一个字符串/zuul/abc /zuul/a 匹配/zuul/* 但是无法匹配多级
9999999
**
匹配任意长度字符串,任意多级目录 zuul/abc, /zuul/a /zuul/a/b/c zuul/**
serviceId:符合path路由规则的url将会被转发到服务(zuul 封装了ribbon)
1.3zuul的访问流程
eureka注册中心,eurekaclient service-hi zuul
常见问题:zuul一旦启动,需要先抓取到注册信息,才能实现路由的转发服务的功能,启动后,不一定抓取到正确的服务列表,在找不到服务时,会出现Forwarding error转发失败,下面的异常会提示无法找到一个有效的服务:服务名称(比如zuul要去访问一个ribbon的工程,但是这个工程未启动,就会报这样的错,或者可能因为时间不够而导致,或者工程开启的先后次序不对而造成异常)
异常信息:
com.netflix.zuul.exception.ZuulException:Forwarding error
Caused by:com.netflix.client.ClientException:Load balancer does not have available server for client:service-ribbon
访问service-hi的服务功能,需要根据zuul提供的对外暴露的接口
http://localhost:8103/zuul-hi/hello?name=wang
过程
zuul接收到请求
匹配url地址和路由规则/zuul-hi/** /zuul-hi/hello
匹配上底层调用ribbon+restTemplate发起请求
http://service-hi/hello?name=wang
ribbon做拦截 zuul已经通过抓取将注册信息存储到本地,拦截拼接匹配服务和实例
http://127.0.0.1:9001/9002/hello?name=wang
最终访问
http://127.0.0.1:9001/9002/hello?name=wang
1.4zuul和nginx整合
http://www.ssm.com/hello?name=wang
nginx配置访问网关集群
#配置网关集群
		location /hello{
			#www.ssm.com/hello?name=wang
			proxy_pass http://zuulserver/zuul-hi/hello;
		}
		location /hi{
			#www.ssm.com/hello?name=wang
			proxy_pass http://zuulserver/zuul-ribbon/hi;
		}

	upstream zuulserver{
		server 127.0.0.1:8103;
		server 127.0.0.1:8104;
	}


1.5zuul高可用集群
复制一个zuul工程,修改端口8104
nginx的upstream server 127.0.0.1:8104
1.6转发给service-ribbon
如何配置zuul
zuul.routes.ribbon.path=/zuul-ribbon/**
 zuul.routes.ribbon.serviceId=service-ribbon
如何配置nginx
location /hi{
			#www.ssm.com/hello?name=wang
			proxy_pass http://zuulserver/zuul-ribbon/hi;
		}
如何访问
http://www.ssm.com/hi?name=wang ------>service-ribbon
访问的流转逻辑
http://www.ssm.com/hi?name=wang
| nginx | 域名,端口,location /hi |
|---|---|
| 转发zuul | http://zuulserver/zuul-ribbon/hi |
| nginx负载均衡 | http://127.0.0.1:8103/zuul-ribbon-hi/hi |
| zuul接收 | 路由匹配/zuul-ribbon/** ribbon |
| 转发到服务 | service-ribbon |
| restTemplate | http://service-ribbon/hi(zuul底层的ribbon) |
| ribbon负载均衡 | http:127.0.0.1:9004/hi |
| 9004工程接收 | restTemplate http://service-hi/hello |
| 第二个负载均衡 | http://127.0.0.1:9001/9002/hello?name=wang |
最终访问的
http://127.0.0.1:9004/hi?name=wang
微服务集群内部调用
http://127.0.0.1:9001/9002/hello?name=wang

如果再加入几个注册中心(一般最多两三个),会形成一个环状的结构
注册中心的高可用集群,互为客户端,互相注册自己的信息到对方,相互抓取服务(注册true 抓取 true),发现相同服务的名称的内容,合并同步,保持一致
2.2搭建高可用的eureka注册中心
每个注册中心的客户端配置中,需要配置一个ipAddressPrefer,底层通信记录信息以ip值优先,否则会使用localhost(使用域名)不会进行同步
eureka server修改配置文件application.properties 开启客户端抓取功能
eureka.client.fetchRegistry=true
配置相互注册的serviceUrl 8888配置8889 8889配置8888
server.port=8888
eureka.client.serviceUrl.defaultZone=http://localhost:8889/eureka
server.port=8889
eureka.client.serviceUrl.defaultZone=http://localhost:8888/eureka
开启ip地址优先配置
eureka.instance.prefer-ip-address=true
拷贝成第二个
端口修改
注册中心地址
各种服务提供者注册地址,编写一个list(即可互相访问)
http://localhost:8888/eureka,http://localhost:8889/eureka
1.demo案例order-user的微服务结构

2.实现这个结构
order.user,springboot工程加入springcloud 加入组件相关配置
2.1order系统
pom:继承parent-demo(继承了springboot和导入了springclooud)
依赖:ribbon 和eureka 客户端
application.properties:
服务名称 order-test
注册地址 8888
启动类@EnableEurekaClient
2.2user 系统
pom:继承parent-demo(继承了springboot和导入了springclooud)
依赖:eureka 客户端
application.properties:
服务名称 user-test
注册地址 8888
启动类@EnableEurekaClient
2.3zl网关和nginx配置
js请求ajax地址
http://www.ssm.com/user/query/point
https://www.ssm.com/order/pay
工程代码
@requestMapping(“user/query/point”)
@RequestMapping(“order/pay”)
zuul网关
添加两对路由转发规则
nginx配置
http://www.ssm.com/user/query/point
location /user{
proxy pass http://zuulserver/zuul-point/user/;
}
http://user-test/user/query/point
http://www.ssm.com/order/pay
location /order{
proxy pass http://zuulserver/zuul-pay/order/;
}
入门微服务
源码展示:
springcloud-parent-demo
pom代码:(boot和cloud)
<project xmlns="http://maven.apache.org/POM/4.0.0" xmlns:xsi="http://www.w3.org/2001/XMLSchema-instance"
  xsi:schemaLocation="http://maven.apache.org/POM/4.0.0 http://maven.apache.org/xsd/maven-4.0.0.xsd">
  <modelVersion>4.0.0</modelVersion>

  <groupId>cn.tedu</groupId>
  <artifactId>springcloud-parent-demo</artifactId>
  <version>0.0.1-SNAPSHOT</version>
  <packaging>pom</packaging>
  <!--继承springboot  -->
  <parent>
		<groupId>org.springframework.boot</groupId>
		<artifactId>spring-boot-starter-parent</artifactId>
		<version>1.5.9.RELEASE</version>
  </parent>
  <name>springcloud-parent-demo</name>
  <url>http://maven.apache.org</url>

  <properties>
    <project.build.sourceEncoding>UTF-8</project.build.sourceEncoding>
  </properties>

  <dependencies>
    <dependency>
      <groupId>junit</groupId>
      <artifactId>junit</artifactId>
      <version>3.8.1</version>
      <scope>test</scope>
    </dependency>
  </dependencies>
  <!--导入springcloud  -->
  <dependencyManagement>
  	<dependencies>
  		<dependency>
  			<groupId>org.springframework.cloud</groupId>
  			<artifactId>spring-cloud-dependencies</artifactId>
  			<version>Edgware.RELEASE</version>
  			<type>pom</type>
  			<scope>import</scope>
  		</dependency>
  	</dependencies>
  </dependencyManagement>
</project>
springcloud-eureka-server(注册中心)其它的注册中心和此注册中心除了端口不同,其它基本一样
pom
<project xmlns="http://maven.apache.org/POM/4.0.0" xmlns:xsi="http://www.w3.org/2001/XMLSchema-instance"
  xsi:schemaLocation="http://maven.apache.org/POM/4.0.0 http://maven.apache.org/xsd/maven-4.0.0.xsd">
  <modelVersion>4.0.0</modelVersion>

  <groupId>cn.tedu</groupId>
  <artifactId>springcloud-eureka-server</artifactId>
  <version>0.0.1-SNAPSHOT</version>
  <packaging>jar</packaging>

  <name>springcloud-eureka-server</name>
  <url>http://maven.apache.org</url>
  <!--继承springcloud-parent  -->
  <parent>
		<groupId>cn.tedu</groupId>
		<artifactId>springcloud-parent-demo</artifactId>
		<version>0.0.1-SNAPSHOT</version>
		<!-- <groupId>org.springframework.boot</groupId>
		<artifactId>spring-boot-starter-parent</artifactId>
		<version>1.5.9.RELEASE</version> -->
  </parent>
  <properties>
    <project.build.sourceEncoding>UTF-8</project.build.sourceEncoding>
  </properties>

  <dependencies>
  	<!-- 导入eureka -->
	<dependency>
		<groupId>org.springframework.cloud</groupId>
		<artifactId>spring-cloud-starter-eureka-server</artifactId>
	</dependency>
    <dependency>
      <groupId>junit</groupId>
      <artifactId>junit</artifactId>
      <version>3.8.1</version>
      <scope>test</scope>
    </dependency>
  </dependencies>
  <!--导入springcloud  -->
  <!-- <dependencyManagement>
  	<dependencies>
  		<dependency>
  			<groupId>org.springframework.cloud</groupId>
  			<artifactId>spring-cloud-dependencies</artifactId>
  			<version>Edgware.RELEASE</version>
  			<type>pom</type>
  			<scope>import</scope>
  		</dependency>
  	</dependencies>
  </dependencyManagement> -->
</project>
application配置
server.port=8888
#eureka相关配置
##关闭当前配置中心的服务抓取和注册(给注册提供者使用,自己也可以作为注册提供者,在高可用时使用,自己注册自己抓取,这里关闭)
#如果自己用自己注册,需要提供服务名称
spring.application.name=eurekaserver
#开启注册抓取(后边会将这两个关闭,嫌开启麻烦,也不向8889开启相互注册服务)
eureka.client.registerWithEureka=false
eureka.client.fetchRegistry=false
#eureka.client.registerWithEureka=true
#eureka.client.fetchRegistry=true
#注册中心的地址,但凡是服务器注册者都需要配置这个地址
#注册者会访问这个地址的接口,携带自己节点的信息注册
eureka.client.serviceUrl.defaultZone=http://localhost:8888/eureka
#配置高可用的注册中心(暂时关闭)
#eureka.client.serviceUrl.defaultZone=http://localhost:8889/eureka
#关闭保护机制(可以剔除,观察剔除现象)
eureka.server.enable-self-preservation=false
#ip优先
eureka.instance.prefer-ip-address=true
启动类
package cn.tedu;

import org.springframework.boot.SpringApplication;
import org.springframework.boot.autoconfigure.SpringBootApplication;
import org.springframework.cloud.netflix.eureka.server.EnableEurekaServer;

//启动类
//springboot
@SpringBootApplication
//rureka注册中心进程启动时需要springboot加载扫描的注解
@EnableEurekaServer
public class StarterEurekaServer {
	public static void main(String[] args) {
		SpringApplication.run(StarterEurekaServer.class, args);

	}
}
springcloud-eureka-client1(注册提供者)与其它注册提供者之间端口不同,其它基本相同
pom文件
<project xmlns="http://maven.apache.org/POM/4.0.0" xmlns:xsi="http://www.w3.org/2001/XMLSchema-instance"
  xsi:schemaLocation="http://maven.apache.org/POM/4.0.0 http://maven.apache.org/xsd/maven-4.0.0.xsd">
  <modelVersion>4.0.0</modelVersion>

  <groupId>cn.tedu</groupId>
  <artifactId>springcloud-eureka-client1</artifactId>
  <version>0.0.1-SNAPSHOT</version>
  <packaging>jar</packaging>

  <name>springcloud-eureka-client1</name>
  <url>http://maven.apache.org</url>
  <!--继承springcloud-parent  -->
  <parent>
		<groupId>cn.tedu</groupId>
		<artifactId>springcloud-parent-demo</artifactId>
		<version>0.0.1-SNAPSHOT</version>
		<!-- <groupId>org.springframework.boot</groupId>
		<artifactId>spring-boot-starter-parent</artifactId>
		<version>1.5.9.RELEASE</version> -->
  </parent>
  <properties>
    <project.build.sourceEncoding>UTF-8</project.build.sourceEncoding>
  </properties>

  <dependencies>
  	<!-- eureka客户端依赖 -->
  	<dependency>
  		<groupId>org.springframework.cloud</groupId>
  		<artifactId>spring-cloud-starter-eureka</artifactId>
  	</dependency>
    <dependency>
      <groupId>junit</groupId>
      <artifactId>junit</artifactId>
      <version>3.8.1</version>
      <scope>test</scope>
    </dependency>
  </dependencies>
</project>
application
server.port=9001
#eureka相关配置
##关闭当前配置中心的服务抓取和注册(给注册提供者使用,自己也可以作为注册提供者,在高可用时使用,自己注册自己抓取,这里关闭)
#如果自己用自己注册,需要提供服务名称
spring.application.name=service-hi
#eureka.client.registerWithEureka=true
#eureka.client.fetchRegistry=true
#注册中心的地址,但凡是服务器注册者都需要配置这个地址
#注册者会访问这个地址的接口,携带自己节点的信息注册
eureka.client.serviceUrl.defaultZone=http://localhost:8888/eureka
控制类
package cn.tedu.controller;

import org.springframework.web.bind.annotation.RequestMapping;
import org.springframework.web.bind.annotation.RestController;

@RestController
public class HelloController {
	@RequestMapping("hello")
	public String sayHi(String name){
		return "hello,"+name+",i am from 9001";
	}
}
启动类
package cn.tedu;

import org.springframework.boot.SpringApplication;
import org.springframework.boot.autoconfigure.SpringBootApplication;
import org.springframework.cloud.netflix.eureka.EnableEurekaClient;
//客户端的启动类
@SpringBootApplication
//eureka客户端注解
@EnableEurekaClient
public class StarterEurekaClient1 {
	public static void main(String[] args) {
		SpringApplication.run(StarterEurekaClient1.class, args);
	}
}
springcloud-ribbon-client
pom文件
<project xmlns="http://maven.apache.org/POM/4.0.0" xmlns:xsi="http://www.w3.org/2001/XMLSchema-instance"
  xsi:schemaLocation="http://maven.apache.org/POM/4.0.0 http://maven.apache.org/xsd/maven-4.0.0.xsd">
  <modelVersion>4.0.0</modelVersion>

  <groupId>cn.tedu</groupId>
  <artifactId>springcloud-ribbon-client</artifactId>
  <version>0.0.1-SNAPSHOT</version>
  <packaging>jar</packaging>

  <name>springcloud-ribbon-client</name>
  <url>http://maven.apache.org</url>
  <!--继承springcloud-parent  -->
  <parent>
		<groupId>cn.tedu</groupId>
		<artifactId>springcloud-parent-demo</artifactId>
		<version>0.0.1-SNAPSHOT</version>
		<!-- <groupId>org.springframework.boot</groupId>
		<artifactId>spring-boot-starter-parent</artifactId>
		<version>1.5.9.RELEASE</version> -->
  </parent>
  <properties>
    <project.build.sourceEncoding>UTF-8</project.build.sourceEncoding>
  </properties>

  <dependencies>
  	<!-- eureka客户端依赖 -->
  	<dependency>
  		<groupId>org.springframework.cloud</groupId>
  		<artifactId>spring-cloud-starter-eureka</artifactId>
  	</dependency>
    <!--ribbon依赖  -->
    <dependency>
  		<groupId>org.springframework.cloud</groupId>
  		<artifactId>spring-cloud-starter-ribbon</artifactId>
  	</dependency>
    <dependency>
      <groupId>junit</groupId>
      <artifactId>junit</artifactId>
      <version>3.8.1</version>
      <scope>test</scope>
    </dependency>
  </dependencies>
</project>
application
server.port=9004
#eureka相关配置
##关闭当前配置中心的服务抓取和注册(给注册提供者使用,自己也可以作为注册提供者,在高可用时使用,自己注册自己抓取,这里关闭)
#如果自己用自己注册,需要提供服务名称
spring.application.name=service-ribbon
#eureka.client.registerWithEureka=true
#eureka.client.fetchRegistry=true
#注册中心的地址,但凡是服务器注册者都需要配置这个地址
#注册者会访问这个地址的接口,携带自己节点的信息注册
#写两个注册中心的地址,这样有一个宕机了另一个也能起到作用
eureka.client.serviceUrl.defaultZone=http://localhost:8888/eureka,http://localhost:8889/eureka
控制层
package cn.tedu.controller;

import org.springframework.beans.factory.annotation.Autowired;
import org.springframework.web.bind.annotation.RequestMapping;
import org.springframework.web.bind.annotation.RestController;

import cn.tedu.service.HelloService;
//访问localhost:9004/hi?name=王老师
@RestController
public class HelloController {
	@Autowired
	private HelloService helloService;
	//客户端调用hi接口
	@RequestMapping("hi")
	public String sayHi(String name){
		return "RIBBON:"+helloService.sayHi(name);
	}
}
服务层
package cn.tedu.service;

import org.springframework.beans.factory.annotation.Autowired;
import org.springframework.stereotype.Service;
import org.springframework.web.client.RestTemplate;

@Service
public class HelloService {

		@Autowired
		private RestTemplate client;//会因为使用的创建过程
		//@Bean+@LoadBalanced注解,ribbon会对restTemplate
		//发送的任何请求做拦截工作,将域名寻找抓取的服务名称做实例
		//节点,将节点的ip:port替换
		public String sayHi(String name){
			//http://service-hi/hello?name=wang  会拦截替换
		 	String sayHi=client.getForObject("http://service-hi/hello?name="+name, String.class);
			return sayHi;
		}

}
启动层(可控制负载均衡)
package cn.tedu;

import org.springframework.boot.SpringApplication;
import org.springframework.boot.autoconfigure.SpringBootApplication;
import org.springframework.cloud.client.loadbalancer.LoadBalanced;
import org.springframework.cloud.netflix.eureka.EnableEurekaClient;
import org.springframework.context.annotation.Bean;
import org.springframework.web.client.RestTemplate;

import com.netflix.loadbalancer.IRule;
import com.netflix.loadbalancer.RandomRule;

//ribbon的启动类
@SpringBootApplication
@EnableEurekaClient
public class StarterRibbon {
	public static void main(String[] args) {
		SpringApplication.run(StarterRibbon.class, args);
	}
	@Bean
	//负载均衡
	@LoadBalanced
	public RestTemplate initRestTemplate(){
		return new RestTemplate();
	}
	//修改自定义的随机负载均衡逻辑
	@Bean
	public IRule initRule(){
		return new RandomRule();
	}
}
springcloud-zuul(网关)与其它的网关之间端口不同
pom文件
<project xmlns="http://maven.apache.org/POM/4.0.0" xmlns:xsi="http://www.w3.org/2001/XMLSchema-instance"
  xsi:schemaLocation="http://maven.apache.org/POM/4.0.0 http://maven.apache.org/xsd/maven-4.0.0.xsd">
  <modelVersion>4.0.0</modelVersion>

  <groupId>cn.tedu</groupId>
  <artifactId>springcloud-zuul</artifactId>
  <version>0.0.1-SNAPSHOT</version>
  <packaging>jar</packaging>

  <name>springcloud-zuul</name>
  <url>http://maven.apache.org</url>
  <parent>
  	<groupId>cn.tedu</groupId>
  	<artifactId>springcloud-parent-demo</artifactId>
  	<version>0.0.1-SNAPSHOT</version>
  </parent>
  <properties>
    <project.build.sourceEncoding>UTF-8</project.build.sourceEncoding>
  </properties>

  <dependencies>
  <!--client eureka  -->
  	<dependency>
  	 <groupId>org.springframework.cloud</groupId>
  	 <artifactId>spring-cloud-starter-eureka</artifactId>
  	</dependency>
  	<!-- gateway zuul -->
  	<dependency>
  	 <groupId>org.springframework.cloud</groupId>
  	 <artifactId>spring-cloud-starter-zuul</artifactId>
  	</dependency>
    <dependency>
      <groupId>junit</groupId>
      <artifactId>junit</artifactId>
      <version>3.8.1</version>
      <scope>test</scope>
    </dependency>
  </dependencies>
</project>
application
 server.port=8103
 #关闭敏感头
 zuul.sensitive-headers=
 #zuul微服务相关
 spring.application.name=zuul-service
 #路由规则 /order-test/**  转发给order-test的服务
 #service-ribbon  service-hi
 zuul.routes.hi.path=/zuul-hi/**
 zuul.routes.hi.serviceId=service-hi
 zuul.routes.ribbon.path=/zuul-ribbon/**
 zuul.routes.ribbon.serviceId=service-ribbon
 zuul.routes.pay.path=/zuul-pay/**
 zuul.routes.pay.serviceId=order-test
 zuul.routes.point.path=/zuul-point/**
 zuul.routes.point.serviceId=user-test
 #eureka server
 eureka.client.serviceUrl.defaultZone=http://localhost:8888/eureka
启动类
package cn.tedu;

import org.springframework.boot.SpringApplication;
import org.springframework.boot.autoconfigure.SpringBootApplication;
import org.springframework.cloud.netflix.eureka.EnableEurekaClient;
import org.springframework.cloud.netflix.zuul.EnableZuulProxy;

@SpringBootApplication
@EnableEurekaClient
@EnableZuulProxy
public class StarterGateWay01 {
	public static void main(String[] args) {
		SpringApplication.run(StarterGateWay01.class, args);
	}
}
nginx的配置
server {
		listen 80;
		server_name www.ssm.com;
		location /user{
			#proxy_pass http://orderuserserver/user;
			#proxy_pass http://127.0.0.1:8090/user;
			proxy pass http://zuulserver/zuul-point/user/;
			add_header 'Access-Control-Allow-Origin' '*';
			add_header 'Access-Control-Allow-Credentials' 'true';
		}
		location /order{
			#proxy_pass http://orderuserserver/order;
			proxy pass http://zuulserver/zuul-pay/order/;
			add_header 'Access-Control-Allow-Origin' '*';
			add_header 'Access-Control-Allow-Credentials' 'true';
		}
		location /{
			#相对路径easymall 相当于c:\\
			root easymall;
			index index.html;
		}
		#配置网关集群(下边)
		location /hello{
			#www.ssm.com/hello?name=wang
			proxy_pass http://zuulserver/zuul-hi/hello;
		}
		location /hi{
			#www.ssm.com/hello?name=wang
			proxy_pass http://zuulserver/zuul-ribbon/hi;
		}
	}
	upstream zuulserver{
		server 127.0.0.1:8103;
		server 127.0.0.1:8104;
	}
更改order pay的源码展示
springboot-order
pom文件
<project xmlns="http://maven.apache.org/POM/4.0.0" xmlns:xsi="http://www.w3.org/2001/XMLSchema-instance"
  xsi:schemaLocation="http://maven.apache.org/POM/4.0.0 http://maven.apache.org/xsd/maven-4.0.0.xsd">
  <modelVersion>4.0.0</modelVersion>

 <groupId>cn.tedu</groupId>
  <artifactId>springboot-demo1</artifactId>
 <version>0.0.1-SNAPSHOT</version>
  <packaging>jar</packaging>

  <name>springboot-demo1</name>
  <url>http://maven.apache.org</url>
	<!-- 当前工程是一个子工程  继承父工程 -->
	<!-- <parent>
		<groupId>org.springframework.boot</groupId>
		<artifactId>spring-boot-starter-parent</artifactId>
		<version>1.5.9.RELEASE</version>
	</parent> -->
	<!-- 继承自己写的父类,同样的功能继承了springboot,springcloud -->
	<parent>
		<groupId>cn.tedu</groupId>
		<artifactId>springcloud-parent-demo</artifactId>
		<version>0.0.1-SNAPSHOT</version>
	</parent>
  <properties>
    <project.build.sourceEncoding>UTF-8</project.build.sourceEncoding>
  </properties>

  <dependencies>
  	<!--eureka ribbon  -->
  	<dependency>
  		<groupId>org.springframework.cloud</groupId>
  		<artifactId>spring-cloud-starter-eureka</artifactId>
  	</dependency>
  	<dependency>
  		<groupId>org.springframework.cloud</groupId>
  		<artifactId>spring-cloud-starter-ribbon</artifactId>
  	</dependency>
  	<!--web应用的简化依赖starter-web (eureka中包含了此依赖,可写可不写) -->
  	<!--log jackson embed tomcat spring context beans springboot  -->
  	<dependency>
  		<groupId>org.springframework.boot</groupId>
  		<artifactId>spring-boot-starter-web</artifactId>
  	</dependency>
  	<!--jdbc协议  -->
  	<dependency>
  		<groupId>org.springframework.boot</groupId>
  		<artifactId>spring-boot-starter-jdbc</artifactId>
  	</dependency>
  	<!-- mysql -->
  	<dependency>
  		<groupId>mysql</groupId>
  		<artifactId>mysql-connector-java</artifactId>
  		<version>5.0.8</version>
  	</dependency>
  	<!--springboot mybaits  -->
  	<dependency>
  		<groupId>org.mybatis.spring.boot</groupId>
  		<artifactId>mybatis-spring-boot-starter</artifactId>
  		<version>1.3.1</version>
  	</dependency>
  	<!--druid  -->
  	<dependency>
  		<groupId>com.alibaba</groupId>
  		<artifactId>druid</artifactId>
  		<version>1.0.14</version>
  	</dependency>
    <dependency>
      <groupId>junit</groupId>
      <artifactId>junit</artifactId>
     <version>3.8.1</version>
      <scope>test</scope>
    </dependency>
  </dependencies>
</project>
application
#8090
server.port=8091
#server.contextPath=/1906
#1906.class-name=big1906
spring.datasource.driver-class-name=com.mysql.jdbc.Driver
spring.datasource.url=jdbc:mysql:///easymall?useUnicode=true&characterEncoding=utf8&autoReconnect=true&allowMultiQueries=true
spring.datasource.username=root
spring.datasource.password=root
spring.datasource.type=com.alibaba.druid.pool.DruidDataSource
mybatis.typeAliasesPackage=cn.tedu.domain
mybatis.mapperLocations=classpath:mapper/*.xml
mybatis.configuration.mapUnderscoreToCamelCase=true
mybatis.configuration.cacheEnabled=false
#mapperscaner
#server id
spring.application.name=order-test
eureka.client.serviceUrl.defaultZone=http://localhost:8888/eureka
启动类
package cn.tedu;

import org.mybatis.spring.annotation.MapperScan;
import org.springframework.boot.SpringApplication;
import org.springframework.boot.SpringBootConfiguration;
import org.springframework.boot.autoconfigure.EnableAutoConfiguration;
import org.springframework.boot.autoconfigure.SpringBootApplication;
import org.springframework.cloud.netflix.eureka.EnableEurekaClient;
import org.springframework.context.annotation.Bean;
import org.springframework.context.annotation.ComponentScan;

/**
 * springboot核心注解
 * 启动一个spring的运行容器
 * @author 在路上
 *
 */

@SpringBootApplication
@MapperScan("cn.tedu.mapper")
@EnableEurekaClient
public class StarterDemo1 {
	public static void main(String[] args) {
		SpringApplication.run(StarterDemo1.class, args);
	}
}
控制层
package cn.tedu.controller;

import org.springframework.beans.factory.annotation.Autowired;
import org.springframework.web.bind.annotation.RequestMapping;
import org.springframework.web.bind.annotation.RestController;

import cn.tedu.service.OrderService;

@RestController
public class OrderController {
	@Autowired
	private OrderService orderService;
	//订单支付
	@RequestMapping("order/pay")
	public Integer orderPay(String orderId){
		try {
			orderService.orderPay(orderId);
			return 1;
		} catch (Exception e) {
			//给自己展示异常
			e.printStackTrace();
			return 0;
		}
	}
}
domain
package cn.tedu.domain;

public class Order {
	private String orderId;
	private Integer orderMoney;
	private Integer userId;
	public Order(String orderId, Integer orderMoney, Integer userId) {
		super();
		this.orderId = orderId;
		this.orderMoney = orderMoney;
		this.userId = userId;
	}
	public Order() {
		super();
	}
	public String getOrderId() {
		return orderId;
	}
	public void setOrderId(String orderId) {
		this.orderId = orderId;
	}
	public Integer getOrderMoney() {
		return orderMoney;
	}
	public void setOrderMoney(Integer orderMoney) {
		this.orderMoney = orderMoney;
	}
	public Integer getUserId() {
		return userId;
	}
	public void setUserId(Integer userId) {
		this.userId = userId;
	}
	@Override
	public String toString() {
		return "Order [orderId=" + orderId + ", orderMoney=" + orderMoney + ", userId=" + userId + "]";
	}

}
package cn.tedu.domain;

public class User {
	private Integer userId;
	private Integer points;
	private Integer lev;
	public User(Integer userId, Integer points, Integer lev) {
		super();
		this.userId = userId;
		this.points = points;
		this.lev = lev;
	}
	public User() {
		super();
	}
	public Integer getUserId() {
		return userId;
	}
	public void setUserId(Integer userId) {
		this.userId = userId;
	}
	public Integer getPoints() {
		return points;
	}
	public void setPoints(Integer points) {
		this.points = points;
	}
	public Integer getLev() {
		return lev;
	}
	public void setLev(Integer lev) {
		this.lev = lev;
	}
	@Override
	public String toString() {
		return "User [userId=" + userId + ", points=" + points + ", lev=" + lev + "]";
	}

}
服务层
package cn.tedu.service;

import org.springframework.beans.factory.annotation.Autowired;
import org.springframework.stereotype.Service;
import org.springframework.web.client.RestTemplate;

import cn.tedu.domain.Order;
import cn.tedu.mapper.OrderMapper;

@Service
public class OrderService {
	@Autowired
	private OrderMapper orderMapper;
	public void orderPay(String orderId) {
		//查询order对象,获取useId和orderMoney的数据
		Order order=orderMapper.selectOrderById(orderId);
		//支付逻辑中可以实现打折,活动,确定支付的真正金额
		System.out.print("用户:"+order.getUserId()+
				"支付金额:"+order.getOrderMoney());
		//TODO想办法 将参数userid  orderMoney封装到一个htt请求中,
		//发起请求访问www.ssm.com/user/update/point(交给nginx)
		//RestTemplate
		RestTemplate client=new RestTemplate();
		String url="http://www.ssm.com/user/update/point?userId="
				+order.getUserId()+"&orderMoney="+order.getOrderMoney();
		//发起代码的请求到接口的url地址
		Integer success = client.getForObject(url, Integer.class);
		if(success==1){
			System.out.println("积分成功");
		}
		if(success==0){
			System.out.println("积分失败");
		}

	}

}
持久层
package cn.tedu.mapper;

import cn.tedu.domain.Order;

public interface OrderMapper {


	Order selectOrderById(String orderId);

}
mapper
<?xml version="1.0" encoding="UTF-8"?>
<!DOCTYPE mapper PUBLIC "-//mybatis.org//DTD Mapper 3.0//EN"
"http://mybatis.org/dtd/mybatis-3-mapper.dtd">
<mapper namespace="cn.tedu.mapper.OrderMapper">
	<!--selectOrderById  -->
	<select id="selectOrderById" parameterType="String" resultType="Order">
		select * from t_order where order_id=#{orderId};
	</select>
</mapper>
springboot-user
pom文件
<project xmlns="http://maven.apache.org/POM/4.0.0" xmlns:xsi="http://www.w3.org/2001/XMLSchema-instance"
  xsi:schemaLocation="http://maven.apache.org/POM/4.0.0 http://maven.apache.org/xsd/maven-4.0.0.xsd">
  <modelVersion>4.0.0</modelVersion>

  <groupId>cn.tedu</groupId>
  <artifactId>springboot-demo1</artifactId>
  <version>0.0.1-SNAPSHOT</version>
  <packaging>jar</packaging>

  <name>springboot-demo1</name>
  <url>http://maven.apache.org</url>
	<!-- 当前工程是一个子工程  继承父工程 -->
	<!-- <parent>
		<groupId>org.springframework.boot</groupId>
		<artifactId>spring-boot-starter-parent</artifactId>
		<version>1.5.9.RELEASE</version>
	</parent> -->
	<!-- 继承自己写的父类,同样的功能继承了springboot,springcloud -->
	<parent>
		<groupId>cn.tedu</groupId>
		<artifactId>springcloud-parent-demo</artifactId>
		<version>0.0.1-SNAPSHOT</version>
	</parent>
  <properties>
    <project.build.sourceEncoding>UTF-8</project.build.sourceEncoding>
  </properties>

  <dependencies>
   <!--eureka -->
  	<dependency>
  		<groupId>org.springframework.cloud</groupId>
  		<artifactId>spring-cloud-starter-eureka</artifactId>
  	</dependency>
  	<!--web应用的简化依赖starter-web  -->
  	<!--log jackson embed tomcat spring context beans springboot  -->
  	<dependency>
  		<groupId>org.springframework.boot</groupId>
  		<artifactId>spring-boot-starter-web</artifactId>
  	</dependency>
  	<!--jdbc协议  -->
  	<dependency>
  		<groupId>org.springframework.boot</groupId>
  		<artifactId>spring-boot-starter-jdbc</artifactId>
  	</dependency>
  	<!-- mysql -->
  	<dependency>
  		<groupId>mysql</groupId>
  		<artifactId>mysql-connector-java</artifactId>
  		<version>5.0.8</version>
  	</dependency>
  	<!--springboot mybaits  -->
  	<dependency>
  		<groupId>org.mybatis.spring.boot</groupId>
  		<artifactId>mybatis-spring-boot-starter</artifactId>
  		<version>1.3.1</version>
  	</dependency>
  	<!--druid  -->
  	<dependency>
  		<groupId>com.alibaba</groupId>
  		<artifactId>druid</artifactId>
  		<version>1.0.14</version>
  	</dependency>
    <dependency>
      <groupId>junit</groupId>
      <artifactId>junit</artifactId>
      <version>3.8.1</version>
      <scope>test</scope>
    </dependency>
  </dependencies>
</project>
application
#8090
server.port=8090
#server.contextPath=/1906
#1906.class-name=big1906
spring.datasource.driver-class-name=com.mysql.jdbc.Driver
spring.datasource.url=jdbc:mysql:///easymall?useUnicode=true&characterEncoding=utf8&autoReconnect=true&allowMultiQueries=true
spring.datasource.username=root
spring.datasource.password=root
spring.datasource.type=com.alibaba.druid.pool.DruidDataSource
mybatis.typeAliasesPackage=cn.tedu.domain
mybatis.mapperLocations=classpath:mapper/*.xml
mybatis.configuration.mapUnderscoreToCamelCase=true
mybatis.configuration.cacheEnabled=false
#mapperscaner
#server id
spring.application.name=user-test
eureka.client.serviceUrl.defaultZone=http://localhost:8888/eureka
启动类
package cn.tedu;

import org.mybatis.spring.annotation.MapperScan;
import org.springframework.boot.SpringApplication;
import org.springframework.boot.SpringBootConfiguration;
import org.springframework.boot.autoconfigure.EnableAutoConfiguration;
import org.springframework.boot.autoconfigure.SpringBootApplication;
import org.springframework.cloud.netflix.eureka.EnableEurekaClient;
import org.springframework.context.annotation.Bean;
import org.springframework.context.annotation.ComponentScan;

/**
 * springboot核心注解
 * 启动一个spring的运行容器
 * @author 在路上
 *
 */

@SpringBootApplication
@MapperScan("cn.tedu.mapper")
@EnableEurekaClient
public class StarterDemo1 {
	public static void main(String[] args) {
		SpringApplication.run(StarterDemo1.class, args);
	}
}
控制层
package cn.tedu.controller;

import org.springframework.beans.factory.annotation.Autowired;
import org.springframework.web.bind.annotation.RequestMapping;
import org.springframework.web.bind.annotation.RestController;

import cn.tedu.domain.User;
import cn.tedu.service.UserService;

@RestController
public class UserController {
	@Autowired
	private UserService userService;
	//请求积分查询
	@RequestMapping("user/query/point")
	public User queryUser(Integer userId){
		return userService.queryUser(userId);
	}
	//更新积分
	@RequestMapping("user/update/point")
	public Integer updateUserPoint(Integer orderMoney,Integer userId){
		try {
			userService.updateUserPoint(orderMoney,userId);
			return 1;
		} catch (Exception e) {
			e.printStackTrace();
			return 0;
		}
	}
}
domain和上述一样
服务层
package cn.tedu.service;

import org.springframework.beans.factory.annotation.Autowired;
import org.springframework.stereotype.Service;

import cn.tedu.domain.User;
import cn.tedu.mapper.UserMapper;

@Service
public class UserService {
	@Autowired
	private UserMapper userMapper;
	public User queryUser(Integer userId) {
		return userMapper.selectUserById(userId);
	}

	public void updateUserPoint(Integer orderMoney, Integer userId) {
		//更改业务逻辑,实现积分的功能
		//根据user的lev的值
		/*
		 * lev=0 普通用户  2倍
		 * lev=1 高级用户  5倍
		 */
		//查询级别
		User user=userMapper.selectUserById(userId);
		//做更新参数的user
		User param=new User();
		param.setUserId(userId);
		if(user.getLev()==0){
			//积分2倍
			param.setPoints(user.getPoints()+orderMoney*2);
		}else if(user.getLev()==1){
			//积分5倍
			param.setPoints(user.getPoints()+orderMoney*5);
		}
		userMapper.updateUserPointById(param);
	}

}
持久层
package cn.tedu.mapper;

import cn.tedu.domain.User;

public interface UserMapper {

	User selectUserById(Integer userId);

	void updateUserPointById(User param);

}
mapper
<?xml version="1.0" encoding="UTF-8"?>
<!DOCTYPE mapper PUBLIC "-//mybatis.org//DTD Mapper 3.0//EN"
"http://mybatis.org/dtd/mybatis-3-mapper.dtd">
<mapper namespace="cn.tedu.mapper.UserMapper">
	<!-- selectUserById -->
	<select id="selectUserById" parameterType="int" resultType="User">
		select * from t_user where user_id=#{userId};
	</select>
	<!--selectOrderById  -->
	<select id="selectOrderById" parameterType="String" resultType="Order">
		select * from t_order where order_id=#{orderId};
	</select>
	<update id="updateUserPointsById" parameterType="User" >
		update t_user set  points=points+#{points} where user_id=#{userId};
	</update>
</mapper>
nginx
server {
		listen 80;
		server_name www.ssm.com;
		location /user{
			#proxy_pass http://orderuserserver/user;
			#proxy_pass http://127.0.0.1:8090/user;
			proxy pass http://zuulserver/zuul-point/user/;
			add_header 'Access-Control-Allow-Origin' '*';
			add_header 'Access-Control-Allow-Credentials' 'true';
		}
		location /order{
			#proxy_pass http://orderuserserver/order;
			proxy pass http://zuulserver/zuul-pay/order/;
			add_header 'Access-Control-Allow-Origin' '*';
			add_header 'Access-Control-Allow-Credentials' 'true';
		}
		location /{
			#相对路径easymall 相当于c:\\
			root easymall;
			index index.html;
		}
		#配置网关集群(下边)
		location /hello{
			#www.ssm.com/hello?name=wang
			proxy_pass http://zuulserver/zuul-hi/hello;
		}
		location /hi{
			#www.ssm.com/hello?name=wang
			proxy_pass http://zuulserver/zuul-ribbon/hi;
		}
	}
	upstream zuulserver{
		server 127.0.0.1:8103;
		server 127.0.0.1:8104;
	}
easymall系统整改
1.架构图
1.1框架的结构图
springboot+springcloud(eureka ribbon zuul config feign hystrix)

1.2maven工程管理结构图

parent:统一资源
common-resource:共用代码的提取
1.3管理架构搭建完毕
easymall-parent:
维护一个pom类型的工程的pom.xml,在xml中定义所有子工程资源的版本
dependencyManagment(版本声明式继承)
创建一个maven的工程


pom文件
dependencyManagement
<dependencyManagement>
  	<dependencies>
  		<!-- springcloud导入 -->
  		<dependency>
  			<groupId>org.springframework.cloud</groupId>
  			<artifactId>spring-cloud-dependencies</artifactId>
  			<version>Edgware.RELEASE</version>
  			<type>pom</type>
  			<scope>import</scope>
  		</dependency>
  		<!--持久层mybatis1.3.0 jdbc等已经传递过来-->
  		<dependency>
  			<groupId>org.mybatis.spring.boot</groupId>
  			<artifactId>mybatis-spring-boot-starter</artifactId>
  			<version>1.3.0</version>
  		</dependency>
  		<!--redis 1.4.7.RELEASE  -->
  		<!-- ES  5.5.2 -->
  	</dependencies>
 </dependencyManagement>
easymall-common-resource
创建一个quickstart
pom:继承easymall-parent
spring-boot-starter-web(jackson)
  <parent>
  	<groupId>cn.tedu</groupId>
  	<artifactId>easymall-parent</artifactId>
  	<version>0.0.1-SNAPSHOT</version>
  </parent>
   <dependency>
    	<groupId>org.springframework.boot</groupId>
    	<artifactId>spring-boot-starter-web</artifactId>
    </dependency>
粘贴代码:课前资料–07springcloud–easymall-common
代码详解
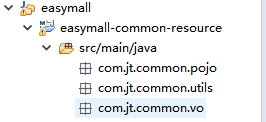
pojo:项目中使用的读取数据库数据封装对象的类
utils:工具类
MD5加密
upload图片上传路径生成的工具
Cookie操作工具类(set get)
MapperUtils(ObjectMapper的静态常量维护)
vo: view object
封装数据的对象,返回给ajax使用的数据结构
javaBean的概念
entity:每个对象属性严格对应表格字段,一行记录对应封装成一个entity对象
domain:一个域对象,可以实现一个对象封装多张表格的关联数据
数据库表格2个表格
| 学生表格 | 学生选课表格 |
|---|---|
| id name gender age num | s_id s_name s_grade student_num |
Student
id
name
gender
age
num
list < Subject > subs;
dto:页面的数据结构对应的参数格式的对象
页面表单的结构未必直接是数据库表格的结构
controller方法直接使用dto对象接收参数,否则你的controller将使用多个对象
页面—》传递数据给服务器端
vo:view object
服务器处理完的逻辑数据----》页面使用
pojo:笼统意义上的Javabean 以上所有具有一定意义的JavaBean都可以称之为pojo
商品系统
1.视频演示
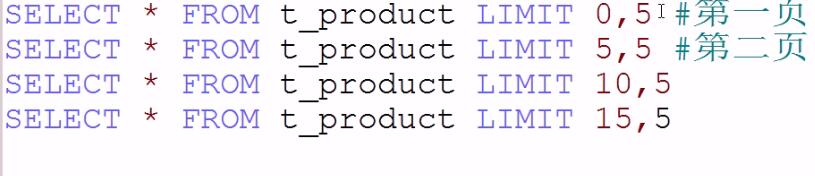
1.1商品的分页查询
页面传递的page rows5条
从数据库中查询分页的数据返回给ajax解析
1.2商品单个查看
进入商品详情页面查看商品图片,名称价钱等
1.3商品后台录入新增(图片的上传功能)
商户填写表单,做表单提交,后台接收到提交数据insert到数据库
1.4商品的后台更新
用户填写表单,提交,做更新操作
2.开发商品系统
2.1数据库的表格
将资料easydb.sql导入当前的数据库中,查看t_product表格的结构

char/String productId 主键值(uuid)
varchar/String prodectName 商品名称
double/Double productPrice 商品价钱
电商中的商品价钱是bigint/long
varchar/String produceCateGory 商品分类
varchar/String productImgurl 商品的图片连接地址
图片数据不能使用text/blob存储在数据库,大字段数据会破坏表格的使用效率
http://img.jt.com/upload/1/d/3/d/6/f/4/d/3213-sdalks.j233-3224.jpg
int/Integer productNum 库存
varchar/String productDescription 商品描述信息
javaBean–>Product


2.2搭建商品系统
创建maven工程quickstart
pom文件
继承easymall-parent
依赖
common-resource
spring-cloud-starter-eureka
持久层
spring-boot-starter-jdbc
mysql-connector-java
mybatis-spring-boot-starter
application.properties
10001-10007
datasource(spring.datasource)
mybatis(mybatis)
eureka:
服务名称
注册url地址
启动类:
@SpringBootApplication
@EnableEurekaClient
@MapperScan(“cn.tedu.product.mapper”)
代码架子:
ProductController
ProductService
ProductMapper(cn.tedu.product.mapper.ProductMapper)
productmapper.xml(拷贝之前xml,namespace,清空所有的标签)
2.3功能开发
接口文件

ProductController
ProductService
返回数据EasyUIResult
Integer total:所有的商品数量
select count(product_id) from t_product(效率高)
total%rows==0?total/rows:total/rows+1
List rows:查询的分页结果
SELECT * FROM t_product LIMIT #{start},#{rows}
int start=(page-1)*rows;
ProductMapper
ProductMapper.xml
缺少javabean 和mysql
jsonview在线查看器
没有过多的源码提供支持,暂时无法进行
自习任务自己做


 1178
1178


 被折叠的 条评论
为什么被折叠?
被折叠的 条评论
为什么被折叠?
 到【灌水乐园】发言


