


本文基于ubuntu22.04+VMware,opencv的版本为OpenCV 4.12.0-dev
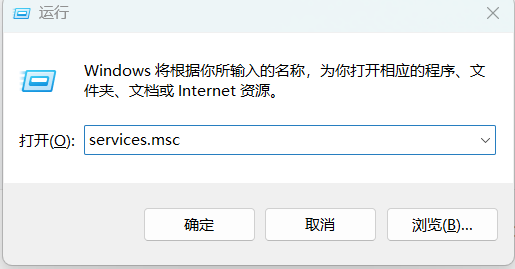
1、先运行WIN+R,打开Windows 服务管理器;
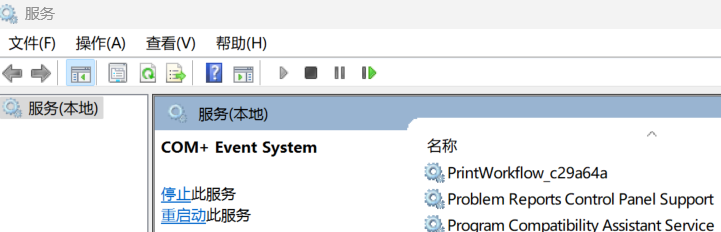
2、选中VMware USB Arbitration Service,右键将其配置为启动,且自动运行状态。

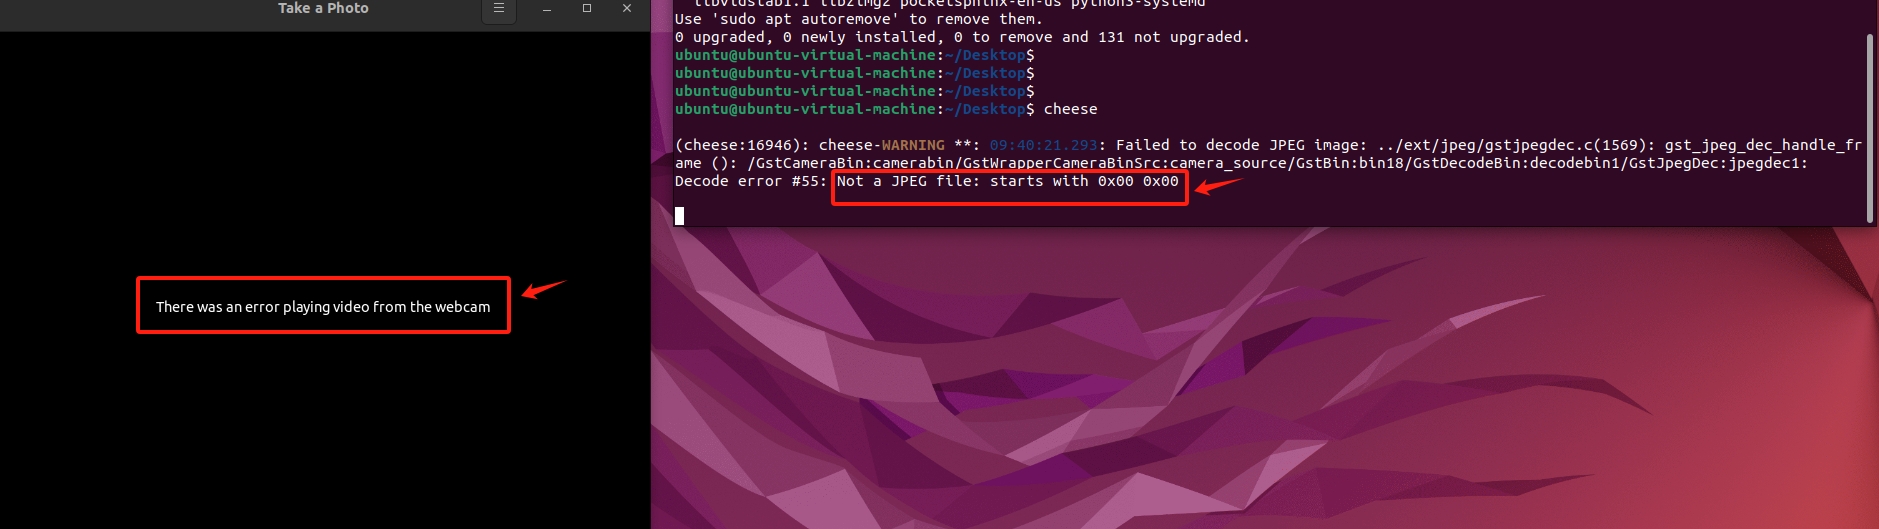
3、虚拟机配置中,添加USB控制器,且需要注意USB兼容性要选为USB3.1,否则,虚拟机中ubuntu用guvcview打开UVC摄像头是会出现严重卡顿,绿屏等异常现象,cheese则直接出现黑屏

下图为USB兼容性选为USB2.0出现的异常现象。
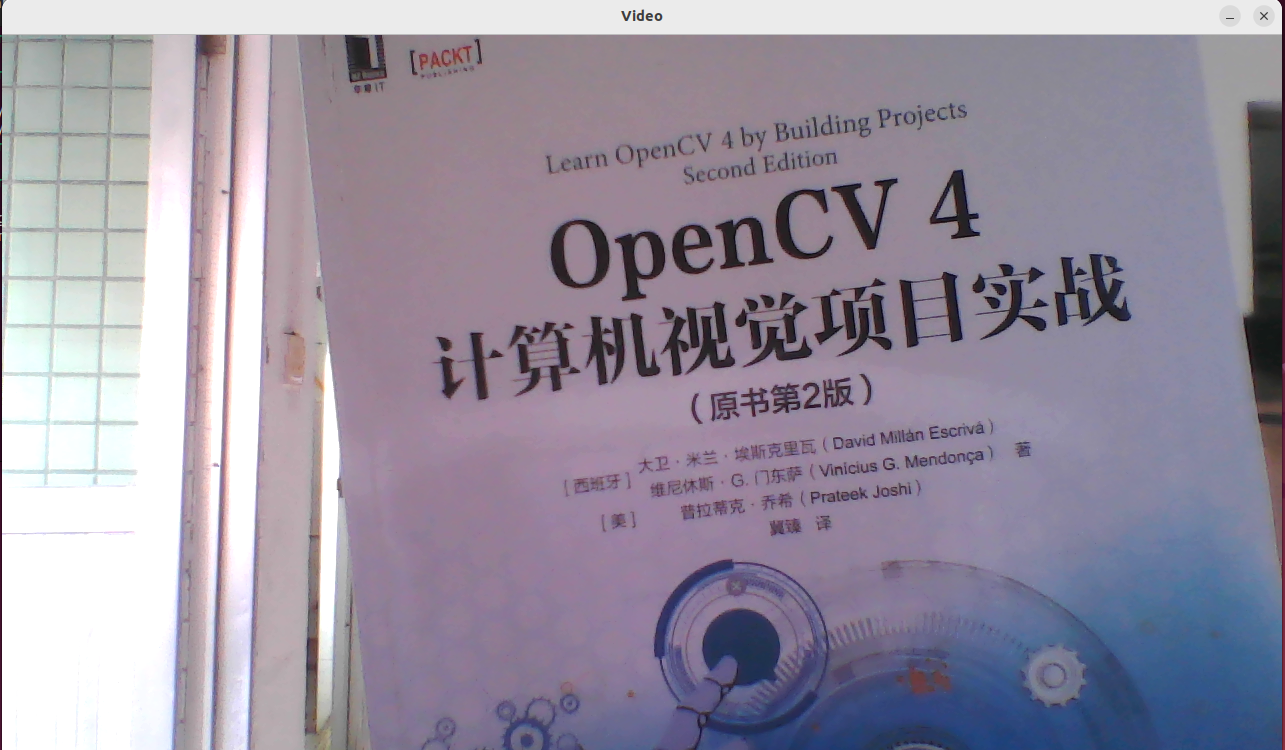
4、运行如下Opencv4代码,既可以打开摄像头预览。
#include <iostream>
#include <string>
#include <sstream>
using namespace std;

// OpenCV includes
#include "opencv2/core.hpp"
#include "opencv2/highgui.hpp"
using namespace cv;

// OpenCV command line parser functions
// Keys accecpted by command line parser
const char* keys =
{
	"{help h usage ? | | print this message}"
    "{@video | | Video file, if not defined try to use webcamera}"
};

int main( int argc, const char** argv )
{
	CommandLineParser parser(argc, argv, keys);
    parser.about("Chapter 2. v1.0.0");
    //If requires help show
    if (parser.has("help"))
	{
	    parser.printMessage();
	    return 0;
	}

	String videoFile= parser.get<String>(0);

	// Check if params are correctly parsed in his variables
	if (!parser.check())
	{
	    parser.printErrors();
	    return 0;
	}

	VideoCapture cap; // open the default camera
	if(videoFile != "")
		cap.open(videoFile);
	else
		cap.open(0);
    if(!cap.isOpened())  // check if we succeeded
        return -1;

    namedWindow("Video",1);
    for(;;)
    {
        Mat frame;
        cap >> frame; // get a new frame from camera
        if(frame.empty())
        	return 0;
        imshow("Video", frame);
        if(waitKey(30) >= 0) break;
    }
    // Release the camera or video cap
    cap.release();

	return 0;
}


 被折叠的 条评论
为什么被折叠?
被折叠的 条评论
为什么被折叠?
 到【灌水乐园】发言


