


转载来源于:http://blog.csdn.net/xuefeng0707/article/details/8888484
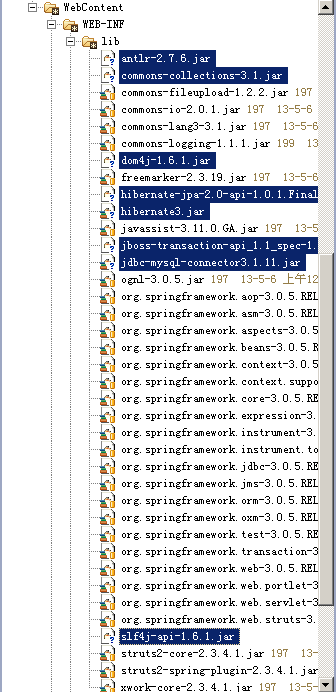
1. 资源准备
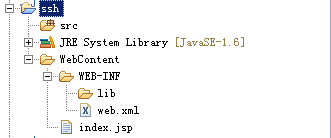
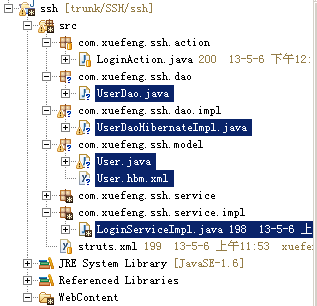
2. 新建空白Web项目
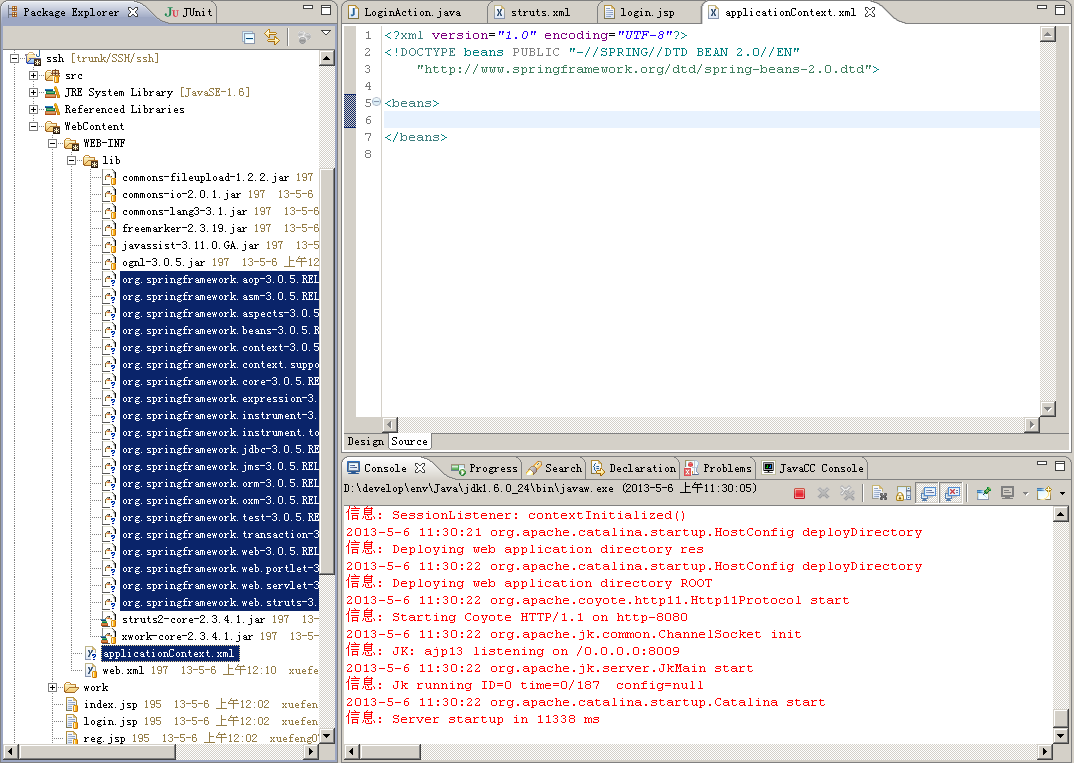
新建一个空白的Web项目,取名为ssh,目录结构如图:
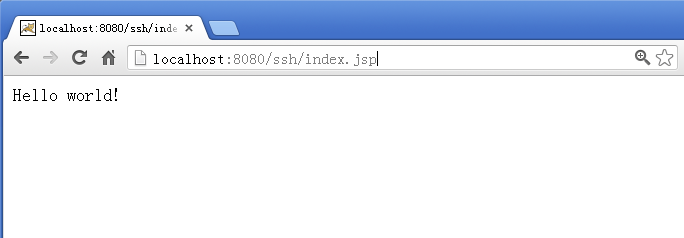
部署到Tomcat中:
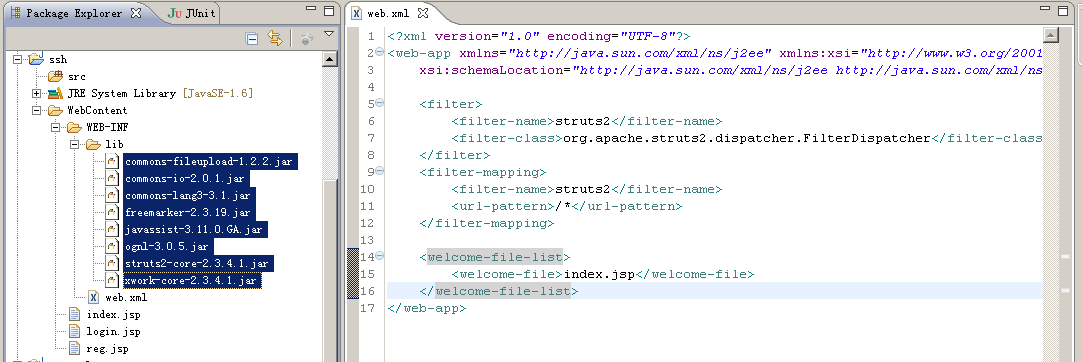
3. 配置Struts2
复制Struts2必需的jar文件到WEB-INF/lib中,并修改web.xml,加入Struts2的filter:
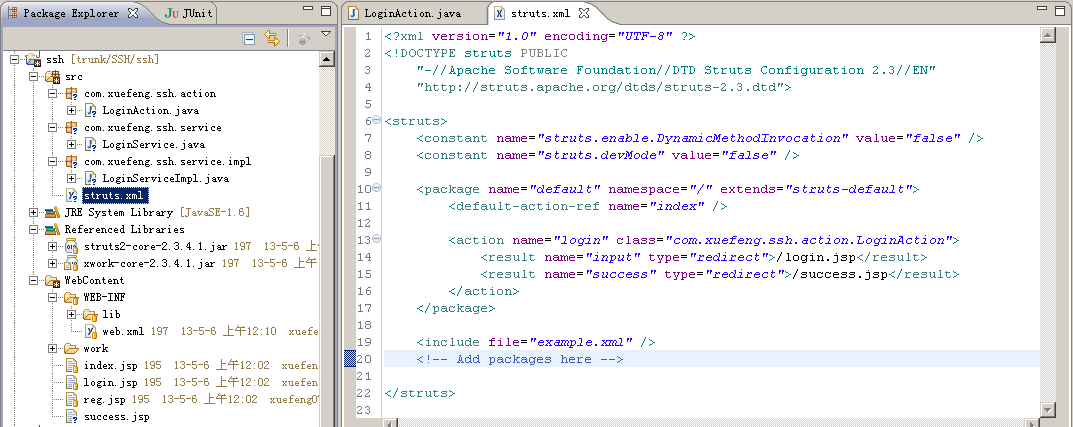
添加一个测试Action,并配置struts.xml:
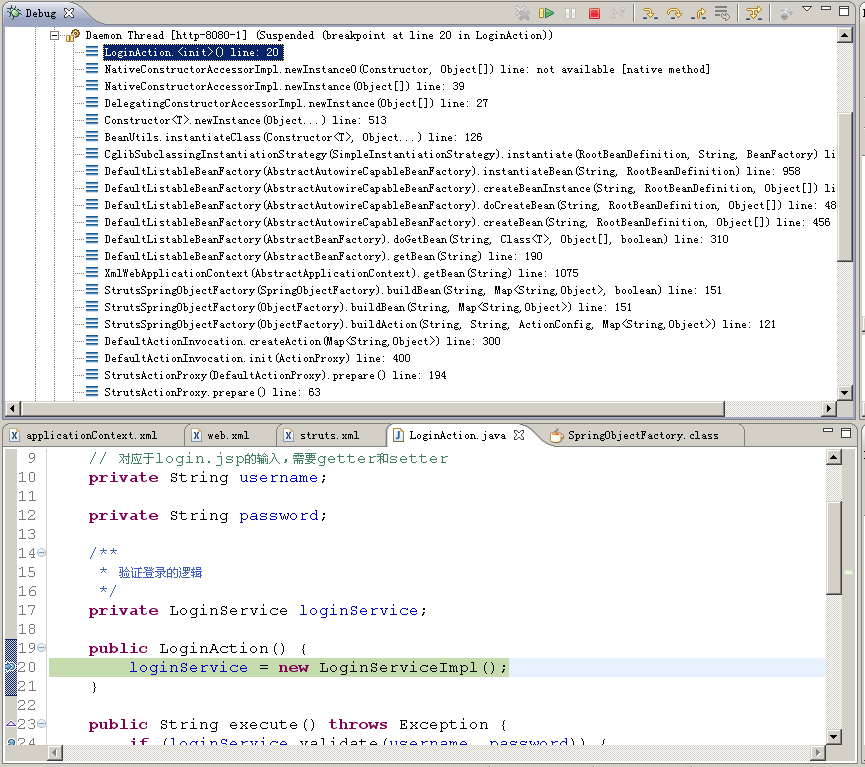
LoginAction的代码如下:
- package com.xuefeng.ssh.action;
- import com.opensymphony.xwork2.Action;
- import com.xuefeng.ssh.service.LoginService;
- import com.xuefeng.ssh.service.impl.LoginServiceImpl;
- public class LoginAction implements Action {
- // 对应于login.jsp的输入,需要getter和setter
- private String username;
- private String password;
- /**
- * 验证登录的逻辑
- */
- private LoginService loginService;
- public LoginAction() {
- loginService = new LoginServiceImpl();
- }
- public String execute() throws Exception {
- if (loginService.validate(username, password)) {
- return SUCCESS;
- }
- return INPUT;
- }
- public String getUsername() {
- return username;
- }
- public void setUsername(String username) {
- this.username = username;
- }
- public String getPassword() {
- return password;
- }
- public void setPassword(String password) {
- this.password = password;
- }
- }
package com.xuefeng.ssh.action;

import com.opensymphony.xwork2.Action;
import com.xuefeng.ssh.service.LoginService;
import com.xuefeng.ssh.service.impl.LoginServiceImpl;

public class LoginAction implements Action {

	// 对应于login.jsp的输入,需要getter和setter
	private String username;

	private String password;

	/**
	 * 验证登录的逻辑
	 */
	private LoginService loginService;

	public LoginAction() {
		loginService = new LoginServiceImpl();
	}

	public String execute() throws Exception {
		if (loginService.validate(username, password)) {
			return SUCCESS;
		}
		return INPUT;
	}

	public String getUsername() {
		return username;
	}

	public void setUsername(String username) {
		this.username = username;
	}

	public String getPassword() {
		return password;
	}

	public void setPassword(String password) {
		this.password = password;
	}
}
login.jsp代码如下:
- <%@ page language="java" contentType="text/html; charset=UTF-8"%>
- <html>
- <head>
- <title>登录页面</title>
- </head>
- <body>
- <form action="login.action" method="post">
- <table cellpadding="0" cellspacing="0" norder="0" align="center">
- <caption>用户登录</caption>
- <tr>
- <td>用户名:</td>
- <td><input type="text" name="username"></td>
- </tr>
- <tr>
- <td>密 码:</td>
- <td><input type="text" name="password"></td>
- </tr>
- <tr>
- <td colspan="2"><input type="submit" value="登录"></td>
- </tr>
- </table>
- </form>
- </body>
- </html>
<%@ page language="java" contentType="text/html; charset=UTF-8"%>
<html>
	<head>
		<title>登录页面</title>
	</head>

	<body>
		<form action="login.action" method="post">
			<table cellpadding="0" cellspacing="0" norder="0" align="center">
				<caption>用户登录</caption>
				<tr>
					<td>用户名:</td>
					<td><input type="text" name="username"></td>
				</tr>
				<tr>
					<td>密  码:</td>
					<td><input type="text" name="password"></td>
				</tr>
				<tr>
					<td colspan="2"><input type="submit" value="登录"></td>
				</tr>
			</table>
		</form>
	</body>
</html>
login.jsp里的input的name需要和LoginAction里的属性名一致。
这样,此时访问登录页面进行测试:
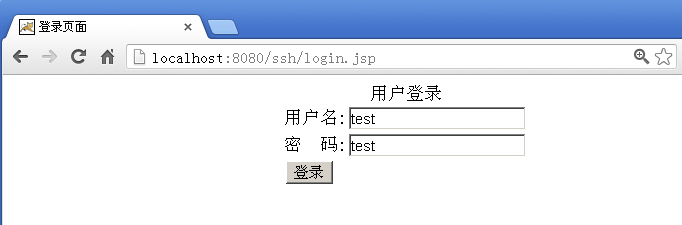
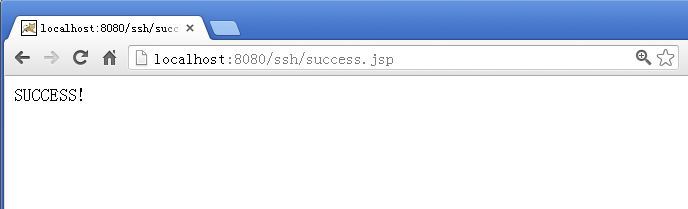
登录成功后,按照struts.xml里的设置,跳转(redirect)到success.jsp:
这里的测试账号在LoginServiceImpl中设置为test和test,如果输错,按照struts.xml里的设置,回到登录界面。
4. 配置Spring
4.1 添加Spring支持
添加Spring需要的jar和配置文件applicationContext.xml。jar可以从Struts的lib中复制,也可以到Spring的官网下载Spring的RELEASE。
然后,修改web.xml,添加Spring支持:
- <listener>
- <listener-class>org.springframework.web.context.ContextLoaderListener</listener-class>
- </listener>
	<listener>
	    <listener-class>org.springframework.web.context.ContextLoaderListener</listener-class>
	</listener>
4.2 Struts集成Spring
Struts是以plugin的方式来集成Spring的,添加struts2-spring-plugin-2.3.4.1.jar,在Struts初始化时,会去加载该jar中包含的struts-plugin.xml,以StrutsSpringObjectFactory取代默认的StrutsObjectFactory,从而达到以Spring容器管理对象的目的。
然后,修改applicationContext.xml,配置已有的Action对象:
- <?xml version="1.0" encoding="UTF-8"?>
- <!DOCTYPE beans PUBLIC "-//SPRING//DTD BEAN 2.0//EN"
- "http://www.springframework.org/dtd/spring-beans-2.0.dtd">
- <beans>
- <bean id="loginAction" class="com.xuefeng.ssh.action.LoginAction" scope="prototype"></bean>
- </beans>
<?xml version="1.0" encoding="UTF-8"?>
<!DOCTYPE beans PUBLIC "-//SPRING//DTD BEAN 2.0//EN"
	"http://www.springframework.org/dtd/spring-beans-2.0.dtd">

<beans>
	<bean id="loginAction" class="com.xuefeng.ssh.action.LoginAction" scope="prototype"></bean>
</beans>
最后,修改struts.xml中Action的引用,把Action的class指定为Spring中bean的id,这样当创建Action的时候,就会以Spring的方式来创建对象了:
- <action name="login" class="loginAction">
- <result name="input" type="redirect">/login.jsp</result>
- <result name="success" type="redirect">/success.jsp</result>
- </action>
		<action name="login" class="loginAction">
			<result name="input" type="redirect">/login.jsp</result>
			<result name="success" type="redirect">/success.jsp</result>
		</action>
4.3 以Spring管理对象创建方式
把Action对象和Spring管理的对象结合起来,在applicationContext.xml中配置:
- <?xml version="1.0" encoding="UTF-8"?>
- <!DOCTYPE beans PUBLIC "-//SPRING//DTD BEAN 2.0//EN"
- "http://www.springframework.org/dtd/spring-beans-2.0.dtd">
- <beans>
- <bean id="loginAction" class="com.xuefeng.ssh.action.LoginAction" scope="prototype">
- <property name="loginService" ref="loginService"></property>
- </bean>
- <bean id="loginService" class="com.xuefeng.ssh.service.impl.LoginServiceImpl"></bean>
- </beans>
<?xml version="1.0" encoding="UTF-8"?>
<!DOCTYPE beans PUBLIC "-//SPRING//DTD BEAN 2.0//EN"
	"http://www.springframework.org/dtd/spring-beans-2.0.dtd">

<beans>
	<bean id="loginAction" class="com.xuefeng.ssh.action.LoginAction" scope="prototype">
		<property name="loginService" ref="loginService"></property>
	</bean>
	<bean id="loginService" class="com.xuefeng.ssh.service.impl.LoginServiceImpl"></bean>
</beans>
这样,就不需要再LoginAction中显示的对loginService赋值了。
5. 配置Hibernate
5.1 添加必需jar
5.2 添加映射文件和DAO层代码
5.3 使用Spring配置Hibernate
修改applicationContext.xml:
- <?xml version="1.0" encoding="UTF-8"?>
- <!DOCTYPE beans PUBLIC "-//SPRING//DTD BEAN 2.0//EN"
- "http://www.springframework.org/dtd/spring-beans-2.0.dtd">
- <beans>
- <bean id="loginAction" class="com.xuefeng.ssh.action.LoginAction"
- scope="prototype">
- <property name="loginService" ref="loginService"></property>
- </bean>
- <bean id="loginService" class="com.xuefeng.ssh.service.impl.LoginServiceImpl">
- <property name="userDao" ref="userDao" />
- </bean>
- <bean id="dataSource"
- class="org.springframework.jdbc.datasource.DriverManagerDataSource">
- <property name="driverClassName">
- <value>com.mysql.jdbc.Driver</value>
- </property>
- <property name="url">
- <value>jdbc:mysql://localhost:3306/ssh</value>
- </property>
- <property name="username">
- <value>root</value>
- </property>
- <property name="password">
- <value>root</value>
- </property>
- </bean>
- <bean id="sessionFactory"
- class="org.springframework.orm.hibernate3.LocalSessionFactoryBean">
- <property name="dataSource" ref="dataSource">
- </property>
- <property name="mappingResources">
- <list>
- <value>com/xuefeng/ssh/model/User.hbm.xml</value>
- </list>
- </property>
- <property name="hibernateProperties">
- <props>
- <prop key="hibernate.dialect">org.hibernate.dialect.MySQLDialect</prop>
- <prop key="hibernate.hbm2ddl.auto">update</prop>
- </props>
- </property>
- </bean>
- <bean id="userDao" class="com.xuefeng.ssh.dao.impl.UserDaoHibernateImpl">
- <property name="sessionFactory" ref="sessionFactory" />
- </bean>
- </beans>
<?xml version="1.0" encoding="UTF-8"?>
<!DOCTYPE beans PUBLIC "-//SPRING//DTD BEAN 2.0//EN"
	"http://www.springframework.org/dtd/spring-beans-2.0.dtd">

<beans>
	<bean id="loginAction" class="com.xuefeng.ssh.action.LoginAction"
		scope="prototype">
		<property name="loginService" ref="loginService"></property>
	</bean>
	<bean id="loginService" class="com.xuefeng.ssh.service.impl.LoginServiceImpl">
		<property name="userDao" ref="userDao" />
	</bean>

	<bean id="dataSource"
		class="org.springframework.jdbc.datasource.DriverManagerDataSource">
		<property name="driverClassName">
			<value>com.mysql.jdbc.Driver</value>
		</property>
		<property name="url">
			<value>jdbc:mysql://localhost:3306/ssh</value>
		</property>
		<property name="username">
			<value>root</value>
		</property>
		<property name="password">
			<value>root</value>
		</property>

	</bean>

	<bean id="sessionFactory"
		class="org.springframework.orm.hibernate3.LocalSessionFactoryBean">
		<property name="dataSource" ref="dataSource">
		</property>
		<property name="mappingResources">
			<list>
				<value>com/xuefeng/ssh/model/User.hbm.xml</value>
			</list>
		</property>
		<property name="hibernateProperties">
			<props>
				<prop key="hibernate.dialect">org.hibernate.dialect.MySQLDialect</prop>
				<prop key="hibernate.hbm2ddl.auto">update</prop>
			</props>
		</property>
	</bean>

	<bean id="userDao" class="com.xuefeng.ssh.dao.impl.UserDaoHibernateImpl">
		<property name="sessionFactory" ref="sessionFactory" />
	</bean>
</beans>
对象的引用链为:
loginAction - loginService - userDao - sessionFactory - dataSource
工程代码下载:http://download.csdn.net/detail/xuefeng0707/5336394


 6万+
6万+

 被折叠的 条评论
为什么被折叠?
被折叠的 条评论
为什么被折叠?
 到【灌水乐园】发言


