


maven进阶——开发自定义插件 - 简书 (jianshu.io)![]() http://events.jianshu.io/p/3f6c2602df3f(1574条消息) 编写 Maven 插件,以及 Maven 插件默认绑定 phase 的原理-CSDN博客
http://events.jianshu.io/p/3f6c2602df3f(1574条消息) 编写 Maven 插件,以及 Maven 插件默认绑定 phase 的原理-CSDN博客![]() https://blog.csdn.net/howeres/article/details/123288554
https://blog.csdn.net/howeres/article/details/123288554
. 前言
因为之前好奇 maven 插件可以不设置绑定 phase 周期,执行时会自动绑定一个默认的 phase 周期。而这个周期具体是哪个 phase 只有去插件的官网上才能查到(文章末尾会讲在项目中查看默认绑定的方法)。
所以我萌生出一个想法,自己写一个插件!
1. 编写插件
和正常编写一个maven项目类似。
总共分两个关键步骤:
- 打包方式设置为
<packaging>maven-plugin</packaging>,加入两个插件所需依赖。
    <groupId>com.super</groupId>
    <artifactId>free-plugin</artifactId>
    <version>1.0.0</version>
    <packaging>maven-plugin</packaging>

    <dependencies>
    	<!-- 以下两个依赖是必须的 -->
        <dependency>
            <groupId>org.apache.maven</groupId>
            <artifactId>maven-plugin-api</artifactId>
            <version>3.5.4</version>
        </dependency>
        <dependency>
            <groupId>org.apache.maven.plugin-tools</groupId>
            <artifactId>maven-plugin-annotations</artifactId>
            <version>3.5.2</version>
            <scope>provided</scope>
        </dependency>
        <!-- 以上两个依赖是必须的 -->

        ...
        <!-- 可加入自定义依赖,我这里随便加了一个工具类 -->
    	<dependency>
	      <groupId>com.google.guava</groupId>
	      <artifactId>guava</artifactId>
	      <version>23.6.1-jre</version>
	    </dependency>
    </dependencies>
- 实现 maven 插件提供的抽象类 AbstractMojo,可以实现:
- @Mojo 注解;通过 defaultPhase 设置默认 phase!!!
- @Parameter 注解;设置参数(可为空,在插件的
<configuration>里面赋值) - execute() 方法;重写来实现我们的插件功能
// goal 的名称叫 hello,默认绑定到 package
@Mojo(name = "hello", defaultPhase = LifecyclePhase.PACKAGE)
public class Hello extends AbstractMojo {
@Parameter private String name;
@Parameter(defaultValue = "World")
private List<String> messages;
// 这里加了 property 参数,代表可以通过命令行 -Dhello.args=Aloha 来设置参数
@Parameter(property = "hello.args")
private String args;
@Override
public void execute() throws MojoExecutionException, MojoFailureException {
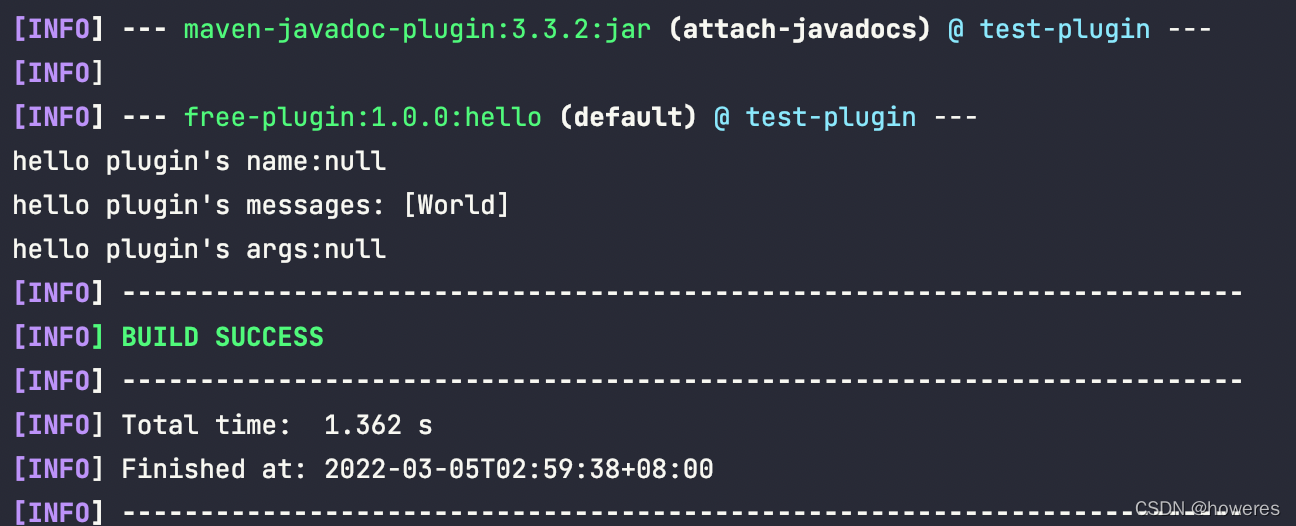
System.out.println("hello plugin's name:" + name);
System.out.println("hello plugin's messages: " + messages);
System.out.println("hello plugin's args:" + args);
}
}
2. 使用插件
- 安装:将上面的写的插件项目安装到本地仓库:
mvn clean install - 使用:新建一个空的maven项目 test-plugin,使用我们编写的插件
<project>
...
    <build>
        <plugins>
            <plugin>
                <groupId>com.super</groupId>
                <artifactId>free-plugin</artifactId>
                <version>1.0.0</version>
                <!-- 必须添加 execution 来绑定本项目要使用的 goal,不然不会执行任何 goal -->
                <executions>
                    <execution>
                        <goals>
                            <goal>hello</goal>
                        </goals>
                    </execution>
                </executions>
            </plugin>
        </plugins>
    </build>
</project>
- 执行结果为:
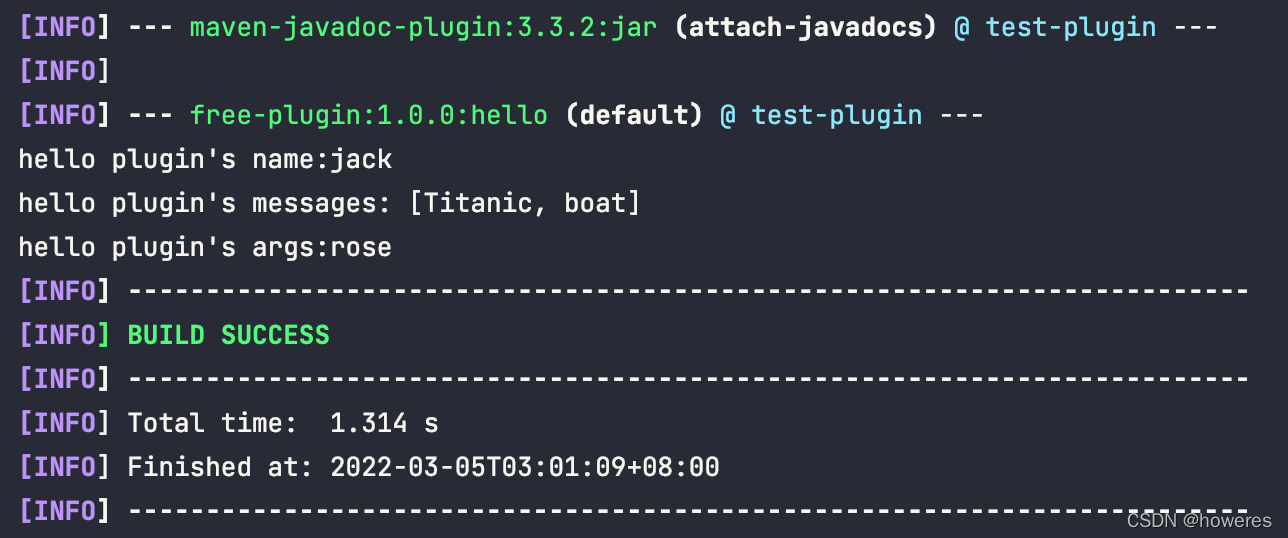
- 如果在其中添加参数
<plugin>
    <groupId>com.super</groupId>
    <artifactId>free-plugin</artifactId>
    <version>1.0.0</version>
    <executions>
        <execution>
            <goals>
                <goal>hello</goal>
            </goals>
        </execution>
    </executions>
    <configuration>
        <name>jack</name>
        <args>rose</args>
        <messages>
        	<!-- 有层级关系即可,真的随便写 -->
            <suibianxie>Titanic</suibianxie>
            <suibianxie>boat</suibianxie>
        </messages>
    </configuration>
</plugin>
- 插件名会默认截取特殊字符之前的字母,比如 free-plugin 会截取为 free,整个 goal 就会叫
free:hello
3. 如何在本项目中查看插件默认绑定的 phase
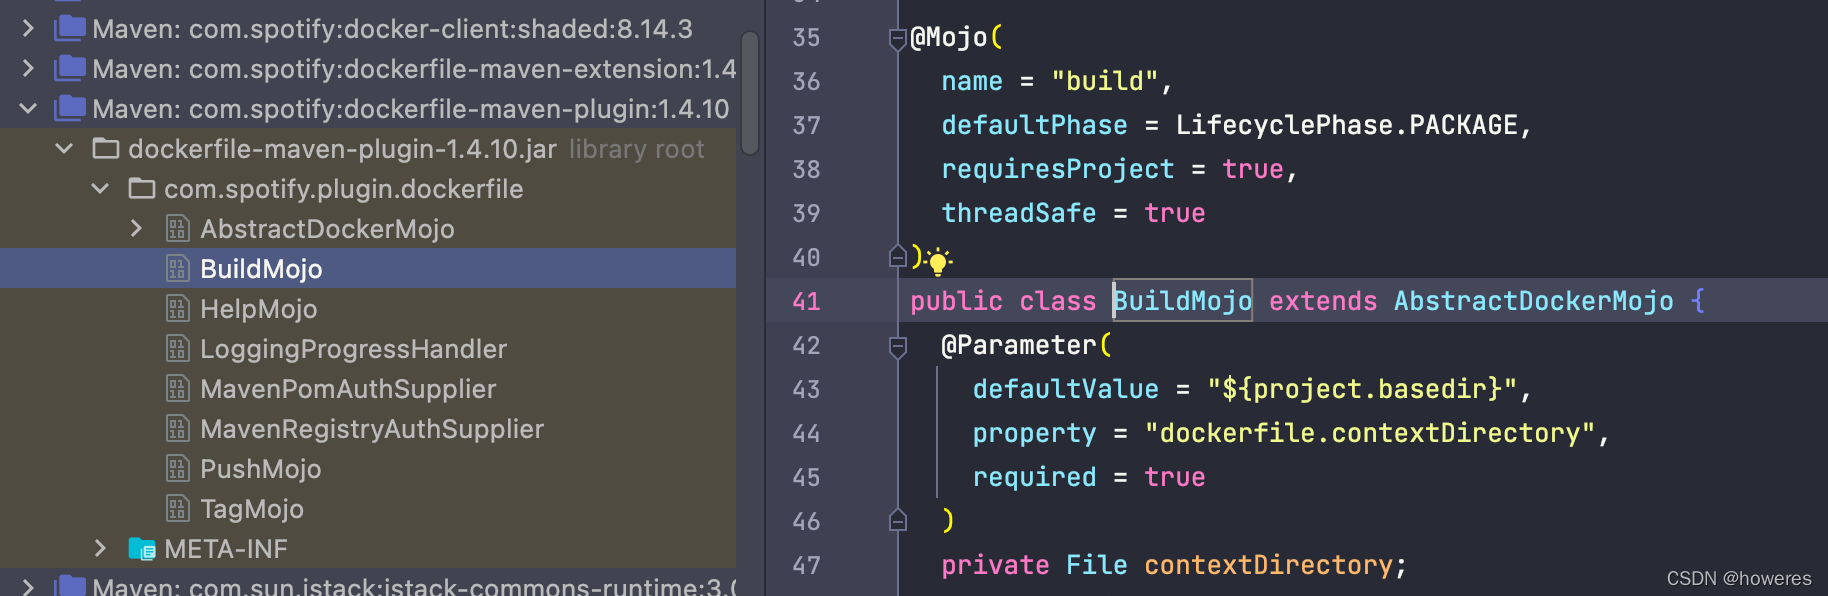
- 因为 idea 中,默认在「External Libraries」中不会显示插件的依赖 (Maven:com.spotify:xxx:1.4.10)。所以我们将我们的插件放在 Dependences 里面
ps: 只是从 plugin 标签移到 dependency 标签里面
<dependencies>
	<dependency>
        <groupId>com.spotify</groupId>
        <artifactId>dockerfile-maven-plugin</artifactId>
        <version>1.4.10</version>
    </dependency>
</dependencies>
- 然后就可以通过查看源码的方式查看默认绑定 phase 了
- 最后移除依赖


 364
364


 被折叠的 条评论
为什么被折叠?
被折叠的 条评论
为什么被折叠?
 到【灌水乐园】发言


