zend framework框架开发的基本流程(1):
①在zend framew官网上下载zend framework库(这里是ZendFramework-1.12.3)
②创建zend framework工程
在cmd中进入到zend framework库的 bin 目录下,通过命令zf.bat create project 项目全路径(D:/ MyProject)创建一个工程,其中MyProject就是工程名
③ 将创建好的工程文件MyProject导入到zend studio中,并将zend framework库中的library类库下的 Zend文件 拷贝到工程中的library文件中
④配置apache,使其支持 zf 框架
在 php.ini 文件中开启 PDO 数据库支持(;extension=php_pdo_mysql.dll 、;extension=php_pdo.dll [去掉前面的分号即可])
启用Apache的 rewrite模块,在httpd.conf 目录下配置 (#LoadModule rewrite_modulemodules/mod_rewrite.so [去掉#即可])
将AllowOverride None 中None改成 All,需要改写以下三个地方:
<Directory "C:/AppServ/www">
    #
    # Possible values for the Options directive are "None", "All",
    # or any combination of:
    #   Indexes Includes FollowSymLinks SymLinksifOwnerMatch ExecCGI MultiViews
    #
    # Note that "MultiViews" must be named *explicitly* --- "Options All"
    # doesn't give it to you.
    #
    # The Options directive is both complicated and important.  Please see
    # http://httpd.apache.org/docs/2.2/mod/core.html#options
    # for more information.
    #
    Options Indexes FollowSymLinks MultiViews ExecCGI

    #
    # AllowOverride controls what directives may be placed in .htaccess files.
    # It can be "All", "None", or any combination of the keywords:
    #   Options FileInfo AuthConfig Limit
    #
    AllowOverride All

    #
    # Controls who can get stuff from this server.
    #
    Order allow,deny
    Allow from all

</Directory>
<Directory />
    Options FollowSymLinks ExecCGI Indexes
    AllowOverride All
    Order deny,allow
    Deny from all
    Satisfy all
</Directory>
<Directory "C:/AppServ/www/cgi-bin">
    AllowOverride All
    Options None
    Order allow,deny
    Allow from all
</Directory>
⑤配置虚拟主机
在httpd.conf 文件中启用Include conf/extra/httpd-vhosts.conf
在httpd-vhosts.conf 文件中配置如下虚拟主机:
<VirtualHost *:80>
    DocumentRoot "C:/AppServ/www/MyProject/public"//网站项目工程根目录
    ServerName  www.MyProject.com //域名
    DirectoryIndex index.php   //首页面
    <Directory />
    Options FollowSymLinks
    AllowOverride None
    Order allow,deny
    Allow from all
    </Directory>
</VirtualHost>
在hosts文件中添加 DNS (127.0.0.1 www.MyProject.com)
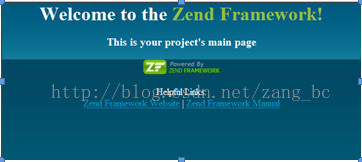
⑥重启 apache ,在浏览器中输入 www.MyPriject.com 验证是否配置成功,出现如下信息说明配置成功


 本文详细介绍使用ZendFramework-1.12.3版本搭建项目的步骤,包括下载库、创建工程、配置开发环境等,并介绍了如何设置Apache支持框架及配置虚拟主机。


 1465
1465

 被折叠的 条评论
为什么被折叠?
被折叠的 条评论
为什么被折叠?
 到【灌水乐园】发言


