


由于这学期发现有些同学在学SSH,同时想到自己也有一段时间没有触碰这个东西,于是决定写一篇关于SSH框架搭建的以及实现一个添加小功能的博文,希望能给大家带来帮助。。。。。。。。
一、工具
由于本人有编程方面的洁癖,算是吧,觉得能用最新版本的框架我就采用最新的
1.MyEclipse2014
2.Navicat
3.Struts2包:struts-2.5.10.1-all
4.Hibernate包:hibernate-release-5.2.8.Final
5.spring包:spring-framework-4.3.6.RELEASE-dist

以上的jar都是个人认为目前最新也比较好用的包。
二、搭建
1.新建一个动态的web项目,这个我想大家都应该知道,这里就不做过多叙述
2.将jar包导入lib文件夹(jar包最后会在链接中给出)
3.修改web.xml配置
<?xml version="1.0" encoding="UTF-8"?>
<web-app xmlns:xsi="http://www.w3.org/2001/XMLSchema-instance" xmlns="http://xmlns.jcp.org/xml/ns/javaee" xsi:schemaLocation="http://xmlns.jcp.org/xml/ns/javaee http://xmlns.jcp.org/xml/ns/javaee/web-app_3_1.xsd" id="WebApp_ID" version="3.1">
<display-name>SSHFamily</display-name>
<welcome-file-list>
<welcome-file>index.html</welcome-file>
<welcome-file>index.htm</welcome-file>
<welcome-file>index.jsp</welcome-file>
<welcome-file>default.html</welcome-file>
<welcome-file>default.htm</welcome-file>
<welcome-file>default.jsp</welcome-file>
</welcome-file-list>
<!-- Struts核心配置 -->
<filter>
<filter-name>struts2</filter-name>
<filter-class>org.apache.struts2.dispatcher.filter.StrutsPrepareAndExecuteFilter</filter-class>
</filter>
<filter-mapping>
<filter-name>struts2</filter-name>
<url-pattern>/*</url-pattern>
</filter-mapping>
<!-- spring监听器配置 -->
<listener>
<listener-class>org.springframework.web.context.ContextLoaderListener</listener-class>
</listener>
<context-param>
<param-name>contextConfigLocation</param-name>
<param-value>classpath:applicationContext.xml</param-value>
</context-param>
</web-app>
注:由于采用了最新的struts包,所以struts的过滤器filtter配置在这个版本中也有了变化。struts2.3.x及以前的版本使用的是org.apache.struts2.dispatcher.ng.filter.StrutsPrepareAndExecuteFilter
而struts2.5修复了以前的一些漏洞,所以这里也变成了org.apache.struts2.dispatcher.filter.StrutsPrepareAndExecuteFilter。2.5版本的struts也要导入llog4j-api-2.7.jar这个包,由于开始我不仅导入了这个包,还导入了其他两个关于log的jar包,结果导致页面出现404错误,后来发现删除就ok了。关于struts2.5的相关改动网上也有很多大牛的有力解释。
4.在src目录下添加applicationcontext.xml和struts.xml
applicationcontext.xml:
<?xml version="1.0" encoding="UTF-8"?>
<beans xmlns="http://www.springframework.org/schema/beans"
xmlns:xsi="http://www.w3.org/2001/XMLSchema-instance"
xmlns:p="http://www.springframework.org/schema/p"
xmlns:c="http://www.springframework.org/schema/c"
xmlns:context="http://www.springframework.org/schema/context"
xmlns:aop="http://www.springframework.org/schema/aop"
xmlns:tx="http://www.springframework.org/schema/tx"
xsi:schemaLocation="http://www.springframework.org/schema/beans
http://www.springframework.org/schema/beans/spring-beans.xsd
http://www.springframework.org/schema/tx
http://www.springframework.org/schema/tx/spring-tx.xsd
http://www.springframework.org/schema/aop
http://www.springframework.org/schema/aop/spring-aop.xsd
http://www.springframework.org/schema/context
http://www.springframework.org/schema/context/spring-context.xsd">
<bean id="dataSource" class="org.apache.commons.dbcp.BasicDataSource">
<property name="driverClassName" value="com.mysql.jdbc.Driver"></property>
<property name="url" value="jdbc:mysql://localhost:3306/bys?useUnicode=true&characterEncoding=UTF8"></property>
<property name="username" value="root"></property>
<property name="password" value="xq1996621"></property>
</bean>
<bean id="sessionFactory"
class="org.springframework.orm.hibernate4.LocalSessionFactoryBean">
<property name="dataSource">
<ref bean="dataSource" />
</property>
<property name="hibernateProperties">
<props>
<prop key="hibernate.dialect">
org.hibernate.dialect.MySQLDialect
</prop>
<prop key="hibernate.show_sql">
true
</prop>
<prop key="hibernate.format_sql">
true
</prop>
<prop key="hibernate.hbm2ddl.auto">
update
</prop>
<prop key="hibernate.current_session_context_class">thread</prop>
</props>
</property>
<property name="mappingResources">
<list>
<value>com/vae/entity/ContactUs.hbm.xml</value>
</list>
</property>
</bean>
<bean id="contactUsAction" class="com.vae.ation.ContactUsAction" scope="prototype">
<property name="contactUsService" ref="contactUsService"></property>
</bean>
<bean id="contactUsDao" class="com.vae.dao.impl.ContactUsDaoImpl">
<property name="sessionFactory" ref="sessionFactory"></property>
</bean>
<bean id="contactUsService" class="com.vae.service.impl.ContactUsServiceImpl">
<property name="contactUsDao" ref="contactUsDao"></property>
</bean>
<bean id="transactionManager"
class="org.springframework.orm.hibernate4.HibernateTransactionManager">
<property name="sessionFactory" ref="sessionFactory" />
</bean>
<tx:annotation-driven transaction-manager="transactionManager" />
</beans>
struts.xml配置:
<?xml version="1.0" encoding="UTF-8" ?>
<!DOCTYPE struts PUBLIC
"-//Apache Software Foundation//DTD Struts Configuration 2.5//EN"
"http://struts.apache.org/dtds/struts-2.5.dtd">
<!-- START SNIPPET: xworkSample -->
<struts>
<package name="sshfamily" extends="struts-default" namespace="/">
<action name="contactus_*" class="contactUsAction" method="{1}">
</action>
</package>
</struts>
<!-- END SNIPPET: xworkSample -->
5.至此就环境就搭完了 ,是不是很简单......................
项目的整个结构:

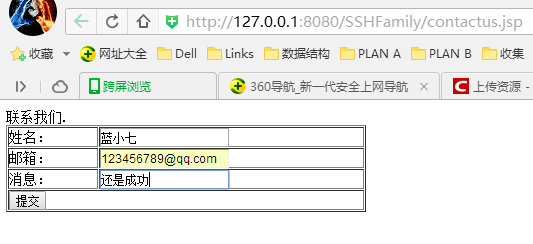
6.页面效果:
数据库:

完结!!!!!!!!!!!!!
重点:该项目的压缩包见一下链接(里面的数据库密码换成自己的相关密码以及建好表即可):
http://download.csdn.net/detail/zaq12346zaqwsx/9777256
结语:关于SSH学习:
1.主要抓住思想把数据库里面抓出来的数据以相应的对象或者一个集合的形式保存,实现页面回显数据
2.在于同学交流中,他觉得service层的代码跟dao层的代码一样,不用写,其实功能简单,这两层确实可以简写为一层,因为目前功能简单也基本上做不到什么业务逻辑处理。但是要体现MVC分层的思想,我觉得还是有必要掌握这种思想。因为业务逻辑层即service层在一些功能复杂的项目中就不会出现也dao层代码一致的情况,当然也不是必然。在复杂的功能中,service层会将dao层的从数据库取出来的数据进行进一步的加工,来实现相应的符合用户或者页面的要求。比如把person表中的所有人的年龄取出来,在service层中进行相加等等。不过目前项目功能简单就可以省略service层,直接用Action层调用dao层即可。
3.其实用到最后,会发现struts+Hibernate+spring这个组合还是会使用起来不太方便,因为里面包含了过多的配置文件。所以我推荐目前想换个框架的同仁用用看springmvc,这个就比较轻量级了,springmvc也可以理解为时替换了struts。
完结 ..............撒花


 6205
6205

 被折叠的 条评论
为什么被折叠?
被折叠的 条评论
为什么被折叠?
 到【灌水乐园】发言


