


- 首先新建一个SpringBoot工程
- 引入对应依赖
<dependency>
     <groupId>org.springframework.boot</groupId>
     <artifactId>spring-boot-starter-security</artifactId>
</dependency>
首先新建一个最简单的Controller
@RestController
public class TestController {
    @RequestMapping("hello")
    public String hello(){
        return "hello, security";
    }
}
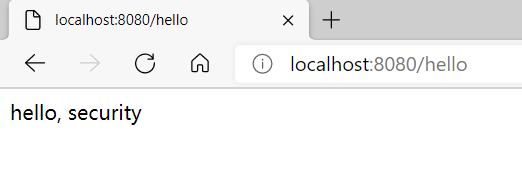
测试:http://localhost:8080/hello

自动跳转到了/login页面,代表Spring Security已生效,需要账号密码进行登录
默认账号密码
- 默认账号为user
- 默认密码为生成的密码

测试:
访问成功!
通过配置文件设置账号密码在SpringBoot配置文件中做如下配置
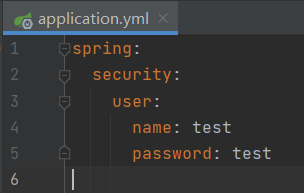
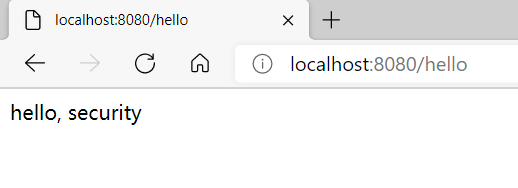
测试发现访问成功!
通过配置类设置账号密码新建MySecurityConfig类继承WebSecurityConfigurerAdapter类来定义自己的安全拦截方案
@EnableWebSecurity
public class MySecurityConfig extends WebSecurityConfigurerAdapter {

    @Override
    protected void configure(AuthenticationManagerBuilder auth) throws Exception {
        auth.inMemoryAuthentication()
               .withUser("testConfig").password(passwordEncoder().encode("testConfig")).roles("admin");
    }

    @Bean
    PasswordEncoder passwordEncoder(){
        return new BCryptPasswordEncoder();
    }
}
- @EnableWebSecurity:开启WebSecurity模式
- @Bean:将实现的加密接口注入到IOC容器中
- roles(“admin”):虽然未指定授权,但是认证时如果不加会报Cannot pass a null GrantedAuthority collection错误
测试发现访问成功!
通过自定义实现类实现通过数据库认证
前面两种设置方式在实际开发中并不实用,因为用户的账号密码是存放在数据库中的。接下来实现根据数据库认证。
首先引入对应依赖
<dependency>
   	<groupId>org.projectlombok</groupId>
    <artifactId>lombok</artifactId>
</dependency>
<dependency>
    <groupId>com.baomidou</groupId>
    <artifactId>mybatis-plus-boot-starter</artifactId>
    <version>3.4.2</version>
</dependency>
<dependency>
    <groupId>mysql</groupId>
    <artifactId>mysql-connector-java</artifactId>
</dependency>
- 数据库:MySQL
- 持久层框架:MyBatis-Plus
- lombok:简化开发的工具
新建用户表users
create table users
(
    id       bigint auto_increment comment '主键ID' primary key,
    username varchar(30) null comment '账号',
    password varchar(30) null comment '密码'
);

insert into users (id, username, password) values
(1,'test1','test1'),
(2,'test2','test2')
实际开发中应使用RBAC模型,这里就简化了
新建对应实体类User
package com.entity;

import com.baomidou.mybatisplus.annotation.IdType;
import com.baomidou.mybatisplus.annotation.TableId;
import lombok.Data;

@Data
public class Users {
    @TableId(type = IdType.AUTO)
    private int id;
    private String username;
    private String password;
}
编写Mapper层UserMapper继承BaseMapper
package com.mapper;

import com.baomidou.mybatisplus.core.mapper.BaseMapper;
import com.entity.Users;
import org.springframework.stereotype.Repository;

@Repository
public interface UsersMapper extends BaseMapper<Users> {}
- 注意编写完Mapper层后需要在主启动类上增加注释@MapperScan(“com.mapper”)来扫描对应的包
在配置类中指定UserDetailsService实现类
@EnableWebSecurity
public class MySecurityConfig2 extends WebSecurityConfigurerAdapter {

    @Autowired
    private MyUserDetailsService myUserDetailsService;

    @Override
    protected void configure(AuthenticationManagerBuilder auth) throws Exception {
        auth.userDetailsService(myUserDetailsService).passwordEncoder(passwordEncoder());
    }

    @Bean
    PasswordEncoder passwordEncoder(){
        return new BCryptPasswordEncoder();
    }
}
对应的UserDetailsService实现类编写
@Service
public class MyUserDetailsService implements UserDetailsService {

    @Autowired
    UsersMapper usersMapper;

    @Override
    public UserDetails loadUserByUsername(String username) throws UsernameNotFoundException {
        QueryWrapper<Users> wrapper = new QueryWrapper<>();
        wrapper.eq("username", username);
        Users users = usersMapper.selectOne(wrapper);
        if (users == null) {
            throw new UsernameNotFoundException("用户不存在");
        }
        List<GrantedAuthority> auths = AuthorityUtils.commaSeparatedStringToAuthorityList("admin");
        return new User(users.getUsername(), new BCryptPasswordEncoder().encode(users.getPassword()), auths);
    }
}
根据用户名查询数据库上对应的用户进行认证
测试:

访问成功!


 5006
5006


 被折叠的 条评论
为什么被折叠?
被折叠的 条评论
为什么被折叠?
 到【灌水乐园】发言


