


L2TP技术
1、安装l2tp软件包:
[root@dp ~]# yum install xl2tpd -y
2、修改配置:
[root@dp ~]# vim /etc/xl2tpd/xl2tpd.conf #分为LAC和LNS两种,我们这里是LNS
[lns default]
ip range = 172.18.1.100-172.18.1.200   ;分配给用户的虚拟ip
local ip = 172.18.1.254           ;本地ppp接口地址
;require chap = yes                ;这里我注释,并在控制文件中设置
;refuse pap = yes                  ;如上
;require authentication = yes      ;如上
name = LinuxVPNserver
ppp debug = yes
pppoptfile = /etc/ppp/options.xl2tpd   ;控制文件,可自定义
length bit = yes
[root@dp ~]# vim /etc/ppp/options.xl2tpd #添加认证策略,验证文件
ipcp-accept-local
ipcp-accept-remote
ms-dns  8.8.8.8   #dns
# ms-dns  192.168.1.1
# ms-dns  192.168.1.3
# ms-wins 192.168.1.2
# ms-wins 192.168.1.4
noccp
auth
#crtscts
#refuse-pap         #拒绝pap
#require-chap       #允许chap
require-mschap-v2   #只允许微软的mschap-v2认证

idle 1800
mtu 1500
mru 1500
nodefaultroute     #默认路由
debug
#lock
proxyarp
connect-delay 5000
3、添加用户及密码:
[root@dp ~]# vim /etc/ppp/chap-secrets
# Secrets for authentication using CHAP
# client        server  secret                  IP addresses
  user1         *        123456                 *
  user2         *        123456                 *
  user3         *        123456                 172.18.1.199  #分配指定地址
4、启动服务,查看状态并连接测试:
[root@dp ~]# systemctl start xl2tpd
[root@dp ~]# netstat -anupl | grep xl2tpd
udp        0      0 0.0.0.0:1701            0.0.0.0:*                           4354/xl2tpd
[root@dp ~]#
[root@dp ~]# firewall-cmd --zone=public --add-port=1701/udp  --permanent
success
[root@dp ~]# firewall-cmd --reload
success
[root@dp ~]#
拨号成功后就会有对应的接口地址:
ppp0: flags=4305<UP,POINTOPOINT,RUNNING,NOARP,MULTICAST>  mtu 1400
        inet 172.18.1.254  netmask 255.255.255.255  destination 172.18.1.100
        ppp  txqueuelen 3  (Point-to-Point Protocol)
        RX packets 8  bytes 248 (248.0 B)
        RX errors 0  dropped 0  overruns 0  frame 0
        TX packets 4  bytes 70 (70.0 B)
        TX errors 0  dropped 0 overruns 0  carrier 0  collisions 0
[root@dp ~]#
[root@dp ~]#
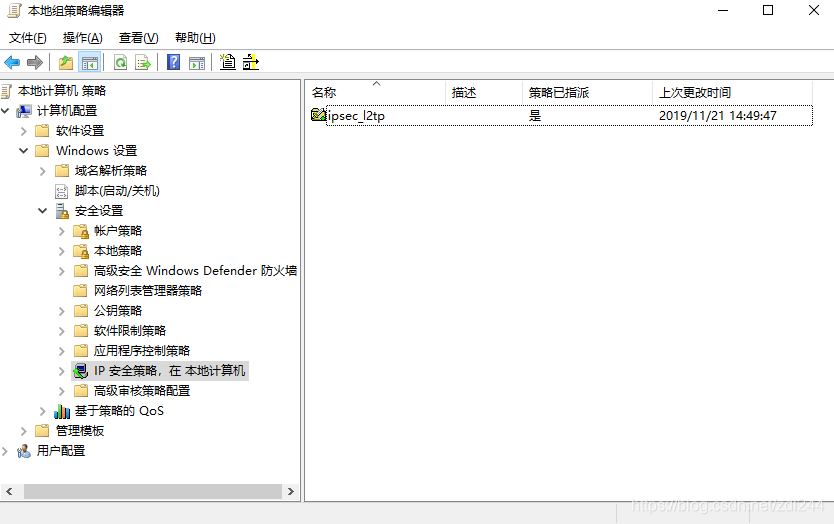
IPSEC安全配置:
centos端配置参考:https://blog.csdn.net/zdl244/article/details/103163256
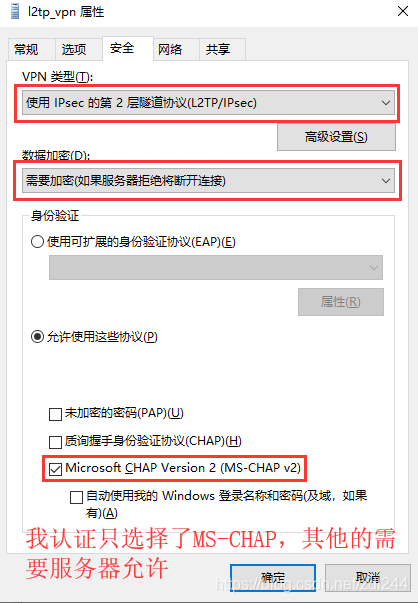
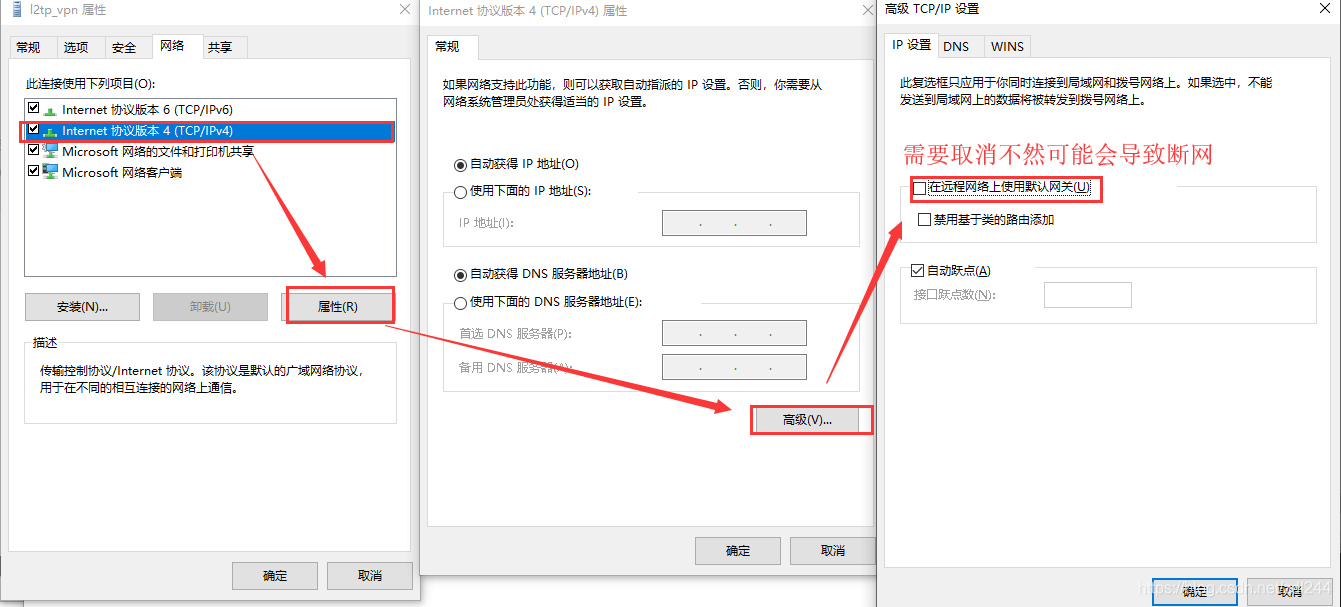
windwos客户端配置:
-------------------------------------------------------------------------------------------------------------------------


 1862
1862

 被折叠的 条评论
为什么被折叠?
被折叠的 条评论
为什么被折叠?
 到【灌水乐园】发言


