


Git简介
Git是一种分布式版本的版本控制工具。早期由Linux之父Lins Toralds在2005年4月开发出了git,用于Linux内核版本管理。再后来12月,Git 1.0正式发布,并免费开源。[1]
Git安装
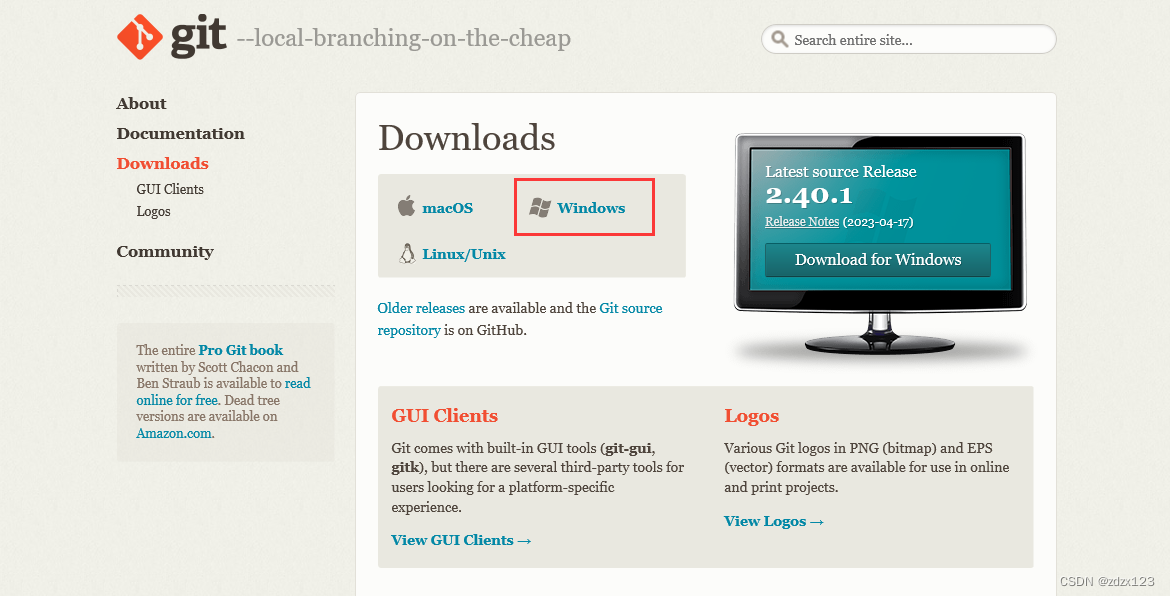
Git官方网站是https://git-scm.com/,点击页面中downloads,选择对应系统的版本(本文以Git Windows版本作为示例),页面跳转后点击“Click here to download”下载 。
双击下载完成的安装程序,运行后,按照其提示一路点击Next即可。安装完成后,打开命令行界面,键git -v命令查看版本,如果出现版本信息则表明安装成功。
C:\Users\tian>git -v
git version 2.40.1.windows.1
Git基础使用
Git配置
在Git的使用过程中,首先要配置用户信息,使用以下命令来配置用户信息。
git config --global user.name "tian"
git config --global user.email "tian@test.com"e
顺便提一下,项目版本管理中,难免会有多种身份,这使得我们需要切换身份,而Git中每一个项目都可以单独设置一个身份,使用以下命令来配置用户信息。
C:\Users\tian>git config --local user.name "tian"
C:\Users\tian>git config --local user.email "tian@test.com"e
此外可以使用以下命令来查看刚才配置的信息。
C:\Users\tian>git config -l
……
user.name=tian
user.email=tian@test.come
Git使用
在配置完用户信息后,我们就可以开始使用git了,我们先新建一个文件夹GitStudy,双击进入文件夹,使用命令初始初始化git。
C:\Users\tian>mkdir GitStudy
C:\Users\tian>cd GitStudy
C:\Users\tian\GitStudy>git init
Initialized empty Git repository in C:/Users/tian/GitStudy/.git/
初始化完成后我们做几个基本的git操作。
1.将文件添加至暂存区
我们新建一个文本文件,命名为test.txt,文件不加任何内容。此时便可以使用git命令将文件添加至Repository中。在使用时也可使用“.”来t添加所有文件。
C:\Users\tian\GitStudy>git add test.txt添加完毕后,可以使用git命令查看目前暂存区的状态。
C:\Users\tian\GitStudy>git status
On branch master

No commits yet

Changes to be committed:
  (use "git rm --cached <file>..." to unstage)
        new file:   test.txt
我们可以看到刚才新建的文件已经添加至暂存区之中,但是可能会有人认为执行本次命令以后的操作就不需要再次添加了,这是不对的,每次文件改动后都必须手动输入命令添加至暂存区中。
顺便提一下,我们可以看见git给我们提供了一个删除暂存区命令,我们执行此命令就可以将暂存区的文件全部删除了,注意此操作并不会影响你原来的文件。
C:\Users\tian\GitStudy>git rm --cached test.txt
rm 'test.txt'

C:\Users\tian\GitStudy>git status
On branch master

No commits yet

Untracked files:
  (use "git add <file>..." to include in what will be committed)
        test.txt

nothing added to commit but untracked files present (use "git add" to track)
2.将暂存区文件提交至存储库之中
我们将文件添加至暂存区后下一步就是把文件提交存储库之中。使用git命令并附带相应的说明便可以提交完成。这里的“Init”可以是任意内容。
C:\Users\tian\GitStudy>git commit -m "Init"
[master (root-commit) 4dc1e89] Init
 1 file changed, 0 insertions(+), 0 deletions(-)
 create mode 100644 test.txt
顺便提一下,可以使用git命令修改说明信息。
C:\Users\tian\GitStudy>git commit --amend -m "This is new Msg"
[master 3f75137] This is new Msg
 Date: Wed May 3 22:43:17 2023 +0800
 1 file changed, 0 insertions(+), 0 deletions(-)
 create mode 100644 test.txt

C:\Users\tian\GitStudy>git log
commit 3f7513718e8a5a5f38332d99334eafd91da23d3a (HEAD -> master)
Author: tian <tian@test.com>
Date:   Wed May 3 22:43:17 2023 +0800

    This is new Msg
3.查看提交的记录
查看提交记录可以使用git命令来查看。git log命令附带了很多参数,在此不进行讨论了。仅研究了最基本的log命令。其中4dc1e89a1edabbc23a6dbd54b4efe00d93eb4426就是git使用的SHA-1算法计算的结果,本文对此也不做深入的研究。
C:\Users\tian\GitStudy>git log
commit 4dc1e89a1edabbc23a6dbd54b4efe00d93eb4426 (HEAD -> master)
Author: tian <tian@test.com>
Date:   Wed May 3 22:43:17 2023 +0800

    Init
4.文件的重名名和删除
在git中,文件名并不重要[2],如果需要更改文件名字可以直接更改。同理删除也一样。下面我们将文件test.txt重命名为change.txt。
C:\Users\tian\GitStudy>git status
On branch master
Changes not staged for commit:
  (use "git add/rm <file>..." to update what will be committed)
  (use "git restore <file>..." to discard changes in working directory)
        deleted:    test.txt

Untracked files:
  (use "git add <file>..." to include in what will be committed)
        change.txt

no changes added to commit (use "git add" and/or "git commit -a")
然后将文件test.txt删除,再使用git命令查看删除后的状态。
C:\Users\tian\GitStudy>git status
On branch master
Changes not staged for commit:
  (use "git add/rm <file>..." to update what will be committed)
  (use "git restore <file>..." to discard changes in working directory)
        deleted:    test.txt

no changes added to commit (use "git add" and/or "git commit -a")
顺便提一下,git是无法识别到文件夹的,故当我们新建目录时需额外新建一个.keep之类的空文件以达到git识别新建的目录的目的。
另外,如果一不小心将文件删除了,可以使用git命令来恢复删除的文件,当然也可以使用“.”来恢复所有删除的文件。也可以使用git checkout HEAD~2 test.txt,这条命令的意思是“用距离现在两个版本以上的文件来覆盖当前工作目录中的文件”[2]。
C:\Users\tian\GitStudy>git checkout .
Updated 1 path from the index
5.重做已经commit的文件
在使用git的过程中,当我们对上次commit后悔的的时,可以使用git reset命令来重做commit。在使用git reset命令之前,先添加一个hello.txt文件并提交。在Windows环境中“^”代表续行符,故使用双引号将head^包裹起来了。
C:\Users\tian\GitStudy>git log --oneline
5955efa (HEAD -> master) 新增Hello.txt
3f75137 This is new Msg
C:\Users\tian\GitStudy>^git reset "head^"
C:\Users\tian\GitStudy>git log --oneline
3f75137 (HEAD -> master) This is new Msg
其中head后面的^代表恢复一次,所以以此类推head^^就是两次,但是倒退超过三次通常不会写成head^^^而是使用head~3类似的写法。head总是指向某一个分支,通常看作当前分支。
顺便提一下,在使用Reset的过程中,每执行一次都会生成一个SHA-1值,可以使用Reflog来查看这个过程。
C:\Users\tian\GitStudy>git reflog
3f75137 (HEAD -> master) HEAD@{0}: reset: moving to head^
5955efa HEAD@{1}: commit: 新增Hello.txt
3f75137 (HEAD -> master) HEAD@{2}: commit (amend): This is new Msg
4dc1e89 HEAD@{3}: commit (initial): Init
分支的操作
1.新增分支
如果要添加一个分支,只需要执行git branch 并在后面加上想要的分支名。
顺便提一下,可以使用git branch命令来查看当前所有分支。
C:\Users\tian\GitStudy>git branch NewBranch

C:\Users\tian\GitStudy>git branch
  NewBranch
* master
2.修改分支名字
使用git branch -m加上原来的分支名字在加上想要的名字便可以修改成功。
C:\Users\tian\GitStudy>git branch -m NewBranch OldBranch

C:\Users\tian\GitStudy>git branch
  OldBranch
* master
3.删除分支
使用git branch -d加上要删除的分支名字便可以删除分支。
C:\Users\tian\GitStudy>git branch -d OldBranch
Deleted branch OldBranch (was 3f75137).
顺便提一下,在删除分支的时候可以使用-D参数来强制删除分支。
4.切换分支
再切换分支前,我们需要再新建一个cat分支,然后使用git checkout cat命令来切换分支。
C:\Users\tian\GitStudy>git branch cat
C:\Users\tian\GitStudy>git checkout cat
Switched to branch 'cat'
5.合并分支
我们将之前未提交的文件提交后,另外新建一个cat.txt文本文件并提交。此时cat分支中新增加了一个cat文件。当我们切换到原来的master分支后发现cat.txt文件消失了,这便是分支的作用。我们可以使用git merge加上分支名字来合并分支。此时消失的文件就再一次出现了。
C:\Users\tian\GitStudy>git add .
C:\Users\tian\GitStudy>git commit -m "cat"
[cat 0a93e03] cat
 1 file changed, 0 insertions(+), 0 deletions(-)
 create mode 100644 cat.txt

C:\Users\tian\GitStudy>git checkout master
Switched to branch 'master'

C:\Users\tian\GitStudy>git merge cat
Updating 3f75137..0a93e03
Fast-forward
 cat.txt   | 0
 hello.txt | 0
 2 files changed, 0 insertions(+), 0 deletions(-)
 create mode 100644 cat.txt
 create mode 100644 hello.txt
6.恢复被删除的分支
当分支呗误删除时,可以使用git branch new_cat 加上SHA-1值来恢复。
C:\Users\tian\GitStudy>git branch
  cat
* master

C:\Users\tian\GitStudy>git branch -D cat
Deleted branch cat (was 0a93e03).

C:\Users\tian\GitStudy>git branch
* master

C:\Users\tian\GitStudy>git branch new_cat 0a93e03

C:\Users\tian\GitStudy>git branch
* master
  new_cat
顺便提一下,除了merge以外还有另一种合并分支的方法,使用git rebase cat命令也可以合并分支。
7.合并冲突的处理
我们在现有的基础上再另外创建一个dog分支,并在这两个分支中都创建my.txt文件,在文件my.txt中分别写入cat和dog。将两个分支的两个文件都进行提交。然后,将分支切换到new_cat上,使用git merge dog命令进行合并。
C:\Users\tian\GitStudy>git merge dog
Auto-merging my.txt
CONFLICT (content): Merge conflict in my.txt
Automatic merge failed; fix conflicts and then commit the result.

C:\Users\tian\GitStudy>git status
On branch new_cat
You have unmerged paths.
  (fix conflicts and run "git commit")
  (use "git merge --abort" to abort the merge)

Unmerged paths:
  (use "git add <file>..." to mark resolution)
        both modified:   my.txt

no changes added to commit (use "git add" and/or "git commit -a")
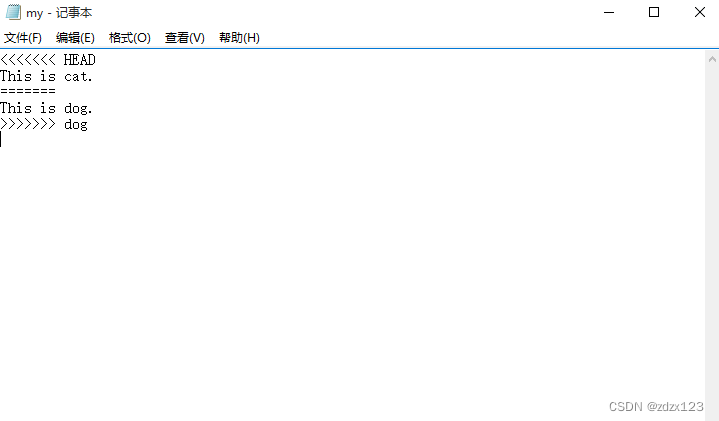
可以看见在合并出现了冲突,打开my.txt文件可以看见git已经为我们标好出现冲突的内容了。此时只需要选择需要的并将不需要的删除重新提交即可。
轻量化标签
1.添加标签
本文仅研究了轻量标签,另一种带有附注的标签不在本文研究范围内。开发过程中会完成特定的里程碑,如版本号1.0,那么此时就需要使用标签来做标记。使用命令git tag 加标签名加SHA-1值便可以添加轻量标签。
C:\Users\tian\GitStudy>git commit -m "cat"
[new_cat 9f8331e] cat
 1 file changed, 1 insertion(+), 1 deletion(-)

C:\Users\tian\GitStudy>git tag v1,0 9f8331e
顺便提一下可以使用git show 加上标签名字来查看已经添加的标签。
C:\Users\tian\GitStudy>git tag version1 6a9c01b

C:\Users\tian\GitStudy>git show version1
commit 6a9c01b426f85c037d5e9eff0e14732a0bb71a80 (HEAD -> new_cat, tag: version1)
Author: tian <tian@test.com>
Date:   Thu May 4 00:42:27 2023 +0800

    add new.txt

diff --git a/my.txt b/my.txt
index a5719d8..613d5df 100644
--- a/my.txt
+++ b/my.txt
@@ -1 +1 @@
-This is cat.
\ No newline at end of file
+This is cat.
diff --git a/new.txt b/new.txt
new file mode 100644
index 0000000..e69de29
2.删除标签
删除标签可以使用git tag -d 加上标签名字来删除。
C:\Users\tian\GitStudy>git tag -d version1
Deleted tag 'version1' (was 6a9c01b)
将内容Push到Gitee上
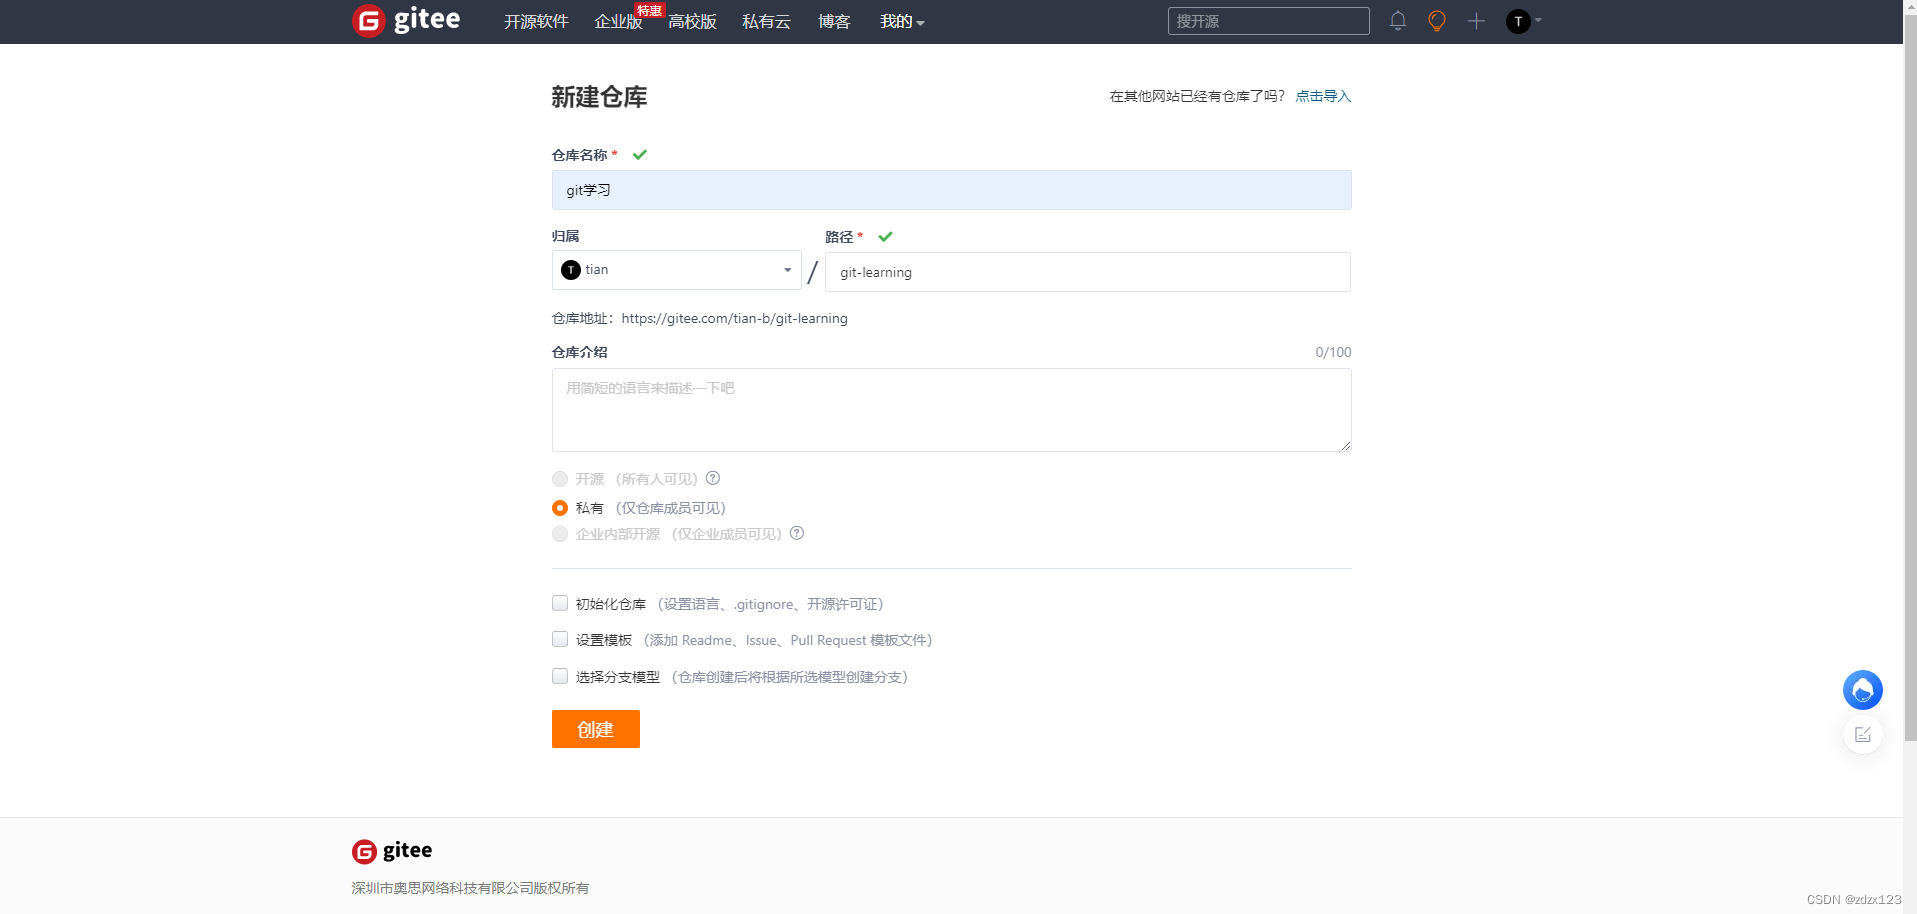
首先在gitee上新建一个仓库,如图所示。
填写完信息后,跳转至引导页面,如图所示。
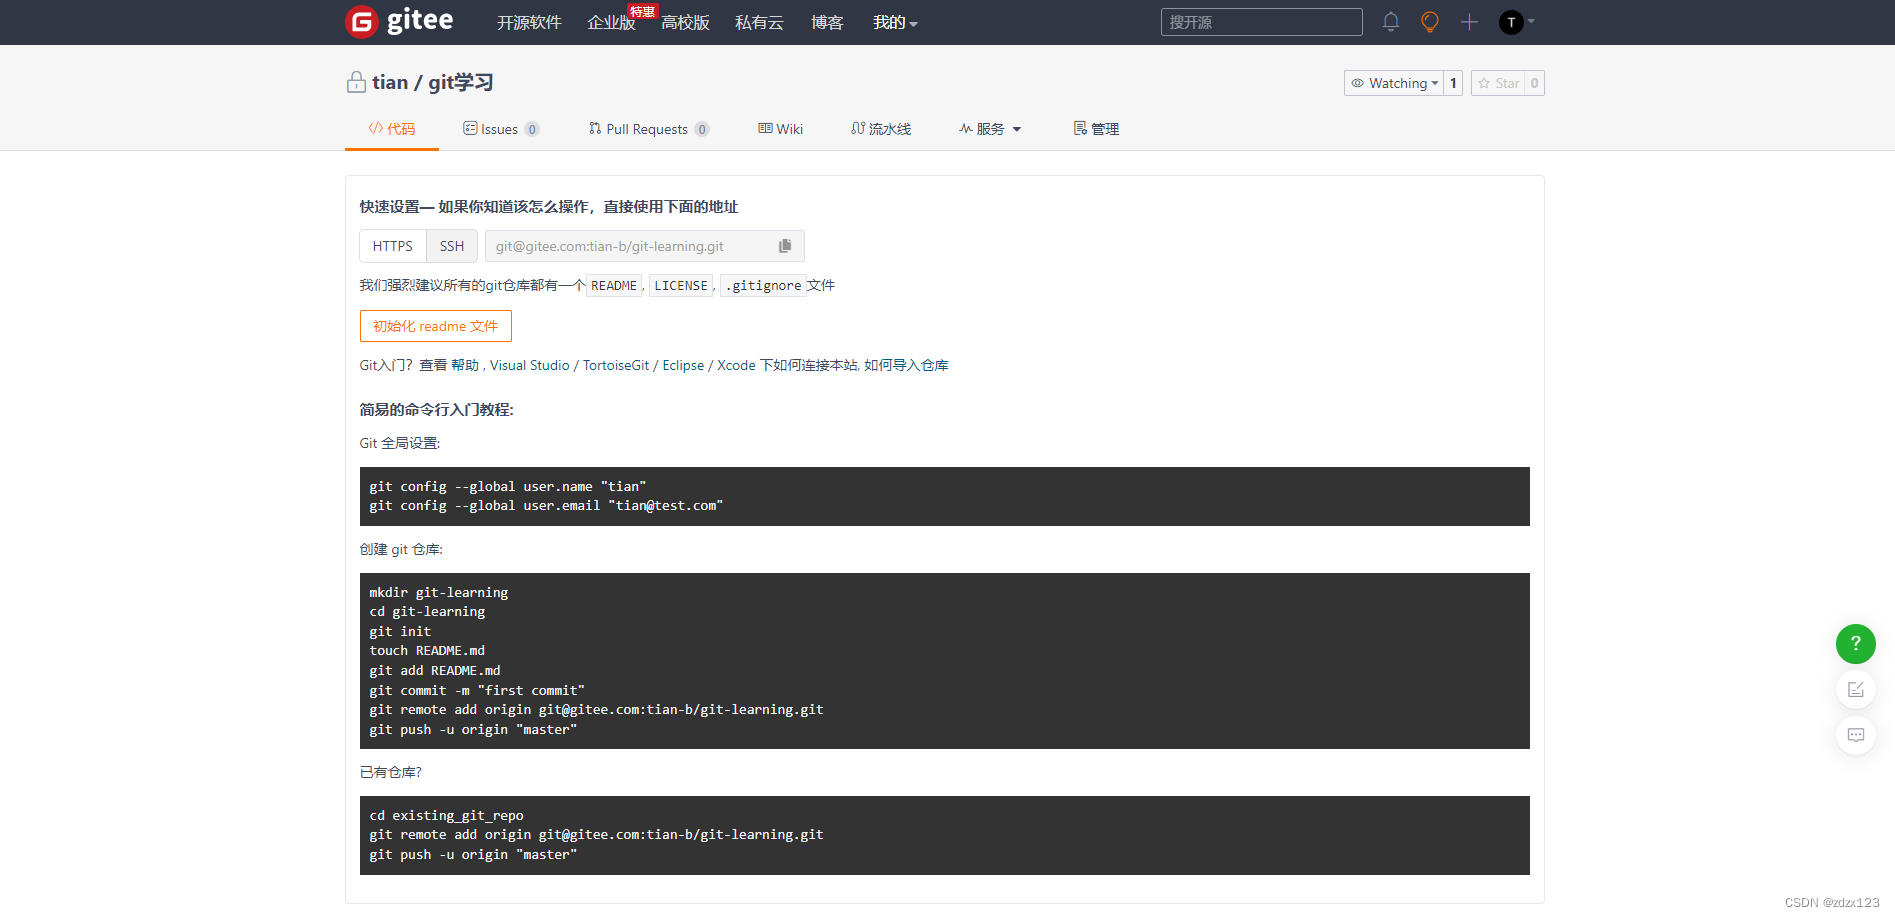
之后根据其提示完成操作即可。
其中关于生成密钥参考生成/添加SSH公钥 - Gitee.com。
总结
本文仅仅的介绍了git的冰山一角,学了这些也仅仅够日常使用,实际上git还有很多奇妙的原理,在这方面限于水平并没有进行介绍。
参考文献
[1]石庆冬.版本管理工具Git的主要特点[J].电子技术与软件工程,2022,(07):72-75.
[2]高见龙. Git从入门到精通[M]. 2019.12. 北京:北京大学出版社, 2019.


 2250
2250


 被折叠的 条评论
为什么被折叠?
被折叠的 条评论
为什么被折叠?
 到【灌水乐园】发言


