


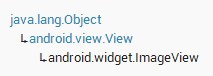
今天要说的这两个组件比较简单,所以ImageButton和ImageView就放在这一篇文章中一起说了,首先说下ImageView,它的主要功能就是为图片展示提供一个容器,定义如下:
今天内容较少,例子就放在同一个文件中说,所以先说下ImageButton,与Button相似,在Android中还有一个就是imagebutton,他的定义如下:
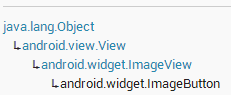
可以看见,ImageButton是继承于ImageView的,所以属性都是差不多一样的,下面写个例子来看看
运行效果:

main.xml:
<LinearLayout xmlns:android="http://schemas.android.com/apk/res/android"
    xmlns:tools="http://schemas.android.com/tools"
    android:id="@+id/LinearLayout1"
    android:layout_width="match_parent"
    android:layout_height="match_parent"
    android:orientation="vertical"
    >

    <ImageView
        android:id="@+id/imgv"
        android:layout_width="fill_parent"
        android:layout_height="wrap_content"
        android:background="@drawable/img_1" />

    <ImageButton
        android:id="@+id/bt"
        android:layout_width="fill_parent"
        android:layout_height="wrap_content"
        android:background="@drawable/img_2" />

</LinearLayout>
MainActivity.java:
package com.example.imageviewdemo;

import android.os.Bundle;
import android.app.Activity;
import android.view.Menu;
import android.view.Window;

public class MainActivity extends Activity {

	@Override
	protected void onCreate(Bundle savedInstanceState) {
		super.onCreate(savedInstanceState);
		//这句就是去掉程序的title
		requestWindowFeature(Window.FEATURE_NO_TITLE);
		setContentView(R.layout.activity_main);
	}
}
为了程序美观,我修改了MainActivity.java使程序没有title,看起来更加美观,上面的是imageview,下面的是imagebutton,从xml标签就能看出来,今天就说到这里了,从第一篇博客到现在,写了也有10来篇文章了,希望能一直坚持下去,下个星期开始就开始学习Android的几种布局,期待。。


 5318
5318


 被折叠的 条评论
为什么被折叠?
被折叠的 条评论
为什么被折叠?
 到【灌水乐园】发言


