


文章目录
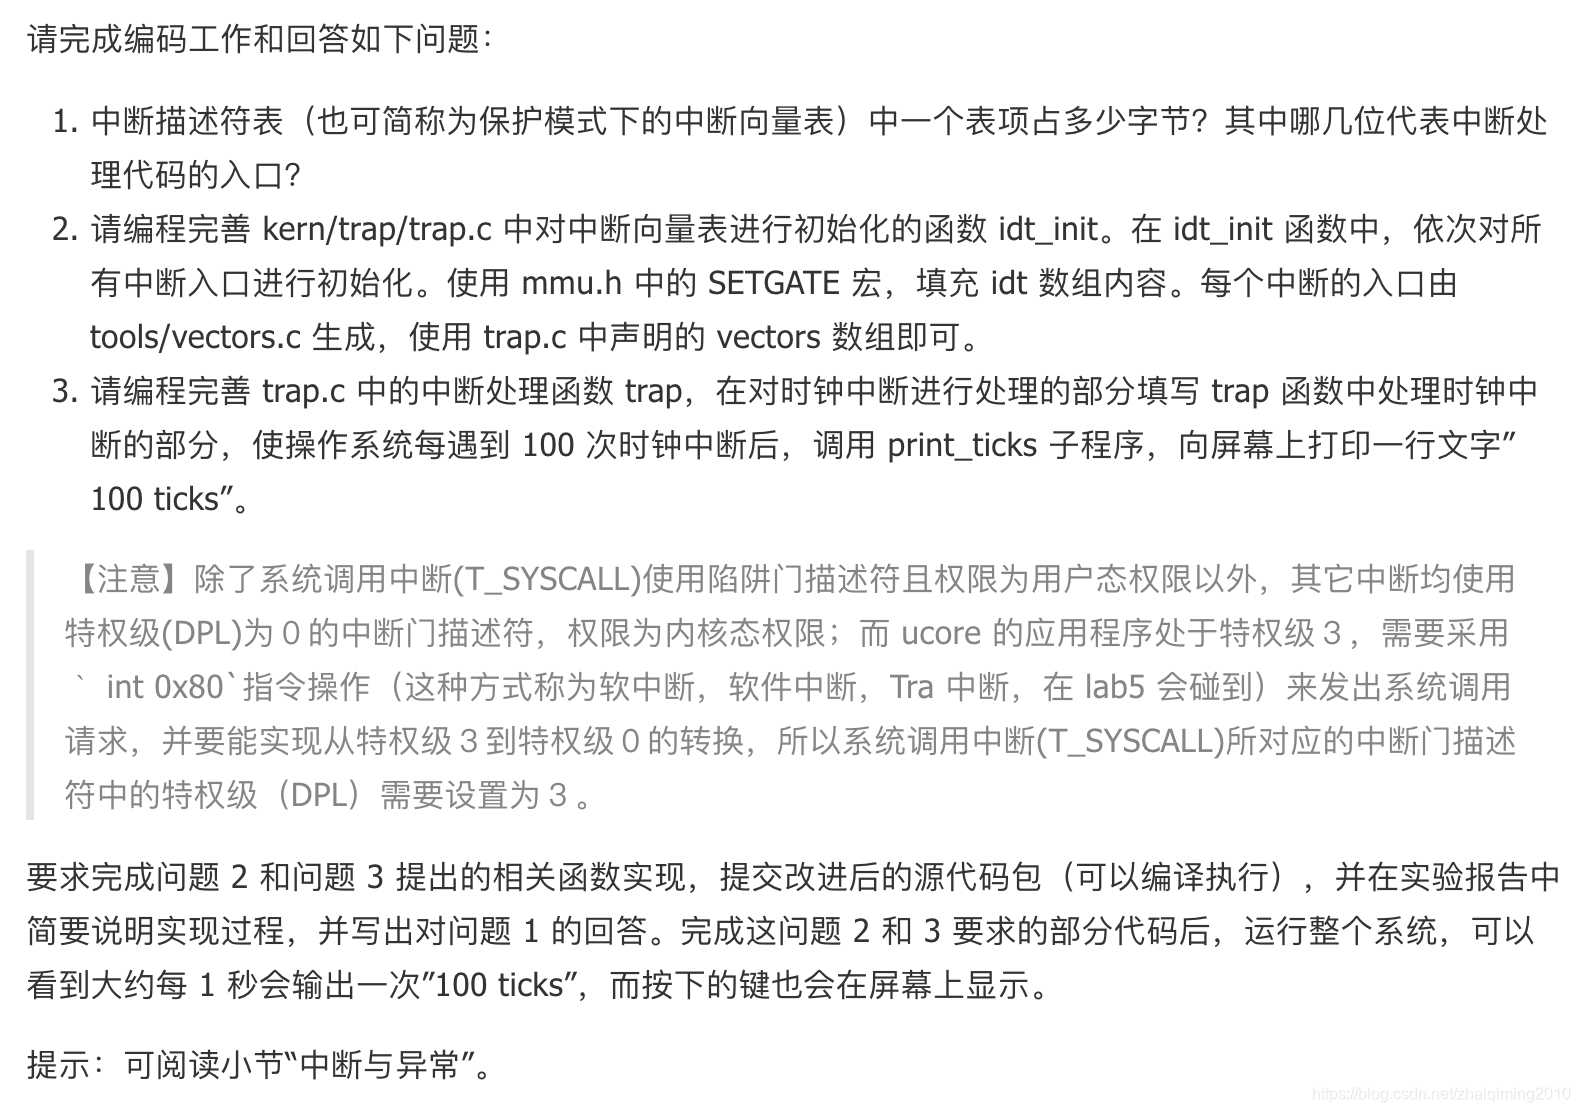
【练习一 @理解通过 make 生成执行文件的过程】

Solution:
- 操作系统镜像文件 ucore.img 是如何一步一步生成的?(需要比较详细地解释 Makefile 中每一条相关命令和命令参数的含义,以及说明命令导致的结果)
首先需要学习makefile的编写规则,可以简单看下 makefile入门
遇到不懂的查GNU MAKE手册 链接: https://pan.baidu.com/s/1_v0m_XPpsXamYGEPkFlJeA 密码: wod9
GCC参数
大概了解makefile的规则之后直接从最关键的地方看起,不用太关注makefile的细节
# create ucore.img
UCOREIMG	:= $(call totarget,ucore.img)
# 可以看到整个img由 bootloader和kernel组成 ,首先申请10000字节的空间,然后将两者依次写入
$(UCOREIMG): $(kernel) $(bootblock)
	$(V)dd if=/dev/zero of=$@ count=10000
	$(V)dd if=$(bootblock) of=$@ conv=notrunc
	$(V)dd if=$(kernel) of=$@ seek=1 conv=notrunc
# -------------------------------------------------------------------

# create bootblock

# 遍历boot下的所有文件并且编译出 .o target文件
bootfiles = $(call listf_cc,boot)
$(foreach f,$(bootfiles),$(call cc_compile,$(f),$(CC),$(CFLAGS) -Os -nostdinc))


bootblock = $(call totarget,bootblock)
$(bootblock): $(call toobj,$(bootfiles)) | $(call totarget,sign)
	@echo + ld $@
	# 将目标文件 $^ 链接起来,同时指定代码段开始地址 为 0x7c00
	$(V)$(LD) $(LDFLAGS) -N -e start -Ttext 0x7C00 $^ -o $(call toobj,bootblock)
	# 反汇编 查看目标文件或者可执行的目标文件的构成 C语言与汇编语言同时显示
	@$(OBJDUMP) -S $(call objfile,bootblock) > $(call asmfile,bootblock)
	# objcopy把一种目标文件中的内容复制到另一种类型的目标文件中.
	@$(OBJCOPY) -S -O binary $(call objfile,bootblock) $(call outfile,bootblock)
	@$(call totarget,sign) $(call outfile,bootblock) $(bootblock)

$(call create_target,bootblock)

# -------------------------------------------------------------------
# -------------------------------------------------------------------
# create kernel target
KOBJS	= $(call read_packet,kernel libs)
kernel = $(call totarget,kernel)
# kernel下的 编译 链接
$(kernel): tools/kernel.ld

$(kernel): $(KOBJS)
	@echo + ld $@
	$(V)$(LD) $(LDFLAGS) -T tools/kernel.ld -o $@ $(KOBJS)
	@$(OBJDUMP) -S $@ > $(call asmfile,kernel)
	@$(OBJDUMP) -t $@ | $(SED) '1,/SYMBOL TABLE/d; s/ .* / /; /^$$/d' > $(call symfile,kernel)

$(call create_target,kernel)

# -------------------------------------------------------------------
-
一个被系统认为是符合规范的硬盘主引导扇区的特征是什么?
参考自wiki:主引导记录(Master Boot Record,缩写:MBR),又叫做主引导扇区,是计算机开机后访问硬盘时所必须要读取的首个扇区,它在硬盘上的三维地址为(柱面,磁头,扇区)=(0,0,1)。在深入讨论主引导扇区内部结构的时候,有时也将其开头的446字节内容特指为“主引导记录”(MBR),其后是4个16字节的“磁盘分区表”(DPT),以及2字节的结束标志(55AA)。因此,在使用“主引导记录”(MBR)这个术语的时候,需要根据具体情况判断其到底是指整个主引导扇区,还是主引导扇区的前446字节。 -
启动代码
主引导记录最开头是第一阶段引导代码。其中的硬盘引导程序的主要作用是检查分区表是否正确并且在系统硬件完成自检以后将控制权交给硬盘上的引导程序(如GNU GRUB)。它不依赖任何操作系统,而且启动代码也是可以改变的,从而能够实现多系统引导。 -
主引导扇区的加载过程
- BIOS加电(台湾用语:引导)自检(Power On Self Test – POST)。BIOS执行内存地址为FFFF:0000H处的跳转指令,跳转到固化在ROM中的自检程序处,对系统硬件(包括内存)进行检查。
-
读取主引导记录(MBR)。当BIOS检查到硬件正常并与CMOS中的设置相符后,按照CMOS中对启动设备的设置顺序检测可用的启动设备。BIOS将相应启动设备的第一个扇区(也就是MBR扇区)读入内存地址为0000:7C00H处。
-
检查0000:7DFEH-0000:7DFFH(MBR的结束标志位)是否等于55AAH,若不等于则转去尝试其他启动设备,如果没有启动设备满足要求则显示"NO ROM BASIC"然后死机。
-
当检测到有启动设备满足要求后,BIOS将控制权交给相应启动设备。启动设备的MBR将自己复制到0000:0600H处,然后继续执行。
事实上,BIOS不仅检查0000:7DFEH-0000:7DFFH(MBR的结束标志位)是否等于55AAH,往往还对磁盘是否有写保护、主引导扇区中是否存在活动分区等进行检查。如果发现磁盘有写保护,则显示磁盘写保护出错信息;如果发现磁盘中不存在活动分区,则显示类似如下的信息“Remove disk or other media Press any key to restart”。
-
硬盘分区表
硬盘分区表占据主引导扇区的64个字节(偏移01BEH–偏移01FDH),可以对四个分区的信息进行描述,其中每个分区的信息占据16个字节。具体每个字节的定义可以参见硬盘分区结构信息。下面是一个例子:
如果某一分区在硬盘分区表的信息如下: 80 01 01 00 0B FE BF FC 3F 00 00 00 7E 86 BB 00
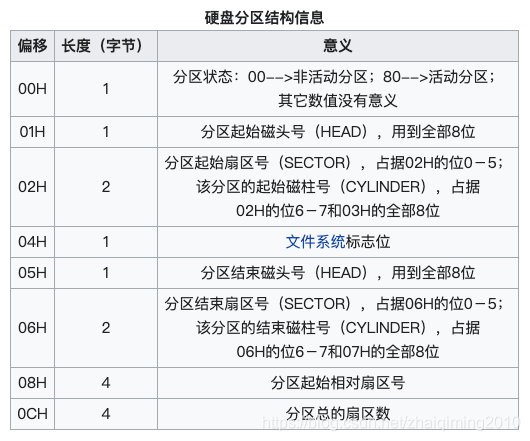
则我们可以看到,最前面的"80"是一个分区的激活标志,表示系统可引导[1];"01 01 00"表示分区开始的磁头号为1,开始的扇区号为1,开始的柱面号为0;"0B"表示分区的系统类型是FAT32,其他比较常用的有04(FAT16)、07(NTFS);"FE BF FC"表示分区结束的磁头号为254,分区结束的扇区号为63、分区结束的柱面号为764;"3F 00 00 00"表示首扇区的相对扇区号为63(小端序);"7E 86 BB 00"表示总扇区数为12289662(小端序)。
对于大于8.4G的现代硬盘,CHS已经无法表示,BIOS使用LBA模式,对于超出的部分,CHS值通常设为0xFEFFFF,并加以忽略,直接使用Offset 0x08-0x0c的4字节相对值,再进行内部转换。
-
结束标志字
结束标志字55,AA(偏移1FEH-偏移1FFH)最后两个字节,是检验主引导记录是否有效的标志。
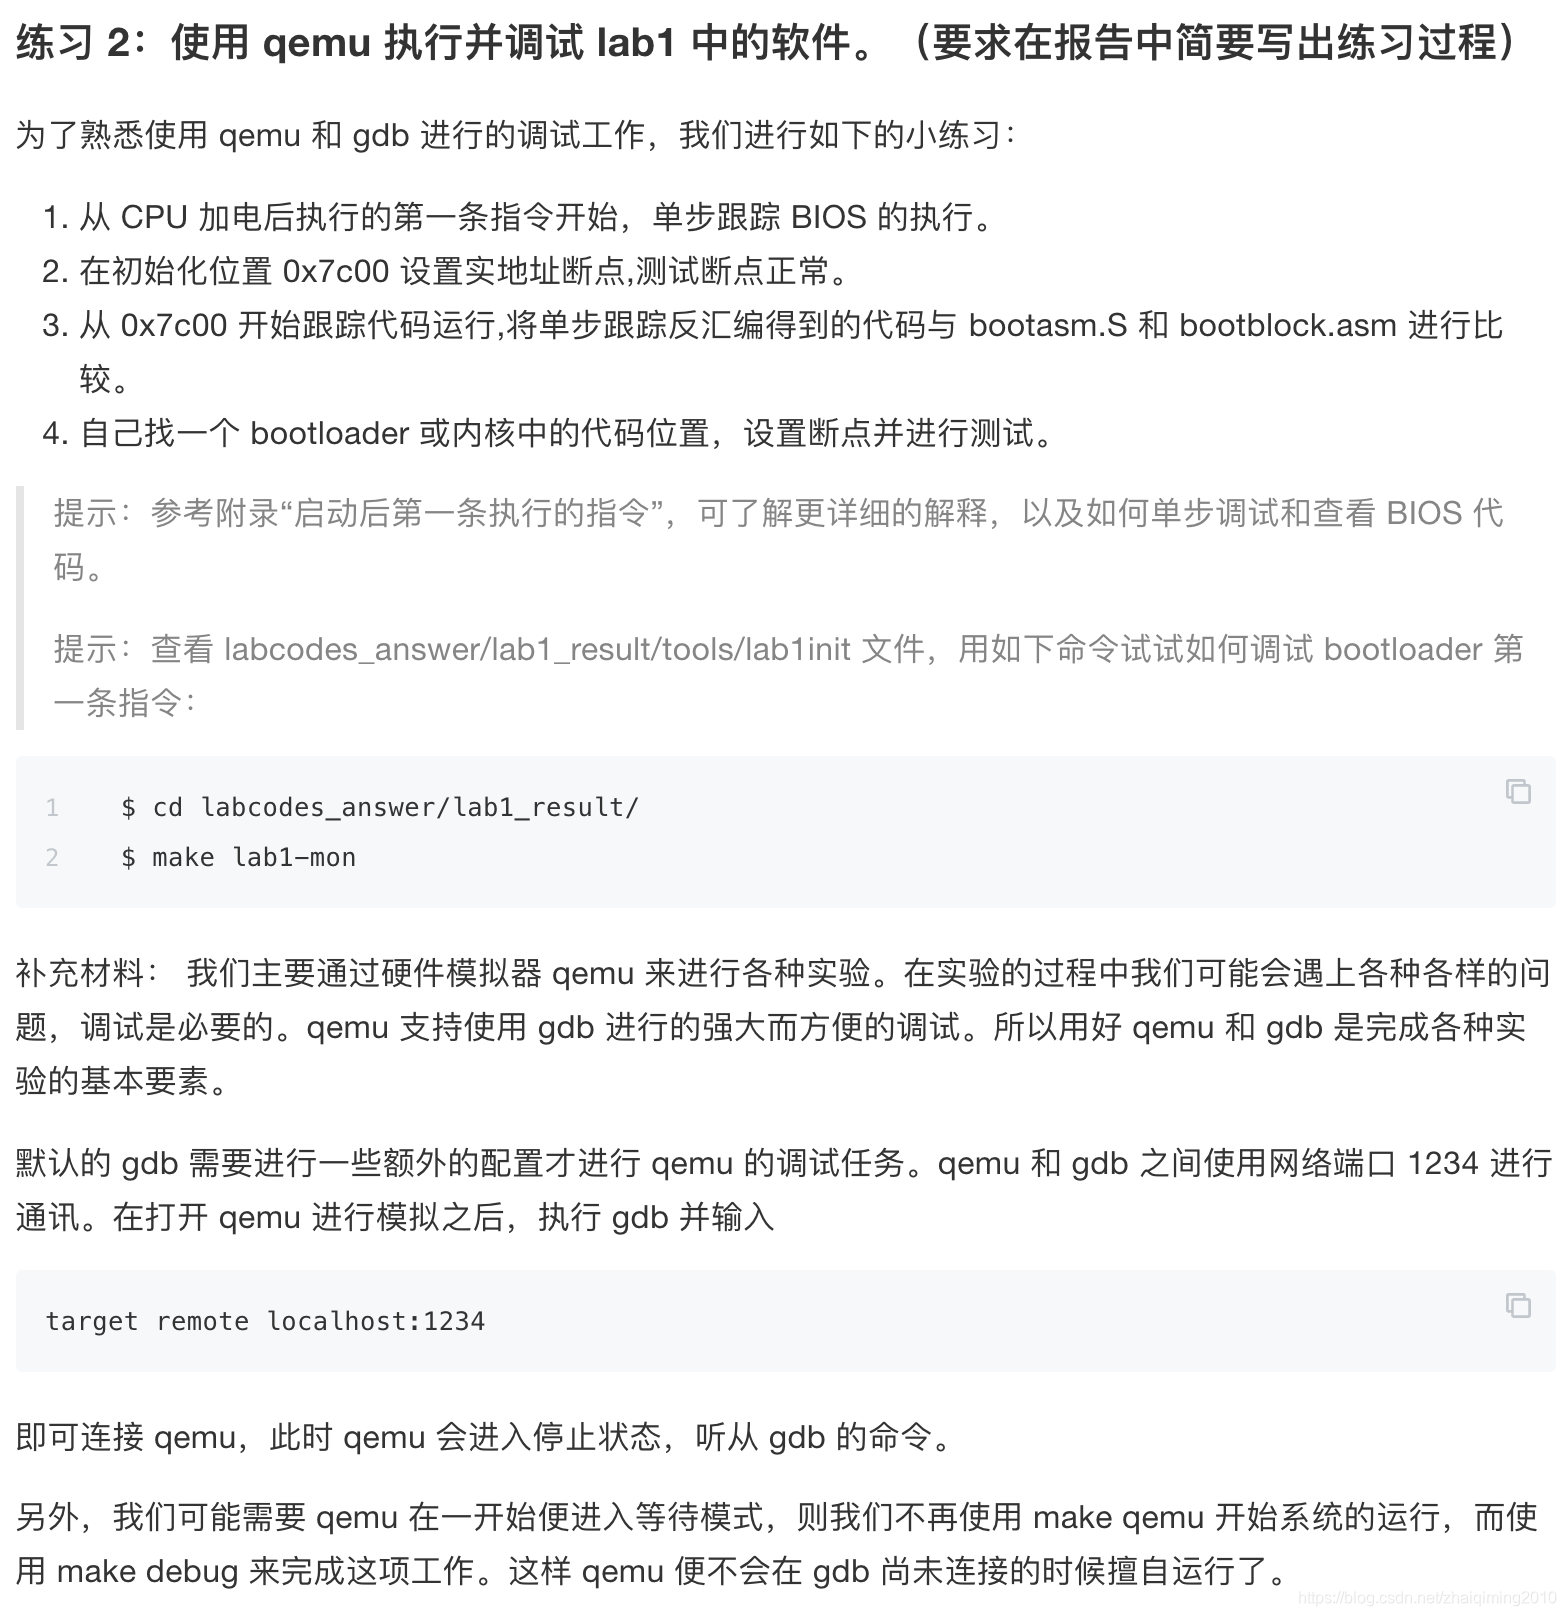
【练习二 @使用 qemu 执行并调试 lab1 中的软件】
Solution:
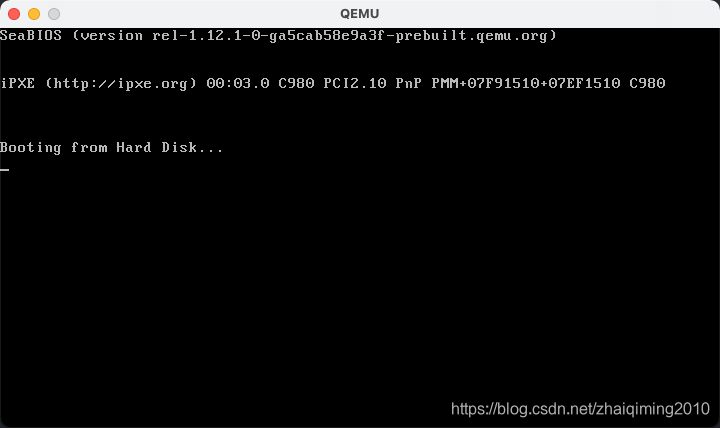
- 【qemu参数】通过qemu加载img,并且在cpu执行第一条指令之前停止
qemu-system-i386 -S -s -hda bin/ucore.img -monitor stdio
这时qemu会呆住
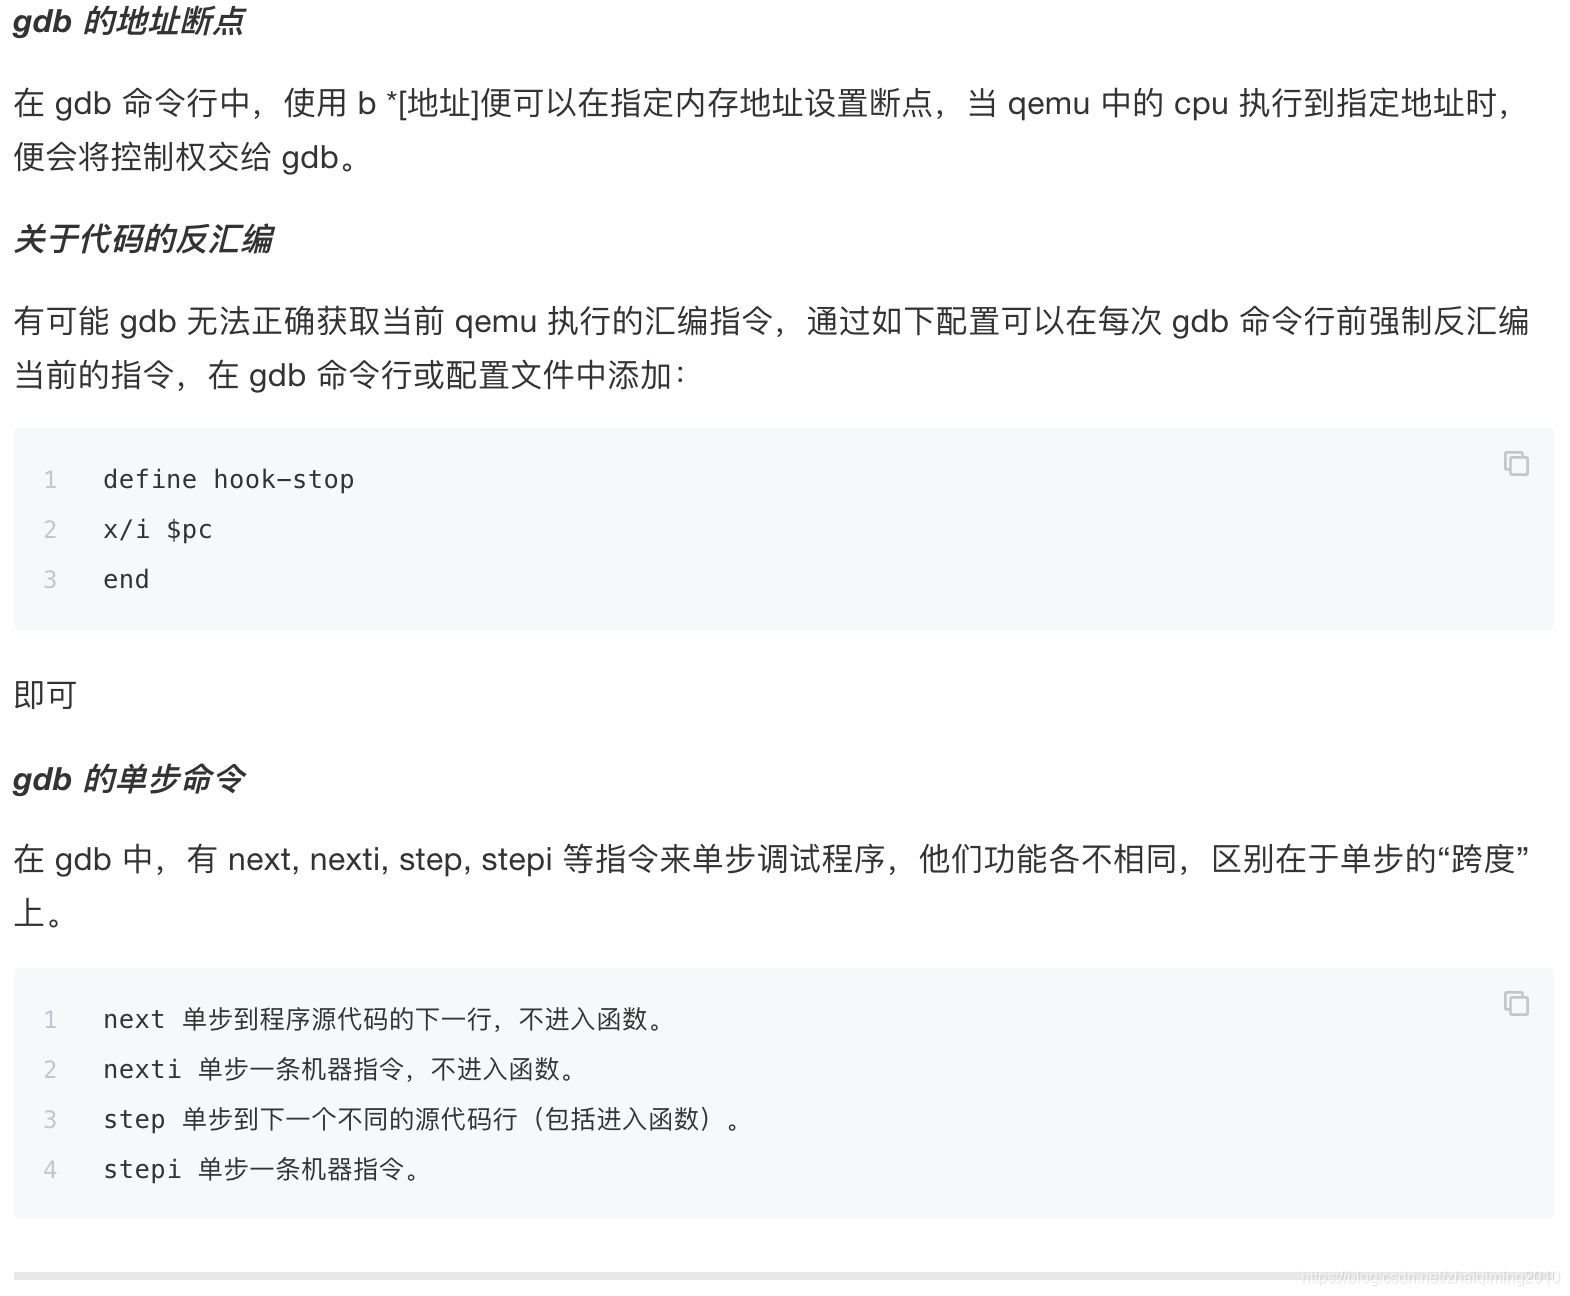
- 【一百个gdb使用技巧】启动gdb,加载调试table,链接远程
(base) ╭─work ~/os_kernel_lab/labcodes/lab1  ‹master*›
╰─➤  i386-elf-gdb
GNU gdb (GDB) 8.3
Copyright (C) 2019 Free Software Foundation, Inc.
License GPLv3+: GNU GPL version 3 or later <http://gnu.org/licenses/gpl.html>
This is free software: you are free to change and redistribute it.
There is NO WARRANTY, to the extent permitted by law.
Type "show copying" and "show warranty" for details.
This GDB was configured as "--host=x86_64-apple-darwin19.0.0 --target=i386-elf".
Type "show configuration" for configuration details.
For bug reporting instructions, please see:
<http://www.gnu.org/software/gdb/bugs/>.
Find the GDB manual and other documentation resources online at:
    <http://www.gnu.org/software/gdb/documentation/>.

For help, type "help".
Type "apropos word" to search for commands related to "word".
/Users/zhaiqiming/.gdbinit:1: Error in sourced command file:
No symbol table is loaded.  Use the "file" command.
#加一个7c00处的断点,BIOS会把启动设备的第一个扇区(也就是MBR扇区)读入内存地址为0000:7C00H处
(gdb) b *0x7c00
Breakpoint 1 at 0x7c00
#读入调试符号表
(gdb) file bin/kernel
Reading symbols from bin/kernel...
#链接远程qemu
(gdb) target remote :1234
Remote debugging using :1234
0x0000fff0 in ?? ()
#查看cs寄存器
(gdb) x/i $cs
   0xf000:      add    %al,(%eax)
#查看ip寄存器
(gdb) x/i $eip
=> 0xfff0:      add    %al,(%eax)
#通过cs:ip得到第一条指令的地址,查看发现是跳转指令,也就是说会长跳转到BIOS指令开始的地方执行
(gdb) x/2i 0xffff0
   0xffff0:     ljmp   $0x3630,$0xf000e05b
   0xffff7:     das
#继续,在7c00处停止,此时bios结束,进入系统引导部分,qemu动起来
(gdb) c
Continuing.
Breakpoint 1, 0x00007c00 in ?? ()
(gdb)
【练习三 @分析 bootloader 进入保护模式的过程】
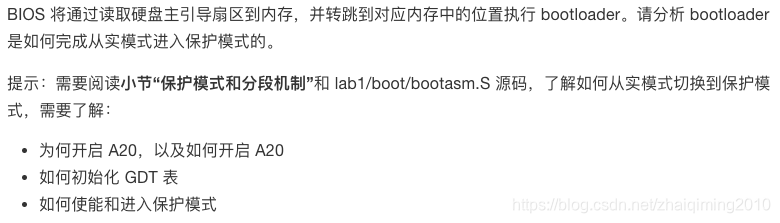
Solution:
-
BIOS启动过程
BIOS 实际上是被固化在计算机 ROM(只读存储器)芯片上的一个特殊的软件,为上层软件提供最底层的、最直接的硬件控制与支持。更形象地说,BIOS 就是 PC 计算机硬件与上层软件程序之间的一个"桥梁",负责访问和控制硬件。 -
att汇编伪指令
汇编程序中以"."开头的名称不是指令的助记符,不会被翻译成机器指令,而是给汇编器一些特殊的指示,称为汇编指示或伪操作。-
.section指示把代码划分成若干个段(section),程序被操作系统加载时,每个段被加载到不同的地址,具有不同的读写执行权限。
-
.data段保存程序的数据是可读写的,C程序的全局变量也属于.data段。上边的程序没定义数据所以.data是空的。
-
.text段保存代码,是只读和可执行的,后面那些指令都属于这个.text段。
-
.globl _start
_start是一个符号(Symbol),符号在汇编程序中代表一个地址,可以用在指令中,汇编程序经过汇编器的处理后所有的符号都被替换成它所代表的地址值。在C中我们可以通过变量名访问一个变量,其实就是读写某个地址的内存单元,我们通过函数名调用一个函数其实就是调转到该函数的第一条指令所在的地址,所以变量名和函数名都是符号,本质上是代表内存地址的。 -
.globl
指示告诉汇编器_start这个符号要被链接器用到,所以要在目标文件的符号表中给它特殊标记。_start就像C程序的main函数一样特殊是整个程序的入口,链接器在链接时会查找目标文件中的_start符号代表的地址,把它设置为整个程序的入口地址,所以每个汇编程序都要提供一个_start符号并且用.globl声明。如果一个符号没有用.globl指示声明这个符号就不会被链接器用到。 -
_start:
_start在这里就像C语言的语句标号一样。汇编器在处理汇编程序时会计算每个数据对象和每条指令的地址,当汇编器看到这样一个标号时,就把它下面一条指令的地址作为_start这个符号所代表的地址。而_start这个符号又比较特殊事整个程序的入口地址,所以下一条指令movl $1, %eax就成了程序中第一条被执行的指令。
-
-
分析Bootasm.S来看ucore是如何完成以上三点的
#include <asm.h>

# Start the CPU: switch to 32-bit protected mode, jump into C.
# The BIOS loads this code from the first sector of the hard disk into
# memory at physical address 0x7c00 and starts executing in real mode
# with %cs=0 %ip=7c00.
# 开启CPU -> 切换到保护模式 -> 跳转到C语言代码去执行
# BIOS会从硬盘的第一个扇区加载Bootasm.S

#相当于C++的define 用来定义常量
.set PROT_MODE_CSEG,        0x8                     # 内核代码段选择子 kernel code segment selector
.set PROT_MODE_DSEG,        0x10                    # 内核数据段选择子 kernel data segment selector
.set CR0_PE_ON,             0x1                     # CR0的第PE位置为1 protected mode enable flag

# start address should be 0:7c00, in real mode, the beginning address of the running bootloader
# 这个开始的位置在系统启动的时候会被加载到7c00,是运行bootloader时的入口
.globl start
start:
.code16                                             # 设置汇编的目标为16-bit模式 Assemble for 16-bit mode
    cli                                             # 屏蔽中断 Disable interrupts
    cld                                             # 将 DF 标志清零 String operations increment

    # Set up the important data segment registers (DS, ES, SS).
    # 设置各个数据段寄存器的值
    xorw %ax, %ax                                   # Segment number zero
    movw %ax, %ds                                   # -> DS : Data Segment
    movw %ax, %es                                   # -> ES : Extra Segment
    movw %ax, %ss                                   # -> SS : Stack Segment

    # Enable A20:
    #  For backwards compatibility with the earliest PCs, physical
    #  address line 20 is tied low, so that addresses higher than
    #  1MB wrap around to zero by default. This code undoes this.
seta20.1:
	#循环检测0x64端口,第二位标志inputBuffer是否为空
    inb $0x64, %al                                  # Wait for not busy(8042 input buffer empty).
    testb $0x2, %al
    jnz seta20.1
	#向64端口发送写命令 0d1h
    movb $0xd1, %al                                 # 0xd1 -> port 0x64
    outb %al, $0x64                                 # 0xd1 means: write data to 8042's P2 port

seta20.2:
	#循环检测0x64端口,第二位标志inputBuffer是否为空
    inb $0x64, %al                                  # Wait for not busy(8042 input buffer empty).
    testb $0x2, %al
    jnz seta20.2
	#向 60h 写入 Output Port 的数据,保证第二位为 1
    movb $0xdf, %al                                 # 0xdf -> port 0x60
    outb %al, $0x60                                 # 0xdf = 11011111, means set P2's A20 bit(the 1 bit) to 1

    # Switch from real to protected mode, using a bootstrap GDT
    # and segment translation that makes virtual addresses
    # identical to physical addresses, so that the
    # effective memory map does not change during the switch.
    # 使用引导GDT和段转换使虚拟地址与物理地址相同,从而在实模式切换到保护模式的过程中,有效内存映射在切换期间不会更改

    #gdtdes是一个段,lgdt命令是load gdt,加载全局描述符表
    lgdt gdtdesc
    #cr0的 PE 位置为1代表开启保护模式
    movl %cr0, %eax
    orl $CR0_PE_ON, %eax
    movl %eax, %cr0

    # Jump to next instruction, but in 32-bit code segment.
    # Switches processor into 32-bit mode.
    # 跳转到第一条32-bit的指令出开始执行 ; 至此开始进入保护模式
    # ljmp $section,$offset即跳转到section:offset地址,改变cs寄存器
    ljmp $PROT_MODE_CSEG, $protcseg

.code32                                             # 设置汇编的目标为32-bit模式 Assemble for 32-bit mode
protcseg:
    # Set up the protected-mode data segment registers
    # 设置各个数据段寄存器的值
    movw $PROT_MODE_DSEG, %ax                       # Our data segment selector
    movw %ax, %ds                                   # -> DS: Data Segment
    movw %ax, %es                                   # -> ES: Extra Segment
    movw %ax, %fs                                   # -> FS
    movw %ax, %gs                                   # -> GS
    movw %ax, %ss                                   # -> SS: Stack Segment


    # Set up the stack pointer and call into C. The stack region is from 0--start(0x7c00)
    # 设置栈寄存器,因为栈地址空间是自高向低拓展的,所以当前栈的可用范围就是0--start(0x7c00) ; 设置完成后进入C函数bootmain
    movl $0x0, %ebp
    movl $start, %esp
    call bootmain

    # If bootmain returns (it shouldn't), loop.
spin:
    jmp spin

# Bootstrap GDT
.p2align 2                                          # force 4 byte alignment
gdt:
    SEG_NULLASM                                     # null seg
    SEG_ASM(STA_X|STA_R, 0x0, 0xffffffff)           # code seg for bootloader and kernel
    SEG_ASM(STA_W, 0x0, 0xffffffff)                 # data seg for bootloader and kernel
# 段表格式
gdtdesc:
    .word 0x17                                      # sizeof(gdt) - 1
    .long gdt                                       # address gdt
【练习四 @分析 bootloader 加载 ELF 格式的 OS 的过程】
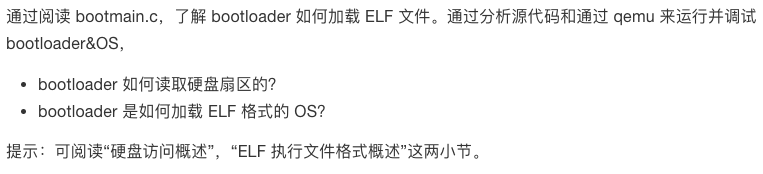
Solution:
#include <defs.h>
#include <x86.h>
#include <elf.h>

/* *********************************************************************
 * This a dirt simple boot loader, whose sole job is to boot
 * an ELF kernel image from the first IDE hard disk.
 *
 * DISK LAYOUT
 *  * This program(bootasm.S and bootmain.c) is the bootloader.
 *    It should be stored in the first sector of the disk.
 *
 *  * The 2nd sector onward holds the kernel image.
 *
 *  * The kernel image must be in ELF format.
 *
 * BOOT UP STEPS
 *  * when the CPU boots it loads the BIOS into memory and executes it
 *
 *  * the BIOS intializes devices, sets of the interrupt routines, and
 *    reads the first sector of the boot device(e.g., hard-drive)
 *    into memory and jumps to it.
 *
 *  * Assuming this boot loader is stored in the first sector of the
 *    hard-drive, this code takes over...
 *
 *  * control starts in bootasm.S -- which sets up protected mode,
 *    and a stack so C code then run, then calls bootmain()
 *
 *  * bootmain() in this file takes over, reads in the kernel and jumps to it.
 * */

#define SECTSIZE        512
#define ELFHDR          ((struct elfhdr *)0x10000)      // scratch space

/* waitdisk - wait for disk ready */
/* 检查io 端口 0x1F7的状态, 第7位为0则硬盘不忙 */
static void
waitdisk(void) {
    while ((inb(0x1F7) & 0xC0) != 0x40)
        /* do nothing */;
}

/* readsect - read a single sector at @secno into @dst */
/* 从secno扇区读取数据到dst */
static void
readsect(void *dst, uint32_t secno) {
    // wait for disk to be ready
    waitdisk();

    /* 0x1F2 到 0x1F6是写入LBA命令的参数, 0x1F7是写入命令的类型, 0x20代表从磁盘读入命令*/
    outb(0x1F2, 1);                         // count = 1
    outb(0x1F3, secno & 0xFF);
    outb(0x1F4, (secno >> 8) & 0xFF);
    outb(0x1F5, (secno >> 16) & 0xFF);
    outb(0x1F6, ((secno >> 24) & 0xF) | 0xE0);
    outb(0x1F7, 0x20);                      // cmd 0x20 - read sectors

    // wait for disk to be ready
    waitdisk();

    // read a sector
    /* 每次读入4字节, 所以需要重复128次*/
    insl(0x1F0, dst, SECTSIZE / 4);
}

/* *
 * readseg - read @count bytes at @offset from kernel into virtual address @va,
 * might copy more than asked.
 * */
/* 包装一下 可以读取任意长度的内容 */
static void
readseg(uintptr_t va, uint32_t count, uint32_t offset) {
    uintptr_t end_va = va + count;

    // round down to sector boundary
    /* 要读入的位置也要能整除扇区大小 */
    va -= offset % SECTSIZE;

    // translate from bytes to sectors; kernel starts at sector 1
    /* 计算offset属于哪个扇区,从哪个扇区开始读 ,加1因为0扇区被引导占用,ELF文件从1扇区开始*/
    uint32_t secno = (offset / SECTSIZE) + 1;

    // If this is too slow, we could read lots of sectors at a time.
    // We'd write more to memory than asked, but it doesn't matter --
    // we load in increasing order.
    for (; va < end_va; va += SECTSIZE, secno ++) {
        readsect((void *)va, secno);
    }
}

/* bootmain - the entry of bootloader */
void
bootmain(void) {
    // read the 1st page off disk
    /* 页大小为4k ,读入了 512 * 8 个字节 ELF头*/
    readseg((uintptr_t)ELFHDR, SECTSIZE * 8, 0);

    // is this a valid ELF?
    /* 判断是否为合法 ELF文件 */
    if (ELFHDR->e_magic != ELF_MAGIC) {
        goto bad;
    }

    struct proghdr *ph, *eph;

    // load each program segment (ignores ph flags)
    /* 从ELF头中获取各个部分应该加载到的位置,ph是起点指针,ELFHDR->e_phnum是各个部分的数量*/
    ph = (struct proghdr *)((uintptr_t)ELFHDR + ELFHDR->e_phoff);
    eph = ph + ELFHDR->e_phnum;
    for (; ph < eph; ph ++) {
        readseg(ph->p_va & 0xFFFFFF, ph->p_memsz, ph->p_offset);
    }

    // call the entry point from the ELF header
    // note: does not return
    /* 进入内核 */
    ((void (*)(void))(ELFHDR->e_entry & 0xFFFFFF))();

bad:
    outw(0x8A00, 0x8A00);
    outw(0x8A00, 0x8E00);

    /* do nothing */
    while (1);
}
【练习五 @实现函数调用堆栈跟踪函数】
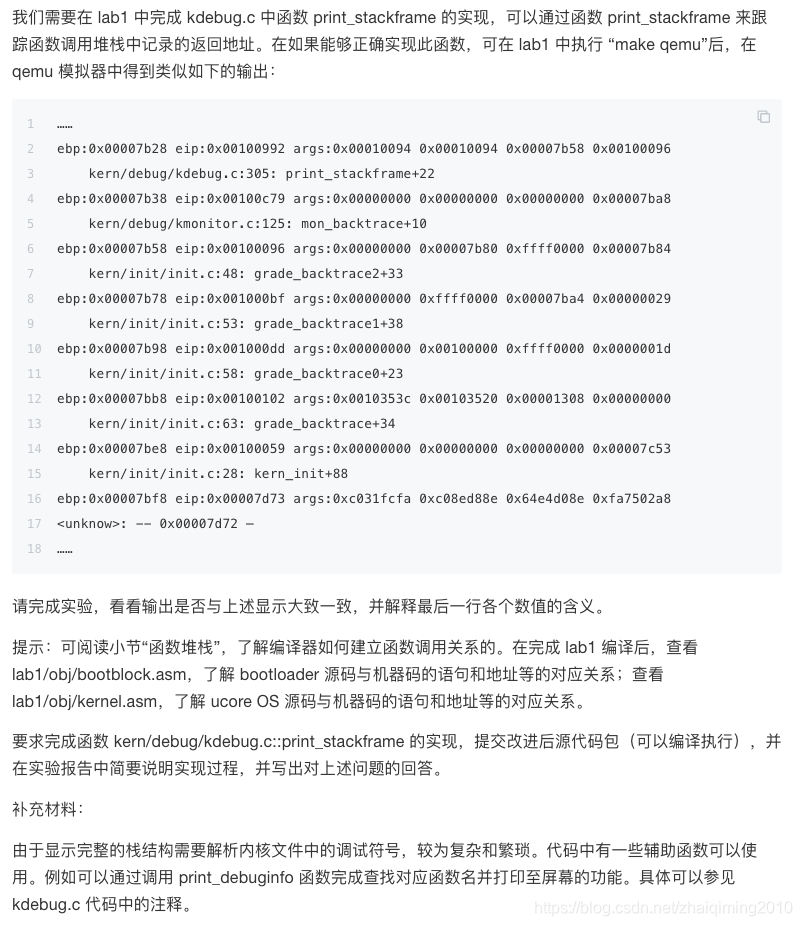
Solution:
- 栈寄存器与栈空间
BP是函数栈空间的栈底,SP则一直是栈顶,所有函数调用过程中都会反复记录BP,目的是记录调用函数的栈空间
ip代表了当前要执行的指令的地址,显然在函数调用完成后执行的肯定是调用结束后的代码,所以减一就代表函数的入口了void print_stackframe(void) { /* LAB1 YOUR CODE : STEP 1 */ /* (1) call read_ebp() to get the value of ebp. the type is (uint32_t); * (2) call read_eip() to get the value of eip. the type is (uint32_t); * (3) from 0 .. STACKFRAME_DEPTH * (3.1) printf value of ebp, eip * (3.2) (uint32_t)calling arguments [0..4] = the contents in address (uint32_t)ebp +2 [0..4] * (3.3) cprintf("\n"); * (3.4) call print_debuginfo(eip-1) to print the C calling function name and line number, etc. * (3.5) popup a calling stackframe * NOTICE: the calling funciton's return addr eip = ss:[ebp+4] * the calling funciton's ebp = ss:[ebp] */ uint32_t ebp = read_ebp(), eip = read_eip(); int i, j; for (i = 0; ebp != 0 && i < STACKFRAME_DEPTH; i ++) { cprintf("ebp:0x%08x eip:0x%08x args:", ebp, eip); uint32_t *args = (uint32_t *)ebp + 2; for (j = 0; j < 4; j ++) { cprintf("0x%08x ", args[j]); } cprintf("\n"); print_debuginfo(eip - 1);//eip - 1 代表当前指令的位置 eip = ((uint32_t *)ebp)[1]; ebp = ((uint32_t *)ebp)[0]; } }
【练习六 @完善中断初始化和处理】
Solution:
- 操作系统特权级
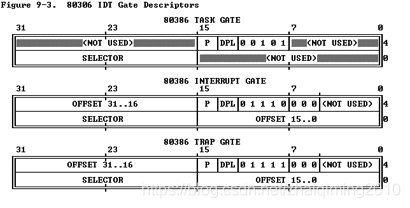
- 通过下图可以看到三种gate 表项的结构,其中选择子和偏移就代表了中断例程的入口
/* segment descriptors 一个表项的描述如下*/ struct segdesc { unsigned sd_lim_15_0 : 16; // low bits of segment limit unsigned sd_base_15_0 : 16; // low bits of segment base address unsigned sd_base_23_16 : 8; // middle bits of segment base address unsigned sd_type : 4; // segment type (see STS_ constants) unsigned sd_s : 1; // 0 = system, 1 = application unsigned sd_dpl : 2; // descriptor Privilege Level unsigned sd_p : 1; // present unsigned sd_lim_19_16 : 4; // high bits of segment limit unsigned sd_avl : 1; // unused (available for software use) unsigned sd_rsv1 : 1; // reserved unsigned sd_db : 1; // 0 = 16-bit segment, 1 = 32-bit segment unsigned sd_g : 1; // granularity: limit scaled by 4K when set unsigned sd_base_31_24 : 8; // high bits of segment base address }; - 要填写idt_init函数,首先需要查看的就是使用到的SETGATE宏
其他的预定义宏在memlayout.h中/* * * Set up a normal interrupt/trap gate descriptor * - istrap: 1 trap, 0中断 * - sel: Code segment selector for interrupt/trap handler 代码段选择子 * - off: Offset in code segment for interrupt/trap handler 代码段内偏移 * - dpl: Descriptor Privilege Level - the privilege level required DPL特权级(代码段静态特权级) * for software to invoke this interrupt/trap gate explicitly * using an int instruction. * */ #define SETGATE(gate, istrap, sel, off, dpl) { \ (gate).gd_off_15_0 = (uint32_t)(off) & 0xffff; \ (gate).gd_ss = (sel); \ (gate).gd_args = 0; \ (gate).gd_rsv1 = 0; \ (gate).gd_type = (istrap) ? STS_TG32 : STS_IG32; \ (gate).gd_s = 0; \ (gate).gd_dpl = (dpl); \ (gate).gd_p = 1; \ (gate).gd_off_31_16 = (uint32_t)(off) >> 16; \ }
idt_init()的实现/* global segment number */ #define SEG_KTEXT 1 #define SEG_KDATA 2 #define SEG_UTEXT 3 #define SEG_UDATA 4 #define SEG_TSS 5 /* global descriptor numbers */ #define GD_KTEXT ((SEG_KTEXT) << 3) // kernel text #define GD_KDATA ((SEG_KDATA) << 3) // kernel data #define GD_UTEXT ((SEG_UTEXT) << 3) // user text #define GD_UDATA ((SEG_UDATA) << 3) // user data #define GD_TSS ((SEG_TSS) << 3) // task segment selector #define DPL_KERNEL (0) #define DPL_USER (3)/* * * Interrupt descriptor table: * * Must be built at run time because shifted function addresses can't * be represented in relocation records. * */ static struct gatedesc idt[256] = {{0}}; static struct pseudodesc idt_pd = { sizeof(idt) - 1, (uintptr_t)idt }; /* idt_init - initialize IDT to each of the entry points in kern/trap/vectors.S */ // 建立中断描述符表,并使能中断 void idt_init(void) { /* LAB1 YOUR CODE : STEP 2 */ /* (1) Where are the entry addrs of each Interrupt Service Routine (ISR)? @每个中断服务例程的入口地址在哪里? * All ISR's entry addrs are stored in __vectors. @都存储在 __vectors 里 * where is uintptr_t __vectors[] ? @那么 __vectors 的存储地址在哪里? * __vectors[] is in kern/trap/vector.S which is produced by tools/vector.c @__vectors[] 定义在 kern/trap/vector.S 中,是由tools/vector.c生成的 * (try "make" command in lab1, then you will find vector.S in kern/trap DIR) @ * You can use "extern uintptr_t __vectors[];" to define this extern variable which will be used later. * (2) Now you should setup the entries of ISR in Interrupt Description Table (IDT). @现在需要设置IDT中的各个例程的入口 * Can you see idt[256] in this file? Yes, it's IDT! you can use SETGATE macro to setup each item of IDT @通过使用SETGATE * (3) After setup the contents of IDT, you will let CPU know where is the IDT by using 'lidt' instruction. @将IDT的地址加载到中断寄存器中 使能中断 * You don't know the meaning of this instruction? just google it! and check the libs/x86.h to know more. * Notice: the argument of lidt is idt_pd. try to find it! */ extern uintptr_t __vectors[]; // 通过extern去寻找 __vectors这个符号 int i; //内核中的中断全部初始化为 DPL_KERNEL 特权级 , 系统调用初始化为 DPL_USER 特权级 for(i=0;i< sizeof(idt) / sizeof(struct gatedesc); i++){ SETGATE(idt[i],0,GD_KTEXT,__vectors[i],DPL_KERNEL); // idt[i] : 待初始化idt段 // 0 : 初始化为中断而不是trap // GD_KTEXT : 等于 (SEG_KTEXT) << 3 ,是处理中断的代码段编号 // __vectors[i] : 存的是第 i 个位置的地址 , 也就是代码段内偏移的值 , 并且每个处理例程都会跳转到 __alltraps处 , __alltraps段内会call trap ,这样就进入了C 语言函数trap() 处理中断 // DPL_KERNEL : 中断的特权级为 DPL_KERNEL } //定义 切换到内核态的系统调用 SETGATE(idt[T_SWITCH_TOK], 1, GD_KTEXT, __vectors[T_SWITCH_TOK], DPL_USER); //使能中断 lidt(&idt_pd); } - 每一百个时钟中断打印一次
	/* trap_dispatch - dispatch based on what type of trap occurred */
static void
trap_dispatch(struct trapframe *tf) {
    char c;

    switch (tf->tf_trapno) {
    case IRQ_OFFSET + IRQ_TIMER:
        /* LAB1 YOUR CODE : STEP 3 */
        /* handle the timer interrupt */
        /* (1) After a timer interrupt, you should record this event using a global variable (increase it), such as ticks in kern/driver/clock.c
         * (2) Every TICK_NUM cycle, you can print some info using a funciton, such as print_ticks().
         * (3) Too Simple? Yes, I think so!
         */
        ticks++;
        if(ticks % TICK_NUM == 0){
            print_ticks();
        }
        break;
    case IRQ_OFFSET + IRQ_COM1:
        c = cons_getc();
        cprintf("serial [%03d] %c\n", c, c);
        break;
    case IRQ_OFFSET + IRQ_KBD:
        c = cons_getc();
        cprintf("kbd [%03d] %c\n", c, c);
        break;
    //LAB1 CHALLENGE 1 : YOUR CODE you should modify below codes.
    case T_SWITCH_TOU:
    case T_SWITCH_TOK:
        panic("T_SWITCH_** ??\n");
        break;
    case IRQ_OFFSET + IRQ_IDE1:
    case IRQ_OFFSET + IRQ_IDE2:
        /* do nothing */
        break;
    default:
        // in kernel, it must be a mistake
        if ((tf->tf_cs & 3) == 0) {
            print_trapframe(tf);
            panic("unexpected trap in kernel.\n");
        }
    }
}
【练习七 @实现用户态和内核态的切换】

challenge1 要求实现用户态和内核态的切换,通过systemCall的方式实现,在调用端使用int触发软中断(T_SWITCH_TOK,T_SWITCH_TOU)
首先要理解用户态和内核态的切换的终极目标是什么.个人理解
U2K: 把当前栈切换到内核栈,当前运行特权级切换为0
K2U: 把当前栈切换到用户栈,当前运行特权级切换为用户级别
首先看下K2U的调用端:
static void
lab1_switch_to_user(void) {
    //LAB1 CHALLENGE 1 : TODO
	asm volatile (
		/* 答案中提到:
		在lab1_switch_to_user中,调用T_SWITCH_TOU中断。
		注意从中断返回时,会多pop两位,并用这两位的值更新ss,sp,损坏堆栈。
		所以要先把栈压两位,并在从中断返回后修复esp。

		这个的原因: 因为在U2K的时候因为发生了运行栈的切换,就硬件来说,执行iret时存在两种情况,一是栈上保存的CS的权限级别(内核态或用户态)与当前一致,不考虑ss和esp;二是栈上保存的权限级别与当前不同,需要恢复ss和esp。OS的任务,是利用iret的功能,在修改CS的同时不改动其它寄存器的值。
		但是在trapentry.S的代码中没有做相关处理,所以在调用端做了一下兼容.
		*/
	    "sub $0x8, %%esp \n"
	    /* [int 命令的执行过程](https://blog.csdn.net/Sagittarius_Warrior/article/details/53128613) */
	    "int %0 \n"
	    /*  [Lab1 Challenge1中关于 mov %ebp, %esp 意义的讨论](https://piazza.com/class/i5j09fnsl7k5x0?cid=1468) */
	    "movl %%ebp, %%esp"
	    :
	    : "i"(T_SWITCH_TOU)
	);
}
回顾一下中断的处理流程: 中断一个硬件调用软件的过程 , 每当收到一条中断的时候,首先会根据中断号查找提前设置好的idt,然后根据选择子查询ldt,获得代码执行入口,接下来执行时会跳转到统一处理的入口__alltraps, __alltraps首先会将各种参数进行压栈保存现场,然后构造调用 void trap(struct trapframe *tf) 时的参数,然后 pushl %esp 相当于进行一个传参操作(供后面调整栈段时), 然后就进入了C函数处理中断
# 中断处理
#include <memlayout.h>

# vectors.S sends all traps here.
.text
.globl __alltraps
__alltraps:
    # ↓↓↓↓↓↓↓↓↓↓↓↓↓↓↓↓↓↓↓↓
    # 将寄存器压栈来构造 trapframe 结构体(在 trap.h 中, 已经 __attribute__((packed)) 取消了gcc的内存对齐)
    # 本代码段中可以看到,首先压的是 ds ,这说明其他的寄存器的压栈是由硬件完成的
    # therefore make the stack look like a struct trapframe
    pushl %ds
    pushl %es
    pushl %fs
    pushl %gs

    # pushal : 保存通用寄存器中的上下文环境
    # 在pushal指令中各寄存器的入栈顺序分别为:
    # %eax->%ecx->%edx->%ebx->%esp->%ebp->%esi->%edi
    # 总共占用4*8=32字节
    pushal

    # 组装完结构体之后,将参数的地址压栈,作为trap()函数的参数
    pushl %esp
    # ↑↑↑↑↑↑↑↑↑↑↑↑↑↑↑↑↑↑↑↑

    # 设置内核的数据段,中断例程都是运行在内核态
    movl $GD_KDATA, %eax
    movw %ax, %ds
    movw %ax, %es

    # 调用 trap(tf) , tf的值等于 esp 寄存器里的值
    # call trap 相当于以下两条指令
    # pushl %eip
    # movl trap, %eip
    call trap

    # pop the pushed stack pointer
    # 从之前将 esp 压栈的位置取出地址的值, 相当于恢复现场,
    # 但是里面的内容已经变了(切换到了新的trapframe开始执行,取决于是TOK还是TOU)
    popl %esp


# 恢复手动压栈的那些寄存器, 屏蔽trap number 和 error code
# 恢复是从中断处理例程里新建的trapframe中取值的,所以这就完成了切换
.globl __trapret
__trapret:
    # restore registers from stack
    popal

    # restore %ds, %es, %fs and %gs
    popl %gs
    popl %fs
    popl %es
    popl %ds

    # get rid of the trap number and error code
    # 这里相当于跳过了结构体的两个成员
    addl $0x8, %esp

    # iret指令 : https://baike.baidu.com/item/iret/1314268?fr=aladdin
    # iret会按照 ip -> cs -> psw -> esp -> ss 的顺序进行恢复
    # 可以看到这个顺序与 trapframe 结构体成员内存布局一致, 也就是从新的trapframe中完成了恢复现场
    # 总结下来, 整个过程就是进入中断,通过软硬结合来保存现场,然后修改寄存器(完成TOU,TOK切换),然后在新位置恢复现场(#^.^#)
    # 切换时的处理见例程代码
    iret
	// 具体切换的实现
    //LAB1 CHALLENGE 1 : YOUR CODE you should modify below codes.
    /*
        修改出一个新的trapframe,并且将返回地址设置为此新trapframe,通过这样的方式完成寄存器的修改
        切换到用户态需要修改 sp , 因为发起中断时是在内核态, 所以没有特权级的变换, 不会有保存的 ss 和 sp
    */
    case T_SWITCH_TOU:
        if (tf->tf_cs != USER_CS) {
            switchk2u = *tf;
            switchk2u.tf_cs = USER_CS;
            switchk2u.tf_ds = switchk2u.tf_es = switchk2u.tf_ss = USER_DS;
            switchk2u.tf_esp = (uint32_t)tf + sizeof(struct trapframe)-16;

            // set eflags, make sure ucore can use io under user mode.
            // if CPL > IOPL, then cpu will generate a general protection.
            switchk2u.tf_eflags |= FL_IOPL_MASK;

            // set temporary stack
            // then iret will jump to the right stack
            *((uint32_t *)tf - 1) = (uint32_t)&switchk2u;
        }
        break;
     /*
        因为中断处理时,已经在内核栈了,只要滑动一下esp就行,不用改ss
    */
    case T_SWITCH_TOK:
        if (tf->tf_cs != KERNEL_CS) {
            tf->tf_cs = KERNEL_CS;
            tf->tf_ds = tf->tf_es = KERNEL_DS;
            tf->tf_eflags &= ~FL_IOPL_MASK;
            switchu2k = (struct trapframe *)(tf->tf_esp - (sizeof(struct trapframe) - 8));
            memmove(switchu2k, tf, sizeof(struct trapframe) - 8);
            *((uint32_t *)tf - 1) = (uint32_t)switchu2k;
        }
        break;


 2856
2856


 被折叠的 条评论
为什么被折叠?
被折叠的 条评论
为什么被折叠?
 到【灌水乐园】发言


