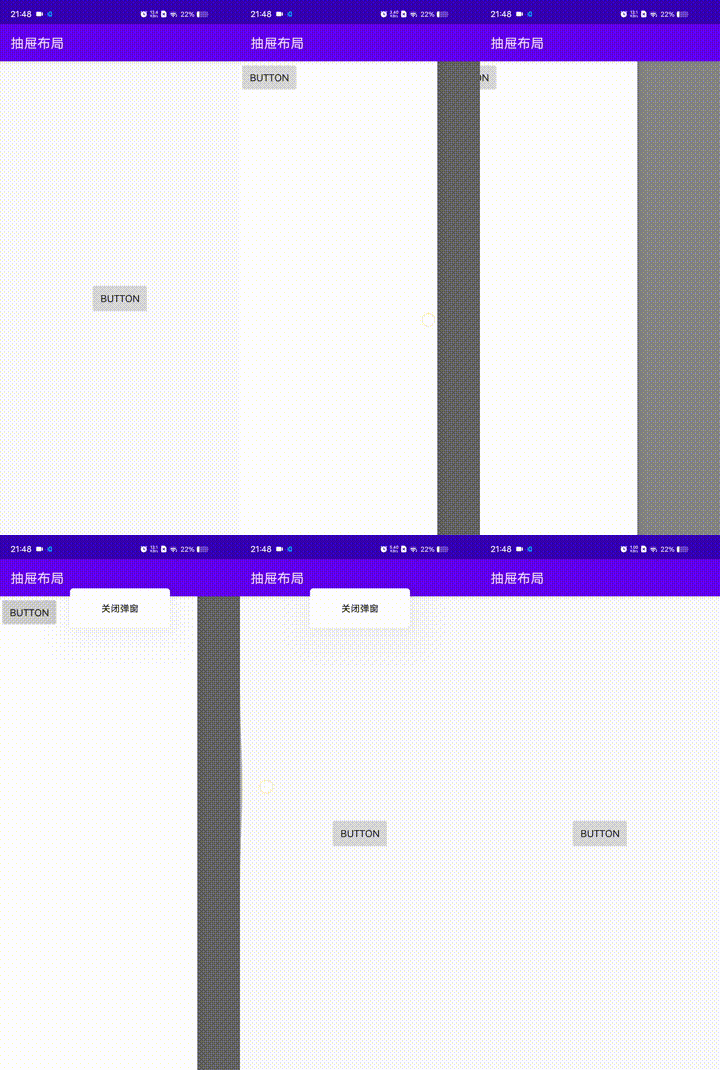
AndroidX抽屉布局

抽屉布局(DrawerLayout)

事例动图
本项目所需要用到的依赖

implementation 'androidx.drawerlayout:drawerlayout:1.0.0'

布局文件

<?xml version="1.0" encoding="utf-8"?>
<androidx.drawerlayout.widget.DrawerLayout
	xmlns:android="http://schemas.android.com/apk/res/android"
	xmlns:app="http://schemas.android.com/apk/res-auto"
	xmlns:tools="http://schemas.android.com/tools"
	android:layout_width="match_parent"
	android:layout_height="match_parent"
	tools:context=".MainActivity"
	android:id="@+id/drawerLayout">

	<LinearLayout
		android:layout_height="match_parent"
		android:layout_width="match_parent"
		android:gravity="center">

		<Button
			android:layout_width="wrap_content"
			android:layout_height="wrap_content"
			android:text="Button"
			android:id="@+id/activity_mainButton"/>

	</LinearLayout>

	<LinearLayout
		android:layout_height="match_parent"
		android:layout_width="match_parent"
		android:layout_gravity="left"
		android:background="#ffffff">

		<Button
			android:layout_width="wrap_content"
			android:layout_height="wrap_content"
			android:text="Button"
			android:id="@+id/activity_mainButton1"/>

	</LinearLayout>

</androidx.drawerlayout.widget.DrawerLayout>

代码部分

import android.app.Activity;
import android.os.Bundle;
import android.view.View;
import android.widget.Button;
import androidx.drawerlayout.widget.DrawerLayout;
import android.view.Gravity;
import android.widget.Toast;

public class MainActivity extends Activity { 
     private Button bt1,bt2;
    private androidx.drawerlayout.widget.DrawerLayout ct1;
    @Override
    protected void onCreate(Bundle savedInstanceState) {
        super.onCreate(savedInstanceState);
        setContentView(R.layout.activity_main);
        bt1 = findViewById(R.id.activity_mainButton);
        bt2 = findViewById(R.id.activity_mainButton1);
        ct1 = findViewById(R.id.drawerLayout);
        bt1.setOnClickListener(new View.OnClickListener() {

                @Override
                public void onClick(View view) {
                    ct1.openDrawer(Gravity.LEFT);
                }
            });
        bt2.setOnClickListener(new View.OnClickListener() {

                @Override
                public void onClick(View view) {
                    Toast.makeText(MainActivity.this,"关闭弹窗",Toast.LENGTH_LONG).show();
                }
            });
    }
	
} 

在抽屉布局会遇到侧滑面内控件无法获取焦点
在这里只需要修改布局顺序

  • 抽屉布局
    • 主页面LinearLayout
    • 侧滑左面LinearLayout_LEFT
    • 侧滑右面LinearLayout_RIGHT
  • 1
    点赞
  • 5
    收藏
    觉得还不错? 一键收藏
  • 打赏
    打赏
  • 0
    评论
Android 中,可以使用抽屉(Drawer)来实现一个位于屏幕底部的可滑动菜单。你可以使用 `DrawerLayout` 和 `NavigationView` 组件来创建底部抽屉。 首先,在你的项目的 build.gradle 文件中添加以下依赖项: ```groovy implementation 'androidx.drawerlayout:drawerlayout:1.1.1' ``` 然后,在你的布局文件中添加以下代码: ```xml <androidx.drawerlayout.widget.DrawerLayout xmlns:android="http://schemas.android.com/apk/res/android" android:id="@+id/drawer_layout" android:layout_width="match_parent" android:layout_height="match_parent"> <!-- 主要内容布局 --> <LinearLayout android:layout_width="match_parent" android:layout_height="match_parent"> <!-- 主要内容视图 --> </LinearLayout> <!-- 底部抽屉布局 --> <com.google.android.material.navigation.NavigationView android:id="@+id/navigation_view" android:layout_width="match_parent" android:layout_height="wrap_content" android:layout_gravity="bottom"> <!-- 抽屉内容视图 --> </com.google.android.material.navigation.NavigationView> </androidx.drawerlayout.widget.DrawerLayout> ``` 在代码中,你需要将主要内容布局放置在 `DrawerLayout` 内,并将底部抽屉布局放置在 `NavigationView` 内。通过设置 `android:layout_gravity="bottom"` 属性,将底部抽屉设置为位于屏幕底部。 接下来,在你的 Activity 中,你需要获取 `DrawerLayout` 和 `NavigationView` 的引用,并设置相关的滑动操作和点击事件监听器: ```java import androidx.appcompat.app.ActionBarDrawerToggle; import androidx.drawerlayout.widget.DrawerLayout; import com.google.android.material.navigation.NavigationView; public class MainActivity extends AppCompatActivity { private DrawerLayout drawerLayout; private NavigationView navigationView; @Override protected void onCreate(Bundle savedInstanceState) { super.onCreate(savedInstanceState); setContentView(R.layout.activity_main); drawerLayout = findViewById(R.id.drawer_layout); navigationView = findViewById(R.id.navigation_view); // 创建 ActionBarDrawerToggle 对象,用于处理抽屉的打开和关闭操作 ActionBarDrawerToggle toggle = new ActionBarDrawerToggle( this, drawerLayout, R.string.navigation_drawer_open, R.string.navigation_drawer_close); drawerLayout.addDrawerListener(toggle); toggle.syncState(); // 设置 NavigationView 的菜单项点击事件监听器 navigationView.setNavigationItemSelectedListener(new NavigationView.OnNavigationItemSelectedListener() { @Override public boolean onNavigationItemSelected(@NonNull MenuItem item) { // 处理菜单项点击事件 return true; } }); } // 在需要打开抽屉时调用 private void openDrawer() { drawerLayout.openDrawer(GravityCompat.END); } // 在需要关闭抽屉时调用 private void closeDrawer() { drawerLayout.closeDrawer(GravityCompat.END); } } ``` 通过调用 `openDrawer()` 方法可以打开底部抽屉,调用 `closeDrawer()` 方法可以关闭底部抽屉。你可以根据自己的需求在菜单项点击事件监听器中处理相关逻辑。 注意,上述代码中的 `R.string.navigation_drawer_open` 和 `R.string.navigation_drawer_close` 是用于指定抽屉打开和关闭时的提示文本,你可以根据需要进行替换。 希望这可以帮助你创建一个底部抽屉

“相关推荐”对你有帮助么?

  • 非常没帮助
  • 没帮助
  • 一般
  • 有帮助
  • 非常有帮助
提交
评论
添加红包

请填写红包祝福语或标题

红包个数最小为10个

红包金额最低5元

当前余额3.43前往充值 >
需支付:10.00
成就一亿技术人!
领取后你会自动成为博主和红包主的粉丝 规则
hope_wisdom
发出的红包

打赏作者

A先生不会提交flag

你的鼓励将是我创作的最大动力

¥1 ¥2 ¥4 ¥6 ¥10 ¥20
扫码支付:¥1
获取中
扫码支付

您的余额不足,请更换扫码支付或充值

打赏作者

实付
使用余额支付
点击重新获取
扫码支付
钱包余额 0

抵扣说明:

1.余额是钱包充值的虚拟货币,按照1:1的比例进行支付金额的抵扣。
2.余额无法直接购买下载,可以购买VIP、付费专栏及课程。

余额充值