


相关视频:
转:scrapy入门实战-爬取代理网站 - JayMu - 博客园
入门scrapy。
学习了有这几点
1.如何使用scrapy框架对网站进行爬虫;
2.如何对网页源代码使用xpath进行解析;
3.如何书写spider爬虫文件,对源代码进行解析;
4.学会使用scrapy的基础命令,创建项目,使用模板生成一个爬虫文件spider;
5,通过配置settings.py反爬虫。如设置user-agent;
设定目标:爬取网络代理www.xicidaili.com网站。
使用scrapy startproject 项目名称
scrapy startproject xicidailiSpider
项目名称应该如何命名呢:建议是需要爬虫的域名+Spider.举个例子:比如要爬取www.zhihu.com,那么项目名称可以写成zhihuSpider。
会在目录中出现该文件目录:

2. 目录中spiders放置的是爬虫文件,然后middlewares.py是中间件,有下载器的中间件,有爬虫文件的中间件。pipelines.py是管道文件,是对spider爬虫文件解析数据的处理。settings.py是设置相关属性,是否遵守爬虫的robotstxt协议,设置User-Agent等。
3.可以使用scrapy提供的模板,命令如下:
scrapy genspider 爬虫名字 需要爬虫的网络域名
举例子:
我们需要爬取的www.xicidaili.com
那么可以使用
scarpy genspider xicidaili xicidaili.com
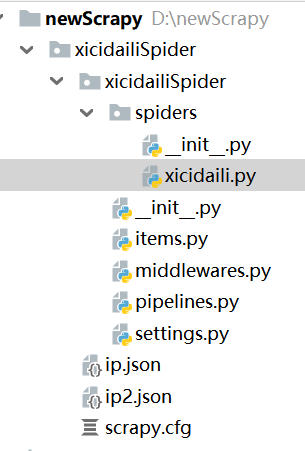
命令完成后,最终的目录如下:
建立后项目后,需要对提取的网页进行分析
经常使用的有三种解析模式:
1.正则表达式
2 xpath response.xpath("表达式")
3 css response.css("表达式")
XPath的语法是w3c的教程。XPath 语法
需要安装一个xpath helper插件在浏览器中,可以帮助验证书写的xpath是否正确。
xpath语法需要多实践,看确实不容易记住。
xicidaili.py
# -*- coding: utf-8 -*-
import scrapy


# 继承scrapy,Spider类
class XicidailiSpider(scrapy.Spider):
    name = 'xicidaili'
    allowed_domains = ['xicidaili.com']
    start_urls = ['https://www.xicidaili.com/nn/',
                  "https://www.xicidaili.com/nt/",
                  "https://www.xicidaili.com/wn/,"
                  "https://www.xicidaili.com/wt/"]

    # 解析响应数据,提取数据和网址等。
    def parse(self, response):
        selectors = response.xpath('//tr')
        for selector in selectors:
            ip = selector.xpath("./td[2]/text()").get()
            port = selector.xpath("./td[3]/text()").get()     #.代表当前节点下
            country = selector.xpath("./td[4]/a/text()").get()   # get()和extract_first() 功能相同,getall()获取多个
            # print(ip,port,country)
            Items={
                "ip":ip,
                "port":port,
                "country":country
            }
            yield  Items
        """
        # 翻页操作
        # 获取下一页的标签
        next_page = response.xpath("//a[@class='next_page']/@href").get()
        # 判断next_page是否有值,也就是是否到了最后一页
        if next_page:
            # 拼接网页url---response.urljoin
            next_url = response.urljoin(next_page)
            # 判断最后一页是否
            yield  scrapy.Request(next_url,callback=self.parse)   # 回调函数不要加括号
    """
# -*- coding: utf-8 -*-
# settings.py设置
# Scrapy settings for xicidailiSpider project
#
# For simplicity, this file contains only settings considered important or
# commonly used. You can find more settings consulting the documentation:
#
# https://doc.scrapy.org/en/latest/topics/settings.html
# https://doc.scrapy.org/en/latest/topics/downloader-middleware.html
# https://doc.scrapy.org/en/latest/topics/spider-middleware.html
BOT_NAME = 'xicidailiSpider'
SPIDER_MODULES = ['xicidailiSpider.spiders']
NEWSPIDER_MODULE = 'xicidailiSpider.spiders'
# 设置到处文件的字符编码
FEED_EXPORT_ENCODING ="UTF8"
# Crawl responsibly by identifying yourself (and your website) on the user-agent
#USER_AGENT = 'xicidailiSpider (+http://www.yourdomain.com)'
# Obey robots.txt rules
# 是否准售robots.txt协议,不遵守
ROBOTSTXT_OBEY = False
# Configure maximum concurrent requests performed by Scrapy (default: 16)
#CONCURRENT_REQUESTS = 32
# Configure a delay for requests for the same website (default: 0)
# See https://doc.scrapy.org/en/latest/topics/settings.html#download-delay
# See also autothrottle settings and docs
#DOWNLOAD_DELAY = 3
# The download delay setting will honor only one of:
#CONCURRENT_REQUESTS_PER_DOMAIN = 16
#CONCURRENT_REQUESTS_PER_IP = 16
# Disable cookies (enabled by default)
#COOKIES_ENABLED = False
# Disable Telnet Console (enabled by default)
#TELNETCONSOLE_ENABLED = False
# Override the default request headers:
DEFAULT_REQUEST_HEADERS = {
'Accept': 'text/html,application/xhtml+xml,application/xml;q=0.9,*/*;q=0.8',
'Accept-Language': 'en',
'User-Agent': 'Mozilla/5.0 (Windows NT 10.0; Win64; x64) \
AppleWebKit/537.36 (KHTML, like Gecko) Chrome/75.0.3770.100 Safari/537.36'
}
# Enable or disable spider middlewares
# See https://doc.scrapy.org/en/latest/topics/spider-middleware.html
#SPIDER_MIDDLEWARES = {
# 'xicidailiSpider.middlewares.XicidailispiderSpiderMiddleware': 543,
#}
# Enable or disable downloader middlewares
# See https://doc.scrapy.org/en/latest/topics/downloader-middleware.html
#DOWNLOADER_MIDDLEWARES = {
# 'xicidailiSpider.middlewares.XicidailispiderDownloaderMiddleware': 543,
#}
# Enable or disable extensions
# See https://doc.scrapy.org/en/latest/topics/extensions.html
#EXTENSIONS = {
# 'scrapy.extensions.telnet.TelnetConsole': None,
#}
# Configure item pipelines
# See https://doc.scrapy.org/en/latest/topics/item-pipeline.html
#ITEM_PIPELINES = {
# 'xicidailiSpider.pipelines.XicidailispiderPipeline': 300,
#}
# Enable and configure the AutoThrottle extension (disabled by default)
# See https://doc.scrapy.org/en/latest/topics/autothrottle.html
#AUTOTHROTTLE_ENABLED = True
# The initial download delay
#AUTOTHROTTLE_START_DELAY = 5
# The maximum download delay to be set in case of high latencies
#AUTOTHROTTLE_MAX_DELAY = 60
# The average number of requests Scrapy should be sending in parallel to
# each remote server
#AUTOTHROTTLE_TARGET_CONCURRENCY = 1.0
# Enable showing throttling stats for every response received:
#AUTOTHROTTLE_DEBUG = False
# Enable and configure HTTP caching (disabled by default)
# See https://doc.scrapy.org/en/latest/topics/downloader-middleware.html#httpcache-middleware-settings
#HTTPCACHE_ENABLED = True
#HTTPCACHE_EXPIRATION_SECS = 0
#HTTPCACHE_DIR = 'httpcache'
#HTTPCACHE_IGNORE_HTTP_CODES = []
#HTTPCACHE_STORAGE = 'scrapy.extensions.httpcache.FilesystemCacheStorage'运行
scrapy crawl xicidai 项目名,这个必须唯一。
如果需要输出文件,
scarpy crawl xicidaili --output ip.json 或者ip.csv


 807
807


 被折叠的 条评论
为什么被折叠?
被折叠的 条评论
为什么被折叠?
 到【灌水乐园】发言


