


 本文介绍如何使用Homebrew安装PHP,并通过下载压缩包的方式安装Xdebug进行调试环境配置。包括配置IDEA、设置xdebug.ini文件及终端验证安装是否成功等步骤。
安装php
-
使用
Homebrew安装
brew install php不需要自己配置 -
下载压缩包安装
https://secure.php.net/downloads.php (这种方式没有使用,不便多说)
安装xdebug并配置调试环境
- 下载压缩包 https://xdebug.org/download.php
注意版本对应:
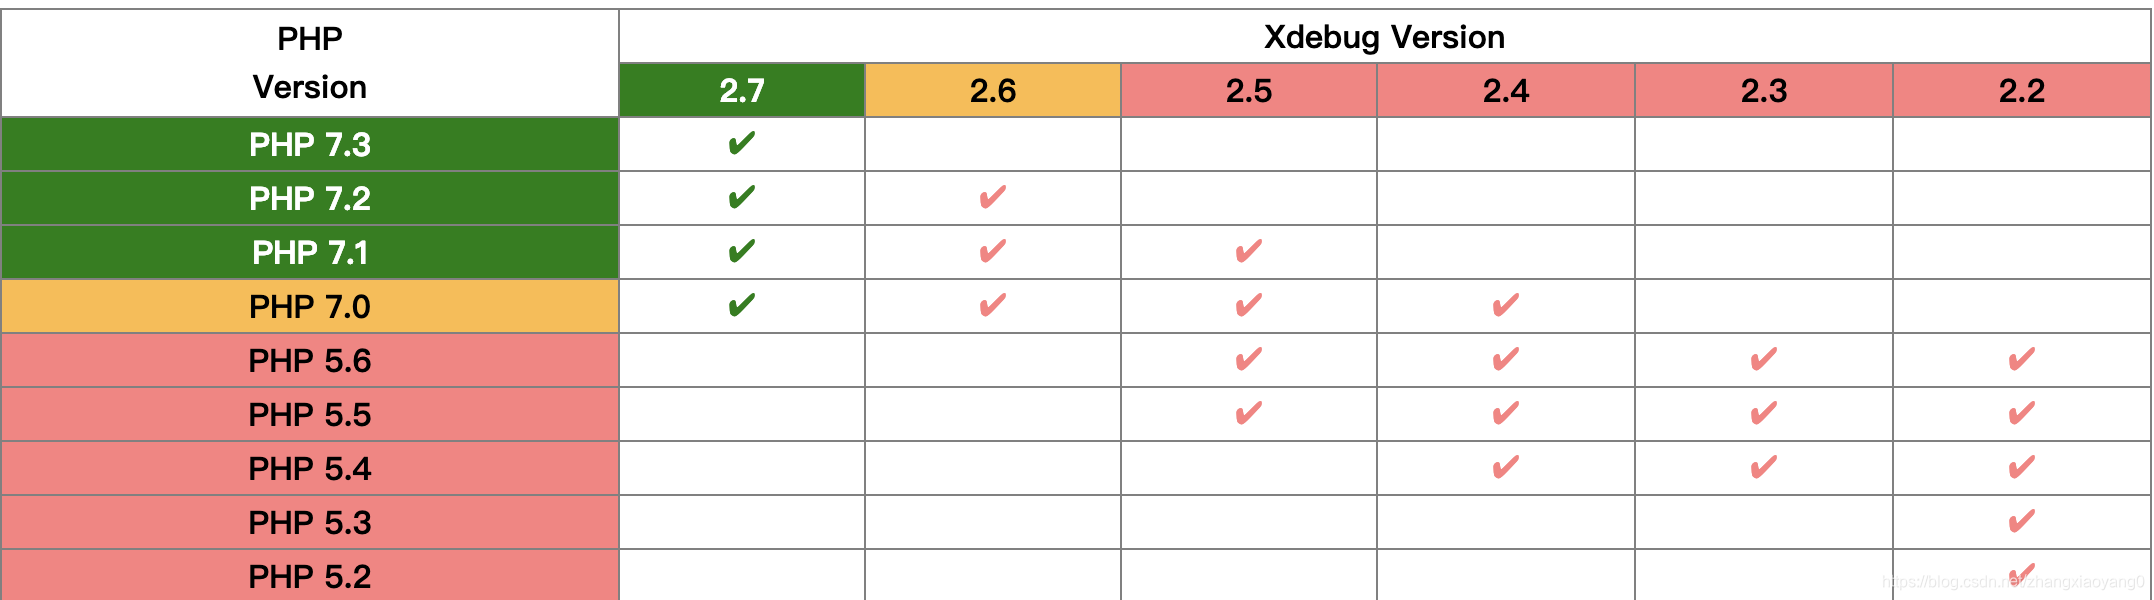
- 解压tar压缩包后,进入目录
xdebug-2.7.0 - terminal中搜索
phpize
➜  xdebug-2.7.0  whereis phpize
/usr/bin/phpize
执行这个命令
➜ phpize
- 依次执行
./configure --enable-xdebug
make
make install
- 由于xdebug和php内置的其他一些扩展有兼容性问题,需要执行:
//该目录也在xdebug解压包下
$ cd debugclient
$ ./configure --with-libedit
$ make
$ make install
- IDEA中修改配置
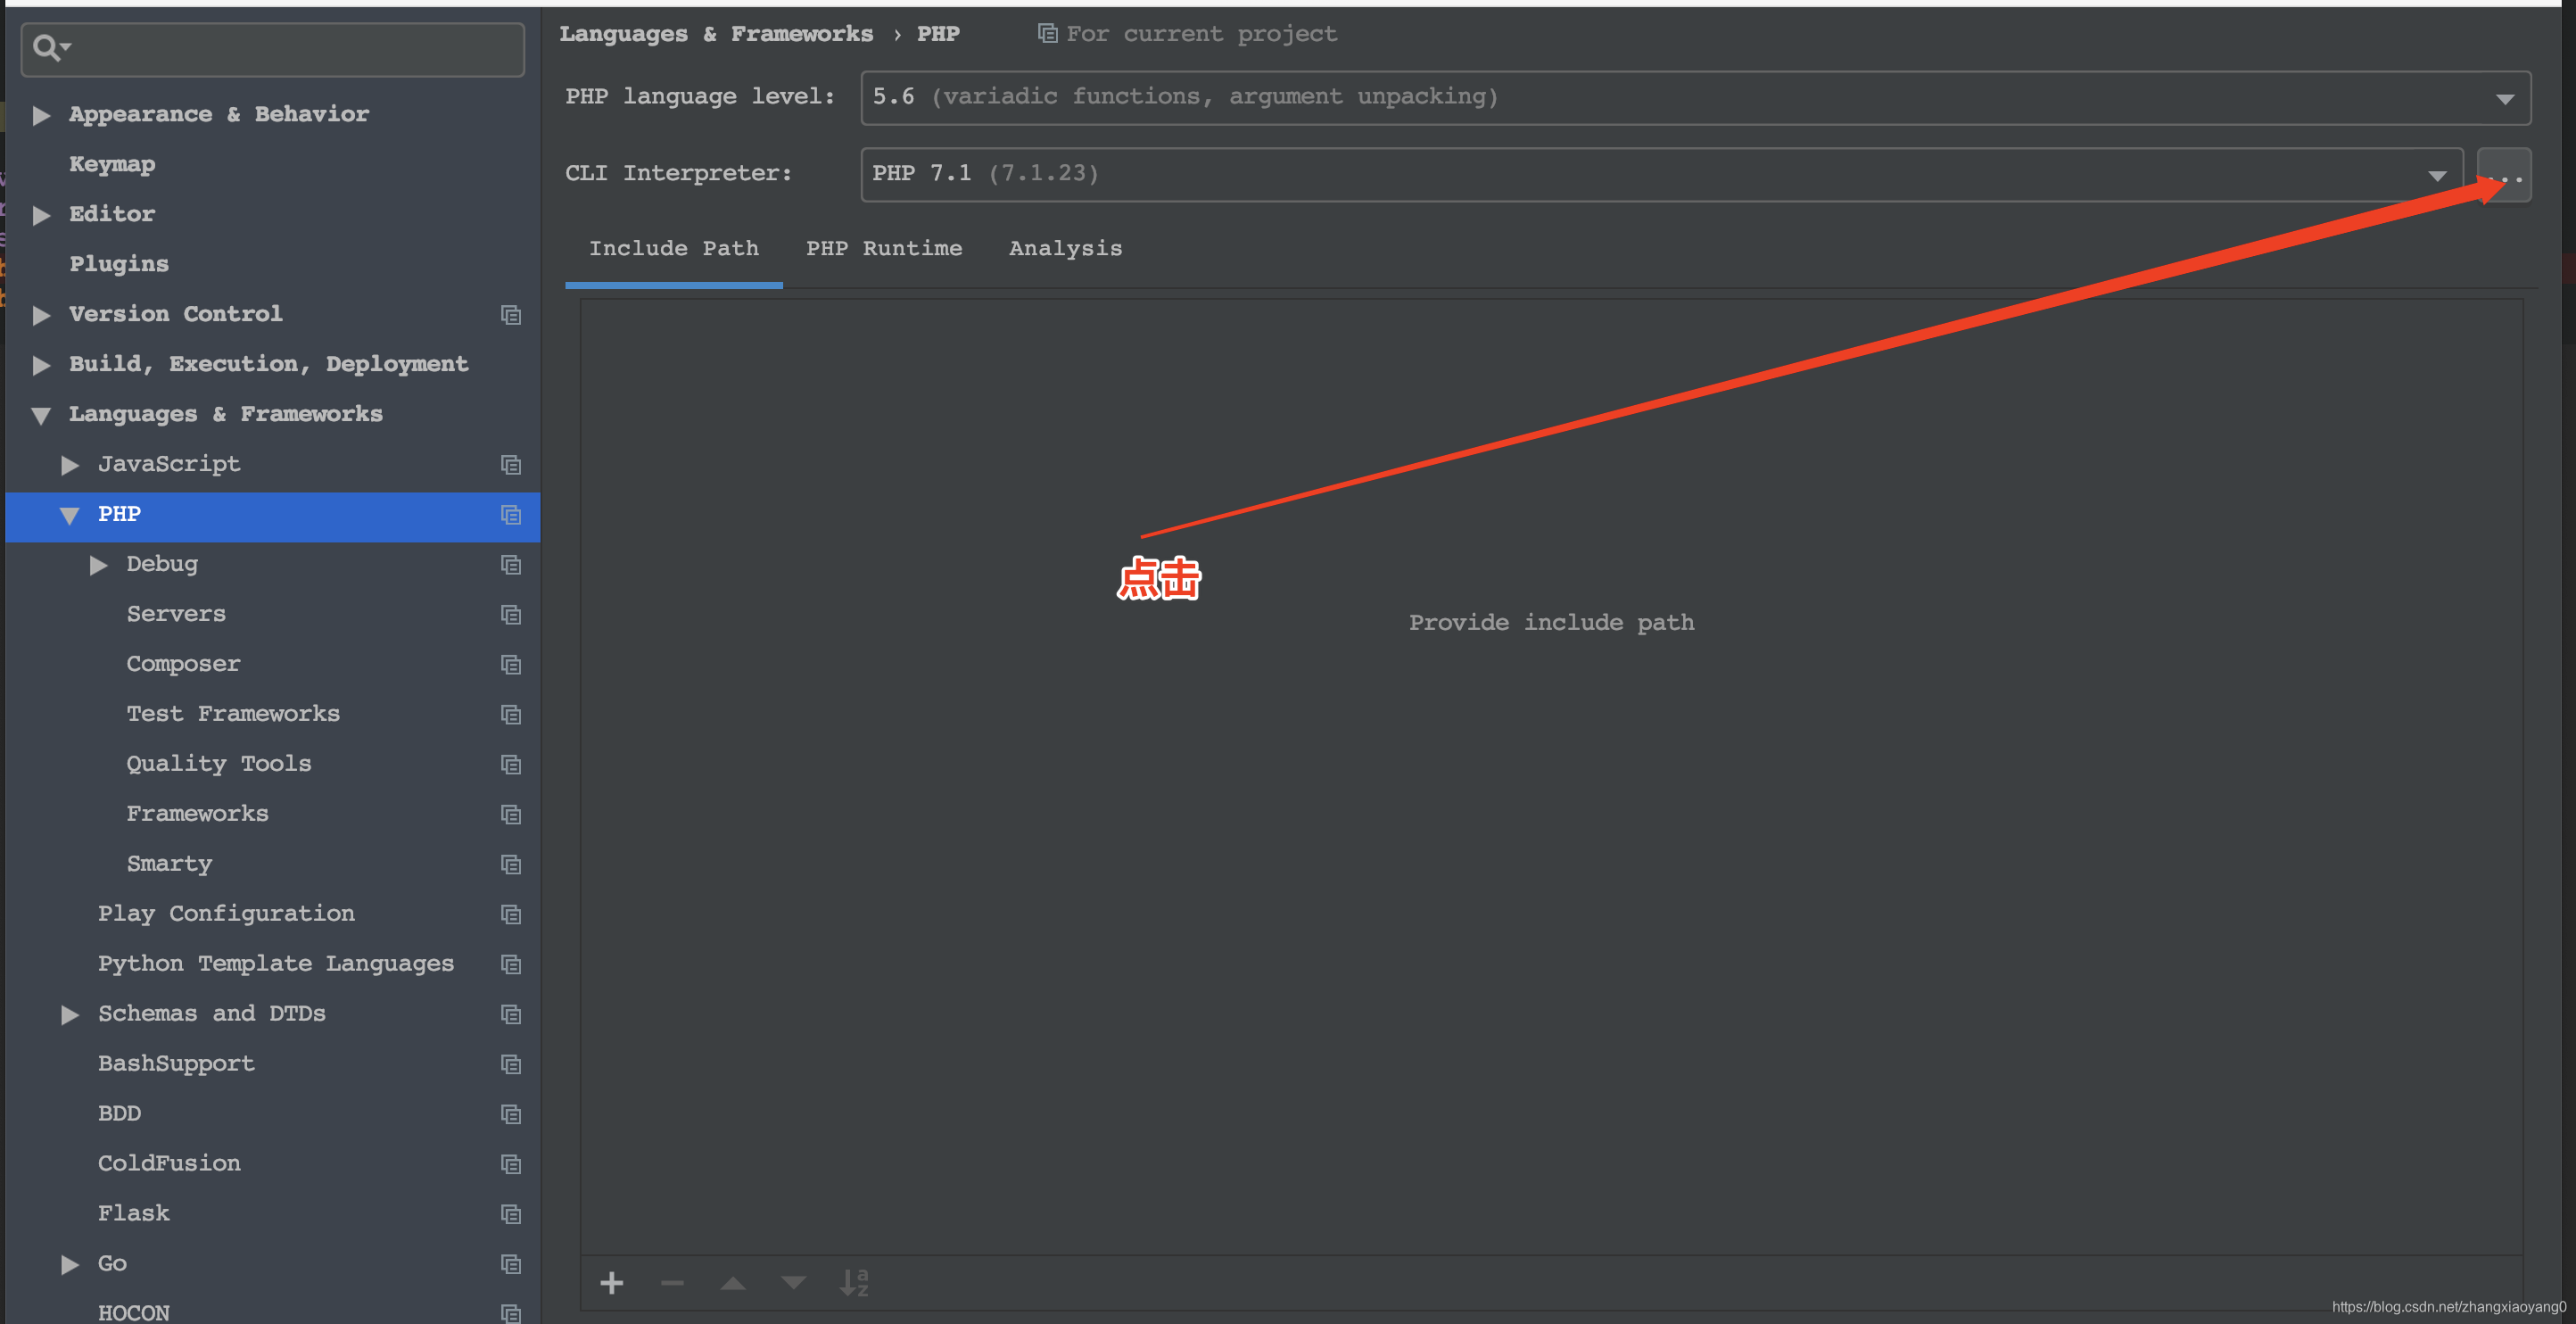
弹出下面的框:
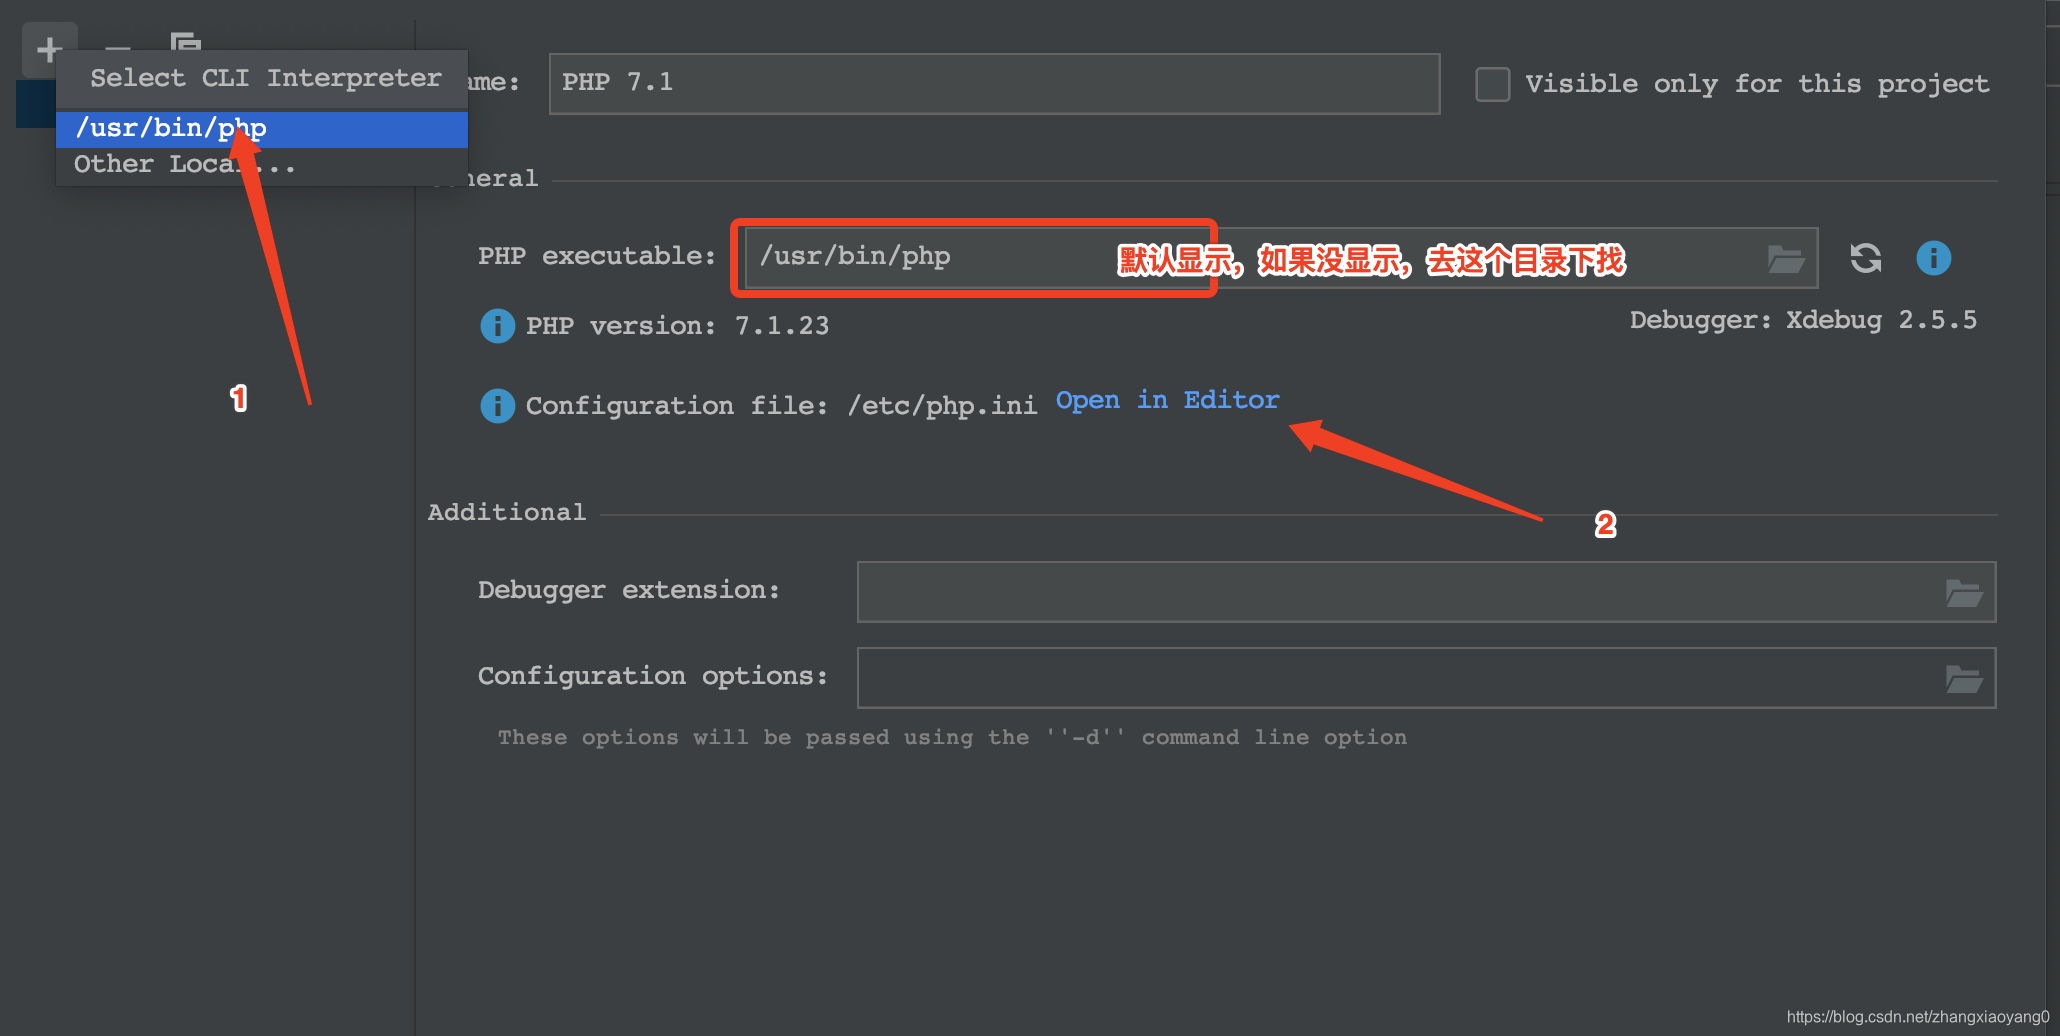
点击2后,tab页中打开

编辑该文件,在末尾添加
[Xdebug]
zend_extension ="/usr/lib/php/extensions/no-debug-non-zts-20160303/xdebug.so"
xdebug.remote_host=127.0.0.1
xdebug.remote_port = 9000
xdebug.remote_mode = "req"
xdebug.remote_enable = 1
xdebug.remote_handler = dbgp
xdebug.idekey = "netbeans-xdebug"
xdebug.profiler_enable=on
xdebug.profiler_enable_trigger = 0
xdebug.trace_output_dir="/Applications/devTools/xdebug-2.7.0/xdebug-2.7.0/xdebuginfo"
xdebug.profiler_output_dir="/Applications/devTools/xdebug-2.7.0/xdebug-2.7.0/xdebuginfo"
xdebug.auto_trace=on
xdebug.collect_params=on
xdebug.collect_return=on
xdebug.show_exception_trace = On
xdebug.remote_autostart = 0
xdebug.remote_connect_back=1
xdebug.collect_vars = On
xdebug.show_local_vars=0
xdebug.var_display_max_children=128
xdebug.var_display_max_data=512
xdebug.var_display_max_depth=5
如果不能保存,就要先修改该文件的权限,该文件一般在/etc 目录下,如果不是这个名称,可以复制一个改名。
另外还需要配置xdebug.ini文件,该文件在xdebug解压包目录下,在该文件中添加:
zend_extension ="/usr/lib/php/extensions/no-debug-non-zts-20160303/xdebug.so"
xdebug.remote_host=127.0.0.1
xdebug.remote_port = 9000
xdebug.remote_mode = "req"
xdebug.remote_enable = 1
xdebug.remote_handler = dbgp
xdebug.idekey = "netbeans-xdebug"
xdebug.remote_autostart = 0
如果不添加,我试了php代码使用debug运行会报错。
操作完后,在终端中执行php -m,如果看到有xdebug模块说明安装成功。
如果有其他问题,欢迎留言。。。。。。。。。。。


 1224
1224

 被折叠的 条评论
为什么被折叠?
被折叠的 条评论
为什么被折叠?
 到【灌水乐园】发言


