


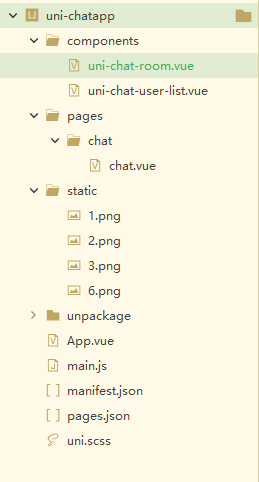
范例项目结构如下:

父页面chat/chat.vue代码如下:
<template>
	<view class="content">
		<chat-room :selectedUser="selectedUser"></chat-room>
		<!-- 监听事件@chooseuser="toggleUser"等价与 v-on:chooseuser="toggleUser" -->
		<chat-user-list :userlist="userlist" v-on:chooseuser="toggleUser"></chat-user-list>
	</view>
</template>

<script>
	import chatRoom from '../../components/uni-chat-room.vue'
	import chatUserList from '../../components/uni-chat-user-list.vue'
	export default {
		components: {
			chatRoom,
			chatUserList
		},
		data() {
			return {
				userlist: [{
						userid: 10001,
						username: '杨洋',
						thumbnail: '../../static/1.png'
					},
					{
						userid: 10002,
						username: '田雨',
						thumbnail: '../../static/2.png'
					},
					{
						userid: 10003,
						username: '童话',
						thumbnail: '../../static/3.png'
					}
				],
				selectedUser: ''
			}
		},
		onLoad() {

		},
		methods: {
			//单击切换不同的聊天用户
			toggleUser:function(index){
				this.selectedUser = this.userlist[index].username;
			}
		}
	}
</script>

<style scoped>
.content{
	display: flex;
	width: 800px;
	height: 700px;
	margin: 0 auto;
}
</style>
子组件components/uni-chat-user-list.vue代码如下:
<template>
	<view class="user-list">
		<view class="card" v-for="(item,index) in userlist" :key="index" @tap="selectUser(index)">
			<image class="item-img" :src="item.thumbnail"></image>
			<text class="item-text">{{item.username}}</text>
		</view>
	</view>
</template>

<script>
	export default {
		//props:["userlist"],此种属性的定义格式等价下面这种写法,只是灵活性差点而已
		props: {
			userlist: {
				type: Array,
				default: function() {
					return []
				}
			}
		},
		data() {
			return {

			};
		},
		methods:{
			selectUser:function(index){
				/*
				$emit首先向App.vue页面传递chooseuser事件,
				然后App.vue再把chooseuser事件传递给包含有监听器@chooseuser的这个页面。
				$emit中的第2个参数index,是传递给父页面的参数值。
				*/
				this.$emit('chooseuser',index);
			}
		},
		mounted() {
			// $on与$emit在同一个vue文件里,可以用来监听chooseuser事件传出的参数值,这是自我捕获
			this.$on('chooseuser',function(index){
				console.log(index);
			});
		},
	}
</script>

<style scoped>
.user-list{
	width:300px;
	height:700px;
	background-color: skyblue;
	border: 1px solid #ccc;
}
.card{
	display: flex;
}
.item-img {
	width:80px;
	height:80px;
}
.item-text{
	font-size: 14px;;
}

</style>
子组件components/uni-chat-room.vue代码如下:
<template>
	<view>
		<view class="chat">User:{{selectedUser}}</view>
	</view>
</template>

<script>

	export default {
		props: {
			selectedUser: {
				type: String,
				default: ''
			}
		},
		data() {
			return {

			};
		},
		watch:{
			/*
			此处定义的函数名与自定义属性selectedUser名一样,
			表示监听selectedUser属性值的实时变化,
			其它方式无法实时获取到this.$props.selectedUser的值
			*/
			selectedUser:function(newValue,oldValue){
				console.log(newValue);
			}
		}
	}
</script>

<style scoped>
.chat{
	width: 500px;
	height: 700px;
	background-color: #F0AD4E;
	border: 1px solid #cccccc;
	font-size: 16px;;
}
</style>
请自行随便下载3张图片替换1.png、2.png、3.png作为头像图标,大图片也可以演示效果如下图所示:

我们再来看看另外一种传参方式来实现上面的同样的范例 :
从父页面中以 this.refs.ref名称.子组件data中定义的属性名称 = 参数值的方式传值到子组件data中定义的属性名称
父页面chat/chat.vue代码如下:
<template>
	<view class="content">
		<chat-room ref="chatRoom1"></chat-room>
		<chat-user-list ref="chatUserList1" @chooseuser="toggleUser"></chat-user-list>
	</view>
</template>

<script>
	import chatRoom from '../../components/uni-chat-room.vue'
	import chatUserList from '../../components/uni-chat-user-list.vue'
	export default {
		components: {
			chatRoom,
			chatUserList
		},
		data() {
			return {

			}
		},
		onLoad() {

		},
		methods: {
			//单击切换不同的聊天用户
			toggleUser:function(index){
				console.log(index);
				this.$refs.chatRoom1.selectedUser = this.$refs.chatUserList1.userlist[index].username;
			}
		},
		mounted() {
			console.log(this.$refs.chatUserList1);
			this.$refs.chatUserList1.userlist = [{
						userid: 10001,
						username: '杨洋',
						thumbnail: '../../static/1.png'
					},
					{
						userid: 10002,
						username: '田雨',
						thumbnail: '../../static/2.png'
					},
					{
						userid: 10003,
						username: '童话',
						thumbnail: '../../static/3.png'
					}
				];
		}
	}
</script>

<style scoped>
.content{
	display: flex;
	width: 800px;
	height: 700px;
	margin: 0 auto;
}
</style>
子组件components/uni-chat-user-list.vue代码如下:
<template>
	<view class="user-list">
		<view class="card" v-for="(item,index) in this.userlist" :key="index" @tap="selectUser(index)">
			<image class="item-img" :src="item.thumbnail"></image>
			<text class="item-text">{{item.username}}</text>
		</view>
	</view>
</template>

<script>

	export default {
		// 这是一个自定义子组件,当父页面中以ref的方式来使用子组件时,例如:<chat-user-list ref="chatUserList1"></chat-user-list>
		// 这是在父页面中给子组件注册引用信息的范例代码,以这样的方式使用子组件,我们是无法在父页面中使用this.$refs.chatUserList1.userlist=[这个数组里的数据太多省略就不写啦......]
		// 方式传参给子组件的,所以不能使用props的方式定义userlist属性,当我们强行运行项目时,错误消息会提示你要在data中定义userlist。
		//props:["userlist"], //此种属性的定义格式等价下面这种写法,只是灵活性差点而已
		/*
		props: {
			userlist: {
				type: Array,
				default: function() {
					return []
				}
			}
		},*/
		data() {
			return {
				userlist: [], // 不能使用props的方式定义userlist属性,datalist还可以在computed中定义读写计算属性
			};
		},
		methods:{
			selectUser:function(index){
				/*
				$emit首先向App.vue页面传递chooseuser事件,
				然后App.vue再把chooseuser事件传递给包含有监听器@chooseuser的这个页面。
				$emit中的第2个参数index,是传递给父页面的参数值。
				*/
				this.$emit('chooseuser',index);
			}

		},
		// 提示信息:computed和watch部分的代码只是为了更深入理解代码而编写,可以直接删掉它们。
		computed: {
			// 计算属性loadingUserList是用来监听data中定义的属性
			loadingUserList:{
				//关于userlist的读取计算属性
				get:function(){
					return this.userlist;
				},
				//关于userlist的写入计算属性
				set:function(a){
					 this.userlist = a;
				}
			}
		},
		watch:{
			/*
			此处定义的函数名与自定义计算属性currentUser名一样,
			表示监听计算currentUser属性值的实时变化,
			*/
			loadingUserList:function(newValue,oldValue){
				//如果userlist里面的数据来自动态数据库加载这里就实时变化啦
				console.log(JSON.stringify(newValue));
			},
		}
	}
</script>

<style scoped>
.user-list{
	width:300px;
	height:700px;
	background-color: skyblue;
	border: 1px solid #ccc;
}
.card{
	display: flex;
}
.item-img {
	width:80px;
	height:80px;
}
.item-text{
	font-size: 14px;;
}

</style>
子组件components/uni-chat-room.vue代码如下:
<template>
	<view>
		<view class="chat">User:{{selectedUser}}</view>
	</view>
</template>

<script>

	export default {
		/*
		// 这是一个自定义子组件,当父页面中以ref的方式来使用子组件时,例如:<chat-room ref="chatRoom1"></chat-room>
		// 这是在父页面中给子组件注册引用信息的范例代码,以这样的方式使用子组件,我们是无法在父页面中使用this.$refs.chatRoom1.selectedUser='张三'
		// 方式传参给子组件的,所以不能使用props的方式定义selectedUser属性,当我们强行运行项目时,错误消息会提示你要在data中定义selectedUser。
		props: {
			selectedUser: {
				type: String,
				default: ''
			}
		},*/
		data() {
			return {
				// 不能使用props的方式定义selectedUser属性,因为我们要以this.$refs.xxx.selectedUser的方式传参给selectedUser,
				// selectedUser还可以在computed中定义读写计算属性
               selectedUser: '' ,
			   msg: 'World'
			};
		},
		// 提示信息:computed和watch部分的代码只是为了更深入理解代码而编写,可以直接删掉它们。
		computed:{
			// 计算属性currentUser是用来监听data中定义的属性
			currentUser:{
				//关于selectedUser的读取计算属性
				get:function(){
					return this.selectedUser
				},
				//关于selectedUser的写入计算属性
				set:function(s){
					this.selectedUser = s
				}
			},
			greeting:{
				get:function(){
					console.log('Hello');
					return 'Hello' +' '+ this.msg +' '+ this.selectedUser;
				},
				cache: false//默认值为true,关闭计算属性greeting的缓存,每次访问计算属性greeting都会获得最新的数据
			}
		},
		watch:{
			/*
			此处定义的函数名与自定义计算属性currentUser名一样,
			表示监听计算currentUser属性值的实时变化,
			*/
			currentUser:function(newValue,oldValue){
				console.log('已切换到用户:'+newValue);
			},
			/*
			此处定义的函数名与自定义计算属性greeting名一样,
			表示监听计算greeting属性值的实时变化,
			*/
			greeting:function(newValue,oldValue){
				console.log('最新问候信息:'+newValue);
			}
		}
	}
</script>

<style scoped>
.chat{
	width: 500px;
	height: 700px;
	background-color: #F0AD4E;
	border: 1px solid #cccccc;
	font-size: 16px;;
}
</style>
我们再来看看另外一种传参方式来实现上面的同样的范例(简化版代码) :
从父页面中以 this.refs.ref名称.子组件data中定义的属性名称 = 参数值的方式传值到子组件data中定义的属性名称
父页面chat/chat.vue简化版代码如下:
<template>
	<view class="content">
		<chat-room ref="chatRoom1"></chat-room>
		<chat-user-list ref="chatUserList1" @chooseuser="toggleUser"></chat-user-list>
	</view>
</template>

<script>
	import chatRoom from '../../components/uni-chat-room.vue'
	import chatUserList from '../../components/uni-chat-user-list.vue'
	export default {
		components: {
			chatRoom,
			chatUserList
		},
		data() {
			return {

			}
		},
		methods: {
			// 单击切换不同的聊天用户
			// 重点提示:必须在父页面里使用事件监听子组件的传递出来的事件,
			// 否则this.$refs读写数据的操作对象会因为属性没有定义而找不到数据
			toggleUser:function(){
				let index = this.$refs.chatUserList1.index ;
				//console.log('父组件中打印index:' + index);
				this.$refs.chatRoom1.selectedUser = this.$refs.chatUserList1.userlist[index].username;
			}
		},
		mounted() {
			console.log(this.$refs.chatUserList1);
			this.$refs.chatUserList1.userlist = [{
						userid: 10001,
						username: '杨洋',
						thumbnail: '../../static/1.png'
					},
					{
						userid: 10002,
						username: '田雨',
						thumbnail: '../../static/2.png'
					},
					{
						userid: 10003,
						username: '童话',
						thumbnail: '../../static/3.png'
					}
				];
		}
	}
</script>

<style scoped>
.content{
	display: flex;
	width: 800px;
	height: 700px;
	margin: 0 auto;
}
</style>
子组件components/uni-chat-user-list.vue简化版代码如下:
<template>
	<view class="user-list">
		<view class="card" v-for="(item,index) in this.userlist" :key="index" @tap="selectUser(index)">
			<image class="item-img" :src="item.thumbnail"></image>
			<text class="item-text">{{item.username}}</text>
		</view>
	</view>
</template>

<script>

	export default {

		data() {
			return {
				userlist: [],
				index: 0
			};
		},
		methods:{
			selectUser:function(index){
				// 向父页面传参,在父页面中以 this.refs.chatUserList1.index 读取接收的参数值
				this.index = index;
				//console.log('子组件中打印index:' + this.index);
				this.$emit('chooseuser'); // 注意不一样的地方,没有用事件传参
			}

		}

	}
</script>

<style scoped>
.user-list{
	width:300px;
	height:700px;
	background-color: skyblue;
	border: 1px solid #ccc;
}
.card{
	display: flex;
}
.item-img {
	width:80px;
	height:80px;
}
.item-text{
	font-size: 14px;;
}

</style>
子组件components/uni-chat-room.vue简化版代码如下:
<template>
	<view>
		<view class="chat">User:{{selectedUser}}</view>
	</view>
</template>

<script>
	export default {
		data() {
			return {
               selectedUser: ''
			};
		}
	}
</script>

<style scoped>
.chat{
	width: 500px;
	height: 700px;
	background-color: #F0AD4E;
	border: 1px solid #cccccc;
	font-size: 16px;;
}
</style>
更多传参方式请参考官网范例,地址如下:
https://uniapp.dcloud.io/use-weex?id=nvue-和-vue-相互通讯


 4707
4707


 被折叠的 条评论
为什么被折叠?
被折叠的 条评论
为什么被折叠?
 到【灌水乐园】发言


