


山东大学 暑期实训 云主机服务比价与预测系统(二)
上一次我们成功配置了MAVEN的环境,同时通过eclipse创建了一个maven工程,这次我们来真正的运行maven程序以体验Spring boot架构的便捷性。
Hello world
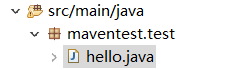
首先建立一个 MAVEN工程如下。

要实现Spring boot的架构,需先修改pom.xml的配置文件,在其中加入下面两项:
下面展示一些 内联代码片。
//导入继承一个父工程,即版本为2.3.4的spring-boot-starter-parent
<parent>
	<groupId>org.springframework.boot</groupId>
	<artifactId>spring-boot-starter-parent</artifactId>
	<version>2.3.4.RELEASE</version>
</parent>
//添加依赖,web的场景启动器,将其导入后有关web开发的部分包会自动下载
<dependency>
	<groupId>org.springframework.boot</groupId>
	<artifactId>spring-boot-starter-web</artifactId>
</dependency>
然后创建一个主程序类
下面展示一些 内联代码片。
package maventest.test;
import org.springframework.boot.SpringApplication;
import org.springframework.boot.autoconfigure.SpringBootApplication;

@SpringBootApplication //标志着这是一个Spring boot应用
//是主程序  所有启动的入口
public class hello {
	public static void main(String[] args) {
		// TODO Auto-generated method stub
		SpringApplication.run(hello.class, args);
	}}
若run方法报错:
The type org.springframework.context.ConfigurableApplicationContext cannot be resolved
解决方法:启动命令行终端,找到项目所在目录,进入到与pom.xml同一级目录下,执行 mvn dependency:purge-local-repository ,成功后,run的报错问题解决。
再创建一个controller类
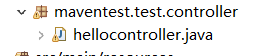
package maventest.test.controller;

import javax.xml.ws.RespectBinding;

import org.springframework.web.bind.annotation.RequestMapping;
import org.springframework.web.bind.annotation.RestController;

@RestController //说明其是一个Controller类
public class hellocontroller {
	@RequestMapping("/hello")//设置访问路径
	public String hello(){
		return "hello Spring boot !"; //作出回应
	}
}
运行hello主程序

观察到Spring boot的启动标志和一系列变量数据,
进入浏览器访问 localhost:8080/hello

可以看到hello程序运行成功。


 167
167


 被折叠的 条评论
为什么被折叠?
被折叠的 条评论
为什么被折叠?
 到【灌水乐园】发言


