


先看看Spring容器,这里不说Spring怎么实现容器的,只是说说容器功能实现的各个阶段,大致可以分为两个阶段:
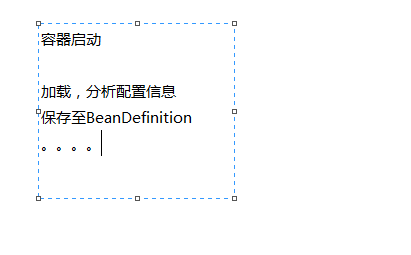
1.启动容器
首先Spring会通过你的配置文件,加载配置信息,分析配置信息,然后会把分析后的信息组成相应的BeanDefinition,最后把这些保存到bean定义必须的BeanDefinition,注册到相应的BeanDefinitionRegistry,这样容器就基本启动了。
注意:这时候还没有实例化Bean,只是保存了配置文件的信息。Spring当然不会放过这个时机。。
于是就可以用BeanFactoryPostProcessor这种手段来搞事了。。。。
其他的先不说,这篇博客主要讲一下PropertyEditor
比如:
import java.util.Date;

public class Entity {

    private Date date;

    public Date getDate() {
        return date;
    }

    public void setDate(Date date) {
        this.date = date;
    }

} <bean id="entity" class="com.editor.Entity">
<property name="date" value="2007-10-16" />
</bean>这样的一个实体类,有一个日期属性,这个属性我在xml中配置了,但是Spring从xml中读出来的只是字符串,它现在还不觉得“2007-10-16”是一个日期类型的,这是后就需要给Spring配置属性编辑器,并且注册,让Spring认识这个日期。
Spring默认有很多的PropertyEditor,如果够用也可以不自定义一个PropertyEditor。而且Spring的PropertyEditor都是默认自动加载的,所有不需要我们配置什么,但是如果我们要自己定义一个PropertyEditor就不一样了,
首先,我们需要编写自己的PropertyEditor,通常是继承PropertyEditorSupport,而不用实现PropertyEditor,这样就不用重写PropertyEditor的所有方法了。
先来看看PropertyEditorSupport:(注意:PropertyEditor和PropertyEditorSupport是java自己定义的,不是Spring的)
/*这里我把部分代码删除了,我们只看看 setAsText()和getAsText()*/
package java.beans;
import java.beans.*;
public class PropertyEditorSupport implements PropertyEditor {

    public void setValue(Object value) {
        this.value = value;
        firePropertyChange();
    }

    public Object getValue() {
        return value;
    }

    public String getAsText() {
        return (this.value != null)
                ? this.value.toString()
                : null;
    }

    public void setAsText(String text) throws java.lang.IllegalArgumentException {
        if (value instanceof String) {
            setValue(text);
            return;
        }
        throw new java.lang.IllegalArgumentException(text);
    }

    private Object value;
    private Object source;
    private java.util.Vector<PropertyChangeListener> listeners;
}
/*今天最主要的就是这几个方法,首先要明白,setAsText()通常是是将String变成你想要的类型,然后给Bean赋值,getAstext()通常是将Bean的属性值变成String,当然你可以按照自己的逻辑来改变方法的作用,只要你明白实现的原理。*/

/*setAsText()方法的声明有一个String text参数,这个参数就是要改变的东西。这里PropertyEditorSupport用了一个 private Object value;来保存最近转换的String的值,所有每次转换了类型之后,这个String其实在PropertyEditorSupport还保存着,*/

/*如果你要getAsText(),只需要getValue()就行了,正像PropertyEditorSupport源码做的那样*/
现在回到我们的问题中,怎么将“2007-10-16”转换成一个日期格式的数据。
首先我们要写自己转换规则
通常是继承PropertyEditorSupport
public class MyEditor extends PropertyEditorSupport {

    private String datePattern;

    public String getDatePattern() {
        return datePattern;
    }

    public void setDatePattern(String datePattern) {
        this.datePattern = datePattern;
    }

    @Override
    public void setAsText(String text) throws IllegalArgumentException {
        SimpleDateFormat format = new SimpleDateFormat(getDatePattern());
        try {
            Date dateValue = format.parse(text);
            setValue(dateValue);
            System.out.println("调用了自定义的类型转换器" + dateValue);
        } catch( Exception e) {
            System.out.println("日期格式不对");
        }
    }

    @Override
    public String getAsText() {
        return super.getAsText();
    }

}
接下来还需要注册给Spring框架:
public class TestMain {

    public static void main(String ai[]) {

        XmlBeanFactory beanFactory = new XmlBeanFactory(new ClassPathResource("/applicationcontext.xml"));

        /*CustomEditorConfigurer是Spring提供的BeanFactoryProcessor的一个实现,专门用来搞类型转换的*/
        CustomEditorConfigurer configurer = new CustomEditorConfigurer();

        MyEditor my = new MyEditor();
        my.setDatePattern("yyyy-MM-dd");

        Map customerEditors = new HashMap();
        customerEditors.put("java.util.Date", my);

        configurer.setCustomEditors(customerEditors);
        configurer.postProcessBeanFactory(beanFactory);

        Entity e = (Entity)beanFactory.getBean("entity");
        System.out.println(e.getDate());

    }
}
运行结果:

如果你想把日期类型,转换成String类型的话,可以调用Entity的get()方法,返回的是一个日期类型,然后你想怎么弄就怎么弄,也可以调用重写过后的MyEditor的getAsText()方法:
@Override
    public String getAsText() {

        Date date = (Date)getValue();
        SimpleDateFormat format = new SimpleDateFormat("yyyy-MM-dd");
        try {

            String dateValue = format.format(date);
            return dateValue;

        } catch( Exception e) {
            System.out.println("日期格式不对");
        }
        return null;
    }
    /*测试类*/
    public class TestMain {

    public static void main(String ai[]) {

        XmlBeanFactory beanFactory = new XmlBeanFactory(new ClassPathResource("/applicationcontext.xml"));

        CustomEditorConfigurer configurer = new CustomEditorConfigurer();

        MyEditor my = new MyEditor();
        my.setDatePattern("yyyy-MM-dd");

        Map customerEditors = new HashMap();
        customerEditors.put("java.util.Date", my);

        configurer.setCustomEditors(customerEditors);
        configurer.postProcessBeanFactory(beanFactory);

        Entity e = (Entity)beanFactory.getBean("entity");
        System.out.println(my.getAsText());
        System.out.println(my.getAsText() instanceof String);
    }
}
运行结果:

这是BeanFactory,如果是Applicationcontext,就更好写了,Applicationcontext会自动识别BeanFactoryPostProcessor并应用,所有只需要在xml中配置一下就行了。
    <bean id="customEditorConfigurer" class="org.springframework.beans.factory.config.CustomEditorConfigurer">
      <property name="customEditors">
        <map>
          <entry key="java.util.Date">
            <bean class="com.editor.MyEditor" />
        </entry>
      </map>
    </property>
  </bean>

    <bean id="myEditor" class="com.editor.MyEditor">
      <property name="datePattern" value="yyyy-MM-dd" />
    </bean>
public class TestMain {
public static void main(String ai[]) {
ApplicationContext ac = new ClassPathXmlApplicationContext("/applicationcontext.xml");
Entity e = (Entity)ac.getBean("entity");
System.out.println(e.getDate());
}
}运行结果:

好了,这篇博客就先写这些了 至于 Spring容器启动的下一阶段 有空再写 。


 被折叠的 条评论
为什么被折叠?
被折叠的 条评论
为什么被折叠?
 到【灌水乐园】发言


