


SpringBoot自动装配原理
springboot的核心就是自动装配,那么为什么引入jar,就能开箱即用?
通过查看源码可以发现项目启动,会去找META-INF/spring.factories,来获取需要自动装配的配置类的全限定名,再跟pom里引入的资源对比,最终判断是否符合装配条件。


自定义一个自己的Starter,提供swagger在线文档功能
官方的 starter 的命名格式为 spring-boot-starter-{xxxx} 比如spring-boot-starter-activemq
第三方我们自己的命名格式为 {xxxx}-spring-boot-starter。比如mybatis-spring-boot-starter。
我们这次就命名为swagger3-springboot-starter,显示出我们专业的水准
1. 引入依赖
<dependencies>
    <!-- 自定义springboot的组件,必须引入此依赖作为入口 -->
    <dependency>
      <groupId>org.springframework.boot</groupId>
      <artifactId>spring-boot-autoconfigure</artifactId>
    </dependency>

    <!-- 读取配置文件时的自动提示功能 -->
    <dependency>
      <groupId>org.springframework.boot</groupId>
      <artifactId>spring-boot-configuration-processor</artifactId>
      <optional>true</optional>
    </dependency>

    <!--引入swagger3 -->
    <dependency>
      <groupId>io.springfox</groupId>
      <artifactId>springfox-boot-starter</artifactId>
      <version>3.0.0</version>
    </dependency>

    <!--集成增强文档knife4j-->
    <dependency>
      <groupId>com.github.xiaoymin</groupId>
      <artifactId>knife4j-spring-boot-starter</artifactId>
      <version>3.0.2</version>
    </dependency>
  </dependencies>
2. 编写配置文件映射类
提供的组件参数从其他项目工程配置文件里读取,实现参数的可配置
package com.xwzhou.config;

import org.springframework.boot.context.properties.ConfigurationProperties;

@ConfigurationProperties(prefix = "springfox")
public class Swagger3Properties {

  /**
   * 文档名称
   */
  private String title;
  /**
   * 作者名
   */
  private String name;
  /**
   * url
   */
  private String url;
  /**
   * email
   */
  private String email;
  /**
   * 版本
   */
  private String version;
  /**
   * 简介
   */
  private String description;

//省略了get/set方法,注意自己补充

}
3. 编写swagger3自动配置类
package com.xwzhou.config;

import com.github.xiaoymin.knife4j.spring.annotations.EnableKnife4j;
import io.swagger.v3.oas.annotations.Operation;
import org.springframework.beans.factory.annotation.Autowired;
import org.springframework.boot.autoconfigure.condition.ConditionalOnBean;
import org.springframework.boot.context.properties.EnableConfigurationProperties;
import org.springframework.context.annotation.Bean;
import org.springframework.context.annotation.Configuration;
import springfox.documentation.builders.ApiInfoBuilder;
import springfox.documentation.builders.PathSelectors;
import springfox.documentation.builders.RequestHandlerSelectors;
import springfox.documentation.oas.annotations.EnableOpenApi;
import springfox.documentation.service.ApiInfo;
import springfox.documentation.service.Contact;
import springfox.documentation.spi.DocumentationType;
import springfox.documentation.spring.web.plugins.Docket;


/**
 * @author xwzhou swagger3 配置
 */
//表示在注入Swagger3In情况下才会执行当前自动配置
@ConditionalOnBean(Swagger3In.class)
//使Swagger3Properties.class中的@ConfigurationProperties注解生效
@EnableConfigurationProperties(Swagger3Properties.class)
//注解配合@Bean注解来生成Bean:这与JavaConfig方式无异,目的是生成Bean并放入容器。
@Configuration
//增强文档knife4j
@EnableKnife4j
@EnableOpenApi
public class Swagger3Config {

  @Autowired
  private Swagger3Properties properties;

  /**
   * swagger3的配置文件
   */
  @Bean
  public Docket createRestApi() {
    return new Docket(DocumentationType.OAS_30)
        .apiInfo(apiInfo())
        .select()
        .apis(RequestHandlerSelectors.withMethodAnnotation(Operation.class))
        .paths(PathSelectors.any())
        .build();
  }

  /**
   * 构建 api文档的详细信息函数,注意这里的注解引用的是哪个
   */
  private ApiInfo apiInfo() {
    return new ApiInfoBuilder()
        .title(properties.getTitle())
        .contact(new Contact(properties.getName(), properties.getUrl(), properties.getEmail()))
        .version(properties.getVersion())
        .description(properties.getDescription())
        .build();
  }


}
Swagger3In类就是个空类,表示在注入Swagger3In情况下才会执行当前自动配置
package com.xwzhou.config;

public class Swagger3In {

}
4.定义注解类,让starter生效
- 被动生效
通过SpringBoot的SPI的机制来去加载我们的starter。我们需要在META-INF下新建一个spring.factories文件key为org.springframework.boot.autoconfigure.EnableAutoConfiguration, value是我们的swagger3配置类全限定名(记得去除前后的空格,否则会不生效)。
org.springframework.boot.autoconfigure.EnableAutoConfiguration=com.xwzhou.config.Swagger3Config

- 主动生效
在starter组件集成到我们的Spring Boot应用时需要主动声明启用该starter才生效,通过自定义一个@EnableSwagger3注解然后在把自动配置类通过Import注解引入进来。
package com.xwzhou.config;

import java.lang.annotation.Documented;
import java.lang.annotation.ElementType;
import java.lang.annotation.Retention;
import java.lang.annotation.RetentionPolicy;
import java.lang.annotation.Target;
import org.springframework.context.annotation.Import;

@Target({ElementType.TYPE})
@Retention(RetentionPolicy.RUNTIME)
@Documented
@Import({Swagger3In.class})
public @interface EnableSwagger3 {

}
5、打包jar
exec 这里很重要,也是很多资料没有描述清楚的地方
<build>
    <plugins>
      <plugin>
        <groupId>org.springframework.boot</groupId>
        <artifactId>spring-boot-maven-plugin</artifactId>
        <configuration>
          <classifier>exec</classifier>
        </configuration>
      </plugin>
    </plugins>
  </build>
直接通过mvn install命令就可以了
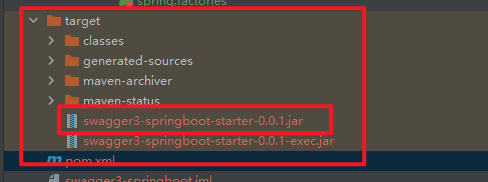
第一个jar就是我们的组件包了
其他项目复用组件
- 项目引入依赖组件
- 可以把组件上传到公司的私服里,让同事引入jar pom即可(推荐第一种)
- 直接把jar给同事,放到自己的本地仓库
<dependency>
      <groupId>com.xwzhou</groupId>
      <artifactId>swagger3-springboot-starter</artifactId>
      <version>0.0.1</version>
    </dependency>
- 配置文件
# swagger 文档开关关闭
springfox:
  documentation:
    swagger-ui:
      enabled: false
  title: zhoudawei-project API接口文档
  name: xwzhou作者
  url: www.xxxx.com
  email: xxxxxx@qq.com
  version: 1.0 版本
  description: API文档简介


# knife4j增强型文档开启(生产环境要关闭)
# 访问地址:http://localhost:8080/doc.html
knife4j:
  enable: true
- 引入注解开启自动装配

- 启动项目验证
访问地址:http://localhost:8080/doc.html

总结
有问题请留言讨论,留言必回!
如果你觉得文章还不错,你的转发、分享、赞赏、点赞、留言就是对我最大的鼓励。
感谢您的阅读,十分欢迎并感谢您的关注。


 2014
2014


 被折叠的 条评论
为什么被折叠?
被折叠的 条评论
为什么被折叠?
 到【灌水乐园】发言


