前端VueRouter解析
VueClI2项目构建过程中安装VueRouter
我们学习了使用vue init webpack [project-name]命令快速构建Vue项目脚手架。如果需要在项目中加入VueRouter,在项目配置填写的阶段Install vue-touter?填写Y(Yes)。

使用VueRouter开发第一个demo
第一个示例很简单,创建一个单页面应用。这个单页面应用有两个路由及两个组件:当点击‘/home’路由的标签元素展示用户主页面(组件Home),当点击’/about’展示"关于页面"(组件About)。这里我们先不管样式及布局的问题,因为加入过多的元素容易模糊我们的焦点。

要使用VueRouter通常有三部曲:
第一步:创建被路由的组件
创建两个单文件组件,一个是about.vue,一个是home.vue。两个组件的内容很简单,模板里面分别写一个h1标题,书写不同的内容文本。为每一个组件起一个name,并将组件以模块的形式导出export default。
- about.vue
<template>
  <div class="about">
    <h1>Welcome to About</h1>
  </div>
</template>

<script>

export default {
  name: "about"
</script>
- home.vue
<template>
  <div class="home">
    <h1>Welcome to home</h1>
  </div>
</template>

<script>
// @ is an alias to /src
export default {
  name: "home"
};
</script>
第二步:配置组件与路由路径的映射关系
修改src/route/index.js
import Vue from 'vue'
import Router from 'vue-router'
import home from '@/components/home'
import about from '@/components/about'

Vue.use(Router)

const routes =[
  {
    path: '/home',
    name: 'home',
    component: home
  },
  {
    path: '/about',
    name: 'about',
    component: about
  }
]

const router = new Router({
  routes,
  mode:'history'
})

export default router
-
首先通过import将子组件Home和About引入到路由配置文件里面
-
配置路由path路径与component组件之间的关系
第三步:在父组件中使用路由及子组件
在src\App.vue中使用路由将子组件about.vue和home.vue进行配置
<template>
  <div id="app">
    <router-link to="/home" >home</router-link>
    <router-link to="/about">about</router-link>
    <router-view/>
  </div>
</template>

<script>
export default {
  name: 'App'
}
</script>

<style>
#app {
  font-family: 'Avenir', Helvetica, Arial, sans-serif;
  -webkit-font-smoothing: antialiased;
  -moz-osx-font-smoothing: grayscale;
  text-align: center;
  color: #2c3e50;
  margin-top: 60px;
}
</style>
-
router-link:
router-link标签可以理解为vue框架语法中的<a>标签,实际上在渲染成html之后它就是一个按标签,用于实现路由规则。to属性通过路由的path配置映射对应的组件。 -
router-view:
router-view标签作为路由组件的展示出口,根据路由的path不同,这个位置替换成不同的组件内容。
运行项目
使用npm run dev进行开发项目

注:开发中npm run dev自动开发浏览器,有两种方式
- 在
config\index.js文件中将dev.autoOpenBrowser设置为true

- 或者在
package.json文件中对scripts.dev进行设置

路由重定向与组件懒加载
路由重定向
当访问项目时候想要默认显示Home主页组件,那么应该怎样做呢?只需要按照下面的方法在router/index.js文件的路由规则配置加上一个路由的重定向配置:
import Vue from 'vue'
import Router from 'vue-router'
import home from '@/components/home'
import about from '@/components/about'

Vue.use(Router)

const routes =[
  {
    path: '/',
    redirect: '/home'
  },
  {
    path: '/home',
    name: 'home',
    component: home
  },
  {
    path: '/about',
    name: 'about',
    component: about
  }
]

const router = new Router({
  routes,
  mode:'history'
})

export default router
此时当我们通过访问项目根路径"/“时候,就会重定向到“/home”显示Home主页内容:这里是主页。并且浏览器地址栏不再是根路径”/",而是"/home"路径。路由路径path与页面显示组件内容是统一的。

路由组件的懒加载
我们打包时,所有的组件都会打包到一个js文件中,前端组件代码一次性加载,如果组件特别多的话有可能因为网络原因导致加载缓慢,从而出现页面白屏的现象。那么,我们能不能把组件按需加载呢?也就是说当组件被路由切换到的时候,再去加载。是可以的,这个实现的名字就叫做懒加载或者延迟加载。如图中黑色边框中的组件,适当的对其中一些组件进行懒加载。那么什么样的组件最适合使用懒加载?就是那些使用频率相对较低的组件,比较适合使用懒加载。首屏组件不适合懒加载,比如:我们例子中的Home组件就不适合懒加载。
我们使用ES6语法对About组件实现了懒加载,代码如下:
const About = () =>import( '../components/About')
import Vue from ‘vue’
import Router from ‘vue-router’
import home from ‘@/components/home’
//import about from ‘@/components/about’
const About =()=> import("…/components/about")
Vue.use(Router)
const routes =[
{
path: ‘/’,
redirect: ‘/home’
},
{
path: ‘/home’,
name: ‘home’,
component: home
},
{
path: ‘/about’,
name: ‘about’,
component: About
}
]
const router = new Router({
routes,
mode:‘history’
})
export default router
然后使用`run run build` 命令对项目进行打包,**最终的打包结果多出一组两个js文件**,就是因为About组件被单独打包了。我们打开文件内容查看一下,是否似曾相识?可以确认就是About组件被单独打包的结果,从而实现js文件组件的按需加载。

嵌套路由的配置实现
------------
我们讲了一个使用VueRouter的例子。例子的内容很简单,当浏览器url路径切换到"/home"的时候显示Home主页组件,当浏览器url路径切换到"/about"的时候显示About关于组件,如下图中左侧的图示所示。那么在实际的开发中,路由的映射关系和网页视图不只是平面的,组件里面仍有子组件,路径下面还有子路径,如下图中的右侧的图示所示。

* 当我们访问“/home/article”的时候,Home组件中的默认router-view显示Article文章组件
* 当我们访问“/home/news”的时候,Home组件中的默认router-view显示News新闻组件
### 嵌套路由的实现
开发的套路仍然是三部曲:
### 第一步:创建被路由的组件
创建两个单文件组件,一个是Article.vue,一个是News.vue。两个组件的内容仍然很简单,模板里面分别写一个h1标题,书写不同的内容文本。为每一个组件起一个name,并将组件以模块的形式导出export default。
* Article.vue
Home Article
* News.vue
Home News
### 第二步:配置组件与路由路径的映射关系
import Vue from ‘vue’
import Router from ‘vue-router’
import home from ‘@/components/home’
import Article from ‘@/components/Article’
import News from ‘@/components/News’
//import about from ‘@/components/about’
const About =()=> import("…/components/about")
Vue.use(Router)
const routes =[
{
path: ‘/’,
redirect: ‘/home’
},
{
path: ‘/home’,
component: home,
children:[
{
path: ‘article’,
component: Article,
},
{
path: ‘news’,
component: News,
}
]
},
{
path: ‘/about’,
name: ‘about’,
component: About
}
]
const router = new Router({
routes,
mode:‘history’
})
export default router
*   首先需要将Article组件和News组件import到路由关系配置文件里面

*   然后在上一节原home路由及组件的映射条目里面,加上children数组属性表示子路由组件之间的映射关系。

*   **另外需要注意,子组件路由的path配置不要加斜杠“/”**


### 第三步:在父组件中加入router-view

在Home.vue文件中加入router-view。代码如下:
Welcome to home
home 组件
article news
* 首先需要注意,当一个父组件有多个子组件的时候,要在template里面加上一个唯一的根标签。如图中的div#home。
* 另外注意:路由router-link的to属性,需要写完整的路由路径,如:“/home/article”,不能写“/article”
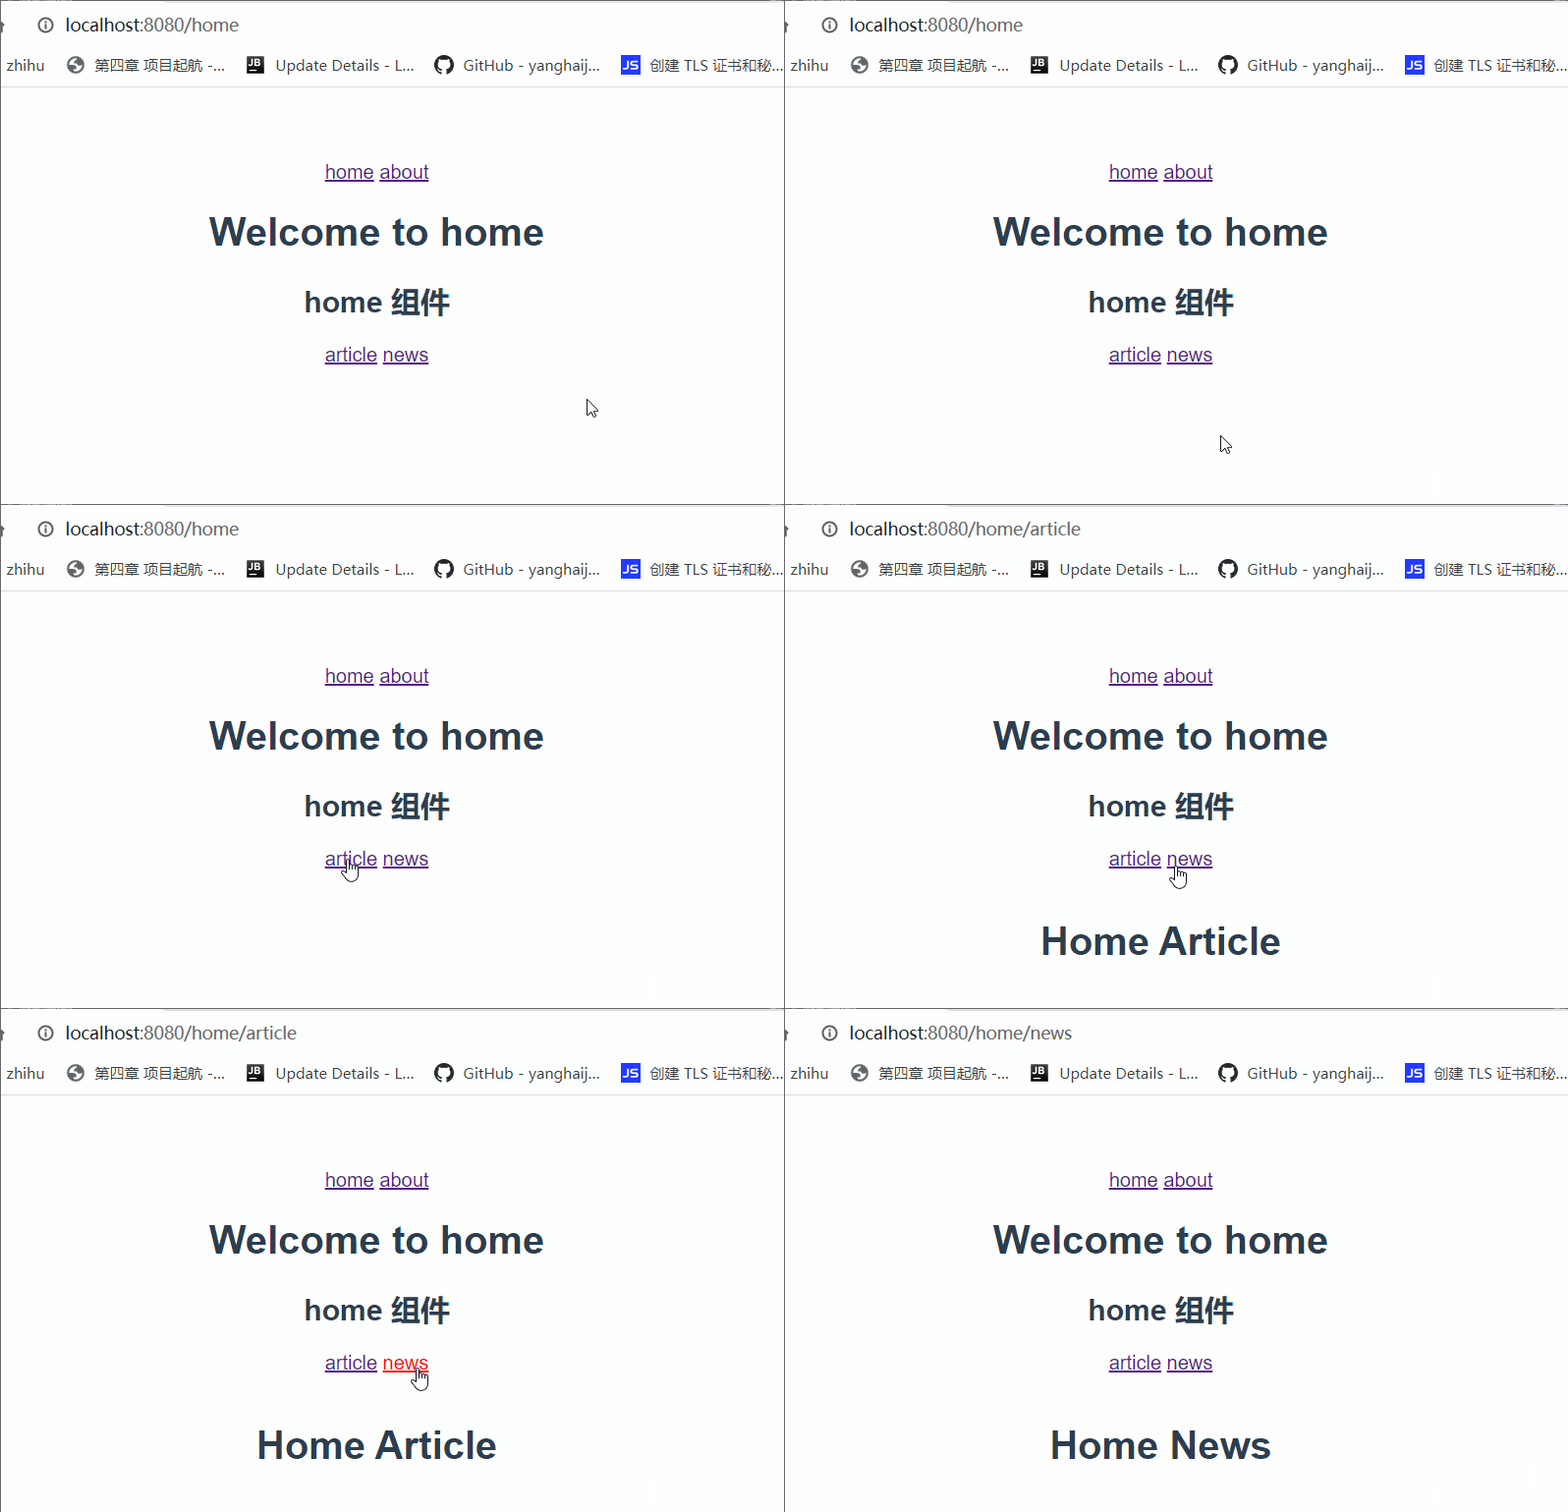
最终实现效果如下:

* 当点击“文章”的时候,显示:这里是文章组件
* 当点击“新闻”的时候,显示:这里是新闻组件
### 默认子路由
那就是当我们访问“/home”路径时,**子组件不会默认显示出来,而是在点击了“文章”或“新闻”之后,对应的子组件才显示出来**。
在代码中加入空字符串的path子路由配置,指向Article组件,这样当访问到“home”路径的时候就默认将Article组件显示出来了。
import Vue from ‘vue’
import Router from ‘vue-router’
import home from ‘@/components/home’
import Article from ‘@/components/Article’
import News from ‘@/components/News’
//import about from ‘@/components/about’
const About =()=> import("…/components/about")
Vue.use(Router)
const routes =[
{
path: ‘/’,
redirect: ‘/home’
},
{
path: ‘/home’,
component: home,
children:[
{
path: ‘’,
component: Article,
},
{
path: ‘article’,
component: Article,
},
{
path: ‘news’,
component: News,
}
]
},
{
path: ‘/about’,
name: ‘about’,
component: About
}
]
const router = new Router({
routes,
mode:‘history’
})
export default router
展示结果:

动态路由的配置与实现
-------------
之前讲的路由的例子都是一对一的关系,也就是说:一个url匹配一个路由和一个组件。比如:当浏览器url路径切换到"/home"的时候显示Home主页组件,当浏览器url路径切换到"/about"的时候显示About关于组件。在实际的开发过程中,我们通常需要多个url匹配同一个路由和组件,如下图所示:

如上图所示,动态路由有如下2层含义:
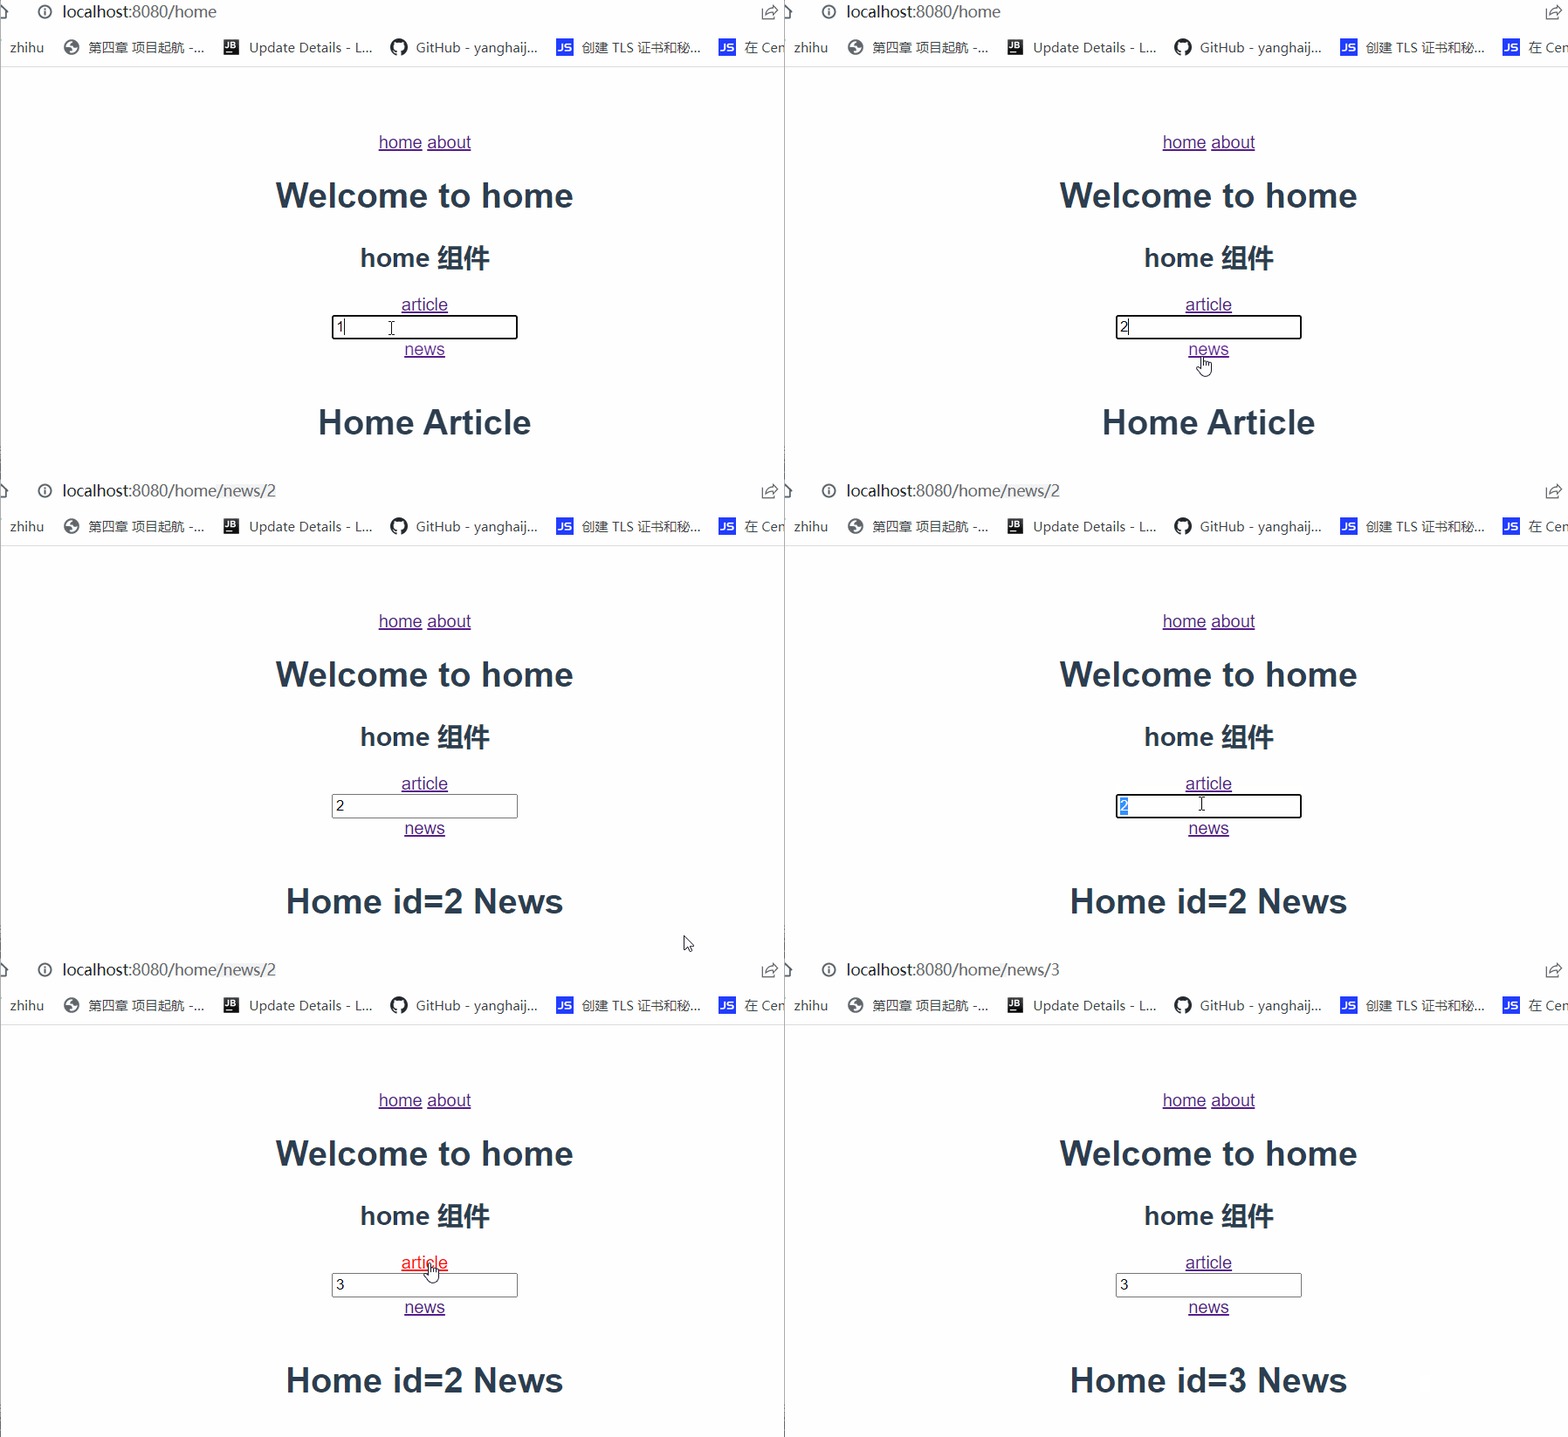
* 动态路由可以传递参数,如上图中的id,根据不同的参数组件可以显示不同的内容。如上图:传递参数1显示id=1的文章,传递2显示id=2的文章。
* 动态路由可以实现路由导航,也就是匹配一个路由规则,从而显示该路由规则对应的组件。如上图中的Article组件的显示。
### 现一个动态路由的例子
* 在router/index.js文件中修改组件与路由之间的映射关系配置,注意id是一个路由参数,前面需要加上冒号
{
path: ‘news/:id’,
component: News,
}
* 修改news组件
Home id={{id}} News
* 修改home.vue
Welcome to home
home 组件
articlenews
<router-view/>
实现效果如下:

动态路由的多段匹配
------------
| 路由规则 | 匹配url | $route.params对象 | 匹配规则含义 |
| --- | --- | --- | --- |
| /news/:id | /news/1 | {id:1} | id=1的新闻 |
| /news/:id/reader/:num | /news/1/reader/2 | {id:1,num:2} | id=1的新闻的第2位读者信息 |
如果您觉得本文不错,欢迎关注,点赞,收藏支持,您的关注是我坚持的动力!
原创不易,转载请注明出处,感谢支持!如果本文对您有用,欢迎转发分享!


 408
408

 被折叠的 条评论
为什么被折叠?


