


先创建mavan-web工程名为ssm,并且引入springmvcjar包:
  <properties>
    <project.build.sourceEncoding>UTF-8</project.build.sourceEncoding>
    <maven.compiler.source>1.7</maven.compiler.source>
    <maven.compiler.target>1.7</maven.compiler.target>
    <spring-version>5.0.16.RELEASE</spring-version>
  </properties>

  <dependencies>
    <dependency>
      <groupId>junit</groupId>
      <artifactId>junit</artifactId>
      <version>4.11</version>
      <scope>test</scope>
    </dependency>
    <dependency>
      <groupId>org.springframework</groupId>
      <artifactId>spring-web</artifactId>
      <version>${spring-version}</version>
    </dependency>
    <dependency>
      <groupId>org.springframework</groupId>
      <artifactId>spring-webmvc</artifactId>
      <version>${spring-version}</version>
    </dependency>
    <dependency>
      <groupId>javax.servlet</groupId>
      <artifactId>javax.servlet-api</artifactId>
      <version>3.0.1</version>
    </dependency>
    <dependency>
      <groupId>jstl</groupId>
      <artifactId>jstl</artifactId>
      <version>1.2</version>
    </dependency>
    <dependency>
      <groupId>com.fasterxml.jackson.core</groupId>
      <artifactId>jackson-databind</artifactId>
      <version>2.11.4</version>
    </dependency>
    <dependency>
      <groupId>com.fasterxml.jackson.core</groupId>
      <artifactId>jackson-annotations</artifactId>
      <version>2.11.4</version>
    </dependency>
    <dependency>
      <groupId>com.fasterxml.jackson.core</groupId>
      <artifactId>jackson-core</artifactId>
      <version>2.11.4</version>
    </dependency>
创建springmvc配置文件:
springMvc.xml,加载mvc驱动的时候一定要注意全限定名,比如:

如果选错了,上面的自动生成beans文件限定名会找不到mvc,程序会报错:

视图解析器的前缀名字一定要用斜杠包起来,易错,/jsp/
<?xml version="1.0" encoding="UTF-8"?>
<beans xmlns="http://www.springframework.org/schema/beans"
xmlns:xsi="http://www.w3.org/2001/XMLSchema-instance"
xmlns:context="http://www.springframework.org/schema/context"
xmlns:mvc="http://www.springframework.org/schema/mvc"
xsi:schemaLocation="http://www.springframework.org/schema/beans
http://www.springframework.org/schema/beans/spring-beans.xsd http://www.springframework.org/schema/context https://www.springframework.org/schema/context/spring-context.xsd http://www.springframework.org/schema/mvc https://www.springframework.org/schema/mvc/spring-mvc.xsd">
<!-- <!–处理器映射器,将处理器的name作为url进行查找–>
<bean class="org.springframework.web.servlet.handler.BeanNameUrlHandlerMapping"/>
<!–处理器适配器,配置对处理器中的handleRequest()方法的调用–>
<bean class="org.springframework.web.servlet.mvc.SimpleControllerHandlerAdapter"/>
<!–视图解析器,指定使用的事jstl类型,suffix后缀名,表示视图文件以.jstl结尾,如果是jsp则是.jsp,prifix前缀,视图存储的位置–>
<bean class="org.springframework.web.servlet.view.InternalResourceViewResolver">
<property name="suffix" value=".jsp"></property>
<property name="prefix" value="/module/"></property>
<property name="viewClass" value="org.springframework.web.servlet.view.JstlView"></property>
</bean>
<!–要设置客户请求的路径,当客户端访问student时,调用StudentController接口。–>
<bean name="/HelloController" class="com.zzz.controller.StudentController"></bean>-->
<!--开启注解扫描,只扫描controller,不然会引起springcore事物配置失效-->
<context:component-scan base-package="com.zzz.controller"></context:component-scan>
<!--加载mvc驱动,取消上面的bean-->
<mvc:annotation-driven></mvc:annotation-driven>
<!--配置视图解析器-->
<bean class="org.springframework.web.servlet.view.InternalResourceViewResolver">
<property name="suffix" value=".jsp"></property>
<property name="prefix" value="/jsp/"></property>
<property name="viewClass" value="org.springframework.web.servlet.view.JstlView"></property>
</bean>
</beans>在web.xml文件里配置springmvc的映射:
<?xml version="1.0" encoding="UTF-8"?>
<web-app xmlns="http://xmlns.jcp.org/xml/ns/javaee"
         xmlns:xsi="http://www.w3.org/2001/XMLSchema-instance"
         xsi:schemaLocation="http://xmlns.jcp.org/xml/ns/javaee http://xmlns.jcp.org/xml/ns/javaee/web-app_4_0.xsd"
         version="4.0">
    <display-name>Archetype Created Web Application</display-name>
    <servlet>
      <servlet-name>ssm</servlet-name>
      <servlet-class>org.springframework.web.servlet.DispatcherServlet</servlet-class>
      <init-param>
        <param-name>contextConfigLocation</param-name>
        <param-value>classpath:springMvc.xml</param-value>
      </init-param>
    </servlet>

    <servlet-mapping>
      <servlet-name>ssm</servlet-name>
      <url-pattern>/</url-pattern>
    </servlet-mapping>

</web-app>
配置完以后,在java文件下创建com.zzz.controller.Hello控制层类,用来调试,在webApp目录下创建modul/test.jsp文件,示例如下:

package com.zzz.controller;

import org.springframework.stereotype.Controller;
import org.springframework.ui.Model;
import org.springframework.web.bind.annotation.RequestMapping;

@Controller
@RequestMapping("/hello")
public class HelloController {
    @RequestMapping("/test")
    public String test(Model model){
        model.addAttribute("msg","success");
        return "test";
    }
}
jsp文件一定不能写到webInf下面
<%--
  Created by IntelliJ IDEA.
  User: Administrator
  Date: 2022/5/11
  Time: 19:41
  To change this template use File | Settings | File Templates.
--%>
<%@ page contentType="text/html;charset=UTF-8" language="java" isELIgnored="false" %>
<html>
<head>
    <title>Title</title>
</head>
<body>
    msg:${msg}
</body>
</html>
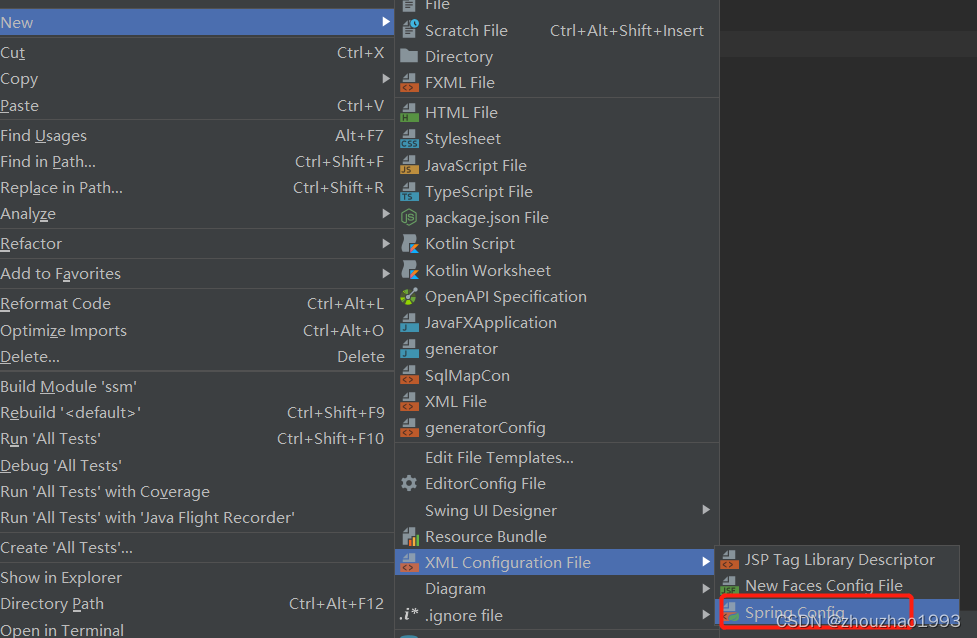
spring配置:
首先将spring和mybatis做整合,需要引入mybatis的jar包和整合jar包:
  <dependency>
      <groupId>com.alibaba</groupId>
      <artifactId>druid</artifactId>
      <version>1.1.16</version>
    </dependency>
    <dependency>
      <groupId>org.mybatis</groupId>
      <artifactId>mybatis</artifactId>
      <version>3.5.5</version>
    </dependency>
    <dependency>
      <groupId>org.mybatis</groupId>
      <artifactId>mybatis-spring</artifactId>
      <version>2.0.5</version>
    </dependency>
    <dependency>
      <groupId>mysql</groupId>
      <artifactId>mysql-connector-java</artifactId>
      <version>5.1.9</version>
    </dependency>
    <dependency>
      <groupId>org.springframework</groupId>
      <artifactId>spring-tx</artifactId>
      <version>5.0.16.RELEASE</version>
    </dependency>
    <dependency>
      <groupId>org.springframework</groupId>
      <artifactId>spring-jdbc</artifactId>
      <version>5.0.16.RELEASE</version>
    </dependency>
先引入mybatis的配置源文件:

driver=com.mysql.jdbc.Driver
url=jdbc:mysql:localhost:3306/test?useUnicode=true&characterEncoding=UTF-8
name=root
password=123456
创建mybatis的配置文件:这个配置文件是普通的文件,不会生成模板,需要自己拷贝头文件:
<?xml version="1.0" encoding="UTF-8"?>
<!DOCTYPE configuration
        PUBLIC "-//mybatis.org//DTD Config 3.0//EN"
        "http://mybatis.org/dtd/mybatis-3-config.dtd">
<configuration>

    <!-- 注意 settings 必须写在 紧跟 properties  -->
    <settings>
        <!--
            将数据库_的字段改为驼峰式写法  tb:student_name  映射为  studentName
        -->
        <setting name="mapUnderscoreToCamelCase" value="true"/>
        <!--将日志打印到控制台-->
        <setting name="logImpl" value="STDOUT_LOGGING" />
    </settings>


</configuration>
创建配置文件,合并mybatis配置文件:
<?xml version="1.0" encoding="UTF-8"?>
<beans xmlns="http://www.springframework.org/schema/beans"
       xmlns:xsi="http://www.w3.org/2001/XMLSchema-instance"
       xmlns:context="http://www.springframework.org/schema/context"
       xsi:schemaLocation="http://www.springframework.org/schema/beans http://www.springframework.org/schema/beans/spring-beans.xsd http://www.springframework.org/schema/context https://www.springframework.org/schema/context/spring-context.xsd">

    <context:property-placeholder location="classpath:db.properties"></context:property-placeholder>
    <bean id="dataSource" class="com.alibaba.druid.pool.DruidDataSource">
        <property name="driverClassName" value="${driver}"></property>
        <property name="url" value="${url}"></property>
        <property name="username" value="${name}"></property>
        <property name="password" value="${password}"></property>
    </bean>
    <bean id="sessionFactory" class="org.mybatis.spring.SqlSessionFactoryBean">
        <property name="configLocation" value="classpath:mybatis.xml"></property>
        <property name="dataSource" ref="dataSource"></property>
        <property name="mapperLocations" value="classpath:com/zzz/mapper/*.xml"></property>
        <property name="typeAliasesPackage" value="com.zzz.entity"></property>
    </bean>
    <bean class="org.mybatis.spring.mapper.MapperScannerConfigurer">
        <property name="basePackage" value="com.zzz.mapper"></property>
        <property name="sqlSessionFactoryBeanName" value="sessionFactory"></property>
    </bean>
    <context:component-scan base-package="com.zzz.service"></context:component-scan>
</beans>
在com.zzz包下创建service、mapper、entity包,在和springMvc整合之前先测试一下spring和mybatis整合有没有问题。

mapper


package com.zzz.mapper;

import com.zzz.entity.Student;
import org.springframework.stereotype.Repository;

@Repository
public interface StudentMapper {
    Student findStudentById(int id);
}

service

package com.zzz.service;

import com.zzz.entity.Student;
import com.zzz.mapper.StudentMapper;
import org.springframework.beans.factory.annotation.Autowired;

import org.springframework.stereotype.Service;
@Service
public class StudentServiceImpl implements StudentService{
    @Autowired
    private StudentMapper studentMapper;
    @Override
    public Student findStudentById(int id) {
        Student studentById = studentMapper.findStudentById(id);
        return studentById;
    }
}


mapper.xml

<?xml version="1.0" encoding="UTF-8"?>
<!DOCTYPE mapper PUBLIC "-//mybatis.org//DTD Mapper 3.0//EN"
        "http://mybatis.org/dtd/mybatis-3-mapper.dtd">
<mapper namespace="com.zzz.mapper.StudentMapper">

    <select id="findStudentById" resultType="com.zzz.entity.Student">
        select * from student where id=#{id}
    </select>
</mapper>


测试:
package com.zzz.test;

import com.zzz.entity.Student;
import com.zzz.service.StudentService;
import org.springframework.context.ApplicationContext;
import org.springframework.context.support.ClassPathXmlApplicationContext;

public class MybatisTest {
    public static void main(String[] args) {
        ApplicationContext applicationContext = new ClassPathXmlApplicationContext("spring.xml");
        StudentService studentService = applicationContext.getBean(StudentService.class);
        Student studentById = studentService.findStudentById(2);
        System.out.println(studentById);
    }
}
运行测试类,在控制台打印出对应学生信息,没问题,开始下一步。
在web.xml中设置spring映射,以及监听器:
<?xml version="1.0" encoding="UTF-8"?>
<web-app xmlns="http://xmlns.jcp.org/xml/ns/javaee"
         xmlns:xsi="http://www.w3.org/2001/XMLSchema-instance"
         xsi:schemaLocation="http://xmlns.jcp.org/xml/ns/javaee http://xmlns.jcp.org/xml/ns/javaee/web-app_4_0.xsd"
         version="4.0">
    <display-name>Archetype Created Web Application</display-name>

    <context-param>
        <param-name>contextConfigLocation</param-name>
        <param-value>classpath:spring.xml</param-value>
    </context-param>
    <listener>
        <listener-class>org.springframework.web.context.ContextLoaderListener</listener-class>
    </listener>
    <servlet>
      <servlet-name>ssm</servlet-name>
      <servlet-class>org.springframework.web.servlet.DispatcherServlet</servlet-class>
      <init-param>
        <param-name>contextConfigLocation</param-name>
        <param-value>classpath:springMvc.xml</param-value>
      </init-param>
    </servlet>

    <servlet-mapping>
      <servlet-name>ssm</servlet-name>
      <url-pattern>/</url-pattern>
    </servlet-mapping>

</web-app>
运行:


 9872
9872


 被折叠的 条评论
为什么被折叠?
被折叠的 条评论
为什么被折叠?
 到【灌水乐园】发言


