


硬件准备
- 树莓派一个(二三四代皆可,我选的是树莓派4B)
- 两端水晶头完好的网线一根
- 一个联网的路由器,并有一个空闲可用的lan口
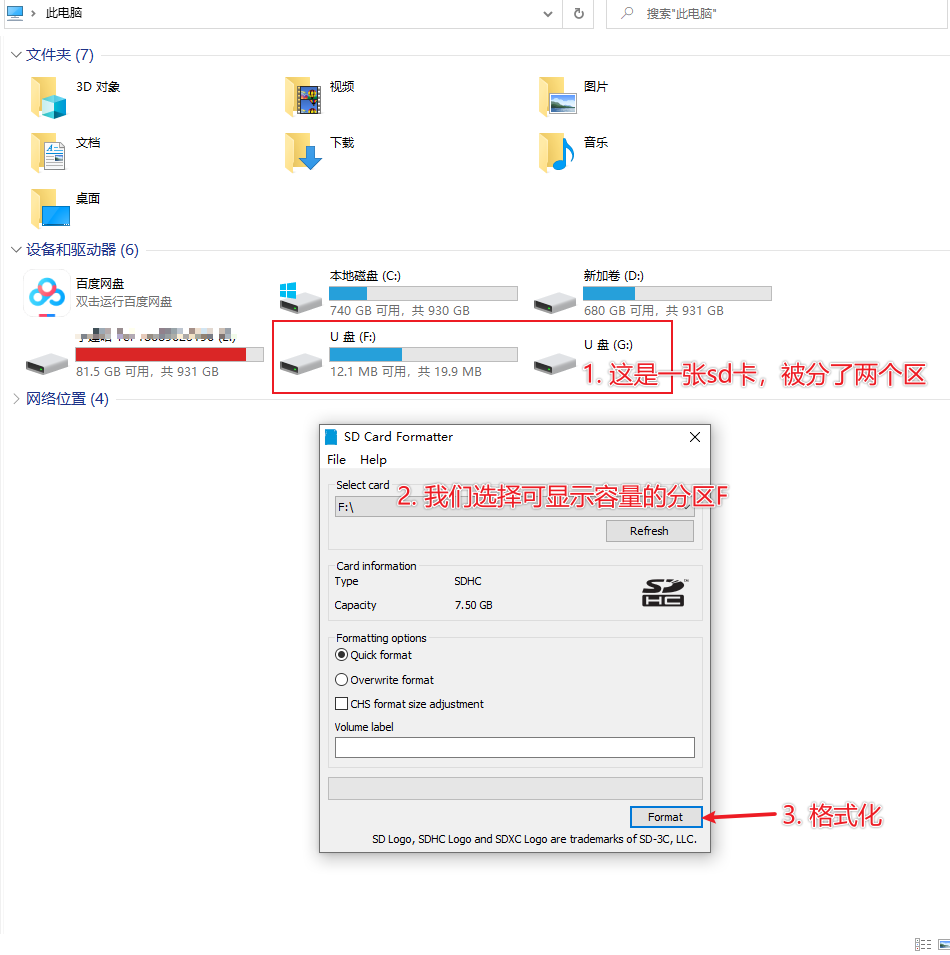
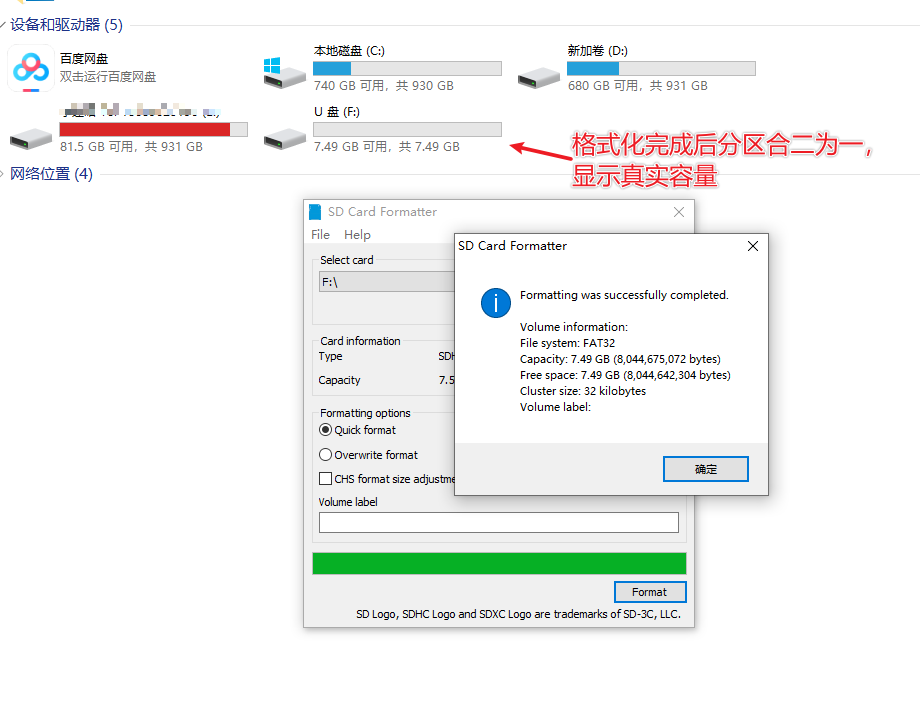
使用SD Card Formatter格式化SD卡
SD Card Formatter下载地址 https://www.sdcard.org/downloads/formatter/
下载镜像
从 https://ubuntu.com/download/raspberry-pi/thank-you?version=20.04.3&architecture=server-arm64+raspi 页面下载镜像

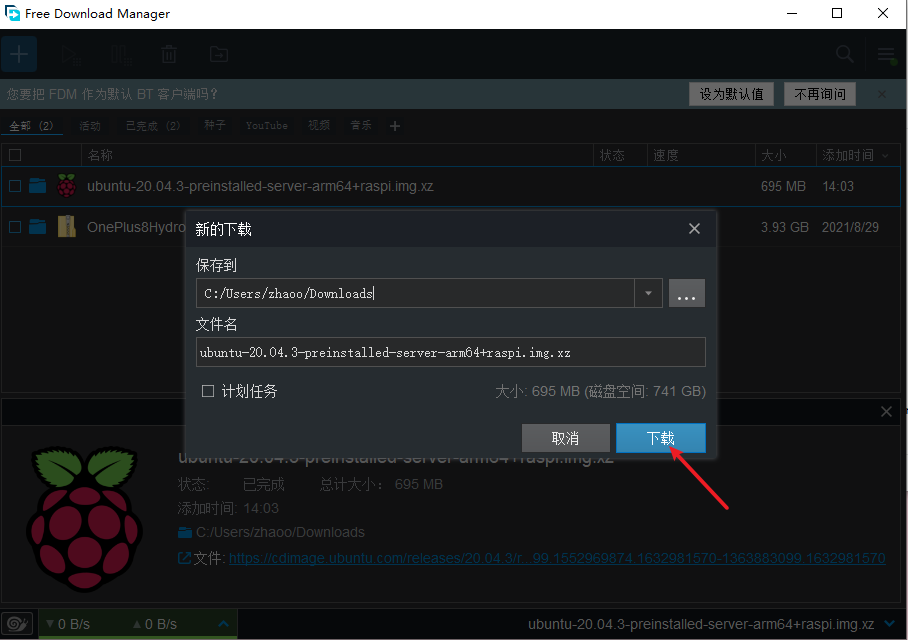
点击页面中download now后, 下载得到的文件为ubuntu-20.04.3-preinstalled-server-arm64+raspi.img

如果你浏览器经常下载失败,建议将https://cdimage.ubuntu.com/releases/20.04.3/release/ubuntu-20.04.3-preinstalled-server-arm64+raspi.img.xz 放入Free Download Manager直接下载
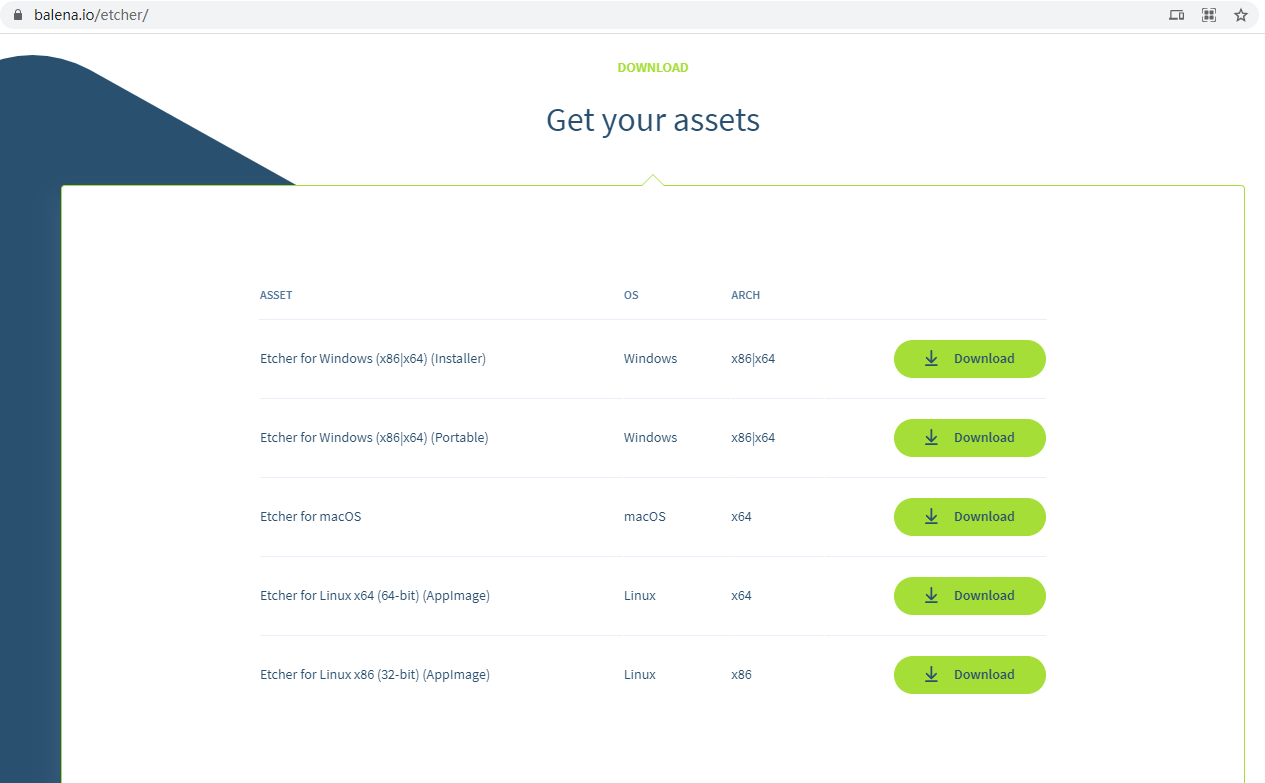
使用balenaEtcher将镜像烧录到SD卡
balenaEtcher下载地址 https://www.balena.io/etcher/
按自己的系统,选择自己需要下载的版本,如果是windows系统,直接下载下图中的第一个即可
打开 Etcher , 选择镜像文件, 选择SD卡 , 开始烧录
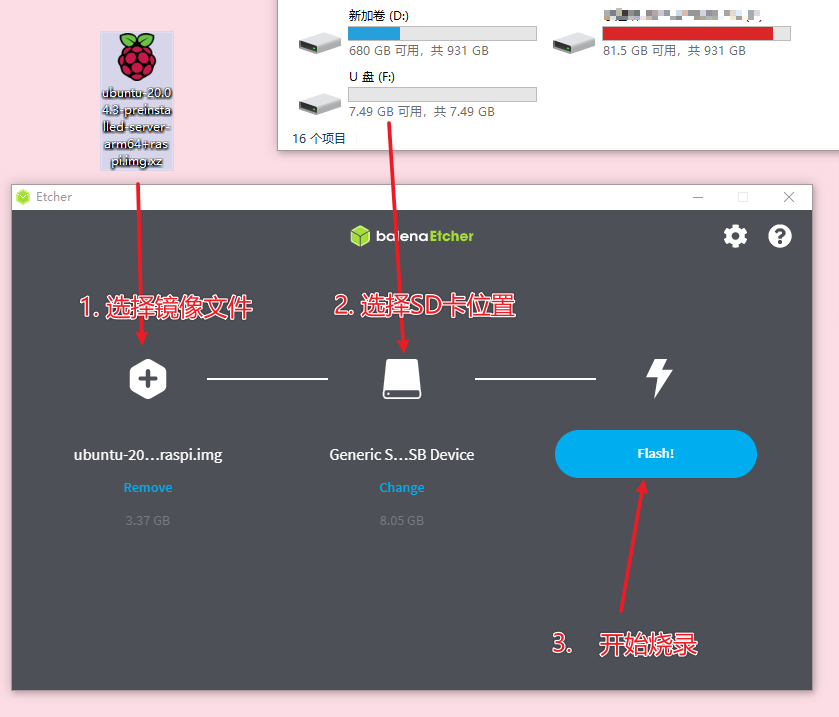
这里图中用的8GB的SD卡,但有几次烧录失败了,后来我换了16GB的内存卡,一次刷成功,如果大家烧录一直失败,建议换一张SD卡试试。
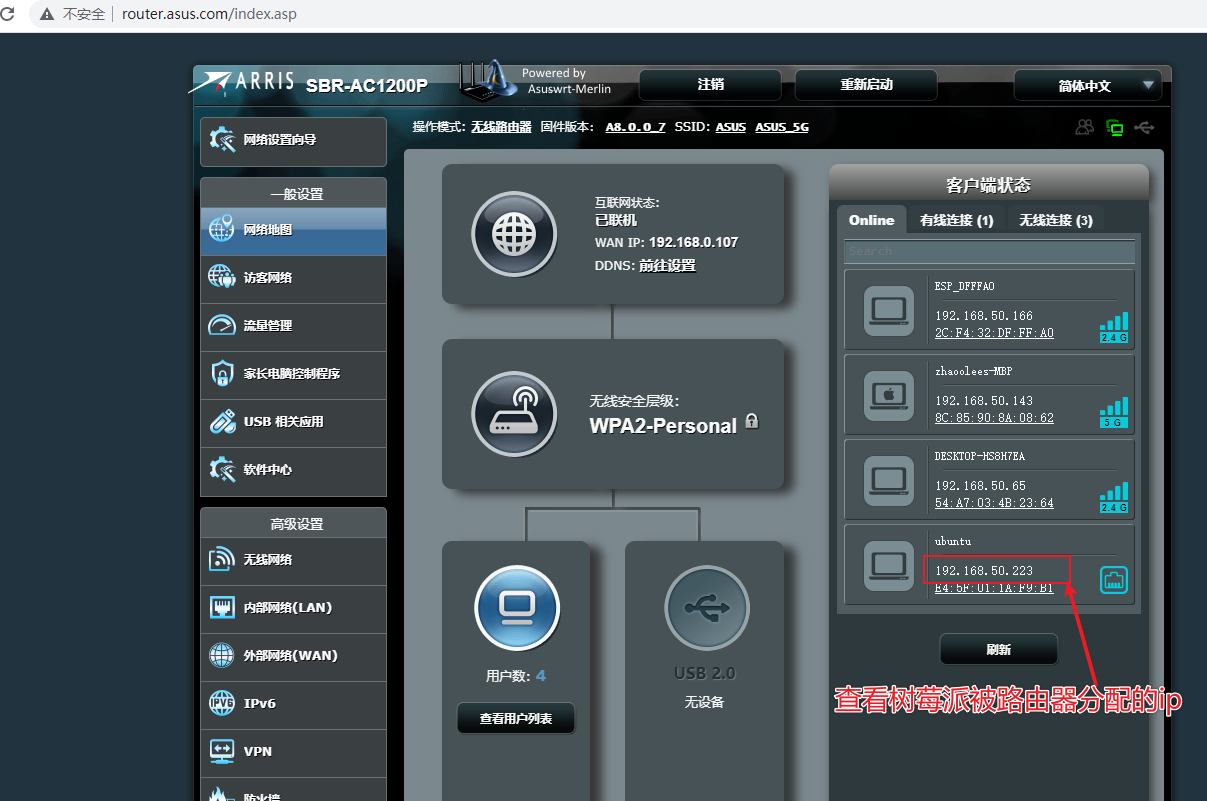
将烧录好的SD卡放入树莓派,使用网线将树莓派与路由器lan口连接,通电开机
登录路由器后台,查看路由器被分配的ip
使用SSH登录树莓派服务器
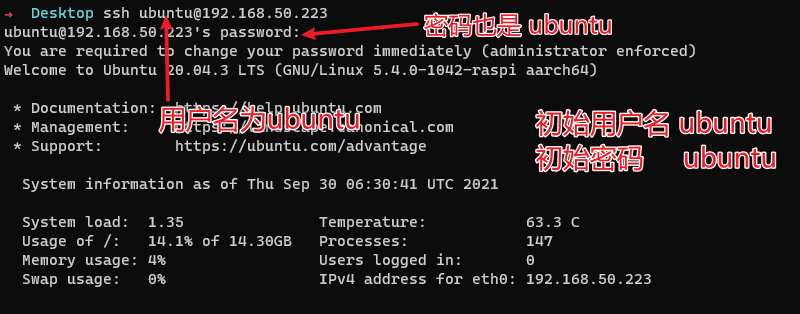
初始用户名,密码均为 ubuntu
第一次登录后,会强制要求改变默认密码
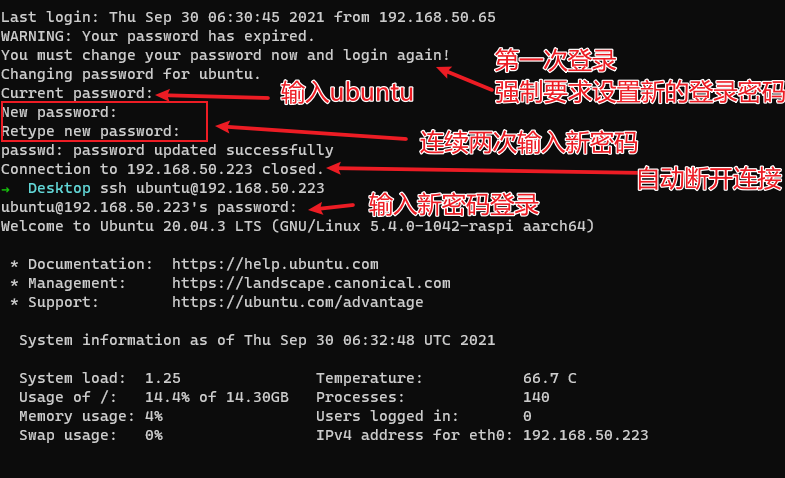
此刻一个联网的服务服务器就搭建完成了!
通过内网穿透,给树莓派这个家庭服务器一个外网域名
内网穿透:服务端设置
- 登录自己的服务器,下载frp,并进行服务端设置
frp这个软件分为两部分,客户端为frpc, 服务端为frps
cd  /opt/
wget https://github.com/fatedier/frp/releases/download/v0.37.0/frp_0.37.0_linux_386.tar.gz
tar zxvf https://github.com/fatedier/frp/releases/download/v0.37.0/frp_0.37.0_linux_386.tar.gz
服务端frpc的配置文件为frpc.ini
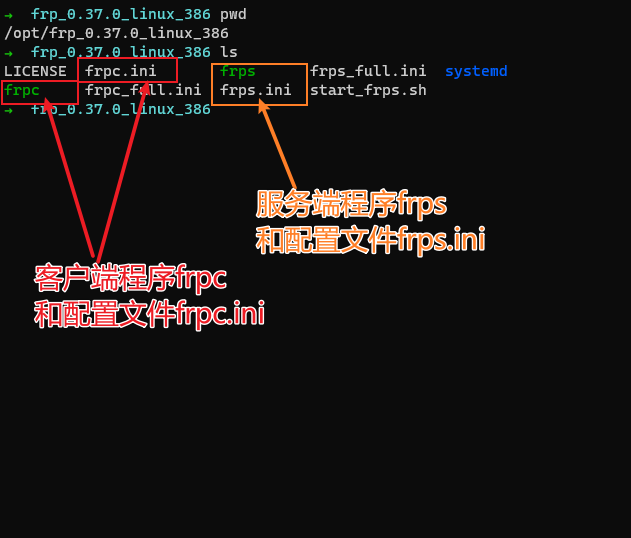
我们需要修改服务端配置文件 frps.ini

[common]
bind_port = 7000
vhost_http_port = 8080
这里的意思是,服务端frp(frps) 运行在7000端口, 同时占用了8080端口,用于接收浏览器请求;
- 运行以下命令,开启frp的服务端程序
./frps -c frps.ini
frps默认前台运行,如果你想以后台守护进程运行, 可以使用node.js版的pm2,
- pm2 全局安装方式
首先安装node.js, npm默认和node.js一起安装
然后通过npm安装 pm2, npm i pm2 -g
pm2的使用也很简单
首先将 ./frps -c frps.ini 存入名为 start_frps.sh 的文件
然后运行
pm2 start  /opt/frp_0.37.0_linux_arm64/start_frps.sh
pm2 save
即可以守护进程的方式运行frps !
此时运行 pm2 list, 可以看到脚本正在运行中…

内网穿透:客户端设置
- 在树莓派内执行以下命令, 下载frp, 并解压
cd /opt/
sudo wget https://github.com/fatedier/frp/releases/download/v0.37.0/frp_0.37.0_linux_arm64.tar.gz
sudo tar zxvf  frp_0.37.0_linux_arm64.tar.gz
进入 /opt/frp_0.37.0_linux_arm64
备份客户端frpc的配置文件frpc.ini sudo cp frpc.ini frpc.ini_backup
sudo vim frpc.ini将以下配置放入frpc.ini
[common]
server_addr = (自己服务器的公网ip)
server_port = 7000

[web]
type = http
local_port = 8080
custom_domains = frp.v2fy.com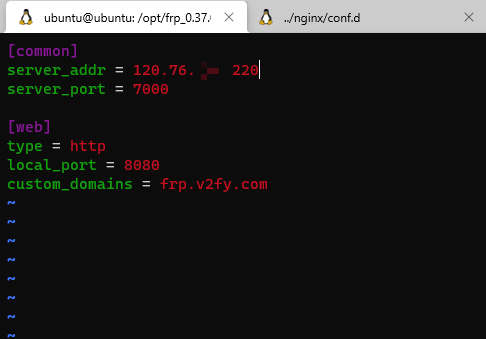
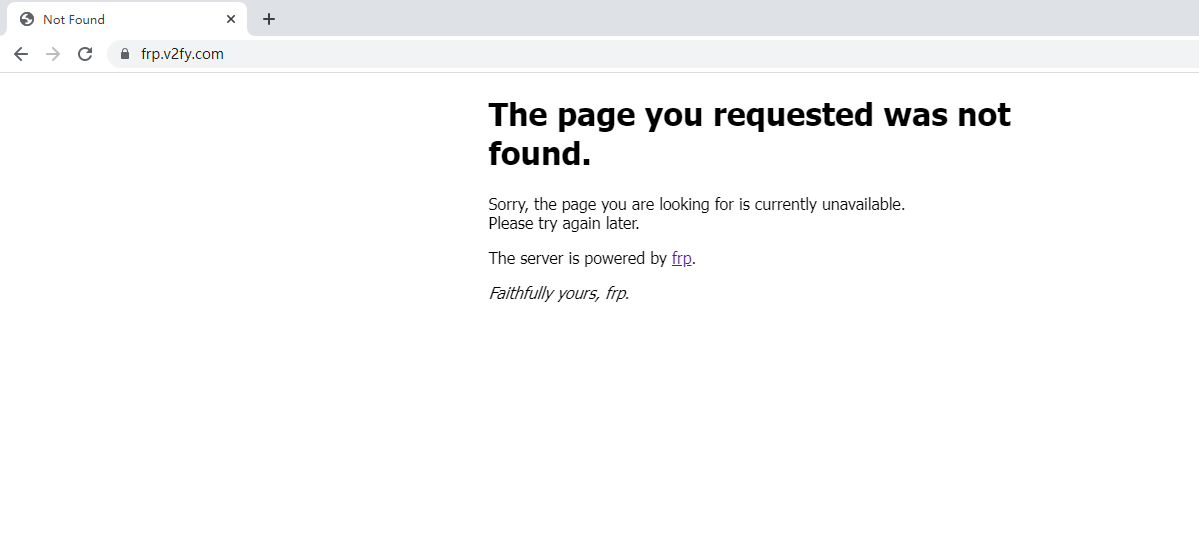
- 使用浏览器从公网访问树莓派,验证内网穿透是否成功
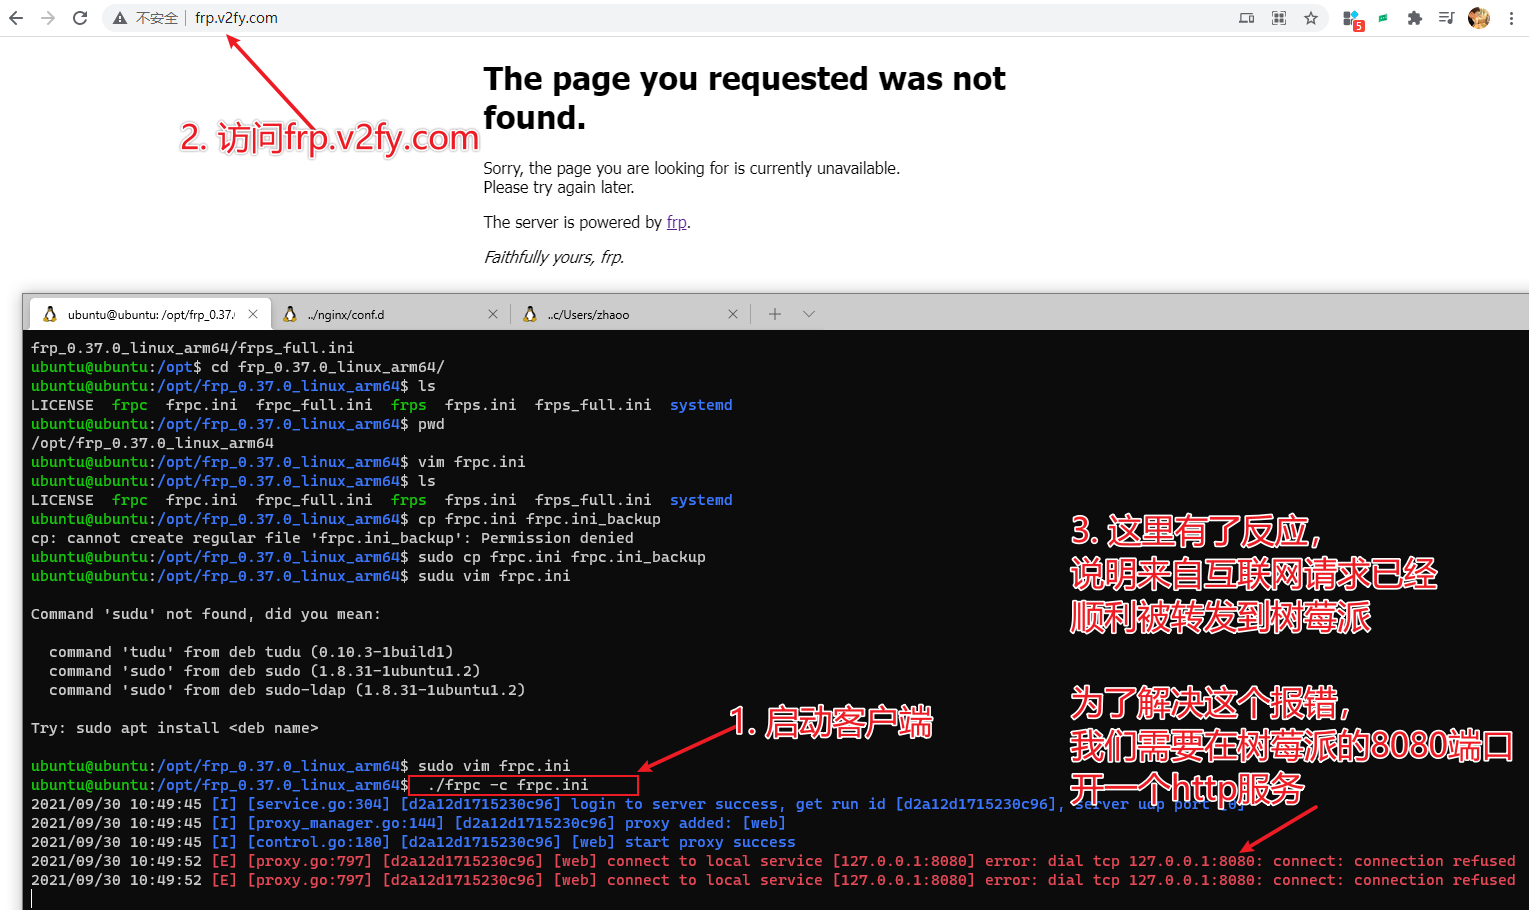
- 配置nginx,转发访问frp.v2fy.com域名的信息到8080端口(做这一步前,请自行在服务端安装nginx)
设置 /etc/nginx/nginx.conf
#user  nginx;
worker_processes  1;
load_module /usr/lib64/nginx/modules/ngx_stream_module.so;

error_log  /var/log/nginx/error.log warn;
pid        /var/run/nginx.pid;

stream {
    map $ssl_preread_server_name $backend_name {
        frp.v2fy.com        frp_v2fy_com;
        default web;
    }


   upstream frp_v2fy_com {
        server 127.0.0.1:8080;
   }

   upstream web {
        server 127.0.0.1:80;
   }

   server {
        listen       443 reuseport;
        listen  [::]:443 reuseport;
        proxy_pass   $backend_name;
        ssl_preread  on;
   }

}

events {
    worker_connections  1024;
}

http {

    include       /etc/nginx/mime.types;
    default_type  application/octet-stream;
    charset utf-8,gbk;
    client_max_body_size 20m;

    set_real_ip_from 127.0.0.1;
    real_ip_header X-Forwarded-For;


    log_format  main  '$remote_addr  - $remote_user [$time_local] "$request" '
                      '$status $body_bytes_sent "$http_referer" '
                      '"$http_user_agent" "$http_x_forwarded_for"';
    access_log  /var/log/nginx/access.log  main;

    sendfile        on;
    #tcp_nopush     on;
    keepalive_timeout  65;
    gzip  on;
    include /etc/nginx/conf.d/*.conf;
}
新建 /etc/nginx/conf.d/frp.v2fy.com.conf , 并在/etc/nginx/conf.d/frp.v2fy.com.conf 写入一下内容(frp.v2fy.com是我的域名, 请大家自行替换为自己的域名)
server {
    server_name      frp.v2fy.com;
    listen           80;

    location / {
        proxy_pass http://127.0.0.1:8080;
        proxy_set_header Host $host:80;
        proxy_set_header X-Real-IP $remote_addr;
        proxy_set_header X-Forwarded-For $proxy_add_x_forwarded_for;
    }
}


server {
    listen       8080 ssl http2;
    listen       [::]:8080 ssl http2;
    server_name  frp.v2fy.com;

    location / {
        proxy_pass http://127.0.0.1:8080;
        proxy_set_header Host $host:443;
        proxy_set_header X-Real-IP $remote_addr;
        proxy_set_header X-Forwarded-For $proxy_add_x_forwarded_for;
    }

    ssl_certificate "/etc/nginx/ssl/frp.v2fy.com/fullchain.cer";
    ssl_certificate_key "/etc/nginx/ssl/frp.v2fy.com/frp.v2fy.com.key";
    ssl_session_cache shared:SSL:1m;
    ssl_session_timeout  10m;
    ssl_ciphers HIGH:!aNULL:!MD5;
    ssl_prefer_server_ciphers on;

    # Load configuration files for the default server block.
    include /etc/nginx/default.d/*.conf;

    error_page 404 /404.html;
        location = /40x.html {
    }

    error_page 500 502 503 504 /50x.html;
        location = /50x.html {
    }
}
重启nginx
nginx -t
nginx -s reload
安装Node.js (使用armv8版本的稳定版node.js)
我查了一下wiki对树莓派CPU架构的描述,树莓派三系及以后的版本都是ARMv8架构
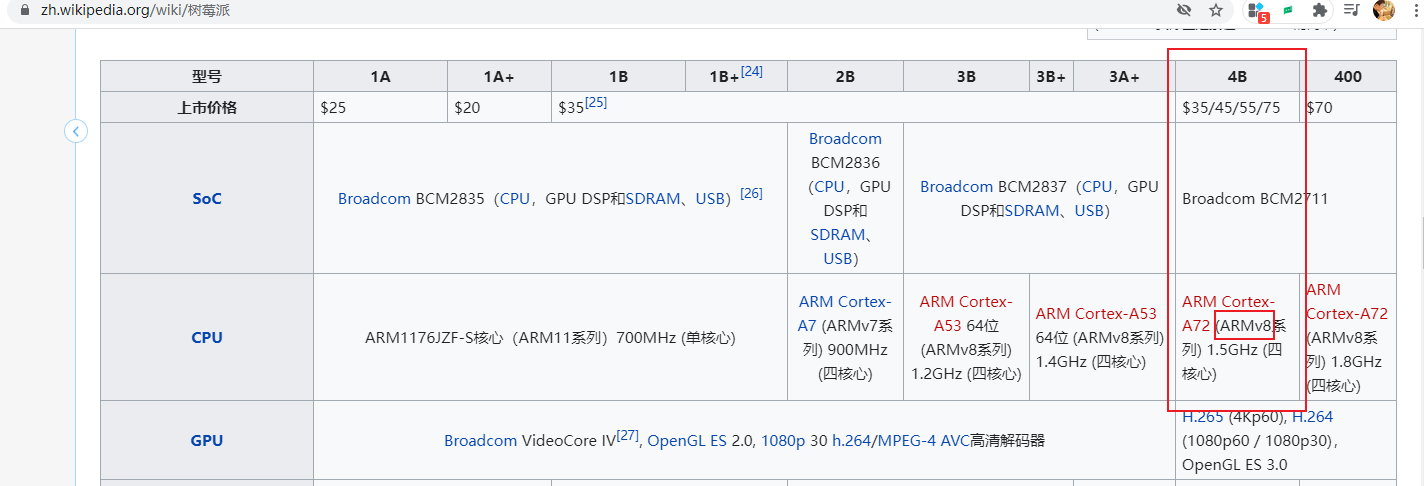
使用ARMv8版本的稳定版Node.js
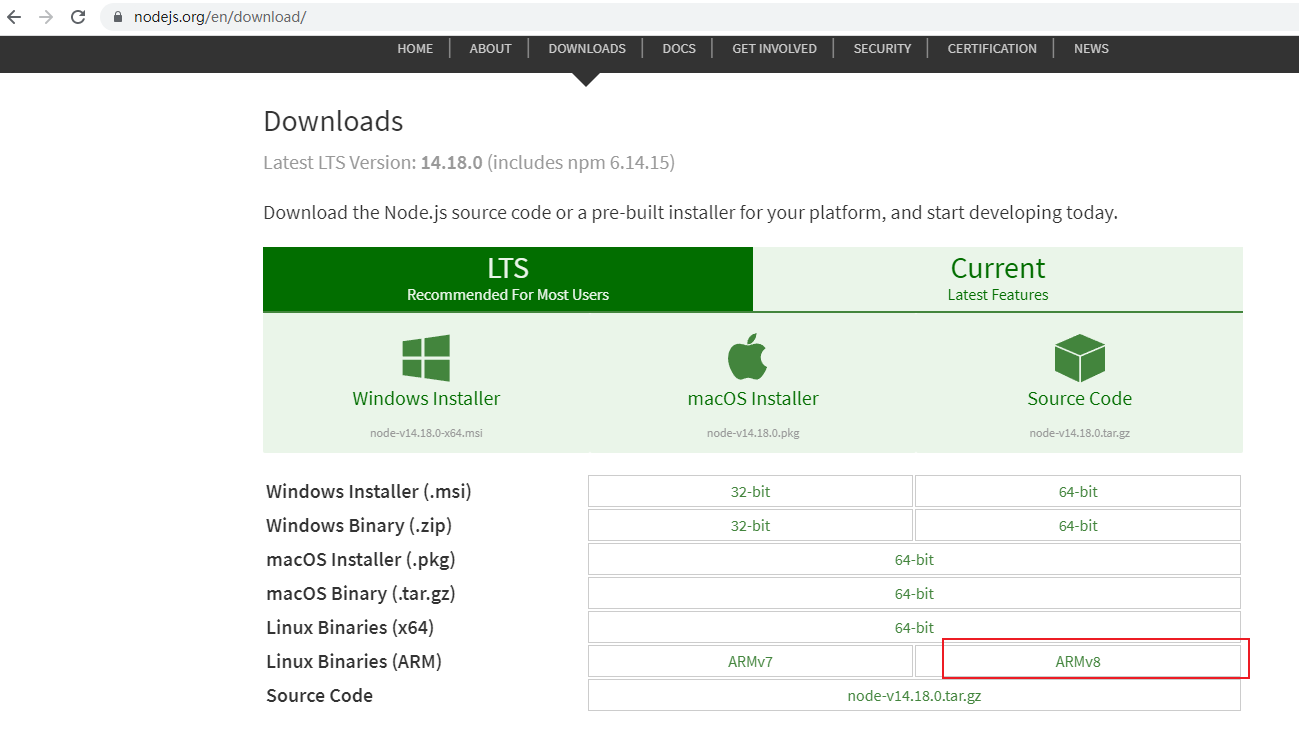
cd /opt/
sudo wget https://nodejs.org/dist/v14.18.0/node-v14.18.0-linux-arm64.tar.xz
sudo tar xvf node-v14.18.0-linux-arm64.tar.xz- 将Node.js添加到系统变量
sudo echo "export NODE_HOME=/opt/node-v14.18.0-linux-arm64" >> ~/.bashrc
sudo echo "export PATH=\$NODE_HOME/bin:\$PATH" >> ~/.bashrc
source ~/.bashrc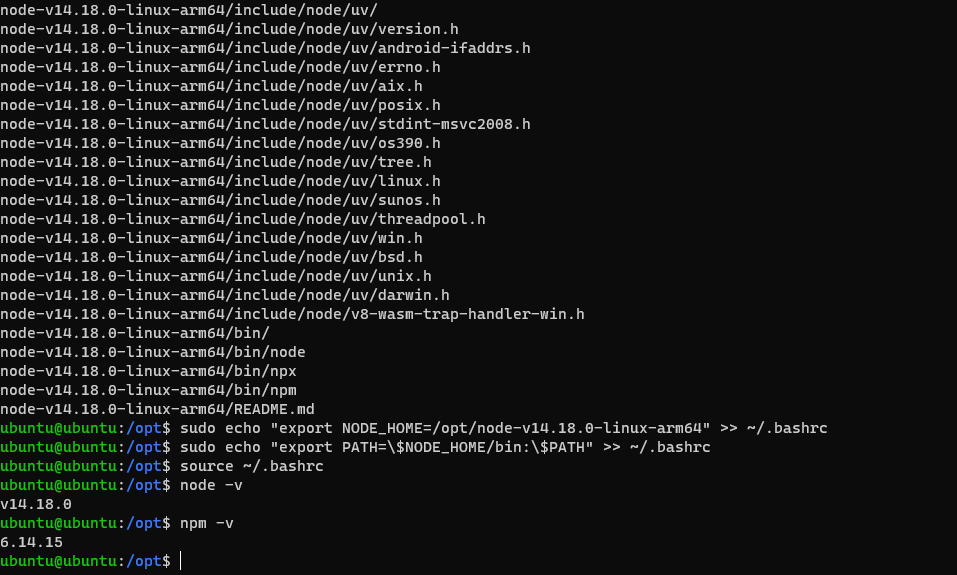
安装http-server服务
npm install http-server -g
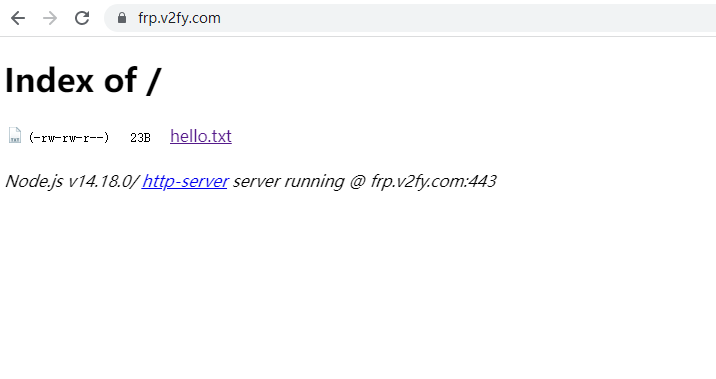
- 在
/opt文件夹 新建frp.v2fy.com文件夹, 并创建hello.txt文件
sudo mkdir /opt/frp.v2fy.com
sudo chmod 777 -R  /opt/frp.v2fy.com
sudo touch /opt/frp.v2fy.com/hello.txt
sudo echo "Hello World! Success! " > /opt/frp.v2fy.com/hello.txt- 安装pm2
npm install pm2 -g- 使用pm2守护运行http-server服务
cd /opt/frp_0.37.0_linux_arm64
sudo chmod 777 start_http_server.sh
sudo echo "http-server /opt/frp.v2fy.com -p 8080" > start_http_server.sh
pm2 start /opt/frp_0.37.0_linux_arm64/start_http_server.sh
pm2 save- 使用pm2守护运行frpc服务
sudo touch /opt/frp_0.37.0_linux_arm64/start_frpc.sh
sudo chmod 777 /opt/frp_0.37.0_linux_arm64/start_frpc.sh
sudo echo "/opt/frp_0.37.0_linux_arm64/frpc -c /opt/frp_0.37.0_linux_arm64/frpc.ini" > /opt/frp_0.37.0_linux_arm64/start_frpc.sh
cd /opt/frp_0.37.0_linux_arm64/
pm2 start  /opt/frp_0.37.0_linux_arm64/start_frpc.sh
pm2 save
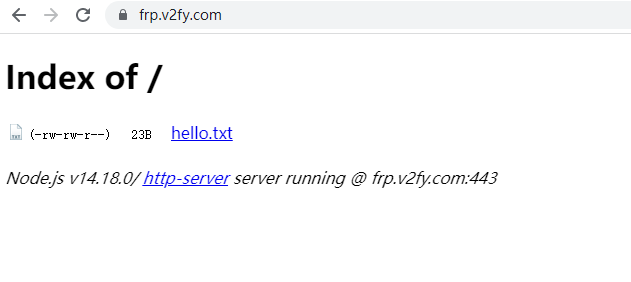
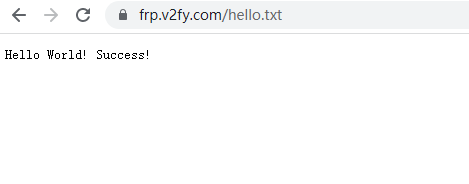
这里可以通过公网顺利访问到家庭服务器的https服务。
添加ssh服务
- 添加配置

[ssh]
type = tcp
local_ip = 127.0.0.1
local_port = 22
remote_port = 6000
配置的意思是,将树莓派的默认ssh的22号端口,映射到frp.v2fy.com的600端口
- 重启frpc服务
cd /opt/frp_0.37.0_linux_arm64
pm2 restart start_frpc.sh- 通过公网frp.v2fy.com的6000端口进行ssh登录
ssh ubuntu@frp.v2fy.com -p 6000
至此我们可以从互联网任何一台电脑,通过ssh访问我们j家里的树莓派服务器。
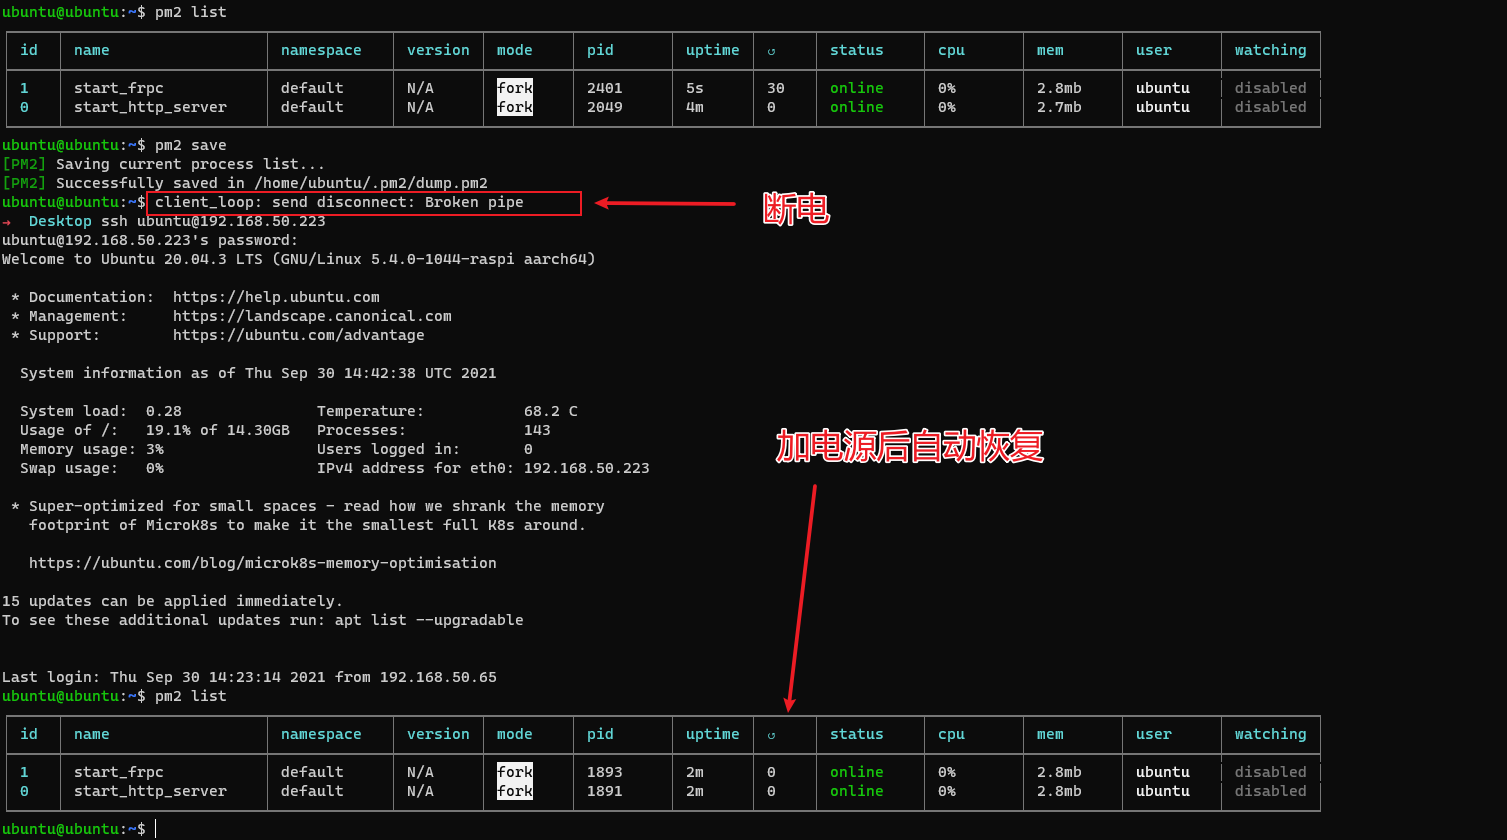
我们将pm2设置为开机启动,这样树莓派意外断电重启后,可以自动开启内网穿透
ubuntu@ubuntu:/opt/frp_0.37.0_linux_arm64$ pm2 startup
[PM2] Init System found: systemd
[PM2] To setup the Startup Script, copy/paste the following command:
sudo env PATH=$PATH:/opt/node-v14.18.0-linux-arm64/bin /opt/node-v14.18.0-linux-arm64/lib/node_modules/pm2/bin/pm2 startup systemd -u ubuntu --hp /home/ubuntu
ubuntu@ubuntu:/opt/frp_0.37.0_linux_arm64$ sudo env PATH=$PATH:/opt/node-v14.18.0-linux-arm64/bin /opt/node-v14.18.0-linux-arm64/lib/node_modules/pm2/bin/pm2 startup systemd -u ubuntu --hp /home/ubuntu
[PM2] Init System found: systemd
Platform systemd
Template
[Unit]
Description=PM2 process manager
Documentation=https://pm2.keymetrics.io/
After=network.target

[Service]
Type=forking
User=ubuntu
LimitNOFILE=infinity
LimitNPROC=infinity
LimitCORE=infinity
Environment=PATH=/opt/node-v14.18.0-linux-arm64/bin:/usr/local/sbin:/usr/local/bin:/usr/sbin:/usr/bin:/sbin:/bin:/usr/games:/usr/local/games:/snap/bin:/opt/node-v14.18.0-linux-arm64/bin:/bin:/usr/local/sbin:/usr/local/bin:/usr/sbin:/usr/bin
Environment=PM2_HOME=/home/ubuntu/.pm2
PIDFile=/home/ubuntu/.pm2/pm2.pid
Restart=on-failure

ExecStart=/opt/node-v14.18.0-linux-arm64/lib/node_modules/pm2/bin/pm2 resurrect
ExecReload=/opt/node-v14.18.0-linux-arm64/lib/node_modules/pm2/bin/pm2 reload all
ExecStop=/opt/node-v14.18.0-linux-arm64/lib/node_modules/pm2/bin/pm2 kill

[Install]
WantedBy=multi-user.target

Target path
/etc/systemd/system/pm2-ubuntu.service
Command list
[ 'systemctl enable pm2-ubuntu' ]
[PM2] Writing init configuration in /etc/systemd/system/pm2-ubuntu.service
[PM2] Making script booting at startup...
[PM2] [-] Executing: systemctl enable pm2-ubuntu...
[PM2] [v] Command successfully executed.
+---------------------------------------+
[PM2] Freeze a process list on reboot via:
$ pm2 save

[PM2] Remove init script via:
$ pm2 unstartup systemd
ubuntu@ubuntu:/opt/frp_0.37.0_linux_arm64$运行pm2 startup, 然后运行弹出的一句命令 sudo env PATH=$PATH:/opt/node-v14.18.0-linux-arm64/bin /opt/node-v14.18.0-linux-arm64/lib/node_modules/pm2/bin/pm2 startup systemd -u ubuntu --hp /home/ubuntu

为了验证开机自启,是否确实设置成功,我拔掉了树莓派的电源,果然http服务不可用了
连上树莓派的电源, frp.v2fy.com又可以访问了
为树莓派添加更大的容量(挂个32GB的大U盘)
我使用的内存卡只有16GB, 还是太小了,于是我往树莓派插了个32GB的U盘扩容容量,插入树莓派后,输入以下命令即可查看U盘有没有被识别
sudo fdisk -l
U盘设备的位置在 /dev/sda1
- 将
/dev/sda1挂载到/mnt/sda1
sudo mkdir /mnt/sda1
sudo mount /dev/sda1 /mnt/sda1进入/mnt/sda1 , 即可往U盘内部读写文件了

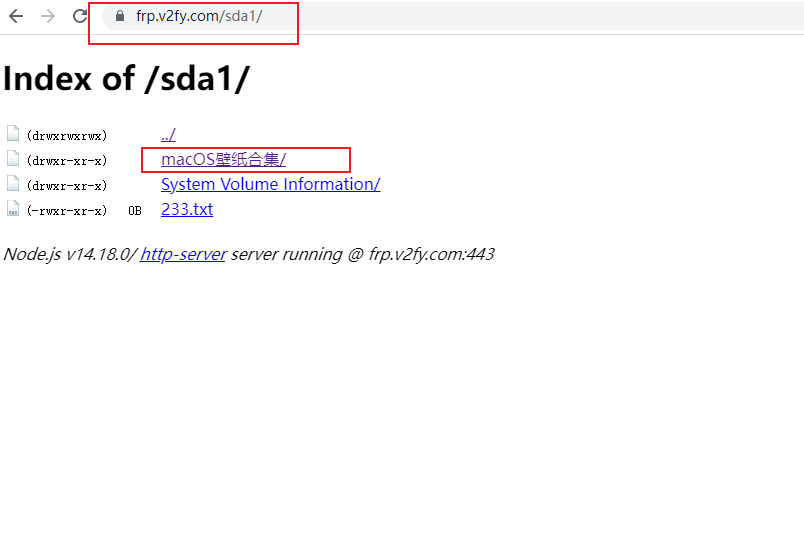
我们也可以将U盘挂载到web服务文件夹
sudo mkdir /opt/frp.v2fy.com/sda1
sudo mount /dev/sda1 /opt/frp.v2fy.com/sda1
再次查看https://frp.v2fy.com, 通过https://frp.v2fy.com/sda1 可以访问U盘里所有的文件
小结
通过本次操作,我通过内网穿透,为家用树莓派提供了一个frp.v2fy.com域名,并可通过公网访问;通过配置ssh, 可以在互联网任何地方,使用frp.v2fy.com的6000端口进行ssh远程登录。


 1966
1966

 被折叠的 条评论
为什么被折叠?
被折叠的 条评论
为什么被折叠?
 到【灌水乐园】发言


