


极光推送官方提供的Cordova插件目前无法适配Capacitor电容器平台进行开发,之前问了官方什么时候会考虑适配,官方的回答是暂不做开发安排,需要调研,这对于想使用Capacitor进行开发的同学来说不太友好,Google了一番,发现有一个GitHub已经对此做了适配,于是Fork了一份整理了下,附上使用文档。原GitHub传送门:https://github.com/netsesame2/cordova-plugin-jpush
Capacitor 使用 npm 安装:
npm i cordova-plugin-jpush-capacitor
capacitor同步插件至Android/iOS项目(前提是已经通过命令添加了IOS/Android平台):
ionic cap sync
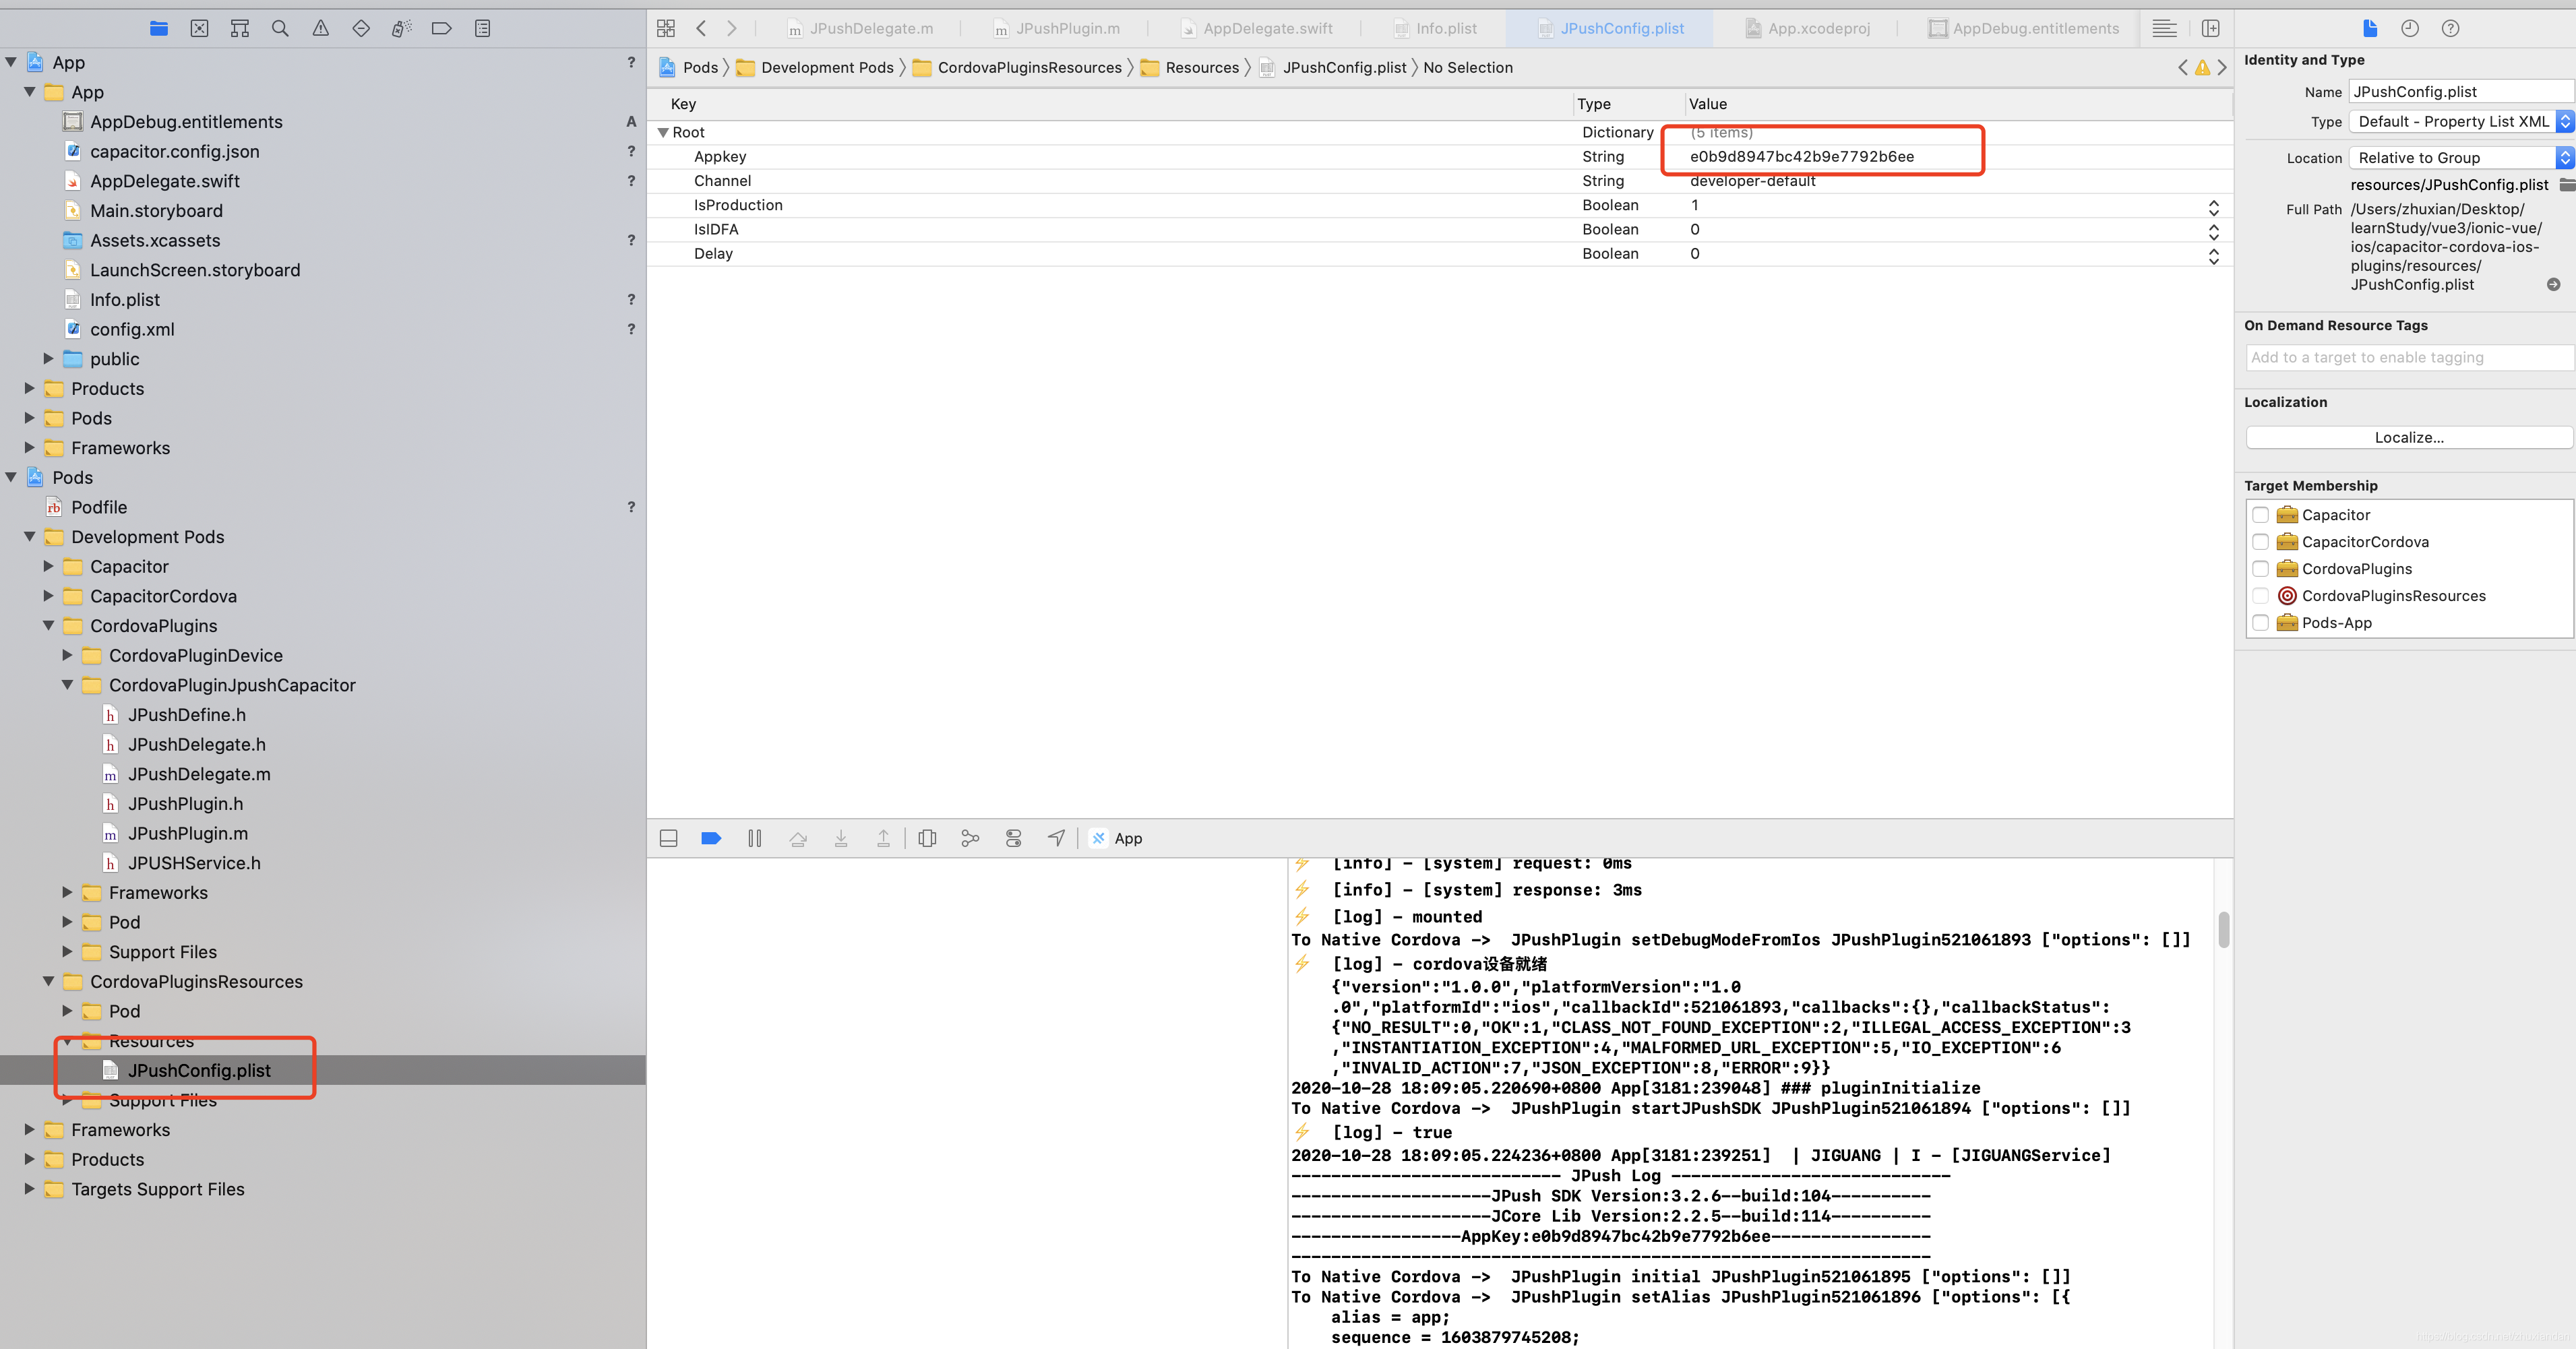
IOS 设置APPKEY:
ionic cap add ios
ionic cap sync
Xcode打开IOS项目,找到如下图中的jpush配置文件,替换成自己项目的APPKEY:
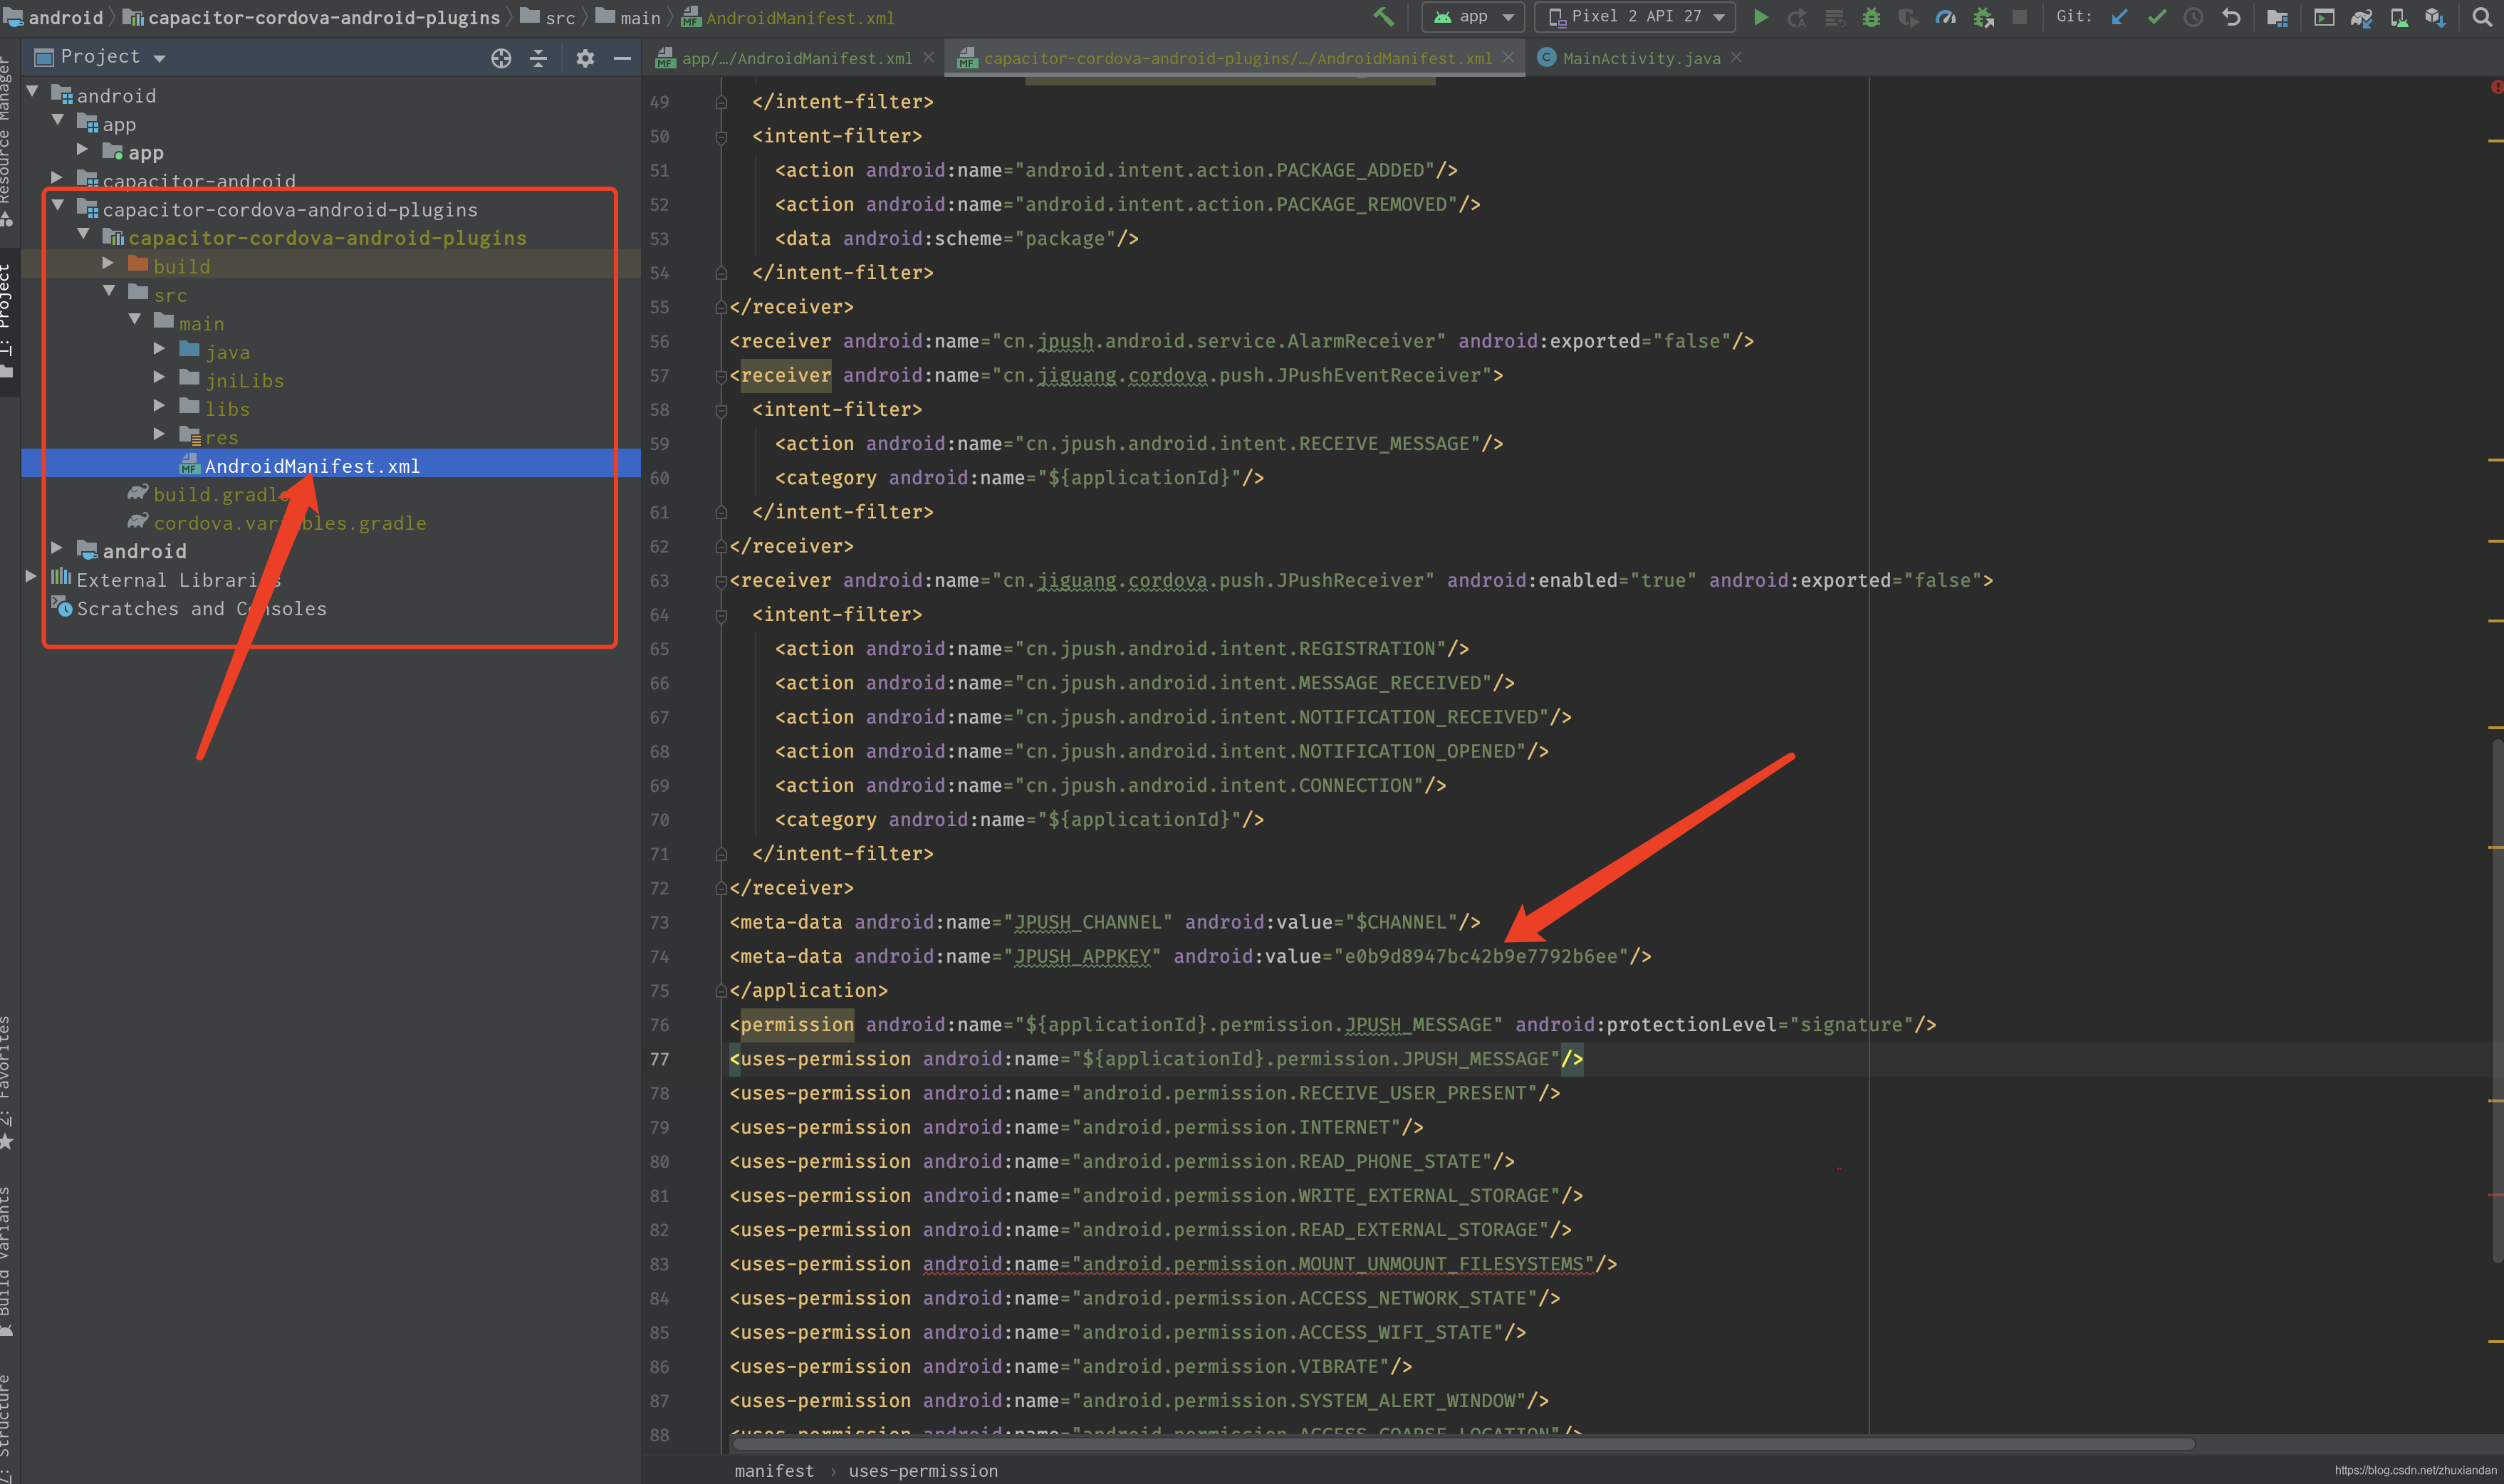
Android设置APPKEY:
ionic cap add android
ionic cap sync
AndroidStudio打开生成的Android项目,找到如下图的标记文件,将APPKEY替换成自己的:
TS中使用,我是用ionic+vue3+capacitor, 纯属用来试水,新建src/utils/jpush.ts文件:
import { isPlatform } from '@ionic/vue';
class Jpush {
    jpush: any;

    constructor() {
        if (window.JPush) {
            this.jpush = window.JPush;
            this.jpush.setDebugMode(true);
            if (isPlatform('ios')) {
                this.jpush.startJPushSDK();
            }
            this.jpush.init();
        }
    }

    getRegistrationID() {
        return new Promise(resolve => {
            this.jpush.getRegistrationID(function (rId: string) {
                resolve(rId);
                console.log("JPushPlugin:registrationID is " + rId);
            })
        })
    }

    // 设置别名
    setAlias(alias: string) {
        return new Promise(((resolve, reject) => {
            this.jpush.setAlias({
                alias,
                sequence: new Date().valueOf(),
            },  (res: { alias: string, sequence: number }) => {
                console.log('别名设置成功: ', res);
                resolve(res);
            },  (err: { code: number, sequence: number }) => {
                console.log('别名设置失败: ', err);
                setTimeout(() => this.setAlias(alias), 3000);
                reject(err);
            })
        }))

    }

    // 设置角标 只限IOS
    setBadge(badge: number) {
        if (isPlatform('ios')) {
            this.jpush.setBadge(badge);
        }
    }
}

export default Jpush
App.vue中使用:
<template>
  <ion-app>
    <ion-router-outlet />
  </ion-app>
</template>

<script lang="ts">
import { Plugins } from "@capacitor/core";
import { defineComponent, onMounted } from 'vue';
import { IonApp, IonRouterOutlet } from '@ionic/vue';
import jpush from "@/utils/jpush";
const { SplashScreen } = Plugins;

export default defineComponent({
  name: 'App',
  components: {
    IonApp,
    IonRouterOutlet
  },
  setup() {
    onMounted(() => {
      // 由于是cordova插件,需要在deviceready回调后才能使用,用过Cordova的都懂
      document.addEventListener('deviceready', () => {
        new jpush().setAlias('app');
      })
      setTimeout(() => SplashScreen.hide(), 2000);
    })
  }
});
</script>
由于Capacitor生成的IOS平台自动加入了推送,会导致极光插件获取的DeviceToken无法回传至极光服务器,所以,还需对IOS进行修改:
- 添加IOS平台
ionic cap add ios
ionic cap sync
- 用Xcode打开项目
ionic cap open ios
在工程中新建一个 Objective-C Bridging Header 文件:

在刚生成的Objective-C Bridging Header文件中导入 jpush 头文件

在Appdelegate.swift 文件的 didRegisterForRemoteNotificationsWithDeviceToken 方法中添加如下代码:
func application(application: UIApplication,
    didRegisterForRemoteNotificationsWithDeviceToken deviceToken: NSData) {
      NSNotificationCenter.defaultCenter().postNotificationName("DidRegisterRemoteNotification", object: deviceToken)
      JPUSHService.registerDeviceToken(deviceToken)
  }
另外,在Target中需要加入推送通知权限:

官方Cordova插件ISSUE:https://github.com/jpush/jpush-phonegap-plugin/issues/434


 699
699


 被折叠的 条评论
为什么被折叠?
被折叠的 条评论
为什么被折叠?
 到【灌水乐园】发言


