


原文:http://www.jianshu.com/p/00f671d204d4
Notification Extension
iOS10 添加了很多的Extension,与通知相关的 extension 有两个:Service Extension和 Content Extension。
我们先来了解一下Content Extension,这个东西主要是干啥的呢?
可以通过提前配置的categoryIdentifier来定制推送显示的界面。
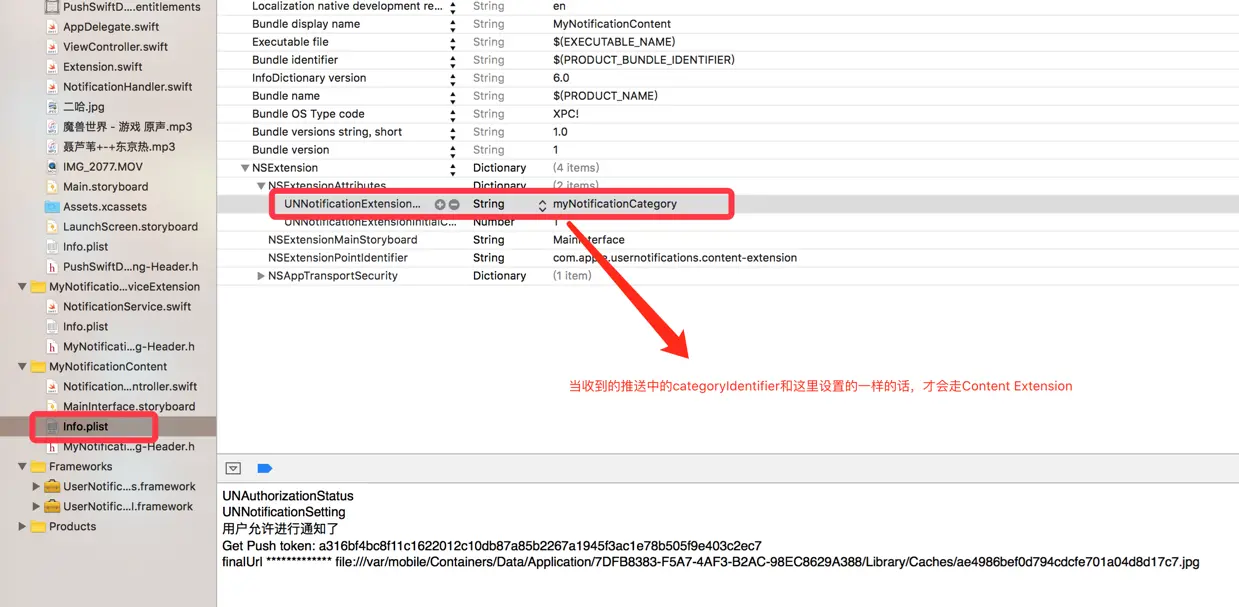
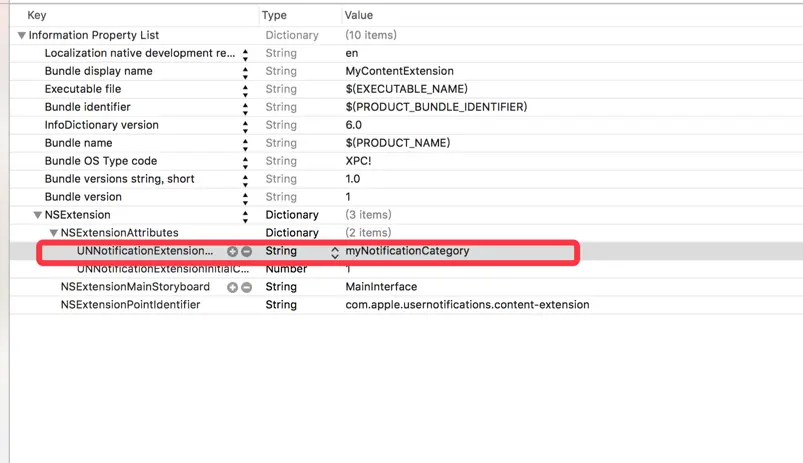
简单来说,在Content Extension的Info.plist中提前配置categoryIdentifier类型,当收到的推送中的categoryIdentifier和Content Extension中提前配置的categoryIdentifier一样就会去走自定义的UI展示。
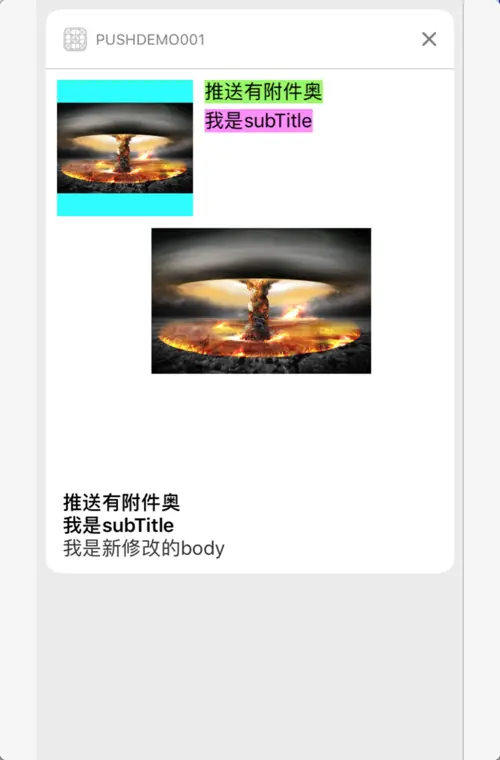
看一下效果图:
把玩一下:
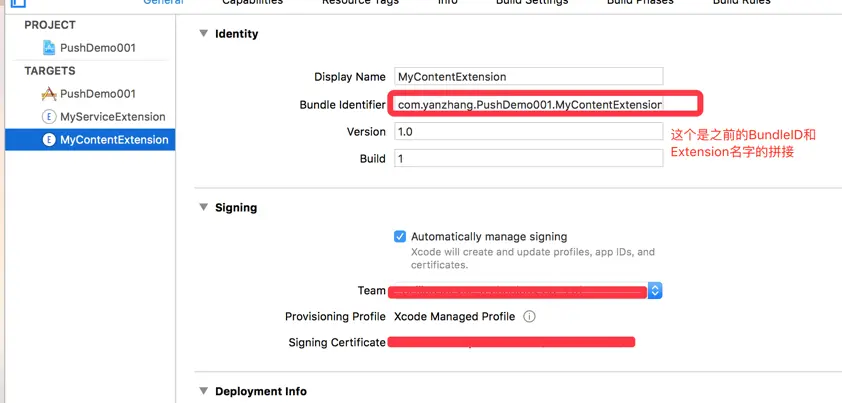
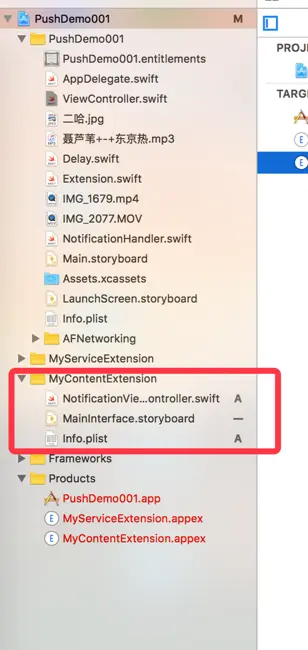
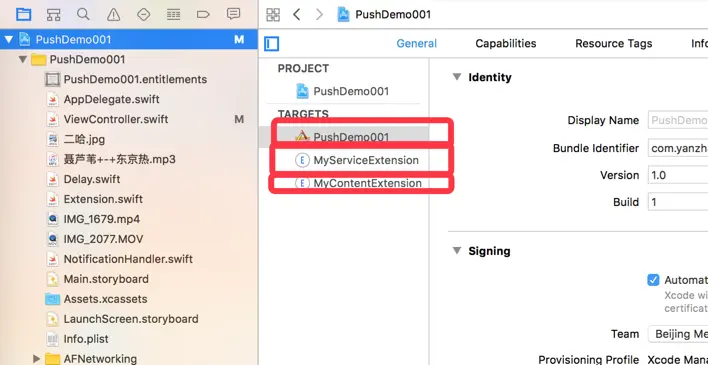
1、创建


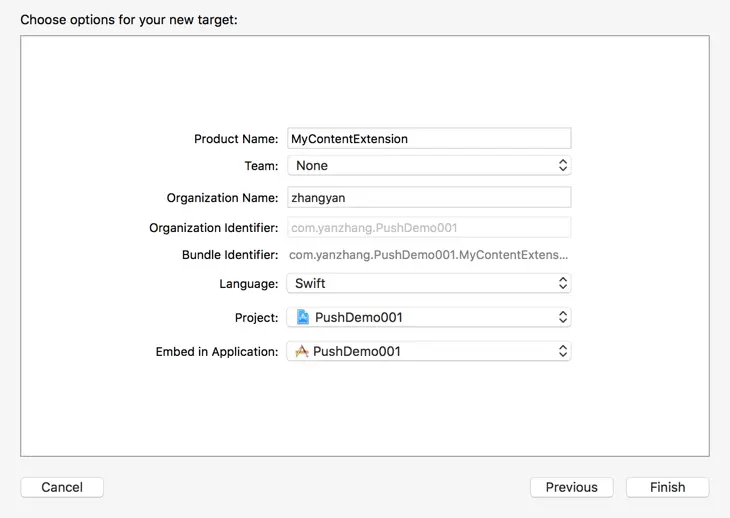
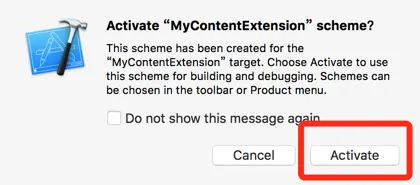
创建完毕相对于之前项目有啥变化:
2、把玩一下
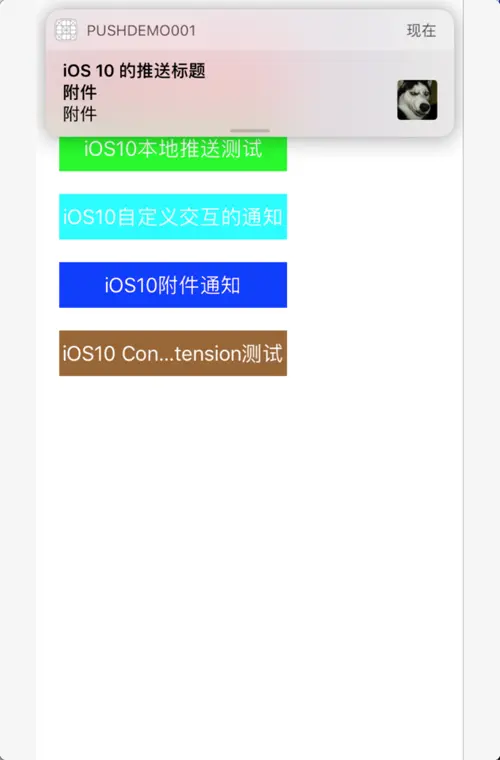
测试发送一个本地推送
// 测试按钮的点击事件5
    func clickBtn5(sender:UIButton) {
        if #available(iOS 10.0, *) {
            // 1、创建推送的内容
            let content = UNMutableNotificationContent()
            content.title = "iOS 10 的推送标题"
            content.body = "附件"
            content.subtitle = "附件"
            content.userInfo = ["name":"张三","age":"20"]
            content.categoryIdentifier = "myNotificationCategory"
            // 2、创建发送触发
            let trigger = UNTimeIntervalNotificationTrigger(timeInterval: 3, repeats: false)
            // 3. 发送请求标识符
            let requestIdentifier = "music"
            // 添加图片
            if let imageURL = Bundle.main.url(forResource: "二哈", withExtension: "jpg"),
                let attachment = try? UNNotificationAttachment(identifier: "imageAttachment", url: imageURL, options: nil)
            {
                content.attachments = [attachment]
            }

            //             添加视频
            //            if let videoURL = Bundle.main.url(forResource: "IMG_2077", withExtension: "MOV"),
            //                let attachment = try? UNNotificationAttachment(identifier: "videoAttachment", url: videoURL, options: nil)
            //            {
            //                content.attachments = [attachment]
            //            }

            //            // 添加音频
            //            if let videoURL = Bundle.main.url(forResource: "聂芦苇+-+东京热", withExtension: "mp3"),
            //                let attachment = try? UNNotificationAttachment(identifier: "voiceAttachment", url: videoURL, options: nil)
            //            {
            //                content.attachments = [attachment]
            //            }

            // 4、创建一个发送请求
            let request = UNNotificationRequest(identifier: requestIdentifier, content: content, trigger: trigger)

            // 5、将请求添加到发送中心
            UNUserNotificationCenter.current().add(request, withCompletionHandler: { (error) in
                if error == nil{
                    print("Time Interval Notification scheduled: \(requestIdentifier)")
                }
            })

        } else {
            // Fallback on earlier versions
        }

} 这个代码和之前讲解的本地推送的代码一样,唯一不一样的就是content.categoryIdentifier = "myNotificationCategory",
为什么要设置content.categoryIdentifier = "myNotificationCategory"?
因为:
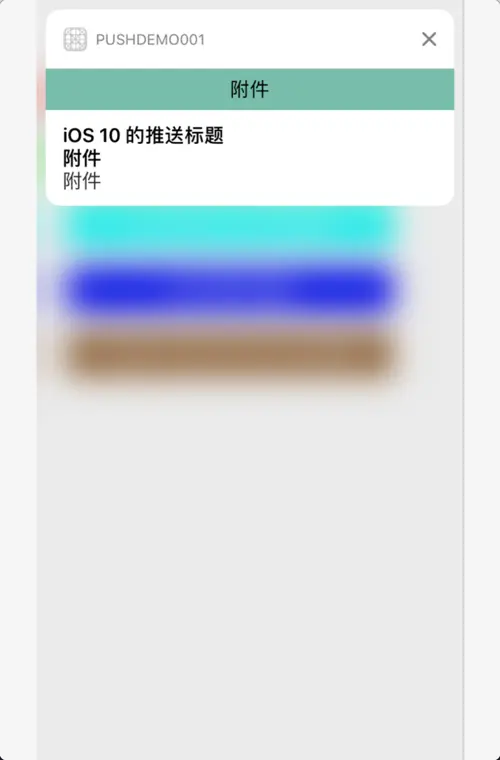
收到推送之后
当下拉通知,查看通知详情的时候就会走相应的断点

什么?你的断点没走?
<1>、首先检查你的推送的content.categoryIdentifier = "myNotificationCategory"
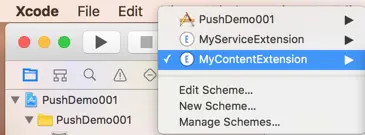
<2>、确定当前调试的tag是Content Extension
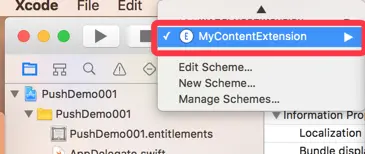
<3>、运行的时候确定选择的app是当前正在运行的app
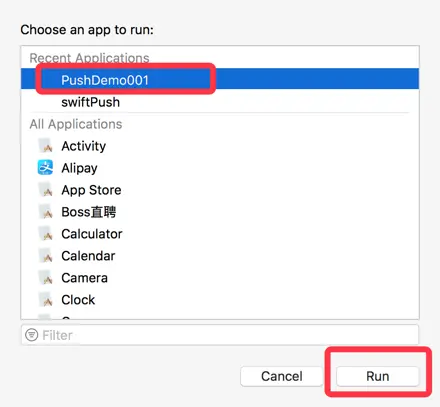
放过断点,查看展示的UI。
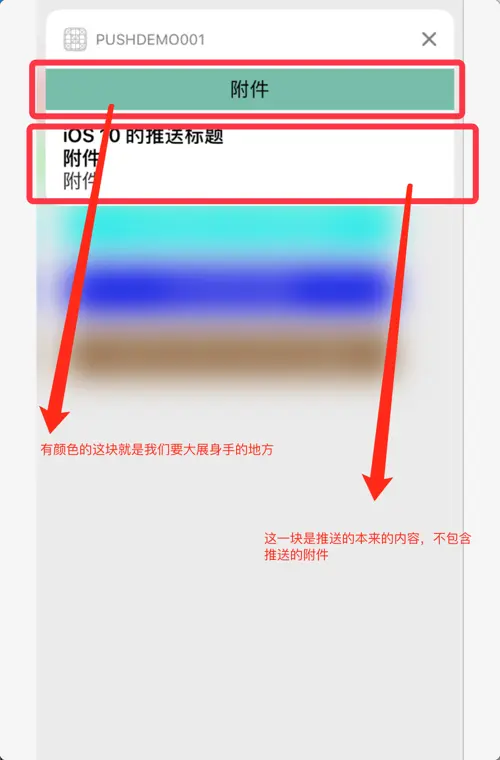
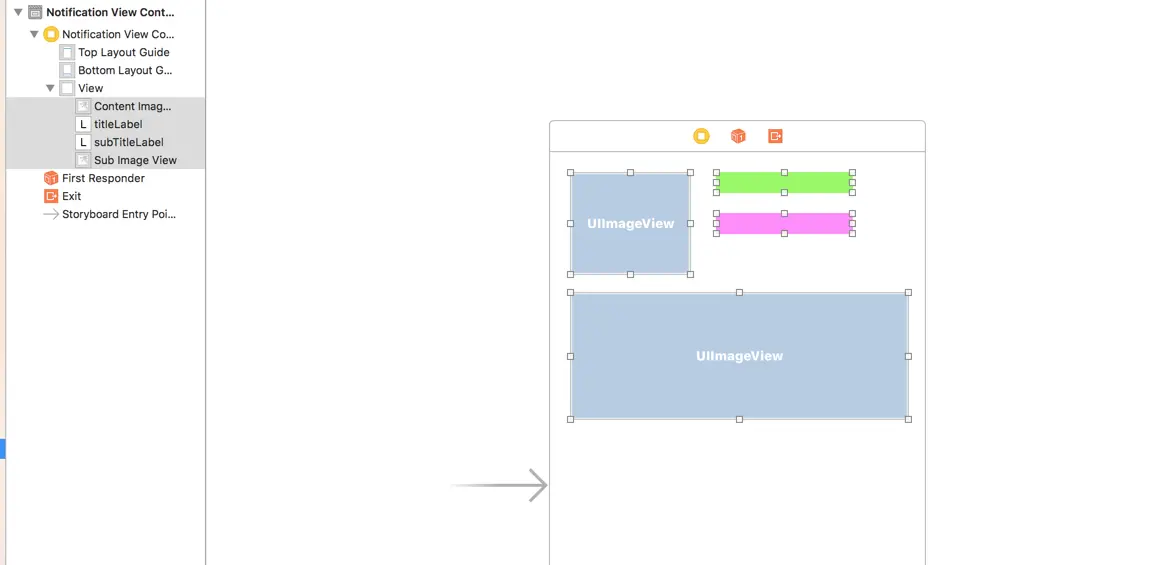
3、定制有颜色的这一部分的UI
还有个地方说一下
Info.plist中的UNNotificationExtensionCategory不仅仅可以定制一个,可以定制多个
变为

代码实现有颜色部分的布局:
@available(iOSApplicationExtension 10.0, *)
func didReceive(_ notification: UNNotification) {
// 1、获取需要显示的内容
let content = notification.request.content
let titleStr = content.title
let subTitleStr = content.subtitle
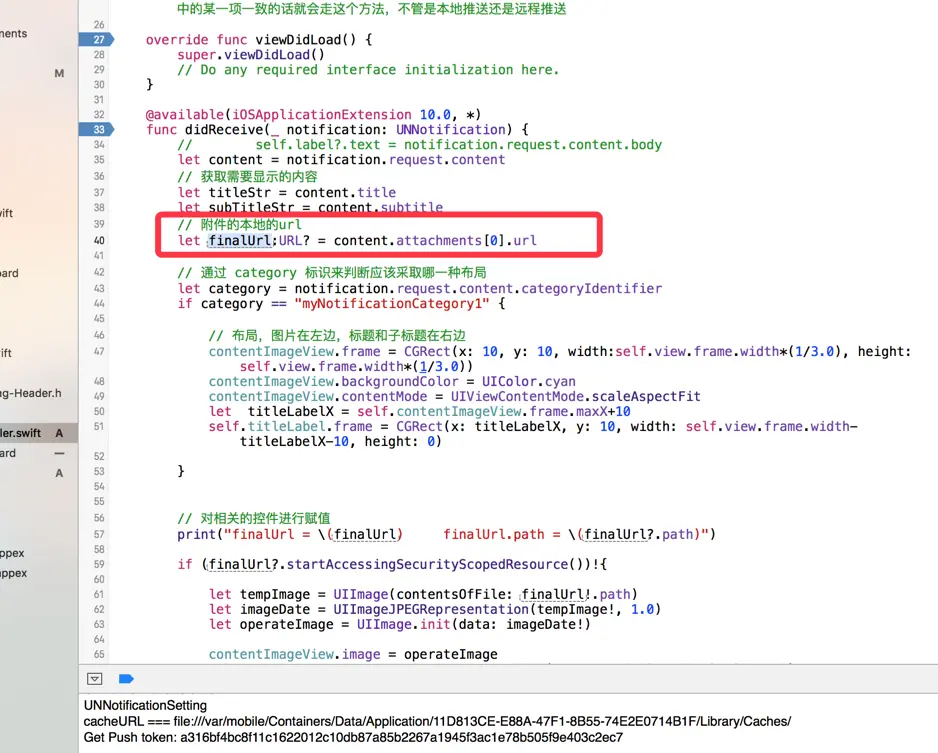
// 附件的本地url
let finalUrl:URL? = content.attachments[0].url
// 2、通过 category 标识来判断应该采取哪一种布局
let category = notification.request.content.categoryIdentifier
if category == "myNotificationCategory1" {
// 布局,图片在左边,标题和子标题在右边
contentImageView.frame = CGRect(x: 10, y: 10, width:self.view.frame.width*(1/3.0), height: self.view.frame.width*(1/3.0))
contentImageView.backgroundColor = UIColor.cyan
contentImageView.contentMode = UIViewContentMode.scaleAspectFit
let titleLabelX = self.contentImageView.frame.maxX+10
self.titleLabel.frame = CGRect(x: titleLabelX, y: 10, width: self.view.frame.width-titleLabelX-10, height: 0)
}
// 3、加载存储在沙盒中的附件
if (finalUrl?.startAccessingSecurityScopedResource())!{
print("finalUrl = \(finalUrl) finalUrl.path = \(finalUrl?.path)")
let tempImage = UIImage(contentsOfFile: finalUrl!.path)
let imageDate = UIImageJPEGRepresentation(tempImage!, 1.0)
let operateImage = UIImage.init(data: imageDate!)
contentImageView.image = operateImage
subImageView.image = operateImage //UIImage(contentsOfFile: finalUrl!.path)
subImageView.contentMode = UIViewContentMode.scaleAspectFit
finalUrl?.stopAccessingSecurityScopedResource()
}
// 更新titleLabel的值
self.titleLabel.text = titleStr
self.titleLabel.sizeToFit()
// 重新布局 subTitleLabel
self.subTitleLabel.frame = CGRect(x: self.titleLabel.frame.minX, y: self.titleLabel.frame.maxY+5, width:self.view.frame.width*(1/3.0), height: 0)
self.subTitleLabel.text = subTitleStr
self.subTitleLabel.sizeToFit()
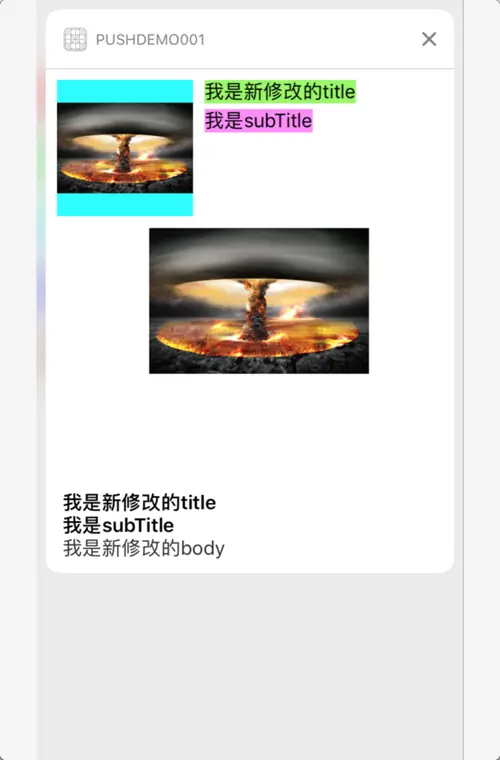
} 本地推送的实现效果

大体的流程实现是这样的:
<1>、如果推送消息中的categoryIdentifier和Content Extension的Info.plist中提前配置UNNotificationExtensionCategory中能找到,那么会自动走Content Extension的类。
<2>、通过不同的categoryIdentifier进行不同的布局,获取自己想要展示的通知中的元素
<3>、如果存在多媒体的话,就直接去获取本地路径<PS:如果是远程推送的话,会先走**Service Extension**,即使有通知附件,也会在这个时候下载下来保存在本地了,所以直接去获取通知的附件url就可以了>
如果Service Extension还不是很清楚的话可以参考
iOS10 通知extension之 Service Extension你玩过了吗?
4、远程推送测试一下
PS:介绍一个好用的测试工具 Kunff
也可以看一下iOS10 远程推送你玩过了吗?更好的了解下iOS10远程推送。
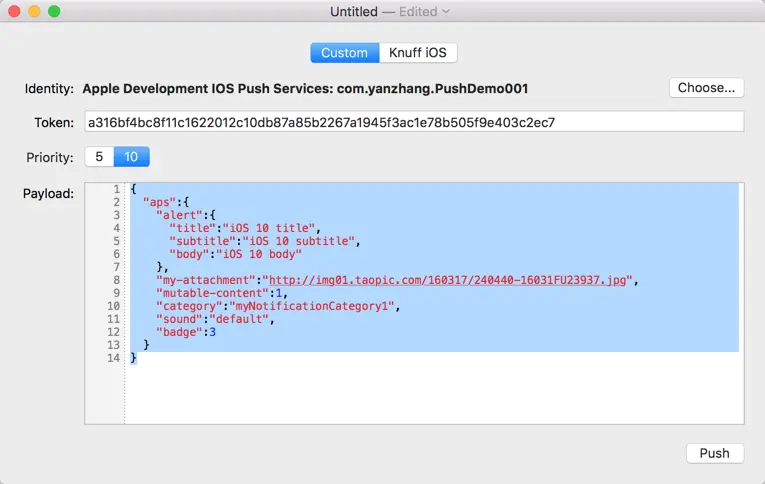
{
"aps":{
"alert":{
"title":"iOS 10 title",
"subtitle":"iOS 10 subtitle",
"body":"iOS 10 body"
},
"my-attachment":"http://img01.taopic.com/160317/240440-16031FU23937.jpg",
"mutable-content":1,
"category":"myNotificationCategory1",
"sound":"default",
"badge":3
}
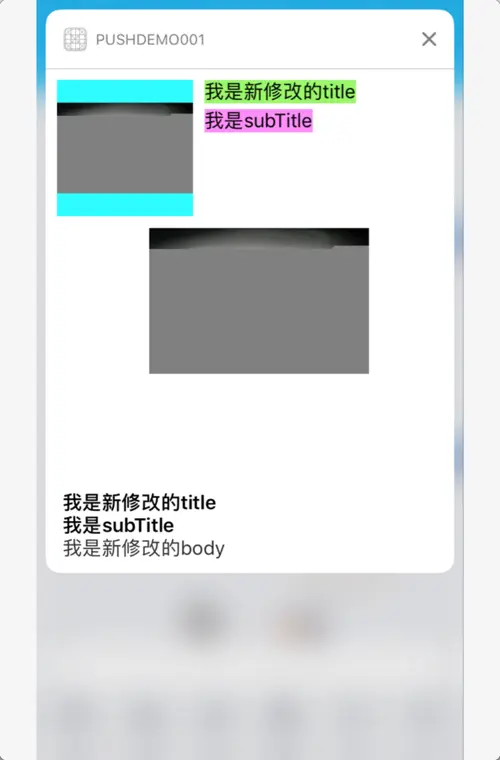
} 实现效果:
4、这里说一下坑点
<1>、刚开始的时候我是这么获取下载图片路径的,因为远程推送在Service Extension的时候就将推送的附件下载到本地,并且保存在沙盒中了,名称我也知道,这个时候我去Content Extension去直接获取这个沙盒地址,去找这个文件的时候,发现找不到。原因是这样的,因为每个target中的沙盒地址不一样。
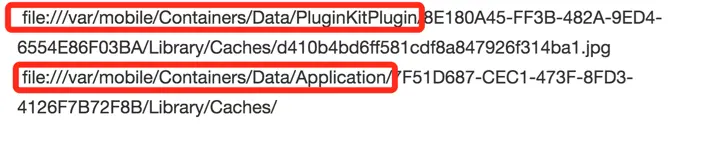
所以这种方法是不可行的。
<2>、直接获取通知的附件的url去加载
然后去直接去用这个路径去获取的话还是获取不到的。
<3>、当需要访问不在 App 自身的沙盒或者自身共享容器里的资源时,需要申请权限访问,使用到 NSURL 的两个方法:
开始安全访问:- (BOOL)startAccessingSecurityScopedResource
停止安全访问:- (void)stopAccessingSecurityScopedResource
也就是需要这么访问
// 附件的本地的url
let finalUrl:URL? = content.attachments[0].url
if (finalUrl?.startAccessingSecurityScopedResource())!{
contentImageView.image = UIImage(contentsOfFile: finalUrl!.path)
subImageView.image = UIImage(contentsOfFile: finalUrl!.path)
subImageView.contentMode = UIViewContentMode.scaleAspectFit
finalUrl?.stopAccessingSecurityScopedResource()
}
但是这么访问另一个奇葩的问题出来了。
本地推送的效果:

远程推送的效果:
报错信息:
ImageIO: createDataWithMappedFile:1322:  'open' failed '/var/mobile/Library/SpringBoard/PushStore/Attachments/com.yanzhang.PushDemo001/c9e9b97a225eeddad295d3a7840101df60d91099.jpeg'
         error = 1 (Operation not permitted)
具体的原因没找到,找到一个类似的原因,说在读取文件的时候,文件被删除了,所以为了阻止这种情况的出现,要先把文件转化成data对象,然后在读取的时候再转成图片。
所以最终的版本:
// 附件的本地的url
  let finalUrl:URL? = content.attachments[0].url
   if (finalUrl?.startAccessingSecurityScopedResource())!{

            let tempImage = UIImage(contentsOfFile: finalUrl!.path)
            let imageDate = UIImageJPEGRepresentation(tempImage!, 1.0)
            let operateImage = UIImage.init(data: imageDate!)

            contentImageView.image = operateImage
            subImageView.image = operateImage //UIImage(contentsOfFile: finalUrl!.path)
            subImageView.contentMode = UIViewContentMode.scaleAspectFit
            finalUrl?.stopAccessingSecurityScopedResource()
        }
最终实现愉快的显示
本地推送,自动布局
远程推送自动布局

5、扩展
<1>、介绍下这个UNNotificationExtensionDefaultContentHidden配置参数
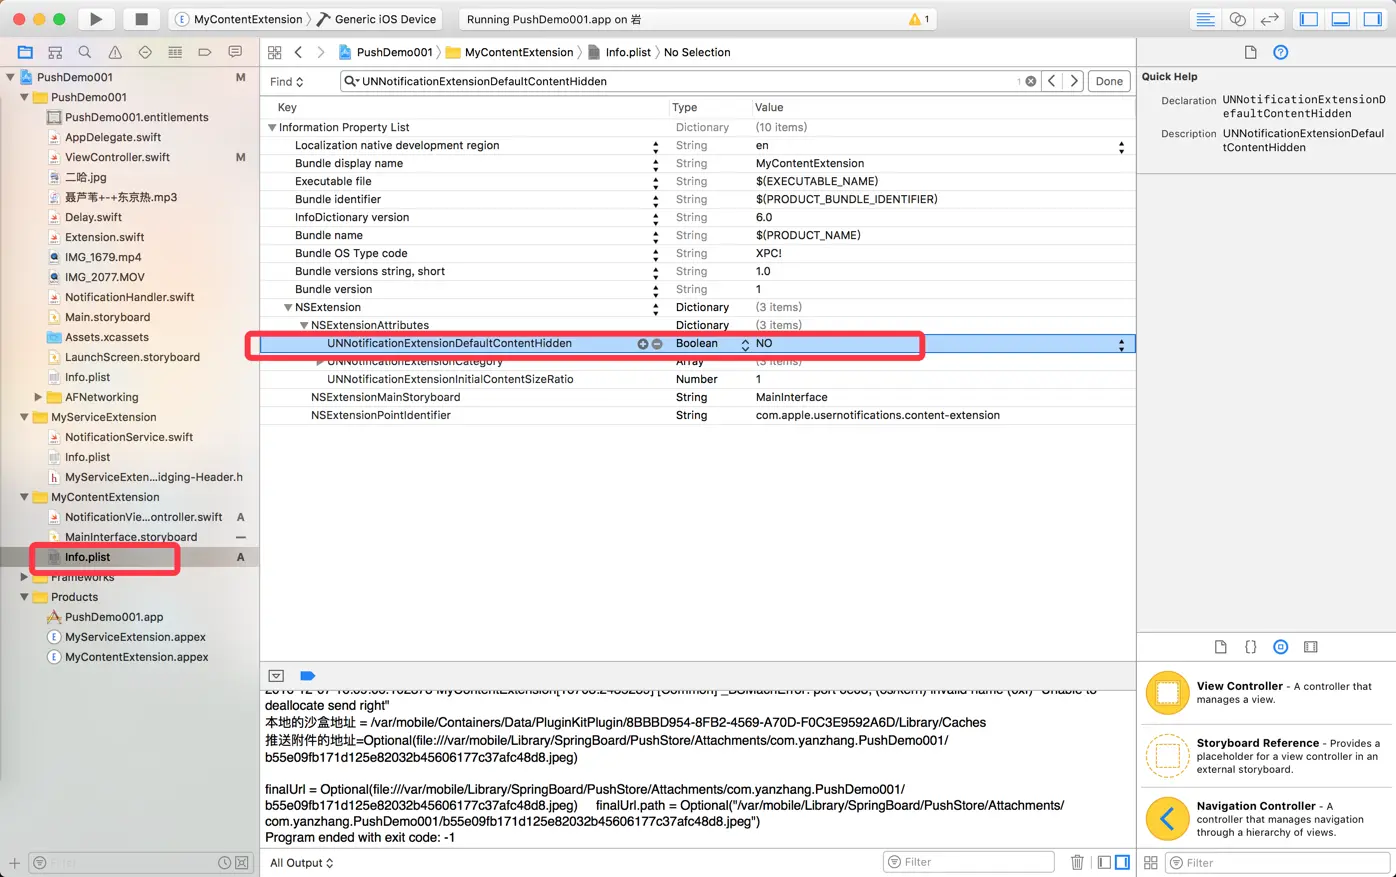
这个参数什么作用?
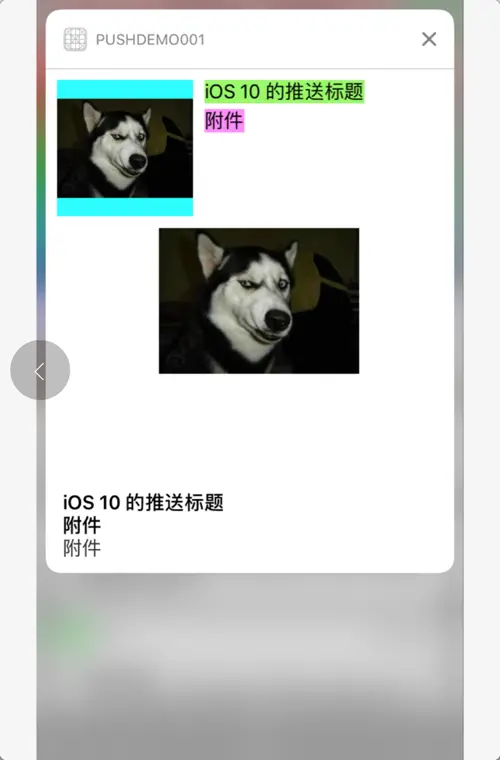
直接看图比较直接,两图顶多言。
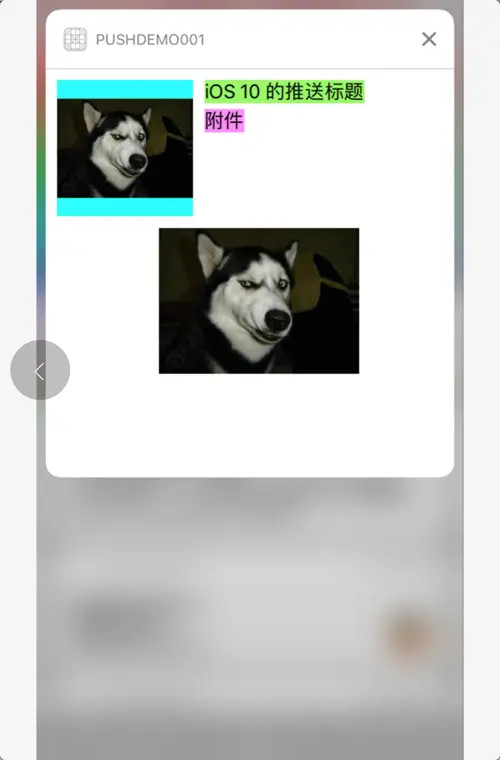
UNNotificationExtensionDefaultContentHidden = YES的时候
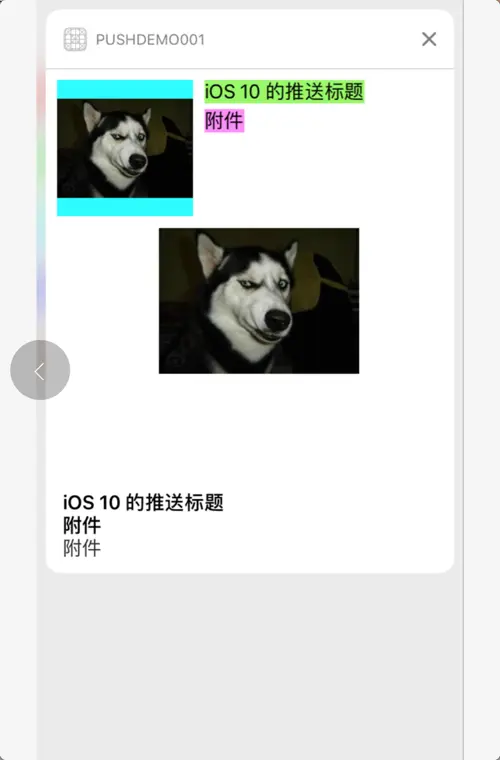
UNNotificationExtensionDefaultContentHidden = NO的时候
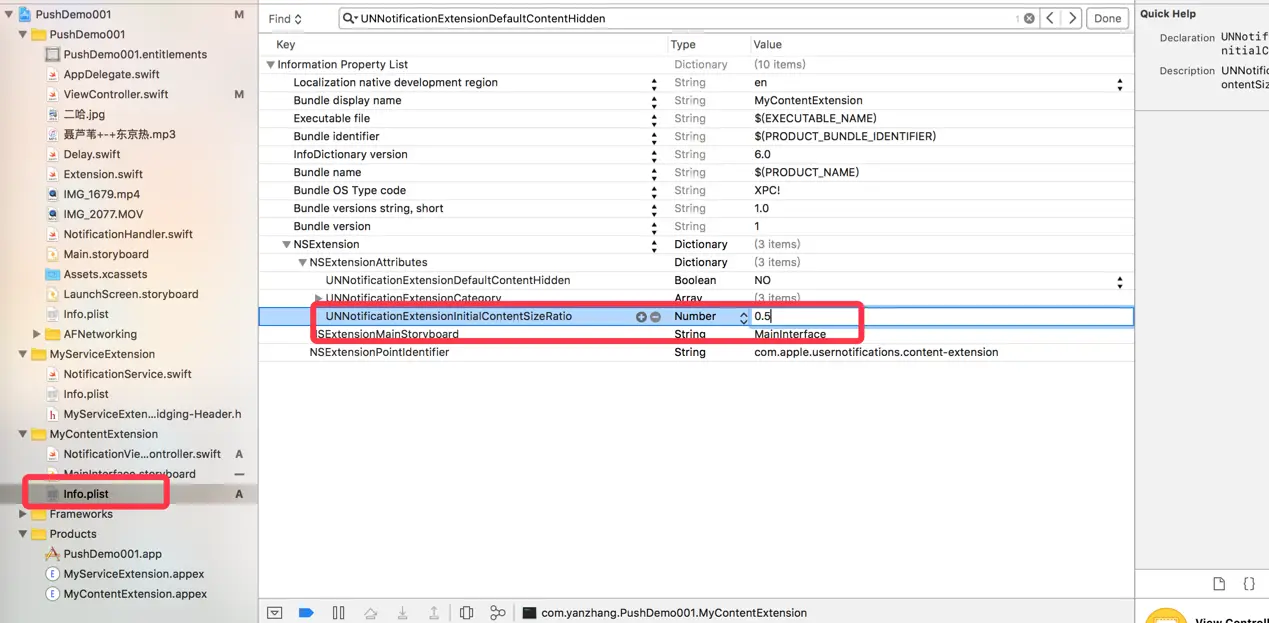
<2>、介绍下这个UNNotificationExtensionInitialContentSizeRatio配置参数
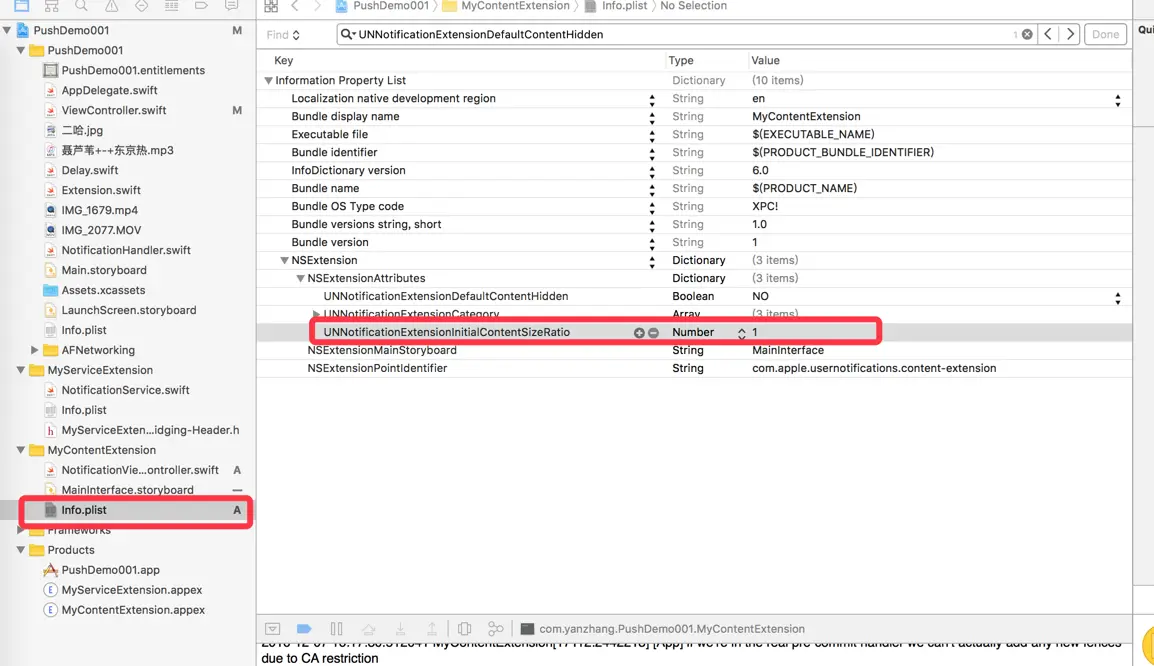
这个参数什么作用?
这个值是一定要有的,系统已经默认创建好了
这个值的类型是一个浮点类型,代表的是高度与宽度的比值。系统会使用这个比值,作为初始化view的大小。举个简单的例子来说,如果该值为1,则该视图为正方
形。如果为0.5,则代表高度是宽度的一半。
注意这个值只是初始化的一个值,在这个扩展添加后,可以重写frame,展示的时候,在我们还没打开这个视图预览时,背景是个类似图片占位的灰色,那个灰色的高度宽度
之比,就是通过这个值来设定。
直接上图

当UNNotificationExtensionInitialContentSizeRatio = 1的时候

<3>、现在的界面要不就太高,要不就太低,怎么搞?来看一下preferredContentSize这个属性。
// 修改整体的高度
preferredContentSize = CGSize(width: UIScreen.main.bounds.width, height: 150)
这样就能动态的计算想要显示的内容的整体的大小了,但是不好的地方就是,等内容加载出来之后会有个变大或者变小的动画。不过还能接受。


最后,献上参考Demo地址:https://github.com/RunOfTheSnail/PushDemo001
参考资料:
http://www.cocoachina.com/ios/20160628/16833.html
https://onevcat.com/2016/08/notification/
http://www.cnblogs.com/lidongq/p/5968923.html
https://developer.apple.com/reference/usernotifications/unnotificationattachment
http://www.jianshu.com/p/2f3202b5e758
http://www.cocoachina.com/ios/20161021/17820.html


 885
885


 被折叠的 条评论
为什么被折叠?
被折叠的 条评论
为什么被折叠?
 到【灌水乐园】发言


