


Android学习——后台程序
在Android系统中我们一直在接触着前台界面程序,其实在一开始接触Android时就听说了,程序就有有界面和无界面之分。后台程序就是这类无界面的程序,它在后台执行,没有影响你的界面。比如短信监听程序,执行在后台,当有短信时才给你们提示,振动或声音;比如闹钟,设定好时间后,在定时通知你;再比如mp3播放器,选择好音乐后,在待在后台唱着,当有电话来时,自动暂停,完后再继续播放。
其实分析下来,我们不难发现,后台程序跟前台程序是一样的,也就是在执行我们指定的程序,只是留给我们两个问题,1.因为没有界面,我们会问,怎么启动,怎么终止?2.因为没有界面,这程序如何通知我们一些信息或状态。
前面的学习让我们知道,一个Activity想Call另一个Activity时,只需要能过中介人Intent就可以了,同样我们与服务处理类打交道也是通过Intent来实现,当然,界面类是继承着Activity,而服务类则是继承着Service类。
启动服务:
// Implicitly start a Service
startService(new Intent(MyService.MY_ACTION));
// Explicitly start a Service
startService(new Intent(this, MyService.class));
停止服务:
stopService(new Intent(this, MyService.class));
同样,跟Activity一样的生命期中,系统也会自动跟据不同的状态来调用继承函数:
@Override
public void onCreate()
public IBinder onBind(Intent intent)
public void onStart(Intent intent, int startId)
。。。
在实际的开发中,我们一般都不会直接写一个服务类,一般都会写一个与后台程序相配套的前台程序,一般的程序总会有一些配置吧~~,然后这个界面中就可以很方便地来控制后台程序的运作。
我们来回答第二个问题,就是在服务中我们怎么发起一个通知给用户,在Andorid中,提供了以下几种方式:
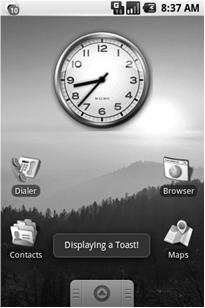
1. Toast
这是一个无模式的小窗体,会将显示的信息显示在首页面中:
实现代码是:
Context context = getApplicationContext();
String msg = “To the bride an groom!”;
int duration = Toast.LENGTH_SHORT;
Toast toast = Toast.makeText(context, msg, duration);
int offsetX = 0;
int offsetY = 0;
toast.setGravity(Gravity.BOTTOM, offsetX, offsetY);
toast.show();
当然,你也可以显示更杂的,可以将一个控制直接当成一个Toast显示出来,也可以自定义一个控件显示出来,自定义控件的强大是大家都知道的~~
2. Notifications
这种方式是系统中比较通用的模式,通过这种方式你可以使系统:将一个图标在状态条上闪,让机器震动,发出声音等。
实现代码:
String svcName = Context.NOTIFICATION_SERVICE;
NotificationManager notificationManager;
notificationManager = (NotificationManager)getSystemService(svcName);
// Choose a drawable to display as the status bar icon
int icon = R.drawable.icon;
// Text to display in the status bar when the notification is launched
String tickerText = “Notification”;
// The extended status bar orders notification in time order
long when = System.currentTimeMillis();
Notification notification = new Notification(icon, tickerText, when);
Context context = getApplicationContext();
// Text to display in the extended status window
String expandedText = “Extended status text”;
// Title for the expanded status
String expandedTitle = “Notification Title”;
// Intent to launch an activity when the extended text is clicked
Intent intent = new Intent(this, MyActivity.class);
PendingIntent launchIntent = PendingIntent.getActivity(context, 0, intent, 0);
notification.setLatestEventInfo(context, expandedTitle,expandedText,launchIntent);
触发方式:
int notificationRef = 1;
notificationManager.notify(notificationRef, notification);
学会了Activity再写个后台程序也就不难了!!
这里顺便再提一下,在Android系统中也提供了多线程编程,我们知道不管是前台还是后台程序,都有生命期的,当程序不活动时,我们想继续让程序执行,这里我们需要用到线程了,在Android系统中使用线程,跟我们直接写java线程程序非常想似:
// This method is called on the main GUI thread.
private void mainProcessing() {
// 主程序中启动线程.
Thread thread = new Thread(null, doBackgroundThreadProcessing, “Background”);
thread.start();
}
// Runnable that executes the background processing method.
private Runnable doBackgroundThreadProcessing = new Runnable() {
public void run() {
//线程执行内容。。。
}
};


 4692
4692

 被折叠的 条评论
为什么被折叠?
被折叠的 条评论
为什么被折叠?
 到【灌水乐园】发言


