


fastdfs结构说明

一 、FastDFS--tracker安装
1 FastDFS安装环境
FastDFS是C语言开发,建议在linux上运行,本教程使用Centos7.4作为安装环境。
安装gcc 依赖环境 yum install gcc-c++ -y
- 安装libevent
2.1 yum -y install libevent
3 安装libfastcommon
1、上传压缩包文件libfastcommonV1.0.7.tar.gz 到 /usr/local目录下,并解压。
2、tar -zxvf libfastcommonV1.0.7.tar.gz
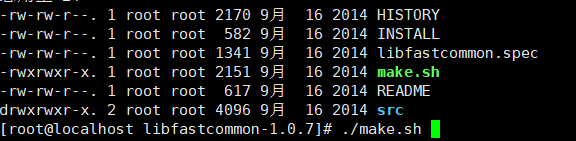
3、进入到解压后的文件夹中

4、进行编译 ./make.sh
5、如果出现编译perl 不识别 运行下面这段命令
# yum -y install zlib zlib-devel pcre pcre-devel gcc gcc-c++ openssl openssl-devel libevent libevent-devel perl unzip net-tools wget
安装 ./make.sh install

注意:libfastcommon安装好后会自动将库文件拷贝至/usr/lib64下,由于FastDFS程序引用usr/lib目录所以需要将/usr/lib64下的库文件拷贝至/usr/lib下。
# cp /usr/lib64/libfastcommon.so /usr/lib
- tracker编译安装
- 上传资料FastDFS_v5.05.tar.gz到 /usr/local 目录下
2、解压编译安装
tar -zxvf FastDFS_v5.05.tar.gz
cd FastDFS
./make.sh
./make.sh install
3、安装成功之后,将安装目录下的conf下的文件拷贝到/etc/fdfs/下。
cd conf
cp * /etc/fdfs/
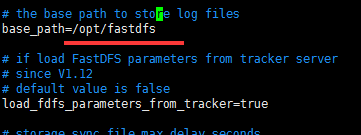
4、修改配置文件
vim /etc/fdfs/tracker.conf

- 创建fastdfs文件夹
- mkdir /opt/fastdfs
5 设置启动项
mkdir /usr/local/fdfs
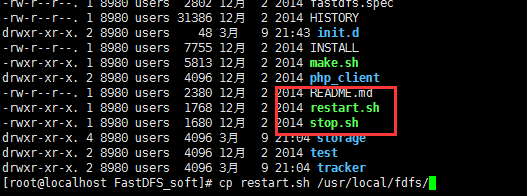
拷贝安装目录下stop.sh 和restart.sh 到/usr/local/fdfs/
cp restart.sh /usr/local/fdfs/
cp stop.sh /usr/local/fdfs/
修改启动脚本
vim /etc/init.d/fdfs_trackerd


把启动脚本中的路径按照上图修改
修改完毕后
注册服务
chkconfig --add fdfs_trackerd
然后可以用service fdfs_trackerd start 启动测试 如下图

二、FastDFS--storage安装
1 修改配置文件
vim /etc/fdfs/storage.conf


2 创建fdfs_storage文件夹
mkdir /opt/fastdfs/fdfs_storage
3 设置启动服务
vim /etc/init.d/fdfs_storaged


chkconfig - -add fdfs_storaged
启动服务
service fdfs_storaged start

4功能文件目录总结说明
| /opt/fastdfs/ | 数据文件及日志 |
| /usr/bin/fdfs_trackerd 、 fdfs_storaged | 启动执行程序 |
| /usr/local/fdfs/ stop.sh 、 restart.sh | 关闭、重启脚本 |
| /etc/init.d/fdfs_tracked 、fdfs_storaged | 服务启动脚本 |
| /etc/fdfs/ | 配置文件 |
5 上传图片测试
FastDFS安装成功可通过/usr/bin/fdfs_test测试上传、下载等操作。
修改/etc/fdfs/client.conf
[root@localhost ~]# vim /etc/fdfs/client.conf
base_path=/opt/fastdfs
tracker_server=192.168.67.163:22122

比如将/root下的日志上传到FastDFS中:
/usr/bin/fdfs_test /etc/fdfs/client.conf upload /root/winteriscoming.jpg

对应的上传路径:
/opt/fastdfs/fdfs_storage/data /00/00/wKhDo1qipbiAJC6iAAB1tayPlqs094_big.jpg

三、FastDFS整合nginx
1 安装前配置fastdfs-nginx-module
上传fastdfs-nginx-module_v1.16.tar.gz上传到 /usr/local,并解压
tar -zxvf fastdfs-nginx-module_v1.16.tar.gz
编辑配置文件:修改config文件将/usr/local/路径改为/usr/
vim fastdfs-nginx-module/src/config

将FastDFS-nginx-module/src下的mod_fastdfs.conf拷贝至/etc/fdfs/下
[root@localhost src]# cp mod_fastdfs.conf /etc/fdfs/
并修改mod_fastdfs.conf的内容:
vim /etc/fdfs/mod_fastdfs.conf
继续修改

继续修改 url中包含group名称

继续修改 #指定文件存储路径

将libfdfsclient.so拷贝至/usr/lib下
[root@localhost src]# cp /usr/lib64/libfdfsclient.so /usr/lib/
2 安装fastdfs-nginx-module
创建nginx/client目录
[root@localhost src]# mkdir -p /var/temp/nginx/client
cd nginx的原始程序目录
| ./configure \ --prefix=/usr/local/nginx \ --pid-path=/var/run/nginx/nginx.pid \ --lock-path=/var/lock/nginx.lock \ --error-log-path=/var/log/nginx/error.log \ --http-log-path=/var/log/nginx/access.log \ --with-http_gzip_static_module \ --http-client-body-temp-path=/var/temp/nginx/client \ --http-proxy-temp-path=/var/temp/nginx/proxy \ --http-fastcgi-temp-path=/var/temp/nginx/fastcgi \ --http-uwsgi-temp-path=/var/temp/nginx/uwsgi \ --http-scgi-temp-path=/var/temp/nginx/scgi \ --add-module=/opt/fastdfs-nginx-module/src |
| ./configure --add-module=/opt/fastdfs-nginx-module/src |
配置成功

编译
[root@localhost nginx-1.12.2]# make
安装
[root@localhost nginx-1.12.2]# make install
3 编辑nginx.conf
vim /usr/local/nginx/conf/nginx.conf
| server { listen 80; server_name file.gmall.com; #charset koi8-r; #access_log logs/host.access.log main; location / { root html; index index.html index.htm; } location /group1/M00/ { ngx_fastdfs_module; } |
启动nginx
/usr/local/nginx/sbin/nginx
设置开机启动
[root@iZ2zednyjjxxq7k3i2dwsfZ nginx-1.12.2]# vim /etc/rc.d/rc.local

需要关闭防火墙
service iptables stop
永久关闭 chkconfig iptables off
测试
/usr/bin/fdfs_test /etc/fdfs/client.conf upload /root/ty.jpg

显示结果:

4 问题排查
打开vim /usr/local/nginx/conf/nginx.conf

然后去logs/error.log 查看报错。
四、 附:nginx注册服务脚本
| #!/bin/bash #chkconfig:2345 21 91 #decription: nginx-server nginx=/usr/local/nginx/sbin/nginx case "$1" in start) netstat -anlpt | grep nginx if [ $? -eq 0 ] then echo " the nginx-server is already running" else echo " ther nginx-server is starting to run" $nginx fi ;; stop) netstat -anlpt | grep nginx if [ $? -eq 0 ] then $nginx -s stop if [ $? -eq 0 ] then echo " the nginx-server is stopped " else echo " failed to stop the nginx-server" fi else echo " the nginx-server has stopped you needn't to stop it " fi ;; restart) $nginx -s reload if [ $? -eq 0 ] then echo "the nginx-server is restarting " else echo " the nginx-server failed to restart" fi ;; status) netstat -anlpt | grep nginx if [ $? -eq 0 ] then echo " the nginx-server is running " else echo " the nginx-server is not running ,please try again" fi ;; status) netstat -anlpt | grep nginx if [ $? -eq 0 ] then echo " the nginx-server is running " else echo " the nginx-server is not running ,please try again" fi ;; *) echo "please enter { start|stop|status|restart}" ;; esac |


 310
310


 被折叠的 条评论
为什么被折叠?
被折叠的 条评论
为什么被折叠?
 到【灌水乐园】发言


