


安装Master节点,后期用于安装监控OpenStack物理主机,下载系统:http://mirror.centos.org/centos-7/7.2.1511/isos/x86_64/ ,制作系统镜像并完整版安装。
配置PXE服务
安装需求包
yum -y install syslinux xinetd tftp-server
mkdir /var/lib/tftpboot/pxelinux.cfg
cp /usr/share/syslinux/pxelinux.0 /var/lib/tftpboot/
编辑并启动TFTP
sed -i "s/disable = yes/disable = no/" /etc/xinetd.d/tftp
systemctl start xinetd.service
systemctl enable xinetd.service
配置并启动DHCP服务
根据自己需求配置DHCP服务的IP地址
# specify domain name
option domain-name "master";
# specify name server's hostname or IP address
#option domain-name-servers master;
option domain-name-servers   172.23.253.10;
# add follows near line 8 (specify PXE server's hostname or IP for "next-server")
filename        "pxelinux.0";
next-server     172.23.253.10;
# default lease time
default-lease-time 600;
# max lease time
max-lease-time 7200;
# this DHCP server to be declared valid
authoritative;
# specify network address and subnet mask
subnet 172.23.253.0 netmask 255.255.255.0 {
    # specify the range of lease IP address
    range dynamic-bootp 172.23.253.11 172.23.253.30;
    # specify broadcast address
    option broadcast-address 172.23.253.255;
    # specify default gateway
option routers 172.23.253.1;
}
systemctl start dhcpd.service
systemctl enable dhcpd.service配置网络安装
下载ISO镜像并配置系统镜像
mkdir -p /var/pxe/centos7
mkdir /var/lib/tftpboot/cv
mount -t iso9660 -o loop /home/iso/CentOS-7-x86_64-DVD-1503-01.iso /var/pxe/centos7
cp /var/pxe/centos7/images/pxeboot/vmlinuz /var/lib/tftpboot/centos7/
cp /var/pxe/centos7/images/pxeboot/initrd.img /var/lib/tftpboot/centos7/
cp /usr/share/syslinux/menu.c32 /var/lib/tftpboot/
编辑/var/lib/tftpboot/pxelinux.cfg/default文件
timeout 100
default menu.c32
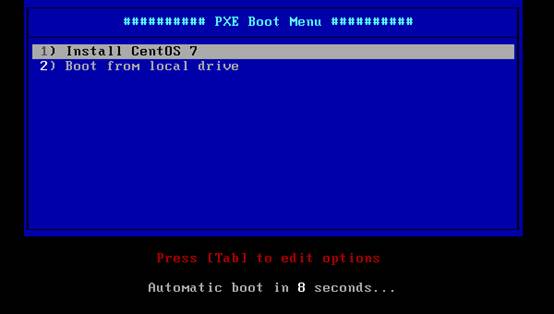
menu title ########## PXE Boot Menu ##########
label 1
menu label ^1) Install CentOS 7
kernel centos7/vmlinuz
# append initrd=centos7/initrd.img method=http://10.0.0.30/centos7 devfs=nomount
append initrd=centos7/initrd.img method=http://172.23.253.10/centos7 devfs=nomount
label 2
menu label ^2) Boot from local drive
localboot安装并启动HTTP服务
yum -y install httpd
rm -f /etc/httpd/conf.d/welcome.conf
# line 86: change to admin's email address
ServerAdmin root@master
# line 95: change to your server's name
ServerName master:80
# line 151: change
AllowOverride All
# line 164: add file name that it can access only with directory's name
DirectoryIndex index.html index.cgi index.php
# add follows to the end
# server's response header
ServerTokens Prod
# keepalive is ON
KeepAlive On编辑/etc/httpd/conf.d/pxeboot.conf文件
Alias /centos7 /var/pxe/centos7
<Directory /var/pxe/centos7>
    Options Indexes FollowSymLinks
    # IP address you allow to access
    Require ip 127.0.0.1 172.23.253.0/24
</Directory>
配置Kickstart 安装
生成加密root密码
 python -c 'import crypt,getpass; print(crypt.crypt(getpass.getpass(), \
crypt.mksalt(crypt.METHOD_SHA512)))'
mkdir /var/www/html/ks 编辑www/html/ks/centos7-ks.cfg文件
#version=RHEL7
# System authorization information
auth --enableshadow --passalgo=sha512
# Run the Setup Agent on first boot
firstboot --enable
ignoredisk --only-use=sda
# Keyboard layouts
keyboard --vckeymap=us --xlayouts='us'
# System language
lang en_US.UTF-8
# Network information
# network  --bootproto=static --device=enp2s0 --gateway=172.23.253.1 --ip=172.23.253.23 --nameserver=8.8.8.8 --netmask=255.255.255.0
network  --bootproto=dhcp --device=enp3s0 --onboot=off
network  --hostname=compute
# Root password SWPUcs406host
rootpw --iscrypted $6$uzrMHOx.wEDIqNmV$ztVy/fnSjKj/SzcT9xeHInjsfgdlr0ndj0aQbbsZuYZdAnh.zHhbZlnGQu3xmqWafb.oHTTtIlt.lc3Ztq0rn0
# System timezone
timezone Asia/Shanghai --isUtc --nontp
user --name=compute --password=$6$uzrMHOx.wEDIqNmV$ztVy/fnSjKj/SzcT9xeHInjsfgdlr0ndj0aQbbsZuYZdAnh.zHhbZlnGQu3xmqWafb.oHTTtIlt.lc3Ztq0rn0 --iscrypted --gecos="Compute"
# System bootloader configuration
bootloader --location=mbr --boot-drive=sda
# Partition clearing information
clearpart --all --initlabel --drives=sda
# Disk partitioning information
part pv.12 --fstype="lvmpv" --ondisk=sda --size=855608
part /boot --fstype="xfs" --ondisk=sda --size=1000
volgroup centos --pesize=4096 pv.12
logvol /  --fstype="xfs" --size=791600 --name=root --vgname=centos
logvol swap  --fstype="swap" --size=64000 --name=swap --vgname=centos
# 这里主要是最小化安装,根据自己的需求添加需要安装的软件
%packages
@base
@core
vim
net-tool
wget
ntp
%end
chmod 644 /var/www/html/ks/centos7-ks.cfg
systemctl restart httpd.service安装系统,在BIOS下设置安装的物理主机以网络启动,然后进入系统安装:
配置网络
HOST_IP=$(ifconfig |grep 'inet '|awk '{ print $2}'|grep '172')
sed -i "s/BOOTPROTO=dhcp/BOOTPROTO=static/" /etc/sysconfig/network-script/ifcfg-enp3s0
echo IPADDR=${HOST_IP} >> /etc/sysconfig/network-script/ifcfg-enp3s0
echo NETMAST=255.255.255.0 >> /etc/sysconfig/network-script/ifcfg-enp3s0
echo GATEWAY=172.23.253.1 >> /etc/sysconfig/network-script/ifcfg-enp3s0
echo DNS1=172.16.245.2 >> /etc/sysconfig/network-script/ifcfg-enp3s0

sed -i "s/BOOTPROTO=dhcp/BOOTPROTO=static/" /etc/sysconfig/network-script/ifcfg-enp2s0
echo IPADDR=10.0.0.x >> /etc/sysconfig/network-script/ifcfg-enp2s0
echo NETMAST=255.255.255.0 >> /etc/sysconfig/network-script/ifcfg-enp2s0
echo GATEWAY=10.0.0.1 >> /etc/sysconfig/network-script/ifcfg-enp2s0

systemctl restart network.service
设置无密码登录
ssh-keygen -t dsa -f ~/.ssh/id_dsa -N ""
cp ~/.ssh/id_dsa.pub ~/.ssh/authorized_keys
scp -rf ~/.ssh/ NODES:
systemctl restart sshd.service参考文章:http://www.server-world.info/en/note?os=CentOS_7&p=pxe&f=1


 被折叠的 条评论
为什么被折叠?
被折叠的 条评论
为什么被折叠?
 到【灌水乐园】发言


