


目录
1 association 和 collection 介绍
在之前的 SQL 映射文件中提及了 resultMap 元素的 association 和 collection 标签,这两个标签是用来关联查询的,它们的属性几乎一致,以下是对它们属性的描述,红色标注的是常用属性。
| 属性 | 描述 |
|---|---|
| property | 实体类属性名 |
| column | 数据库字段名或者其别名 |
| javaType | 实体类属性的 Java 类型 |
| jdbcType | 数据库列的数据类型 |
| ofType | 指定关联对象的类型。它通常用于泛型类型的情况,以确保正确的类型转换 |
| select | 指定一个子查询,用于加载关联的对象 |
| fetchType | 用于控制加载策略,比如立即加载还是延迟加载。常见的取值有 lazy(延迟加载)和 eager(立即加载) |
| resultMap | 引用预定义的结果映射,以便更灵活地配置关联对象的映射规则 |
| resultSet | 指定结果集的名称,以便在多结果集的情况下进行区分 |
| autoMapping | 是否自动映射所有列到目标对象的属性上。默认为 true,表示自动映射;设置为 false 则表示不自动映射 |
| columnPrefix | 当使用内连接查询时,这个属性可以用来指定前缀,以区分关联表的列名 |
| foreignColumn | 指定外键对应的列名 |
| notNullColumn | 指定一个列名,只有当该列的值不为 null 时,才会执行关联查询 |
| typeHandler | 自定义的类型处理器 |
2 案例分析
以典型的 员工 (Employee) 和部门 (Department) 为例
- 一个员工只能在一个部门:Employee -> Department(一对一)
- 一个部门可以包含多个员工:Department -> Employee(一对多)
以用户 (User) 和角色 (Role) 为例,两者成了一个双向的一对多,从而变成了多对多,不做介绍
- 一个用户可以拥有多个角色:User -> Role(一对多)
- 一个角色可以赋予多个用户:Role -> User(一对多)
表 department 和 表 employee
# 创建 department 表
drop table if exists department;
create table department(
department_id int(11) primary key auto_increment, #主键,自增
department_name varchar(255)
)charset=utf8;

# 插入数据
insert into department(department_name) values
('开发部'),
('人力资源部'),
('市场营销部'),
('财务部'),
('行政部'),
('监察部'),
('客服服务部');

# 创建 employee 表
drop table if exists employee;
create table employee(
employee_id int(11) primary key auto_increment, #主键,自增
employee_name varchar(255),
employee_age int(11),
employee_sex char(32),
employee_email varchar(255),
employee_address varchar(255),
department_id int(11)
)charset=utf8;

# 插入数据
insert into employee values
(1, '唐浩荣', 23, 1, '15477259875@163.com', '中国上海浦东区', 1),
(2, '黄飞鸿', 32, 1, '86547547@qq.com', '大清广东', 2),
(3, '十三姨', 18, 0, '520520520@gmail.com', '大清广东', 3),
(4, '纳兰元述', 28, 1, '545627858@qq.com', '大清京师', 5),
(5, '梁宽', 31, 1, '8795124578@qq.com', '大清广东', 7),
(6, '蔡徐坤', 20, 0, '4257895124@gmail.com', '四川成都', 4),
(7, '杨超越', 21, 0, '8746821252@qq.com', '中国北京', 7),
(8, '马保国', 66, 1, '6666666666@qq.com', '广东深圳', 6),
(9, '马牛逼', 45, 1, 'asdfg45678@163.com', '湖北武汉', 3);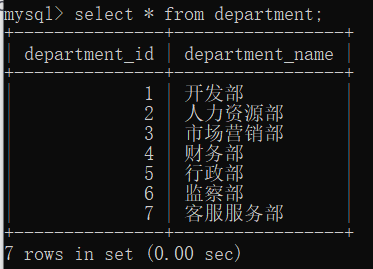

3 一对一关联和一对多关联
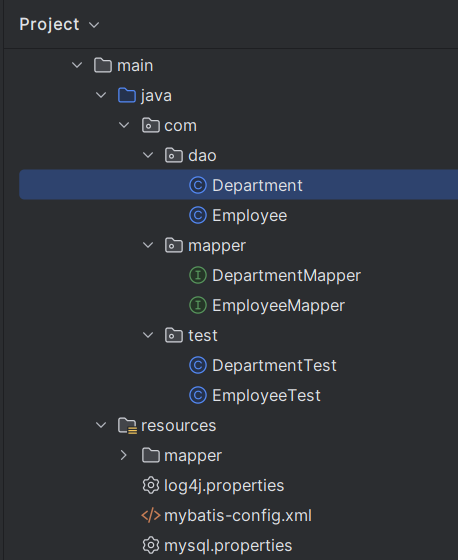
工程目录
Department 类
public class Department {
    //部门id
    private Integer deptId;
    //部门名称
    private String deptName;

    //部门有哪些员工
    private List<Employee> employees;

    // Getter、Setter、toString 方法省略
}
Employee 类
public class Employee {
    //员工id
    private Integer empId;
    //员工名称
    private String empName;
    //员工年龄
    private Integer empAge;
    //员工性别
    private Integer empSex;
    //员工邮箱
    private String empEmail;
    //员工地址
    private String empAddress;

    //员工所属部门,和部门表构成一对一的关系,一个员工只能在一个部门
    private Department department;

    // Getter、Setter、toString 方法省略
}
创建 DepartmentMapper
public interface DepartmentMapper {
    //查询所有数据
    @Select("select * from department")
    @Results(id = "deptMap1", value = {
            @Result(property = "deptId", column = "department_id"),
            @Result(property = "deptName", column = "department_name"),
            // 一对多关联对象
            // 根据 department_id 来比较
            @Result(property = "employees", column = "department_id",
                many = @Many(select = "com.mapper.EmployeeMapper.selectEmpByDeptId"))
    })
    List<Department> selectAll();
    // 根据 id 查找部门
    @Select("select * from department where department_id = #{id}")
    @Results(id = "deptMap2", value = {
            @Result(property = "deptId", column = "department_id"),
            @Result(property = "deptName", column = "department_name")
    })
    Department findDepartmentById(int id);
}
创建 EmployeeMapper
public interface EmployeeMapper {
    //查询所有数据
    @Select("select * from employee")
    @Results(id = "empMap1", value = {
            @Result(property = "empId", column = "employee_id", id = true),
            @Result(property = "empName", column = "employee_name"),
            @Result(property = "empAge", column = "employee_age"),
            @Result(property = "empSex", column = "employee_sex"),
            @Result(property = "empEmail", column = "employee_email"),
            @Result(property = "empAddress", column = "employee_address"),
            // 一对一关联对象
            // 根据 department_id 来比较
            @Result(property = "department", column = "department_id",
                    one = @One(select = "com.mapper.DepartmentMapper.findDepartmentById"))}

    )
    List<Employee> selectAll();
    //根据员工id查询数据
    @Select("select * from employee where employee_id = #{id}")
    @ResultMap("empMap1")
    Employee selectEmpByEmpId(@Param("id") int empId);

    // 根据 department_id 查询数据
    @Select("select * from employee where department_id = #{id}")
    @ResultMap("empMap1")
    Employee selectEmpByDeptId(@Param("id") int deptId);
}
log4j.properties
log4j.rootLogger=DEBUG, Console
#Console
log4j.appender.Console=org.apache.log4j.ConsoleAppender
log4j.appender.Console.layout=org.apache.log4j.PatternLayout
log4j.appender.Console.layout.ConversionPattern=%d [%t] %-5p [%c] - %m%n
log4j.logger.java.sql.ResultSet=INFO
log4j.logger.org.apache=INFO
log4j.logger.java.sql.Connection=DEBUG
log4j.logger.java.sql.Statement=DEBUG
log4j.logger.java.sql.PreparedStatement=DEBUG
mysql.properties
url=jdbc:mysql://localhost:3306/study?useSSL=false&useUnicode=true&characterEncoding=UTF-8&serverTimezone=UTC
name=root
password=123456
driver=com.mysql.cj.jdbc.Driver
MyBatis 配置文件 mybatis-config.xml
<?xml version="1.0" encoding="UTF-8" ?>
<!DOCTYPE configuration
        PUBLIC "-//mybatis.org//DTD Config 3.0//EN"
        "http://mybatis.org/dtd/mybatis-3-config.dtd">
<configuration>
    <!-- 通过properties标签,读取java配置文件的内容 -->
    <properties resource="mysql.properties" />
    <!-- 配置环境.-->
    <environments default="development">
        <environment id="development">
            <!--配置事务的类型-->
            <transactionManager type="JDBC"></transactionManager>
            <!--dataSource 元素使用标准的 JDBC 数据源接口来配置 JDBC 连接对象源 -->
            <dataSource type="POOLED">
                <!--配置连接数据库的4个基本信息-->
                <property name="url" value="${url}" />
                <property name="username" value="${name}" />
                <property name="password" value="${password}" />
                <property name="driver" value="${driver}" />
            </dataSource>
        </environment>
    </environments>
    <!--通过包 package 引入 SQL 映射文件-->
    <mappers>
        <package name="com.mapper"/>
    </mappers>
</configuration>
创建 EmployeeTest 测试类
public class EmployeeTest {
    //定义 SqlSession
    SqlSession sqlSession = null;
    //定义 EmployeeMapper 对象
    private EmployeeMapper mapper = null;

    @Before
    public void getSqlSession() throws IOException {
        //加载 mybatis 全局配置文件 Resources
        // 原 InputStream is = MybatisTest.class.getClassLoader().getResourceAsStream("mybatis-config.xml");
        InputStream is = Resources.getResourceAsStream("mybatis-config.xml");
        //创建 SqlSessionFactory 对象
        SqlSessionFactory sqlSessionFactory = new SqlSessionFactoryBuilder().build(is);
        //根据 sqlSessionFactory 产生 session
        sqlSession = sqlSessionFactory.openSession();
        // 创建Mapper接口的的代理对象,getMapper方法底层会通过动态代理生成 EmployeeMapper 的代理实现类
        mapper = sqlSession.getMapper(EmployeeMapper.class);
    }

    //查询所有员工数据
    @Test
    public void testSelectAll() {
        List<Employee> listEmployee = mapper.selectAll();
        for (Employee employee : listEmployee) {
            System.out.println(employee);
        }
        sqlSession.close();
    }

    //根据员工 id 查询数据
    @Test
    public void testSelectById() {
        Employee employee = mapper.selectEmpByEmpId(1);
        System.out.println(employee);
        sqlSession.close();
    }
}
测试结果
查询所有员工数据,包括员工所在部门(一个员工属于一个部门)

创建 DepartmentTest 测试类
public class DepartmentTest {
    //定义 SqlSession
    SqlSession sqlSession = null;
    //定义 DepartmentMapper 对象
    private DepartmentMapper mapper = null;

    @Before
    public void getSqlSession() throws IOException {
        //加载 mybatis 全局配置文件 Resources
        // 原 InputStream is = MybatisTest.class.getClassLoader().getResourceAsStream("mybatis-config.xml");
        InputStream is = Resources.getResourceAsStream("mybatis-config.xml");
        //创建 SqlSessionFactory 对象
        SqlSessionFactory sqlSessionFactory = new SqlSessionFactoryBuilder().build(is);
        //根据 sqlSessionFactory 产生 session
        sqlSession = sqlSessionFactory.openSession();
        // 创建Mapper接口的的代理对象,getMapper方法底层会通过动态代理生成 DepartmentMapper 的代理实现类
        mapper = sqlSession.getMapper(DepartmentMapper.class);
    }

    //查询所有部门数据
    @Test
    public void testSelectAll() {
        List<Department> listDepartment = mapper.selectAll();
        for (Department department : listDepartment) {
            System.out.println(department);
        }
        sqlSession.close();
    }

    //根据部门 id 查询 数据
    @Test
    public void testSelectById() {
        Department department = mapper.findDepartmentById(1);
        System.out.println(department);
        sqlSession.close();
    }
}
测试结果
查询所有部门信息,包括该部门有哪些员工(一个部门有多个员工)

4 参考文档
篇篇“参考”这位博主的文档。。。不过确实写的挺好的


 1928
1928


 被折叠的 条评论
为什么被折叠?
被折叠的 条评论
为什么被折叠?
 到【灌水乐园】发言


