


目前在西瓜视频上免费刊登 Flutter 系列教程,每日更新,欢迎关注接收提醒
【x2】各种系列的教程
【x3】更多文章请查看 flutter从入门 到精通
本篇文章 中写到的是 flutter 通过 UiKitView 调用了ios 原生的 UILabel 案例。
flutter 通过AndroidView 调用android 原生的TextView 请点击查看这里
flutter 中嵌套使用ios原生组件的流程基本上可以描述为:
- 1 info.plist文件设置
- 2 ios 端实现原生组件PlatformView提供原生view
- 3 ios 端创建PlatformViewFactory用于生成PlatformView
- 4 ios 端创建FlutterPlugin用于注册原生组件
- 5 flutter 平台嵌入 原生view
1 info.plist文件设置
iOS端的UiKitView目前还只是preview状态, 默认是不支持的, 需要手动打开开关, 在info.plist文件中新增一行io.flutter.embedded_views_preview为true.
如果不添加,会抛出如下异常:
Trying to embed a platform view but the PrerollContext does not support embedding

2 创建IOS 原生View
创建类 FlutterIosTextLabel 并实现FlutterPlatformView 协议
FlutterIosTextLabel.h
#import <Foundation/Foundation.h>
#import <Flutter/Flutter.h>

NS_ASSUME_NONNULL_BEGIN

//实现协议FlutterPlatformView
@interface FlutterIosTextLabel :  NSObject<FlutterPlatformView>

-(instancetype)initWithWithFrame:(CGRect)frame
                  viewIdentifier:(int64_t)viewId
                       arguments:(id _Nullable)args
                 binaryMessenger:(NSObject<FlutterBinaryMessenger>*)messenger;
@end

NS_ASSUME_NONNULL_END
FlutterIosTextLabel.m
#import "FlutterIosTextLabel.h"

@implementation FlutterIosTextLabel{
    //FlutterIosTextLabel 创建后的标识
    int64_t _viewId;
    UILabel * _uiLabel;
    //消息回调
    FlutterMethodChannel* _channel;
}

//在这里只是创建了一个UILabel
-(instancetype)initWithWithFrame:(CGRect)frame viewIdentifier:(int64_t)viewId arguments:(id)args binaryMessenger:(NSObject<FlutterBinaryMessenger> *)messenger{
    if ([super init]) {
        if (frame.size.width==0) {
            frame=CGRectMake(frame.origin.x, frame.origin.y, [UIScreen mainScreen].bounds.size.width, 22);
        }
        _uiLabel =[[UILabel alloc] initWithFrame:frame];
        _uiLabel.textColor=[UIColor redColor];
        _uiLabel.text=@"ios 原生 uilabel ";
        _uiLabel.font=[UIFont systemFontOfSize:14];
        _uiLabel.textAlignment=NSTextAlignmentCenter;
        _uiLabel.backgroundColor=[UIColor grayColor];

        _viewId = viewId;

    }
    return self;

}


- (nonnull UIView *)view {
    return _uiLabel;
}

@end
2 创建PlatformViewFactory
FlutterIosTextLabelFactory.h
#import <Foundation/Foundation.h>
#import <Flutter/Flutter.h>
NS_ASSUME_NONNULL_BEGIN

@interface FlutterIosTextLabelFactory : NSObject<FlutterPlatformViewFactory>

- (instancetype)initWithMessenger:(NSObject<FlutterBinaryMessenger>*)messager;

@end

NS_ASSUME_NONNULL_END
FlutterIosTextLabelFactory.m
#import "FlutterIosTextLabelFactory.h"
#import "FlutterIosTextLabel.h"

@implementation FlutterIosTextLabelFactory{
     NSObject<FlutterBinaryMessenger>*_messenger;
}
- (instancetype)initWithMessenger:(NSObject<FlutterBinaryMessenger> *)messager{
    self = [super init];
    if (self) {
        _messenger = messager;
    }
    return self;
}

//设置参数的编码方式
-(NSObject<FlutterMessageCodec> *)createArgsCodec{
    return [FlutterStandardMessageCodec sharedInstance];
}

//用来创建 ios 原生view
- (nonnull NSObject<FlutterPlatformView> *)createWithFrame:(CGRect)frame viewIdentifier:(int64_t)viewId arguments:(id _Nullable)args {
    //args 为flutter 传过来的参数
    FlutterIosTextLabel *textLagel = [[FlutterIosTextLabel alloc] initWithWithFrame:frame viewIdentifier:viewId arguments:args binaryMessenger:_messenger];
    return textLagel;
}

@end
4 创建Plugin
FlutterIosTextLabelPlugin.h
#import <Foundation/Foundation.h>
#import <Flutter/Flutter.h>

NS_ASSUME_NONNULL_BEGIN

@interface FlutterIosTextLabelPlugin :NSObject<FlutterPlugin>

@end

NS_ASSUME_NONNULL_END
FlutterIosTextLabelPlugin.m
#import "FlutterIosTextLabelPlugin.h"
#import "FlutterIosTextLabelFactory.h"


@implementation FlutterIosTextLabelPlugin

+ (void)registerWithRegistrar:(nonnull NSObject<FlutterPluginRegistrar> *)registrar {

    //注册插件
    //注册 FlutterIosTextLabelFactory
    //com.flutter_to_native_test_textview 为flutter 调用此  textLabel 的标识
    [registrar registerViewFactory:[[FlutterIosTextLabelFactory alloc] initWithMessenger:registrar.messenger] withId:@"com.flutter_to_native_test_textview"];
}

@end
4 注册
4.1 创建 FlutterIosTextLabelRegistran
FlutterIosTextLabelRegistran.h
#import <Foundation/Foundation.h>
#import <Flutter/Flutter.h>
#import "FlutterIosTextLabelPlugin.h"
NS_ASSUME_NONNULL_BEGIN

@interface FlutterIosTextLabelRegistran : NSObject
+ (void)registerWithRegistry:(NSObject<FlutterPluginRegistry>*)registry;
@end

NS_ASSUME_NONNULL_END
FlutterIosTextLabelRegistran.m
#import "FlutterIosTextLabelRegistran.h"

@implementation FlutterIosTextLabelRegistran

+(void)registerWithRegistry:(NSObject<FlutterPluginRegistry> *)registry{
    //注册插件
    [FlutterIosTextLabelPlugin registerWithRegistrar:[registry registrarForPlugin:@"FlutterIosTextLabelPlugin"]];
}

@end
4.2 AppDelegate 中注册插件
import UIKit
import Flutter

@UIApplicationMain
@objc class AppDelegate: FlutterAppDelegate {
    override func application(
        _ application: UIApplication,
        didFinishLaunchingWithOptions launchOptions: [UIApplication.LaunchOptionsKey: Any]?
        ) -> Bool {
        //flutter 中引用的插件通过些类来注册
        GeneratedPluginRegistrant.register(with: self);
        ... ..
        //注册插件
        FlutterIosTextLabelRegistran.register(with: self);
        return super.application(application, didFinishLaunchingWithOptions: launchOptions)
    }
}
5 flutter页面中使用UiKitView嵌入ios 原生UILabel
5.1 最简单的调用

//这里设置的 viewType值与 ios 中插件注册的标识 一至
// [registrar registerViewFactory:[[FlutterIosTextLabelFactory alloc] initWithMessenger:registrar.messenger] withId:@"com.flutter_to_native_test_textview"];
@override
  Widget build(BuildContext context) {
    // TODO: implement build
    return Scaffold(
      appBar: appBar,
      //显示的页面
      body: Container(
   			height: 200,
   			child: UiKitView(
   			//设置标识
           viewType: "com.flutter_to_native_test_textview",
        ),
    ),
    );
  }
5.2 flutter 调用 原生view并传参数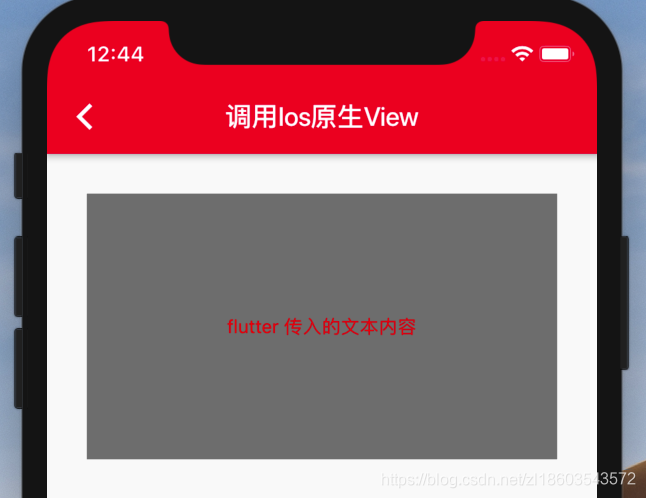
            mTextWidget = Container(
              height: 200,
              child: UiKitView(
                //标识
                viewType: "com.flutter_to_native_test_textview",
                creationParams: {
                  "content": "flutter 传入的文本内容",
                },
                //参数的编码方式
                creationParamsCodec: const StandardMessageCodec(),
              ),
            );
ios 原生中的接收(只会接收一次)
#import "FlutterIosTextLabel.h"

@implementation FlutterIosTextLabel{
    //FlutterIosTextLabel 创建后的标识
    int64_t _viewId;
    UILabel * _uiLabel;
    //消息回调
    FlutterMethodChannel* _channel;
}

-(instancetype)initWithWithFrame:(CGRect)frame viewIdentifier:(int64_t)viewId arguments:(id)args binaryMessenger:(NSObject<FlutterBinaryMessenger> *)messenger{
    if ([super init]) {

    .... ....
        //接收 初始化参数
        NSDictionary *dic = args;
        NSString *content = dic[@"content"];
        if (content!=nil) {
            _uiLabel.text=content;
        }

        .... ....
    }
    return self;

}

   ... ...

@end
5.3 flutter 更新 原生view 中的数据
原生组件初始化的参数并不会随着setState重复赋值,可以通过MethodCall来实现更新数据。
首先让原生view组件实现MethodCallHandler接口:
在FlutterIosTextLabel 的初始化函数中
-(instancetype)initWithWithFrame:(CGRect)frame viewIdentifier:(int64_t)viewId arguments:(id)args binaryMessenger:(NSObject<FlutterBinaryMessenger> *)messenger{
    if ([super init]) {

          ... ...

        // 注册flutter 与 ios 通信通道
        NSString* channelName = [NSString stringWithFormat:@"com.flutter_to_native_test_textview_%lld", viewId];
        _channel = [FlutterMethodChannel methodChannelWithName:channelName binaryMessenger:messenger];
        __weak __typeof__(self) weakSelf = self;
        [_channel setMethodCallHandler:^(FlutterMethodCall *  call, FlutterResult  result) {
            [weakSelf onMethodCall:call result:result];
        }];

    }
    return self;

}

-(void)onMethodCall:(FlutterMethodCall*)call result:(FlutterResult)result{
    if ([[call method] isEqualToString:@"updateText"]) {
        //获取参数
        NSDictionary *dict = call.arguments;
        NSString *content = dict[@"updateText"];
        if (content!=nil) {
            _uiLabel.text=content;
        }
    }else{
        //其他方法的回调
    }
}
flutter 中调用 ios 原生view
  MethodChannel _channel;
  int viewId=0;
          mTextWidget = Container(
            height: 200,
            child: AndroidView(
              //标识
              viewType: "com.flutter_to_native_test_textview",
              creationParams: {
                "content": "flutter 传入的文本内容",
              },
              //参数的编码方式
              creationParamsCodec: const StandardMessageCodec(),
              //view创建完成时的回调
              onPlatformViewCreated: (id) {
                viewId = id;
              },
            ),
          );
更新数据
//这里设置的标识 MethodChannel('com.flutter_to_native_test_textview_$viewId');
// 与ios NSString* channelName = [NSString stringWithFormat:@"com.flutter_to_native_test_textview_%lld", viewId]; 中注册的一至
void clickUpdtae(){
_channel = new MethodChannel('com.flutter_to_native_test_textview_$viewId');
 updateTextView();
}

//这里的标识 updateText
//与android 中接收消息的方法中
//if ("updateText".equals(methodCall.method)) {...} 一至
void updateTextView() async {
    return _channel.invokeMethod('updateText', "更新内容");
 }
通过onPlatformViewCreated回调,监听原始组件成功创建,并能够在回调方法的参数中拿到当前组件的id,这个id是系统随机分配的,然后通过这个分配的id加上我们的组件名称最为前缀创建一个和组件通讯的MethodChannel,拿到channel对象之后就可以通过invokeMethod方法向原生组件发送消息了,这里这里调用的是‘updateText’这个方法,参数是一个String.
本公众号会首发系列专题文章,付费的视频课程会在公众号中免费刊登,在你上下班的路上或者是睡觉前的一刻,本公众号都是你浏览知识干货的一个小选择,收藏不如行动,在那一刻,公众号会提示你该学习了。


 3840
3840

 被折叠的 条评论
为什么被折叠?
被折叠的 条评论
为什么被折叠?
 到【灌水乐园】发言


