


目录
Mybatis
在原始的mybatis中,我们编写sql语句十分繁琐
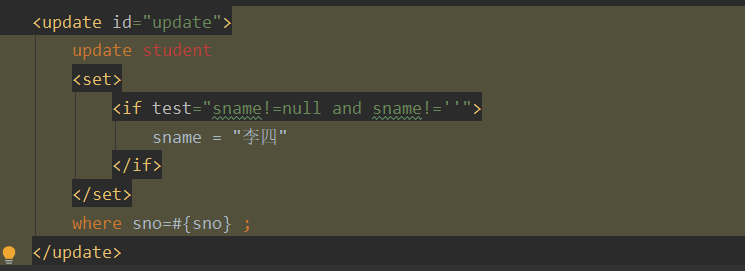
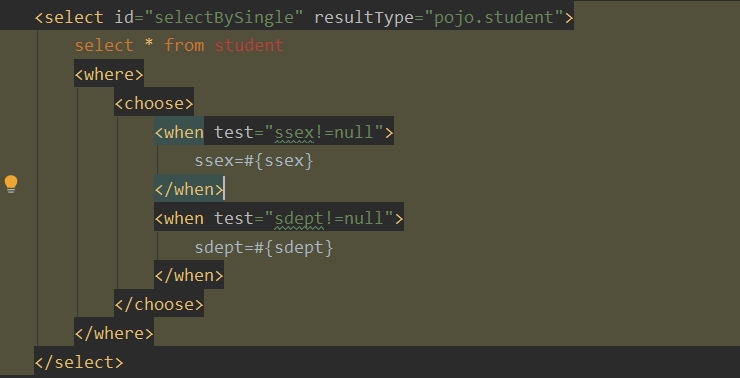
因此我们可以使用MybatisPlus来对原始的Mybatis进行增强。
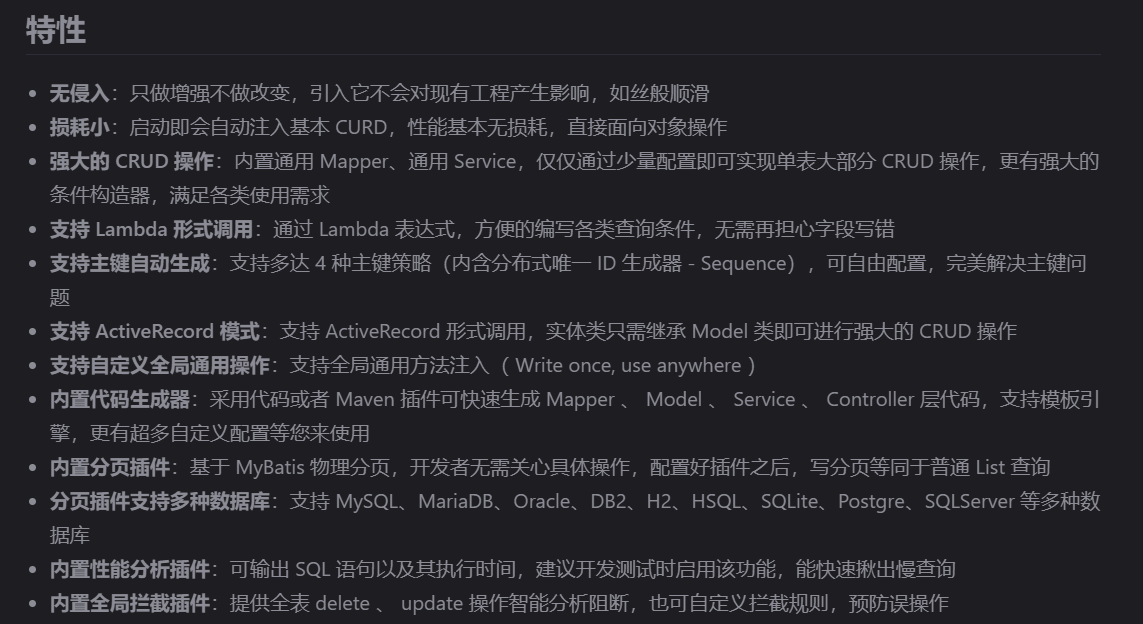
MybatisPlus特性
MybatisPlus的使用
引入MyBatisPlus(后续称为MP)的依赖
        <dependency>
            <groupId>com.baomidou</groupId>
            <artifactId>mybatis-plus-boot-starter</artifactId>
            <version>3.4.3</version>
        </dependency>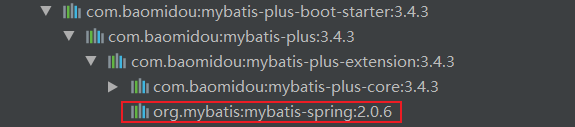
引入MP也相当于引入了Mybatis。
接着编写Mapper类并继承MP的接口。需要指定一个泛型,用来告诉MP我们需要对哪个实体类进行操作。
这里包扫描一共有两种方式,一种是在引导类中添加@MapperScan("指定Mapper路径")。另一种是在Mapper类中添加注解@Mapper。我采用第二种方式
@Mapper
public interface studentMapper extends BaseMapper<Student> {
}
创建对应mapper的xml文件
<?xml version="1.0" encoding="UTF-8" ?>
<!DOCTYPE mapper
        PUBLIC "-//mybatis.org//DTD Mapper 3.0//EN"
        "http://mybatis.org/dtd/mybatis-3-mapper.dtd">

<mapper namespace="com.zmt.mapper.StudentMapper">
</mapper>
编写测试类
@RunWith(SpringJUnit4ClassRunner.class)//让测试运行于Spring测试环境
@SpringBootTest
public class TestSql {
    @Resource
    private StudentMapper studentMapper;
    @Test
    public void test01() throws Exception {
        Student student = studentMapper.selectById(1);
        System.out.println(student.toString());
    }
}
Student{sno='1', sname='张三', ssex='男', sdept='student', sage=18}
可以正常使用。
常见注解
MP通过扫描实体类并基于反射获取实体类信息作为数据库表信息。其对应的映射信息
- 类名驼峰转下划线作为表名
- 名为id的字段作为主键
- 变量名驼峰转下划线作为表的字段名
MP常用注解
- @TableName:用来指定表名
- @TableId:用来指定表中主键字段信息
- @TabelField:用来指定表中的普通字段信息
@TableName
当实体类与表明映射关系不一致时,可以使用该注解进行指定。比如说用户表叫做tb_user而实体类叫做User。那么我们可以在类上添加该注解@TableName("tb_user")
@TableId
除了可以使用它来指定表中主键外,还可以使用它来指定id生成策略
@TableId(value="id" type=) type可取值
- IdType.AUTO: 数据库自增长
- IdType.INPUT: 通过set方法自行输入
- IdType.ASSIGN_ID: 分配ID,接口ldentifierGenerator的方法nextld来生成id。默认实现类为DefaultldentifierGenerator雪花算法(默认实现策略)
@TableField
使用@TableField的常见场景 :
- 成员变量名与数据库字段名不一致
- 成员变量名以is开头,且是布尔值
- 成员变量名与数据库关键字冲突。比如说order需要使用@TableField("'order'")
- 成员变量不是数据库字段。需要添加属性值@TableField(exist = false)
MP常见配置
mybatis-plus:
  type-aliases-package: com.zmt.pojo # 别名扫描包
  mapper-locations: "classpath*:/mapper/**/*.xml" # Mapper.xml文件地址,默认值
  configuration:
  	map-underscore-to-camel-case: true # 是否开启下划线和驼峰的映射
  	cache-enabled: false # 是否开启二级缓存
  global-config:
		db-config:
			id-type: assign_id # id为雪花算法生成
			update-strategy: not_null # 更新笑略: 只更新非空字段
条件查询器Wrapper
QueryWrapper
    @Test
    public void testQueryWrapper() throws Exception {
        //查询sno与sname字段。sname字段中要包含“张”字,年龄要大于等于10
        QueryWrapper wrapper = new QueryWrapper<Student>()
                .select("sno","sname")
                .like("sname","张")
                .ge("sage",10);
        List<Student> list = studentMapper.selectList(wrapper);
        for (Student student : list) {
            System.out.println(student.toString());
        }
}- gt为大于
- ge为大于等于
- lt为小于
- le为小于等于
UpdateWrapper
    @Test
    public void testUpdate() throws Exception {
        UpdateWrapper<Student> wrapper = new UpdateWrapper<Student>().eq("sname", "李四").;
        Student student = new Student();
        student.setSsex("男");
        studentMapper.update(student,wrapper);
    }
需要构造一个对象,该对象不为空的值会被set到数据库中
另一种用法,就是需要更改多行数据我们可以使用UpdateWrapper的setSql方法。实现一个将所有人的年龄减一。
@Test
public void testUpdate() throws Exception {
	UpdateWrapper<Student> sqlWrapper = new UpdateWrapper<Student>()
	.setSql("sage= sage-1");
	studentMapper.update(null,sqlWrapper);
}
LambdaQueryWrapper
与QueryWrapper的区别是,它不采用硬编码的方式来指定字段,可以在一定程度上避免书写错误
@Test
public void testLambdaQueryWrapper() throws Exception {
	LambdaQueryWrapper<Student> wrapper = new LambdaQueryWrapper<Student>()
	.select(Student::getSname,Student::getSage)//指定查找名字与年龄字段
	.eq(Student::getSno, 2);
	Student student = studentMapper.selectOne(wrapper);
	System.out.println(student.toString());
}
注意:
- QueryWrapper和LambdaQueryWrapper通常用来构建select、delete、update的where条件部分
- UpdateWrapper和LambdaUpdateWrapper通常只有在set语句比较特殊才使用
- 尽量使用LambdaQueryWrapper和LambdaUpdateWrapper 避免硬编码
自定义SQL
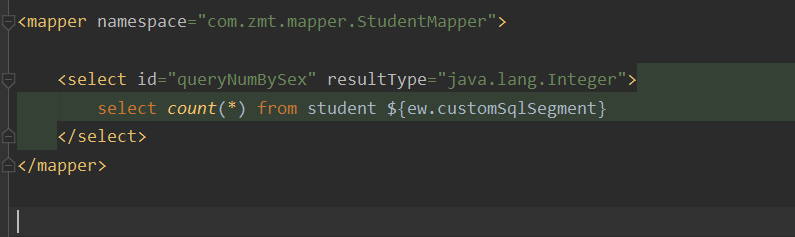
虽然我们可以通过UpdateWrapper的setSql语句来实现自定义SQL。但是这样并不符合开发规定。而且在存在MP无法帮我们构建SQL的场景,比如说在查找语句中,给字段起别名或是使用count(*)等方法。这时我们可以在Mapper.xml文件中,自定义SQL语句
使用方法如下:
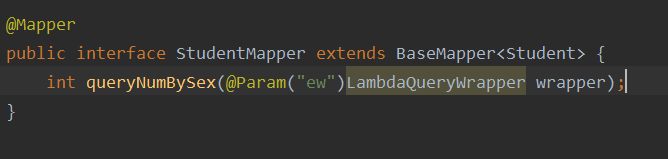
- 在Service类中基于Wrapper构造好where条件
- 在mapper类中创建自定义方法,并使用@param注解声明wrapper变量(参数名必须为ew)
- 在xml文件中自定义SQL,并使用Wrapper条件
@Test
public void testQueryByXML() throws Exception {
	LambdaQueryWrapper<Student> wrapper = new LambdaQueryWrapper<Student>()
	.eq(Student::getSsex, "男");
	int count = studentMapper.queryNumBySex(wrapper);
	System.out.println(count);
}
Service接口
这个接口是为了将基础的增删改查方法,不需要我们去写。
- 使用方法在Service的接口类继承IService接口并指定实体类
- Service的实现方法去继承ServiceImpl实现类,并指定Mapper与实体类
public interface StudentService extends IService<Student> {
}
@Service
public class StudentServiceImpl extends ServiceImpl<StudentMapper, Student> implements StudentService{
}@Test
public void testService() throws Exception {
Student student = new Student();
student.setSname("王五");
student.setSage(16);
studentService.save(student);
}通过Serivce接口,我们可以在Controller中直接使用Service对数据库进行操作,而不用在Service中编写代码
@RestController
@RequestMapping("/user")
public class Controller {
    @Autowired
    private StudentService studentService;

    /**
     * 新增学生信息
     */
    @PostMapping
    public void getStudentById(@RequestBody Student student){
        studentService.save(student);
    }

    /**
     * 删除学生信息
     */
    @DeleteMapping("/{id}")
    public void deleteById(@PathVariable("id") Long id){
        studentService.removeById(id);
    }

    /**
     * 根据id查询学生信息
     */
    @GetMapping("{id}")
    public Student queryById(@PathVariable("id") Long id){
        return studentService.getById(id);
    }

    /**
     * 批量查询
     */
    @GetMapping("{ids}")
    public List<Student> queryById(@PathVariable("ids") List<Long> ids){
        return studentService.listByIds(ids);
    }
}
而对于复杂业务,我们还是需要在Service中添加业务代码。
这里用一个复杂更新为例。
/**
 * 查询学生信息,如果是男生年龄则-age
 */
@PutMapping("{id}/age/{age}")
public void updateById(@PathVariable("id") Long id,@PathVariable("age") int age){
    studentService.reduceAge(id,age);
}
@Service
public class StudentServiceImpl extends ServiceImpl<StudentMapper, Student> implements StudentService {
@Override
public void reduceAge(Long id, int age) {
Student student = getById(id);
if ("女".equals(student.getSsex())) {
return;
}
Integer sage = student.getSage();
lambdaUpdate()
.set(Student::getSage, sage - age)
.eq(Student::getSage, sage)//乐观锁,如果更新数据库前,学生年龄还等于查找出时的年龄,说明没有进行过修改。
.update();
}
}批量添加数据
如果有十万条数据需要添加到数据库中,执行十万次save()方法效率最慢,因为每保存一条数据都是一次网络请求,而在IService中,提供了批量添加的方法。接下来测试添加1w条数据花费的时间
@RunWith(SpringJUnit4ClassRunner.class)
@SpringBootTest
public class TestInserte {
    @Autowired
    private StudentService studentService;

    @Test
    public void test() throws Exception {
        long start = System.currentTimeMillis();
        for (int i = 0; i < 10000; i++) {
            studentService.save(buildStudent(i));
        }
        long end = System.currentTimeMillis();
        System.out.println("花费时间:"+(end-start));
    }

    private Student buildStudent(int i) {
        Student student = new Student();
        student.setSname("赵六"+i);
        return student;
    }
}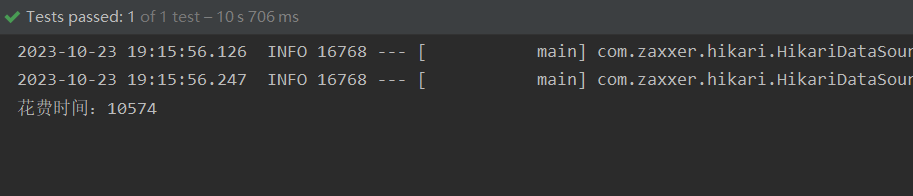
再来测试批量添加,由于需要预先创建出对象保存在内存中,所以一次创建500个避免占用内存过大
@Test
public void test() throws Exception {
	List<Student> list = new ArrayList<>();
	long start = System.currentTimeMillis();
	for (int i = 0; i < 10000; i++) {
    	list.add(buildStudent(i));
    	if (i%500==0){
        	studentService.saveBatch(list);
        	list.clear();
    	}
	}
	long end = System.currentTimeMillis();
	System.out.println("花费时间:"+(end-start));
}
可以看到比单次插入效率提升很多。但是还有提升空间,批量插入之所以能提升速度是将要提交的数据先进行编译,编译成sql语句后,一次性提交到数据库中相当于执行了500次insert语句。如果将500条sql语句变为1条,则速度还可以提升。这个功能需要在数据库中配置rewriteBatchedstatements=true
jdbc:mysql://localhost:3306/school?useSSL=false&serverTimezone=UTC&rewriteBatchedstatements=true接下来再去执行该测试方法

经过多次测试,确实有提升,但不多,可能是因为我的数据量太少了吧
MP的代码生成
可以引入依赖编写代码生成,也可以下载官方插件MyBatisX点击生成,不过我采用的是另一个插件MyBatisPlus插件
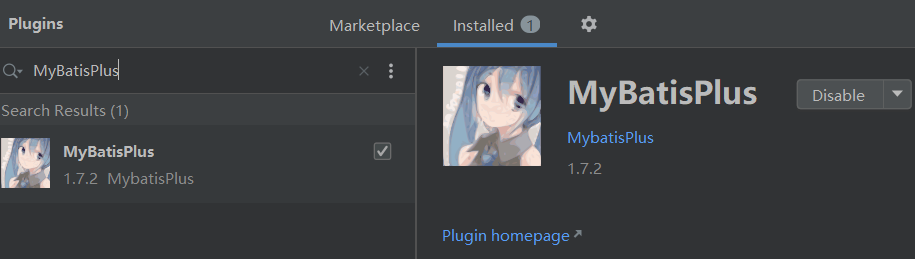
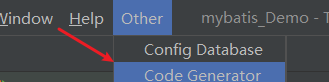
下载好后,在IDEA的顶部出现以一个菜单栏
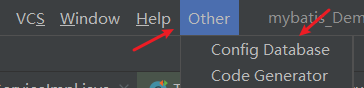
进行配置数据库
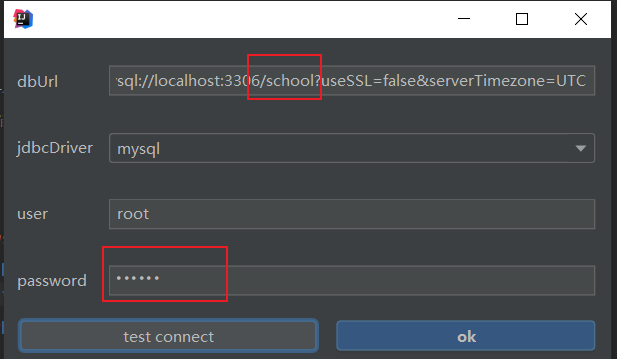
修改数据库名称以及密码就可以使用。
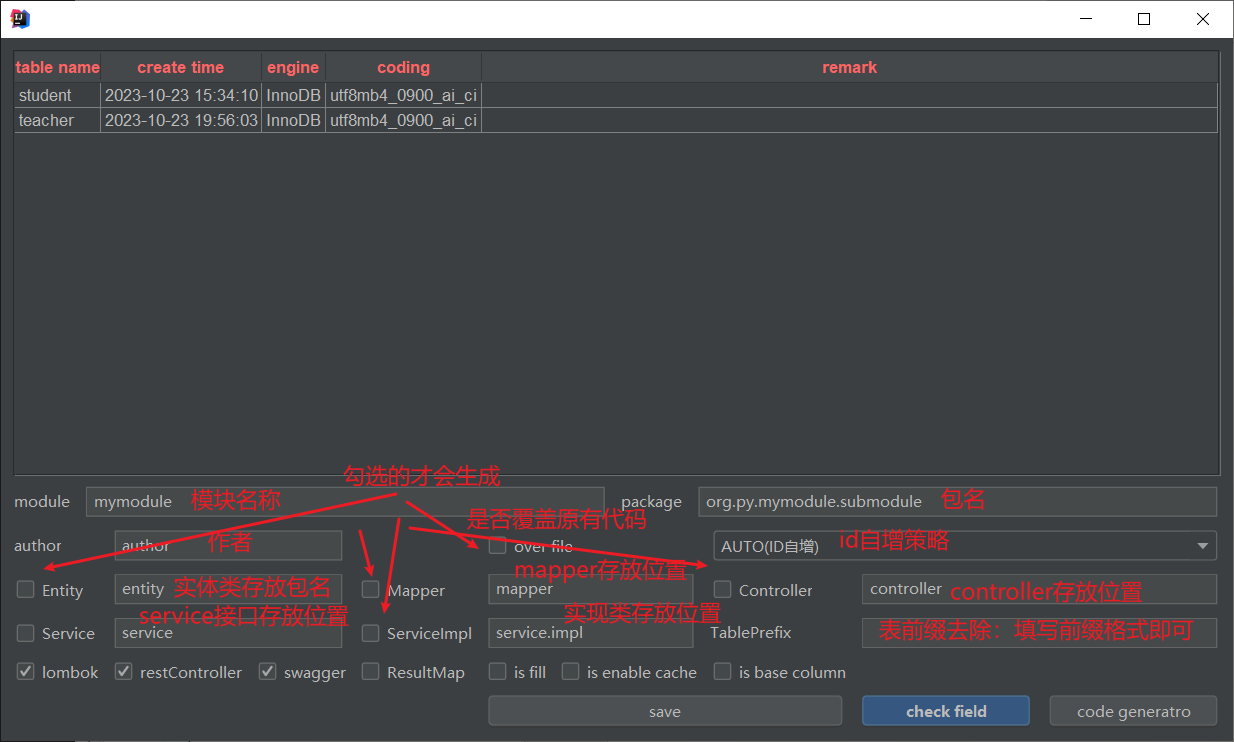
生成结果如下

MP静态工具
静态工具的出现是为了避免循环引入的事情发生。
比如说在StudentController中,有一个业务是通过学生id查询到对应的教课老师。这需要查询学生表和老师表。那么就需要在StudentService中引入TeacherService。而在TeacherController中存在一个业务是通过教师id去查询所有的学生信息,那么就要在TeacherService引入StudentService。两个Service相互注入就形成了循环依赖。为了解决这种情况,可以使用MP提供的静态工具(该工具在最新版本才存在,我的是3.5.4版本)
在StudentServiceImpl中编写如下代码。可以在不注入TeacherService的情况下,查找到教师信息
@Override
public Teacher getTeacherByStudentId(Long teacherId) {
	//需要和那个表联合查找,就指定对应的反射类
	Teacher teacher = Db.lambdaQuery(Teacher.class)
                                 .eq(Teacher::getTno, teacherId)
                                 .one();//如果有多个老师可以调用list()方法

}
MP扩展功能之逻辑删除
所谓逻辑删除,并不是真正的删除,只是在查询时不去查询被逻辑删除的数据。比如说用户删除订单信息,这些订单信息并不会真的被删除,而是将查询状态从0改为1。这些数据在用户查询时不会被展示。
既然是扩展功能,那就不需要修改我们的业务代码。修改配置文件就可以实现。
mybatis-plus:
  global-config:
    db-config:
      logic-delete-field: flag #逻辑删除在数据库中的字段名可以是Integer或Boolean的值
      logic-delete-value: 1 #逻辑已删除值默认为1
      logic-not-delete-value: 0 #逻辑未删除值默认为0
逻辑删除存在的问题。比如:
- 会导致数据库表垃圾数据越来越多,影响查询效率
- SQL中全都需要对逻辑删除字段做判断,影响查询效率
因此,不太推荐采用逻辑删除功能,如果数据不能删除,可以采用把数据迁移到其它表的办法
MP扩展功能之枚举处理器
在业务中,可能会遇到账号状态问题,1表示正常,2表示冻结。也有可能会遇到业务处理状态,1表示未处理,2表示处理中,3表示处理结束等。当这些数据较少时,能够记住,但多了之后可能会频繁查看状态信息。为了避免这种事情,我们可以将这些状态设置成一个枚举类来方便我们使用。
随之产生的问题是,数据库中仍是存储的int类型数据,而数据库中查找出来的数据也无法转为枚举类型。在MP中也有对应的解决方法。
枚举类
@Getter
public enum UserStatus {
    NORMAL(1,"正常"),
    FREEZE(2,"冻结");

    @EnumValue//值为1是返回NORMAL对象,值为2返回FREEZE对象
    private final int value;
    @JsonValue//返回前端时返回"正常","冻结"信息而不是返回NORMAL与FREEZE信息
    private final String desc;

    UserStatus(int value,String desc){
        this.value=value;
        this.desc=desc;
    }
}
在配置类中添加如下配置
mybatis-plus:
  configuration:
    default-enum-type-handler: com.baomidou.mybatisplus.core.handlers.MybatisEnumTypeHandler
在业务代码中,要做一定的修改
    @Test
    public void testEnum() throws Exception {
        Student student = new Student();
//        if (student.getStatus()==1) {
//
//        }
        if (student.getStatus()== UserStatus.NORMAL) {

        }
    }
}
第二种的可读性比第一种与数字判断相比较可读性更好
MP扩展功能之JSON处理器
有时我们在数据库中存储的数据为JSON类型的数据,那么拿到服务器后需要转化为具体对象,在MP中存在JSON处理器来帮我们去做这件事。
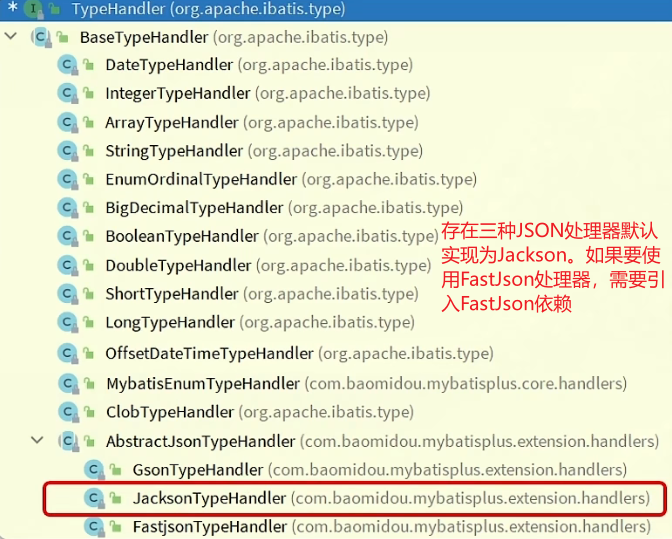
与枚举类处理器配置不同的是,JSON的处理器并没有全局配置,只能在字段上进行配置,同时开启自动映射
@Data
@TableName(autoResultMap = true)//开启自动映射
public class Student {
    @TableId(value = "sno",type= IdType.AUTO)
    private Long sno;
    private String sname;
    private String ssex;
    private String sdept;
    private Integer sage;
    private UserStatus status;
    //对该字段添加一个JSON处理器
    @TableField(typeHandler = JacksonTypeHandler.class)
    private UserInfo info;
}
MP插件功能
MP提供一下几种插件,最常用的就是分页插件
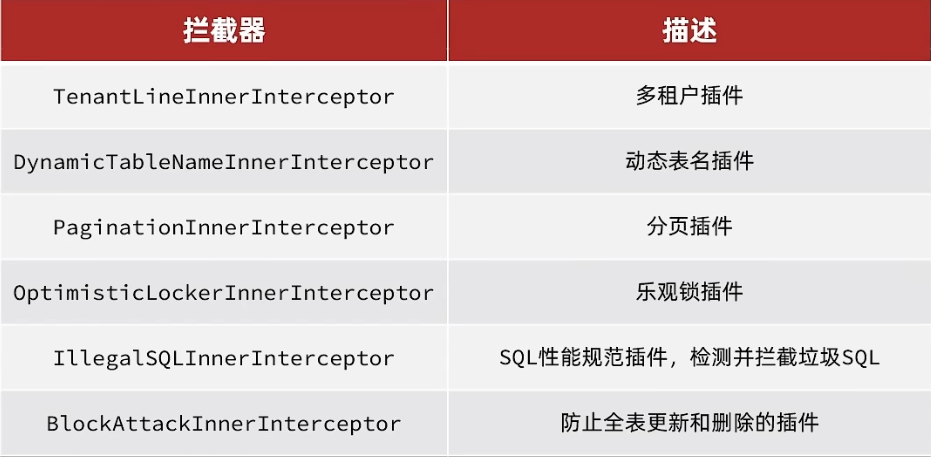
接下来展示分页插件的使用方法
@Configuration
public class MyBatisConfig {

    @Bean
    public MybatisPlusInterceptor mybatisPlusInterceptor(){
        MybatisPlusInterceptor interceptor = new MybatisPlusInterceptor();
        //创建分页插件,并指定数据库类型
        PaginationInnerInterceptor pageIntercept = new PaginationInnerInterceptor(DbType.MYSQL);
        //设置一次最多查找1000条
        pageIntercept.setMaxLimit(1000L);
        interceptor.addInnerInterceptor(pageIntercept);
        return interceptor;
    }
}
@RunWith(SpringJUnit4ClassRunner.class)
public class TestPage {
@Test
public void test01() throws Exception {
int pageNO = 1;
int pageSize = 5;
Page<Student> page = new Page<>(pageNO, pageSize);
//添加排序,以ssex字段为准,降序排序 true为升序排序
page.addOrder(new OrderItem("sage", false));
//page中设置好参数后,在查询过程中,会将结果重新set到page中
page = studentService.page(page);
List<Student> records = page.getRecords();
for (Student student : records) {
System.out.println(student);
}
}
}


 2048
2048

 被折叠的 条评论
为什么被折叠?
被折叠的 条评论
为什么被折叠?
 到【灌水乐园】发言


