


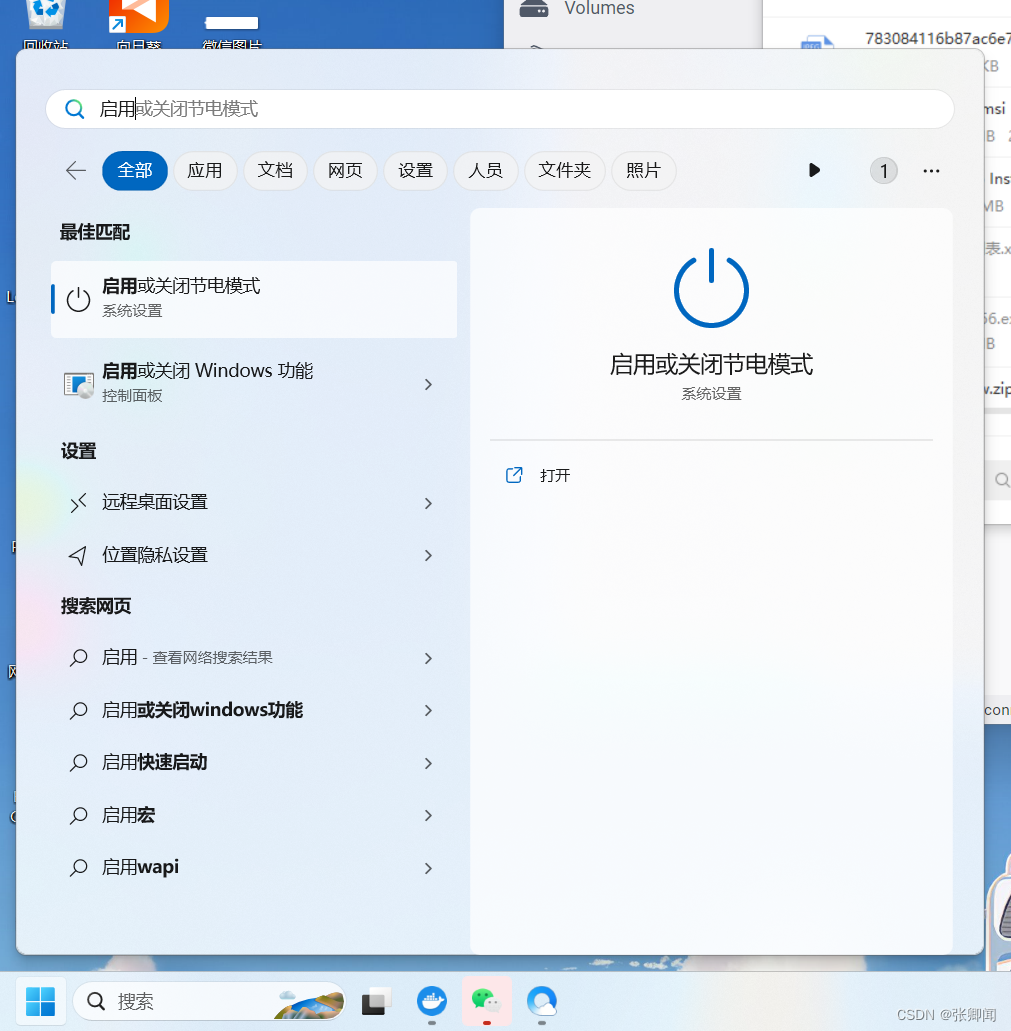
一、开启windows功能
1.搜索启用,点开启用或关闭windows功能
2.勾选这三个选项,如果你是家庭版没有Hyper-V,先勾选其他的,然后往下看,安装Hyper-V
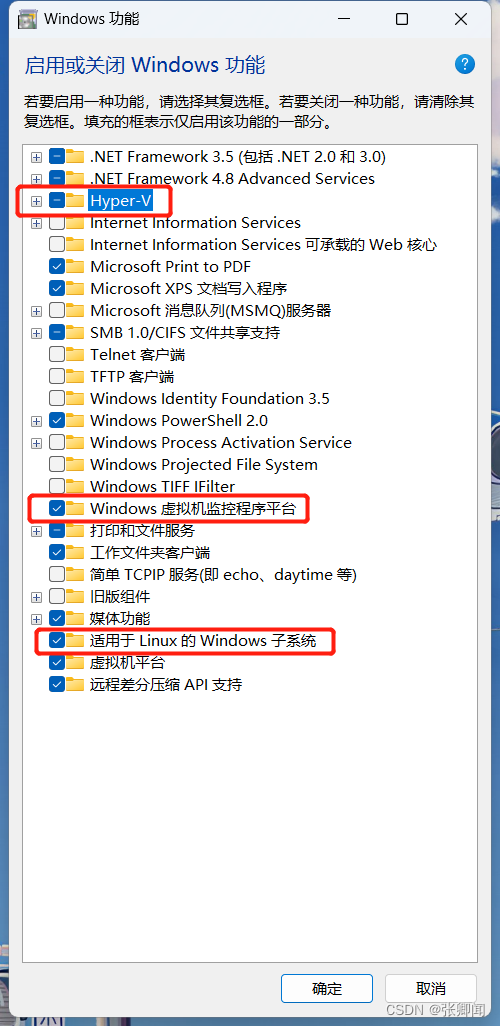
3.安装Hyper-V(没有此选项时执行,有的话直接勾选)
创建一个Hyper-V.txt文件,粘贴以下代码进去
pushd "%~dp0"
dir /b %SystemRoot%\servicing\Packages\*Hyper-V*.mum >hyper-v.txt
for /f %%i in ('findstr /i . hyper-v.txt 2^>nul') do dism /online /norestart /add-package:"%SystemRoot%\servicing\Packages\%%i"
del hyper-v.txt
Dism /online /enable-feature /featurename:Microsoft-Hyper-V-All /LimitAccess /ALL
修改文件后缀为:Hyper-V.cmd
右键点击以管理员身份运行
等待处理完成,输入Y,电脑自动重启
重启后可以在启用或关闭windows功能看到Hyper-V已经安装
二、管理员运行cmd执行以下命令
1.启动wsl
dism.exe /online /enable-feature /featurename:Microsoft-Windows-Subsystem-Linux /all /norestart2.启动虚拟机
dism.exe /online /enable-feature /featurename:VirtualMachinePlatform /all /norestart3.启动Hyper-V
dism.exe /Online /Enable-Feature:Microsoft-Hyper-V /Allbcdedit /set hypervisorlaunchtype auto重启电脑!!!!!
三、安装wsl2
1.下载安装包
https://wslstorestorage.blob.core.windows.net/wslblob/wsl_update_x64.msi
2.双击运行
3.cmd管理员模式执行命令
wsl --set-default-version 2重启电脑!!!!!
四、安装docker desktop
1.官网下载
Docker: Accelerated, Containerized Application Development

一路下一步,就装上了
2.修改配置
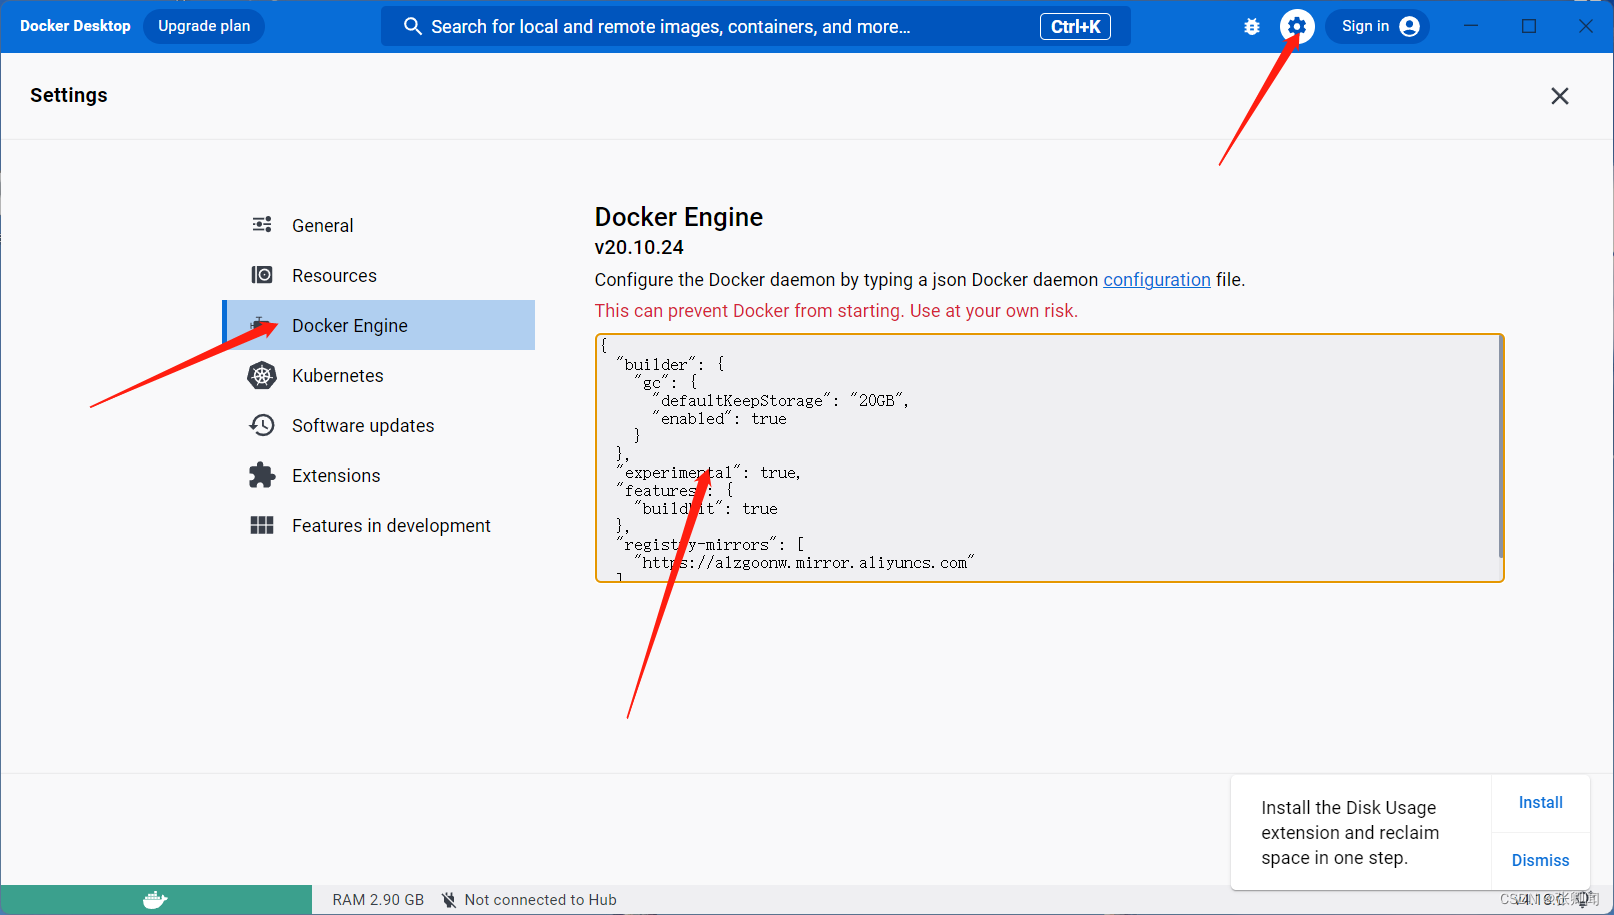
{
  "builder": {
    "gc": {
      "defaultKeepStorage": "20GB",
      "enabled": true
    }
  },
  "experimental": true,
  "features": {
    "buildkit": true
  },
  "registry-mirrors": [
    "https://alzgoonw.mirror.aliyuncs.com"
  ]
}
3.结束


 1万+
1万+


 被折叠的 条评论
为什么被折叠?
被折叠的 条评论
为什么被折叠?
 到【灌水乐园】发言


