


maven-3-6-3的安装
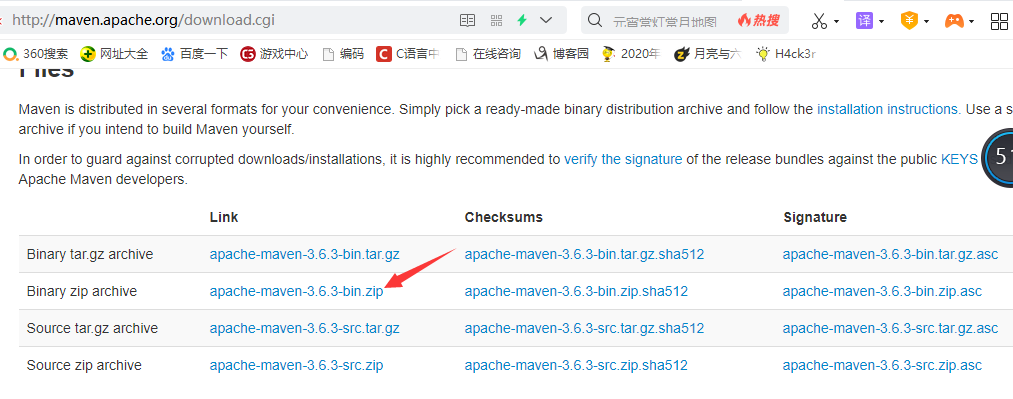
第一步:登录官网 http://maven.apache.org,选择下载apache-maven-3.6.3-bin.zip。
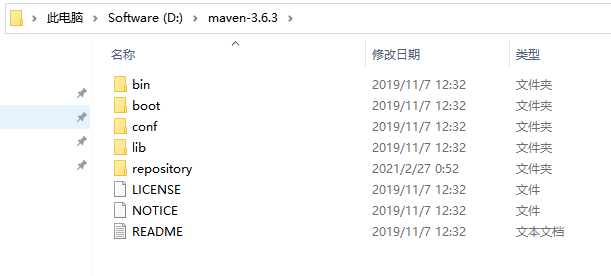
第二步:解压压缩包。我是把解压后的文件夹复制到D盘(其他盘符也可以)中去的。**
第三步:打开conf文件中的setting.xml文件。在其中添加一些代码。
注:repository是自己建的一个文件夹。
<localRepository>D:\maven-3.6.3\repository</localRepository>
第四步在<mirrors></mirrors>标签下添加如下代码:
<mirror>
      <id>aliyunmaven</id>
      <mirrorOf>*</mirrorOf>
      <name>阿里云公共仓库</name>
      <url>https://maven.aliyun.com/repository/public</url>
    </mirror>
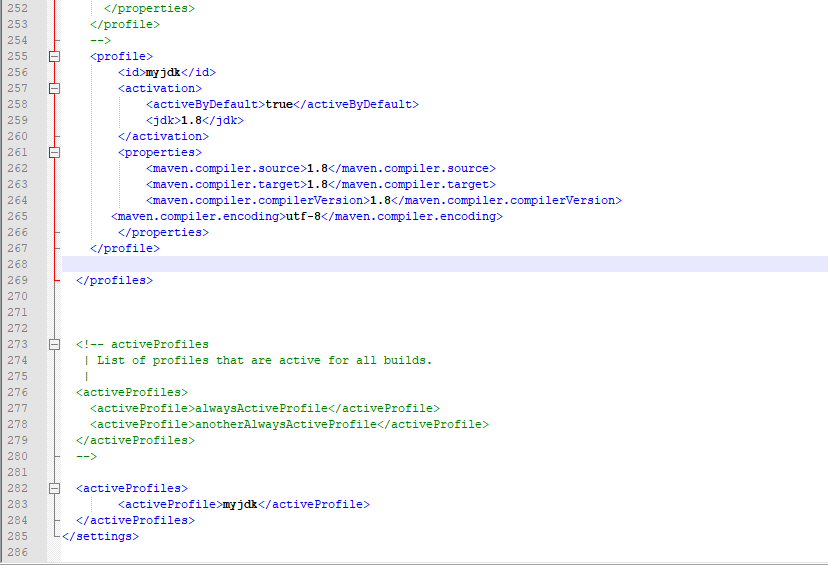
第五步在<profiles></profiles>标签下添加如下代码.注意这里的jdk版本因人而异,我的是1.8. <id></id>标签里面的myjdk名字任取
<profile>
        <id>myjdk</id>
        <activation>
            <activeByDefault>true</activeByDefault>
            <jdk>1.8</jdk>
        </activation>
        <properties>
            <maven.compiler.source>1.8</maven.compiler.source>
            <maven.compiler.target>1.8</maven.compiler.target>
            <maven.compiler.compilerVersion>1.8</maven.compiler.compilerVersion>
       <maven.compiler.encoding>utf-8</maven.compiler.encoding>
        </properties>
    </profile>
第六步.添加一个新标签,放在最后一行。
 <activeProfiles>
        <activeProfile>myjdk</activeProfile>
  </activeProfiles>
如图所示:
第七步:修改环境变量(都是在系统变量中进行的)

image.png
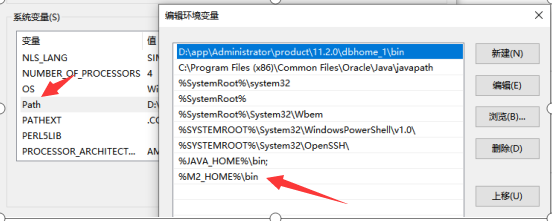
image.png
结果:在cmd中输入 mvn -v。出现如下界面就是正确的。

篇幅有限,不能一一细聊。如有遇到问题,欢迎留言评论


 999
999


 被折叠的 条评论
为什么被折叠?
被折叠的 条评论
为什么被折叠?
 到【灌水乐园】发言


