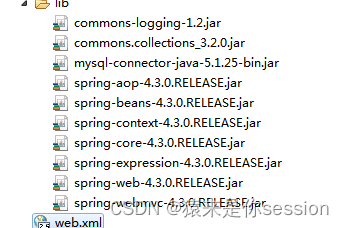
- 创建web项目
- 导入jar包(MySQL连接包可忽略)
4.创建springmvc的.xml配置文件:
<?xml version="1.0" encoding="UTF-8"?>
<beans xmlns="http://www.springframework.org/schema/beans"
xmlns:xsi="http://www.w3.org/2001/XMLSchema-instance"
xmlns:context="http://www.springframework.org/schema/context"
xmlns:mvc="http://www.springframework.org/schema/mvc"
xsi:schemaLocation="http://www.springframework.org/schema/beans http://www.springframework.org/schema/beans/spring-beans.xsd
http://www.springframework.org/schema/context http://www.springframework.org/schema/context/spring-context-4.0.xsd
http://www.springframework.org/schema/mvc http://www.springframework.org/schema/mvc/spring-mvc-4.0.xsd">
<!-- 配置自动扫描的包 -->
<context:component-scan base-package="com.controller"></context:component-scan>
<!-- 配置视图解析器 如何把handler 方法返回值解析为实际的物理视图 -->
<bean class="org.springframework.web.servlet.view.InternalResourceViewResolver">
<property name = "prefix" value="/jsp/"></property>
<property name = "suffix" value = ".jsp"></property>
</bean>
</beans>
5.
①引入约束头文件
<?xml version="1.0" encoding="UTF-8"?>
<beans xmlns="http://www.springframework.org/schema/beans"
xmlns:xsi="http://www.w3.org/2001/XMLSchema-instance"
xmlns:context="http://www.springframework.org/schema/context"
xmlns:mvc="http://www.springframework.org/schema/mvc"
xsi:schemaLocation="http://www.springframework.org/schema/beans http://www.springframework.org/schema/beans/spring-beans.xsd
http://www.springframework.org/schema/context http://www.springframework.org/schema/context/spring-context-4.0.xsd
http://www.springframework.org/schema/mvc http://www.springframework.org/schema/mvc/spring-mvc-4.0.xsd">
② 配置自动扫描的包,用于扫描controller所在的包名
<context:component-scan base-package="xxx.xxx"></context:component-scan>
③配置视图解析器,解析controller返回的字符串(实际为xxx.jsp的简写,如:index.jsp,解析器能解析index这个字符串并返回index.jsp这个页面)
6.创建com.controller包及controller类,包名需要与springmvc扫描的包一致
package com.controller;
import javax.servlet.http.HttpServletRequest;
import org.springframework.stereotype.Controller;
import org.springframework.ui.Model;
import org.springframework.web.bind.annotation.RequestMapping;
@Controller
public class UserController {
@RequestMapping("/login")
public String login(HttpServletRequest request){
System.out.println("login方法执行了...");
String username = request.getParameter("username");
System.out.println(username);
return "index";
}
}
7.controller类的配置
①在类上注册@controller注解,表示其为控制器
②在方法上注册@RequsetMapping(“/xxx”),其作用是标识用户访问具体服务所需要的字符串,如在此标识为”/login”,那么用户访问此方法的URL为localhost:8080/项目名/login
③return “index”表示返回index.jsp这个页面,具体在视图解析器已经说明,实际上可简单理解视图解析器为对String类型进行切割匹配类似,这里是将URL地址切割匹配。
8.在web.xml上注册springDispatcherServlet
<?xml version="1.0" encoding="UTF-8"?>
<web-app version="2.5"
xmlns="http://java.sun.com/xml/ns/javaee"
xmlns:xsi="http://www.w3.org/2001/XMLSchema-instance"
xsi:schemaLocation="http://java.sun.com/xml/ns/javaee
http://java.sun.com/xml/ns/javaee/web-app_2_5.xsd">
<display-name></display-name>
<servlet>
<servlet-name>springDispatcherServlet</servlet-name>
<servlet-class>org.springframework.web.servlet.DispatcherServlet</servlet-class>
<init-param>
<param-name>contextConfigLocation</param-name>
<param-value>classpath:springmvc.xml</param-value>
</init-param>
<load-on-startup>1</load-on-startup>
</servlet>
<servlet-mapping>
<servlet-name>springDispatcherServlet</servlet-name>
<url-pattern>*.action</url-pattern>
</servlet-mapping>
<welcome-file-list>
<welcome-file>index.jsp</welcome-file>
</welcome-file-list>
</web-app>
9.配置web.xml,大家会发现与servlet配置类似,可见springmvc实际是对servlet的封装
①声明springDispatcherServlet
②添加扫描springmvc.xml扫描并加载配置文件
③声明映射的URL地址或需要被拦截的请求,其中mapping名字与servlet注册名字需一致,另外*.action表示拦截所有后缀为.action的url请求,如:localhost:8080/xx/xx.action
10.WEB-INF下随意创建一个jsp,挂一个a链接到controller或直接在地址栏输入localhost:8080/xx/login.action,看配置是否连通
<%@ page language="java" import="java.util.*" pageEncoding="utf-8"%>
<%
String path = request.getContextPath();
String basePath = request.getScheme()+"://"+request.getServerName()+":"+request.getServerPort()+path+"/";
%>
<!DOCTYPE HTML PUBLIC "-//W3C//DTD HTML 4.01 Transitional//EN">
<html>
<head>
<base href="<%=basePath%>">
<title>My JSP 'index.jsp' starting page</title>
<meta http-equiv="pragma" content="no-cache">
<meta http-equiv="cache-control" content="no-cache">
<meta http-equiv="expires" content="0">
<meta http-equiv="keywords" content="keyword1,keyword2,keyword3">
<meta http-equiv="description" content="This is my page">
<!--
<link rel="stylesheet" type="text/css" href="styles.css">
-->
</head>
<body>
<a href="login.action?username=张三">第一个springmvc项目</a>
</body>
</html>
11.控制台login方法输出"login方法执行了...",表明后端已拦截请求并执行了login方法